
Sew a Book
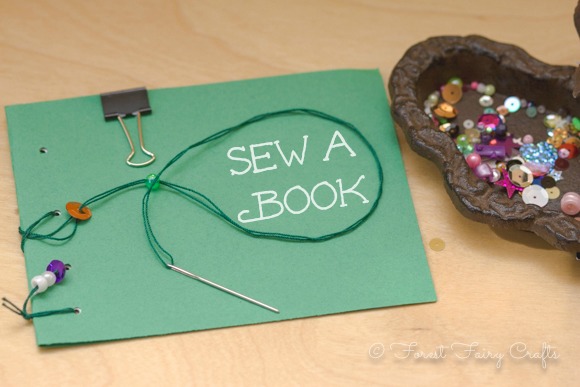
Once upon a time, books were treasures. They were kept in castles. They were guarded. And only a few very chosen people were allowed to read them. They were valued like gold and jewels. Because each and every book was made by hand. People worked hard to create paper. They lettered each word with ink and a feather. And then they had all these pages. How did they hold the pages together?
They sewed them.
Children found this idea fascinating. We looked in books to see the bindings. Most have modern glues. We did find a few with stitching.
I shared a few ideas for stitching their own books. They loved becoming authors and illustrators after sewing. I invited them to write about anything they wanted. What freedom! It could be fiction or non-fiction. A field guide to flowers in your yard or to dragons. We saw books about kittens. Books about the seasons. Books about unicorns. And books about flowers. I plan to revisit the idea and make more complex designs throughout the year. A wonderful first sewing project for all ages.
Ages
- All ages (these were with 5-8 year olds). Older children got into the history of bookmaking. They also dove into the writing and illustrating of their own stories. Younger children enjoyed threading beads and sequins.
Supplies
- Paper
- Construction Paper (or watercolor, anything for a cover)
- Needle and Thread
- Hole Punch
- Binder clip
- Sequins and beads
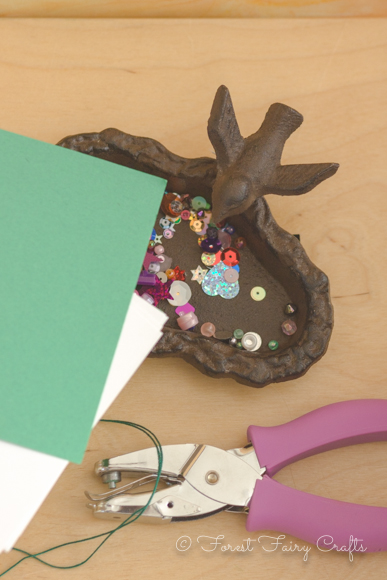
Preparation
- I cut the paper (any size works). I cut the construction paper so it could fold around the white paper (double the length of the white paper)
- I folded the construction paper around the white paper and secured with a binder clip
- I punched four holes along the folded binding edge. All the papers were now held together with the binderclip, keeping the holes aligned. Aha! moment :)
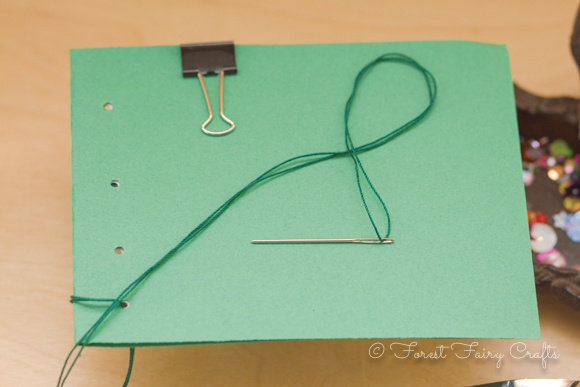
- I doubled and knotted thread on the needles (tips about our needle and thread choices are in our book
)
- I tied the thead around the first hole- actually went through and then back up through the loop in the thread. Any knotting will do. The books were ready for sewing!
With Children
- We talked about history and sewing. We talked about taking our time. I showed how the needle can go back through a hole more than once to create a decorative binding.
- We talked a lot about not taking the binderclip off until after you sew through the holes. Pages will slip!
- Children threaded beads and sewed beads and sequins along the way.
- They discussed what they would write and draw. We talked about books with no pictures and books with no words. They really got to thinking about the process of creating a book.
I tied off threads and they drew and wrote. As long as the threads didn't wrap around the open side of the book, it was all good. They loved their books for many reasons. And wanted to make more! Which is always good. Love inspiration :)

Wishing you happy sewing today!
Please note: This post contains an affiliate link. Should you decide to purchase our book, a small percentage returns to the forest. Your price remains the same. Thank you!
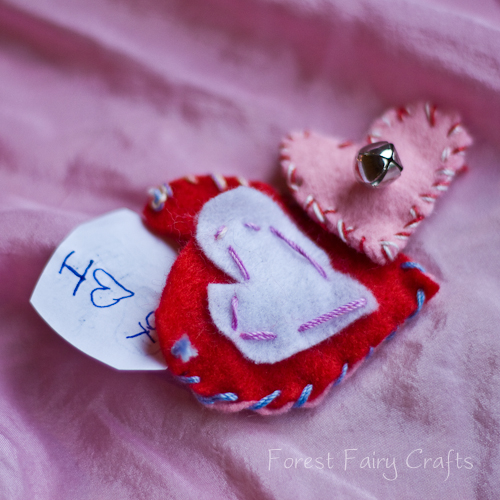
Wishing Heart
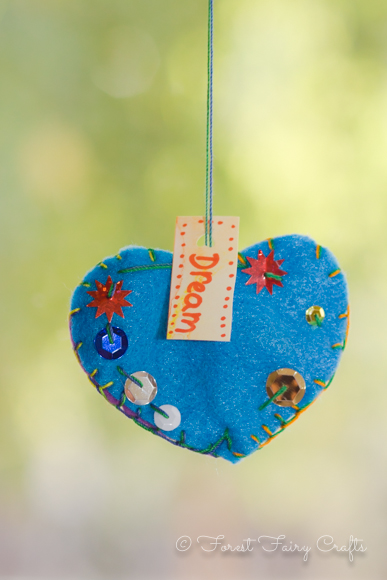
Let's begin with a wish. A hope. A dream. Let's made crafts to celebrate our wishes. Because the best wishes are from the heart.
This was my first sewing project of the year with second and third grade students (7-9 years old). Most had used needle and thread before. I wanted a project that would let them explore. A project that let everyone be successful. Whether they wanted one decoration. Or a hundred and one :)
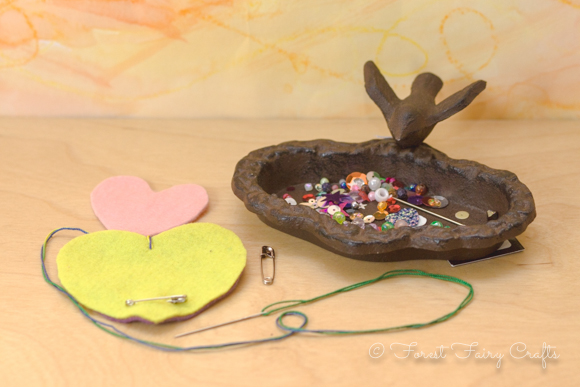
Supplies:
- Felt (two colors for each heart)
- Needle and thread (chenille needles and crochet thread)
- Safety pin
- Beads and sequins
- Slip of pretty paper for name and wish
- Optional: a third, smaller felt heart to decorate
Age: 6+
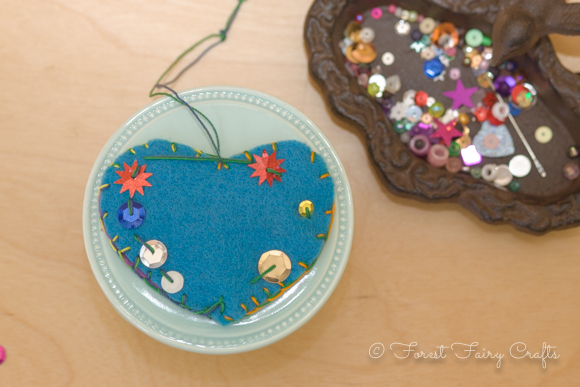
Prep: Cut hearts. Secure them together with a safety pin. Double and knot thread on the needle. Sew one stitch at the top hiding the knot between the two hearts. The stitch and the safety pin keep the felt together while children sew.
Children: These hearts are a lovely first sewing activity because almost everything is beautiful (expect for tangles). Children add a bead or sequin to one side of the heart. They push the needle through felt anywhere they like. Big stitches work just fine.
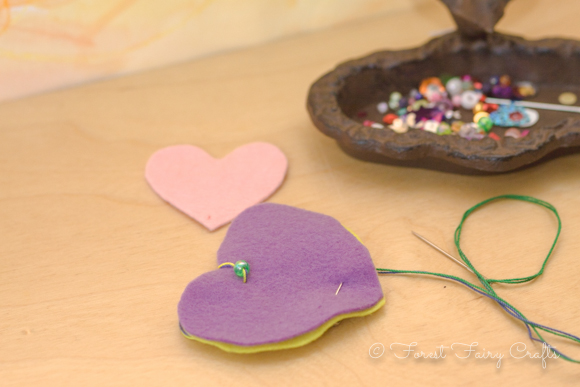
Now the needle and thread is on the other side. Add another sequin, bead, or both.
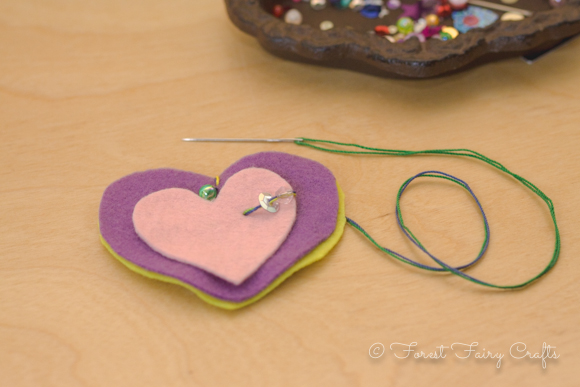
You can also add the little felt heart. Be careful when going through three layers of felt. It may take a little practice.
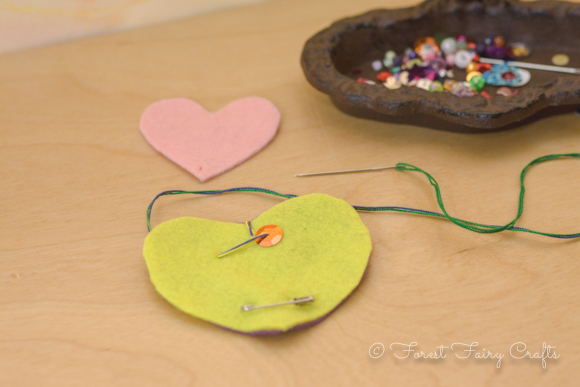
Add all of the sequins and beads that make your heart happy.
Helper: Just encourage. Sort out any tangles. Take off the safety pin once the two pieces of felt are secure.
Most design choices will be fine. Long strings of beads. Loops around the outside of the heart. Crisscross stitching. It's all okay. This allows children to experiment with sewing. And have fun! They can stitch around the outside if they like, but it's not needed.
Tie a knot. Move the string to the center for hanging if there is enough string left. If not, add a string. Many children strung beads on their hanging thread to catch the light. If beads go on the hanging thread, be sure to tie a knot around the last bead so they don't slip off.
Children: Write your name and a wish on a pretty slip of paper.

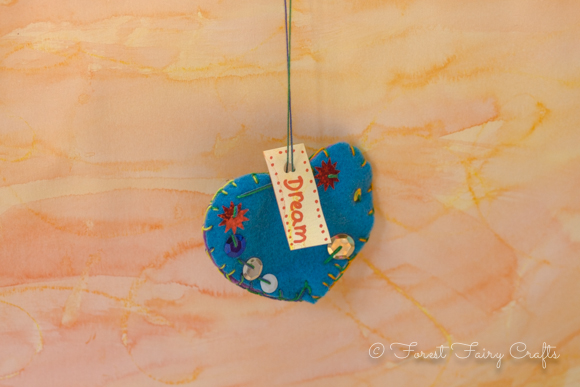
Each class hung their hearts in a special area of the room.
One is lovely. A collection is gorgeous.
Have fun sewing this week!
For more insights about sewing with children and teaching children how to sew, consider our Forest Fairy Crafts book. It shares our favorite needles and threads along with stitches, troubleshooting, and more. The link is an affiliate link. Should you decide to purchase, a small amount returns to the Forest. Enjoy :)
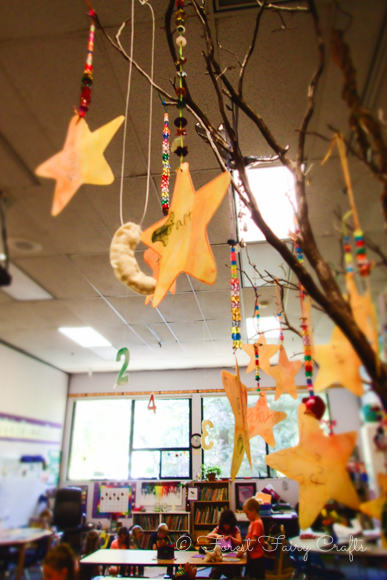
Wishing Stars
We start a journey with expectations. And children are often told "don't do this," or "don't do that," as they start an adventure (like a new school year). Think of all the rules, the rules, the rules :)
So I like to think of the things we do want for our adventure. What do we want to create? How do we want to feel? What should we bring to this journey?
Children often wish for things. Things like ponies or candy. I want to wish for things we cannot touch. Kindness. Friends. Creativity. Beauty. Hope. Love.
And, every once in awhile, a child cracks my heart wide open with a wish. Like this one.
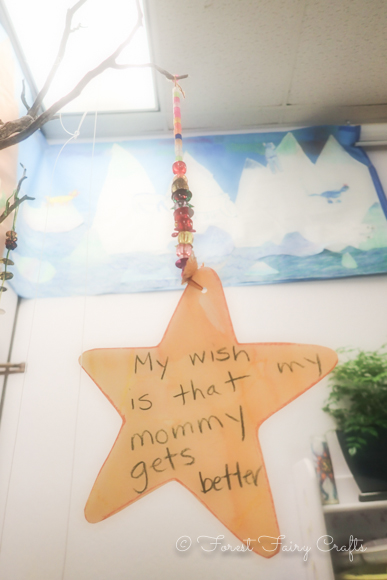
Something about crafting allows us to feel deeply. To share deeply. Creating a space where we can express ideas that are big and mighty. They connect us. As we sew or bead or knit, we create together. We create community.
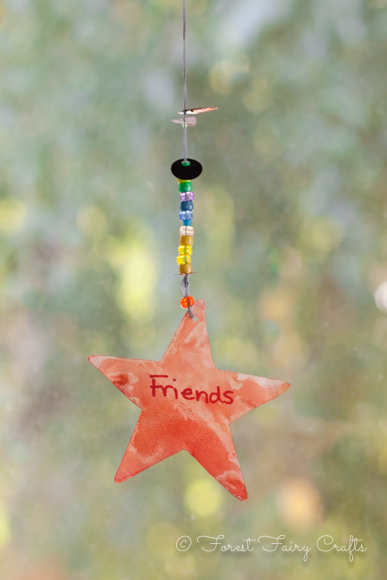
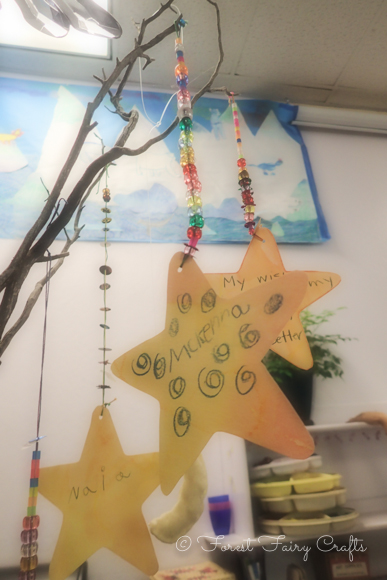
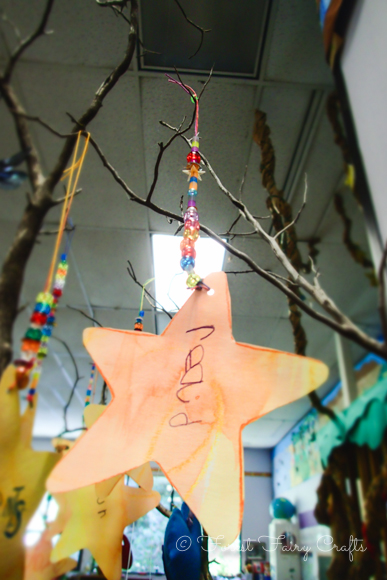
The stars can be very simple or made fancier.
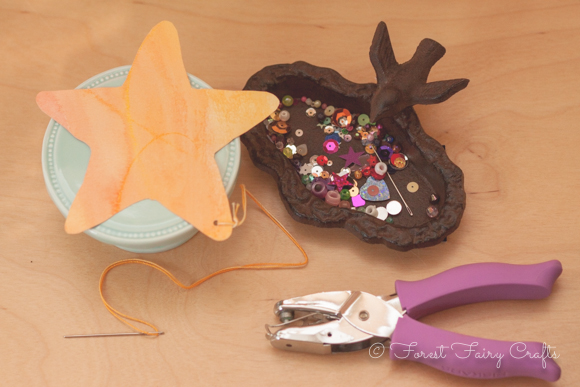
Optional: Children can watercolor or decorate their own paper. We have painted squares on both sides, then we cut into stars. For time's sake, I watercolored and cut these stars.
Supplies:
- Stiff paper
- Needle and thread (I used friendly blunt needles and crochet thread)
- Beads and sequins
- Hole punch
Prep:
Watercolor paper on both sides and punched a hole. Double the thread and tie a knot. Go through the hole, then back through the loop in the thread. The thread is now attached to the star and ready for decorating.
Ages: 5-7
For children:
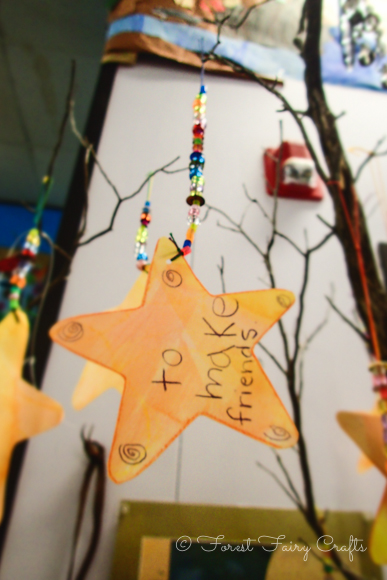
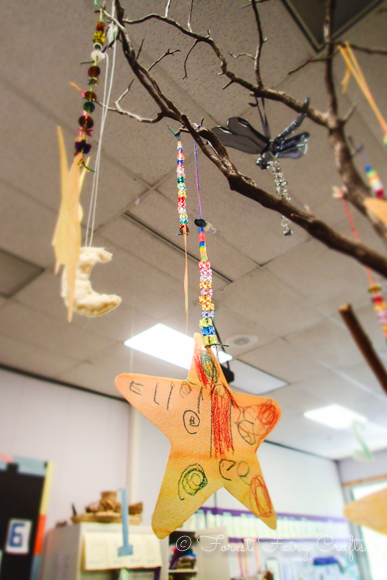
Write name on one side of the star and a wish on the other side. If a wish is hard to choose, add a few beads while thinking. Wishes can take time. Decorating the star is also lovely. Thread sequins and beads. Hang in a sunny place to see the sun shine on your wishing star.
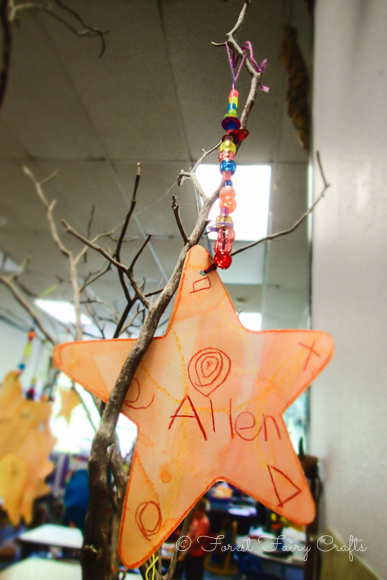
Helper: When tying off, be sure to tie around the last bead, or else they can all slide right off the thread. I loop the needle through the last bead a couple of times to secure all the other beads on the thread.
Enjoy! One class hung them on a branch. Another hung them from the ceiling over their gathering space. All those wishes watching over the children. Beautiful! These inspire a lot of discussion and create a lovely space where children celebrate wishes coming true :)
This wish? To read. May all your wishes come true :)
The First Forest Beasts
The Forest Beasts are here!

We had such fun designing these softies. The kids chose all the shapes and colors. I helped with the sewing machine- especially with the faux fur. That material is hard to sew!
I am inspired to think of easy, early tricks for sewing machine skills. The kids loved seeing their ideas become real life cuddle-monsters :)
These may be the first, but they sure won't be the last beasts :)
PS- Ian had a friend visiting. These were just as fun for the boys as the girls. A great boy craft! *Not that I believe certain crafts are for "boys" or "girls". I just see how they respond to different ideas. And the boys (and girls!) loved this one!
Tie Dye Adventures
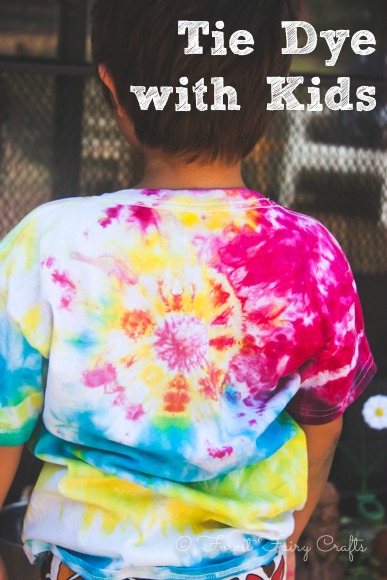
Tie Dye is timeless.
Seriously. I thought tie dye might be a fun glimpse into my college years. I could share an activity from my youth. I learned that what felt "dated" to me was "all new" to them. And they LOVE it. The process was magic.
And they learned a lot along the way :)
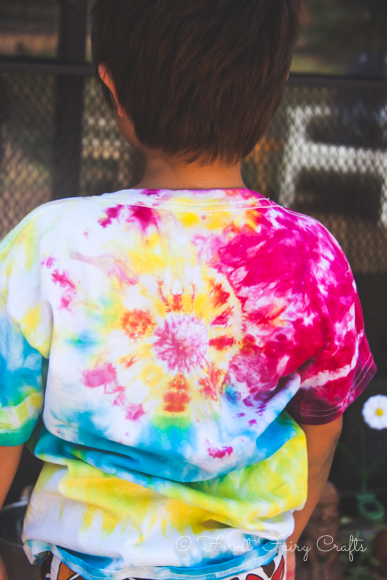
So we started with the Jacquard Funky Groovy Tie Dye Kit. The kit came with directions, dye, rubber bands, and one pair of gloves (which became imortant later). We looked online for inspiration. We learned a few different techniques for using the rubber bands. Anika tried a swirl. Mila wanted a stripes. Ian wanted a bullseye.
They each had a t-shirt and a white tea towel/flour sack which was thin cotton. The Flour Sack Towels were a surprising hit. They are used as doll and stuffie blankets, dancing scarves, and decorations. We found them on a whim and I'm so glad that we gave them a try. Each child got a shirt and a scarf.
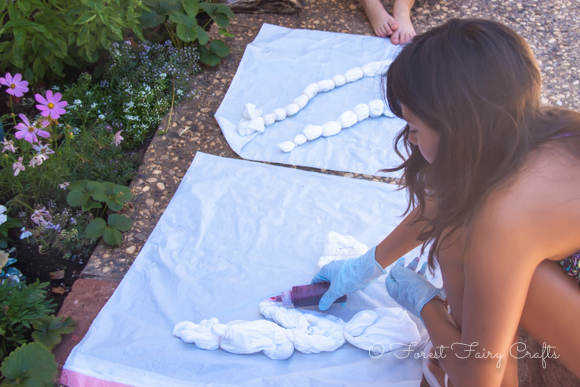
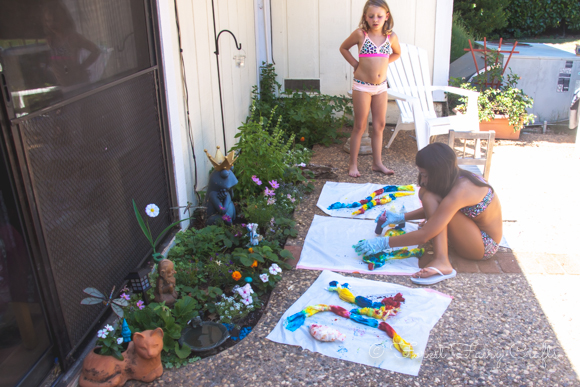
Anika (11) could manage the rubber bands on her own. For Mila (6), I encouraged her to loop the rubber band once, then I cinched each one with a few more loops. Ian (5), pointed to where he wanted the rubber bands and I put them on for him. When they were done, we placed plastic bags in the shade (one for each child). I've dyed before, so I know what happens when projects are close to each other (dye easily puddles and moves to the other project). So we gave each project plenty of room.

The kit came with red, blue, and yellow. And one pair of gloves. I let Anika wear the gloves. She started with the dye. Then I wanted to have fun, too. We planned to jump in the pool afterwards so using a little without gloves would be fine, right?
Wrong. My hands were dyed for days! My fingernails, especially, looked like monster-hands all yellowed and green. Next time, I will get extra gloves :)
Anika and I used the bottles while Mila and Ian told us where to add the colors. We were careful not to let the dye puddle underneath the project (keeping each area the chosen color).
After awhile, mixing became fun too!
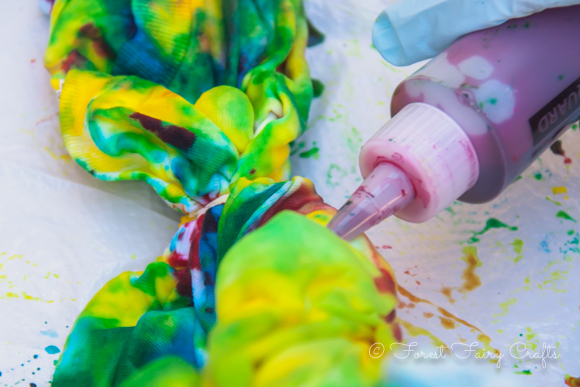
The colors were so vivid! And the directions had a lot of illustrations, which Anika appreciated. I asked her to read a lot of them to me, so information reading practice, hurrah.

Oh, one idea was to place marbles or bouncy balls inside the fabric before adding the rubber band, thus creating the bulls-eye effect. Fun stuff. We searched Pinterest and found lots of inspiration :)
We had extra dye when the kids finished. And a couple of four sacks. So I decided to dip-dye. I asked the kids to predict what would happen. I found old containers that I wasn't worried about ruining. I draped the towels over a child-chair (that I also wasn't worried about ruining). And we tucked a few inches into the dye. Science! What might happen and why?
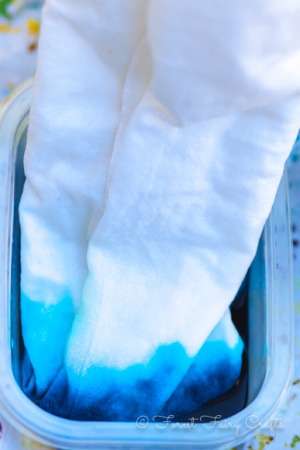
By now our workspace was nice and messy. So I made sure that nothing sat in a puddle of unwanted color (brown) and we left everything to sit. This was hard for the kids because they wanted to open their creations right away. I can understand that! Practice patience :)
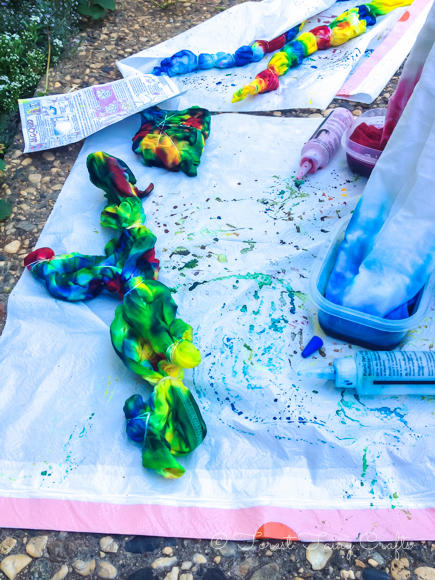
And by now my hands were a mess! Oh, you can see the fun directions in this image. Perfect for older children.
We let the projects sit. And sit.
The dip dye started its science-magic.

We looked up how water can travel "up". We let everything stay overnight. The next morning, the blue had traveled up half of the towel! I didn't get a photo of that, sorry.
The kids were amazed. Then I wore the gloves (I learned my lesson the hard way) to snip the rubber bands carefully and rinse excess dye. The kids were thrilled by what they had created. Awesome!
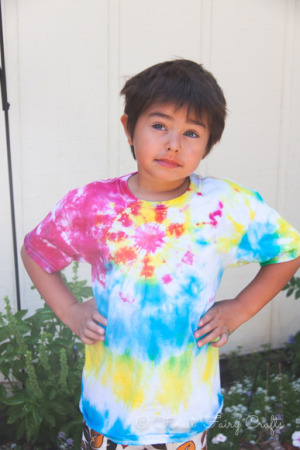
I held their projects up for them to admire, then tossed everything to wash and dry (as instructed). Finally, the shirts were ready to wear.

Each one turned out different. Exactly like the kids who made them :)
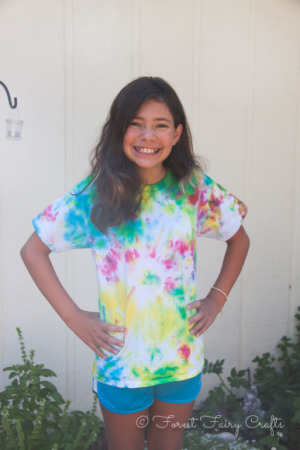

These child-led crafts are delightful and rewarding for them. Look what can be made!
I remembered why I wore so much tie-dye in college. It's fun!
Ian loved the activity as much as the girls, so this is definitely fun for boys and girls. The best part is that, every time they wear the shirts, they remind us of happy times. And that never goes out of syle :)
This is not a sponsored post, but the links are affiliate, so if you decide to try your own tie-dye adventure, a small percentage returns to the Forest. Your price remains the same. Thank you!

Happy dying!
I completely forgot! We made these a couple of weeks ago. The kit comes with Soda Ash, which is mixed with warm water to soak the clothing to prepare for the dye. Lots of opportunities to practice patience. I followed the advice to save the soak after taking the clothes out (all in the directions) so I could easily dunk a couple of extra scarves when we had left-over dye.
Figured I should let you know that we followed that step :)
Have fun!
The Children's Festival

Another year of magic!
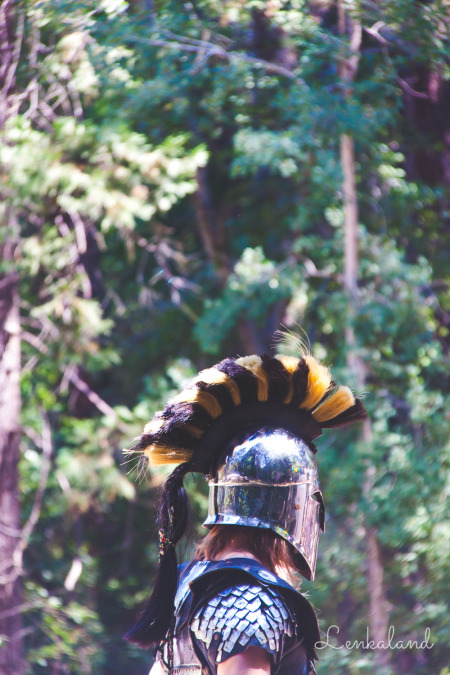
The Children's Festival is a community celebration of childhood and adventure. We dress up as unicorns and kitty-fairies and (this year) Superman :)


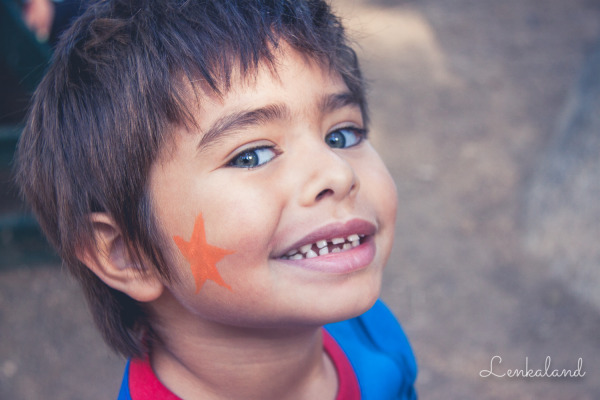
Magic can be so simple in childhood! The highlights of the festival include facepainting using watercolors (always check paint for whether it's safe and appropiate (not permanent :)).
Clay and painting a giant cardboard castle and hammering scrap wood to make daggers and swords and little houses.
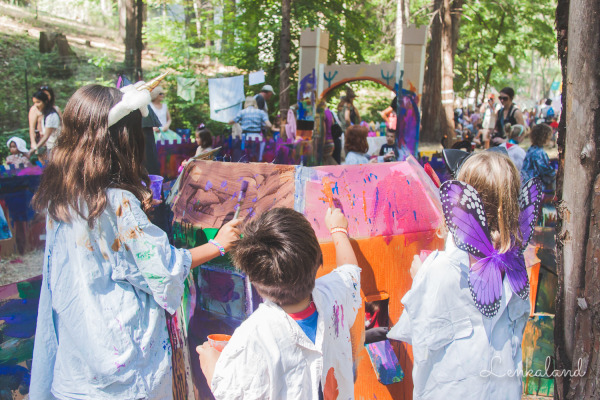
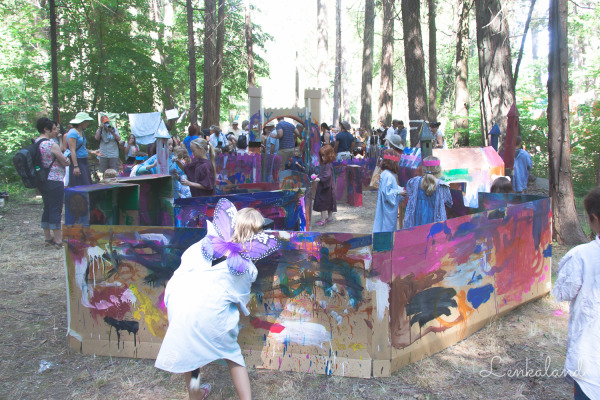


Children create their own magic! They become vivid characters with a few simple ideas. We are surely lucky to have dedicated volunteers who make these dreams possible.
Oh, and the favorite treat! I almost forgot!

A lemon with a stick of peppermint. You suck the lemon up through the peppermint. The candy becomes a sweet straw. The kids love this treat! We had to go back for second lemons. When life gives you lemons, make easy peppermint lemonade :)

Simple things that make magic for children. I may use a few ideas at our next party :)
The Festival, however, takes magic to another level with the many volunteers who go above and beyond to make an unforgettable adventure!
The bride is guarded by a Troll who demands a stick or rock for toll. The children search for the best items to give him. He has red eyes and a spider on his nose!
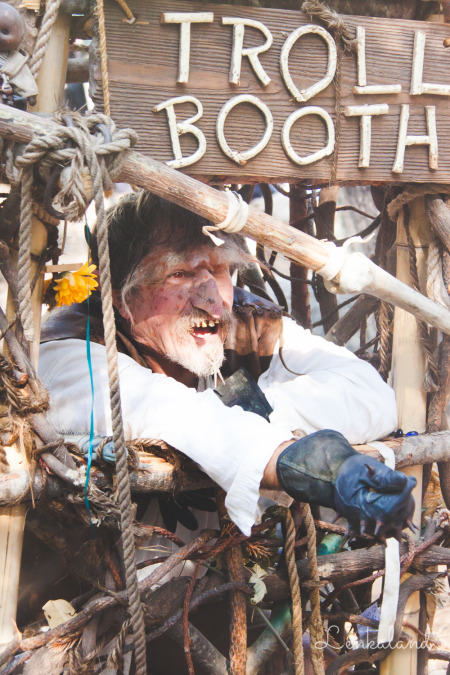
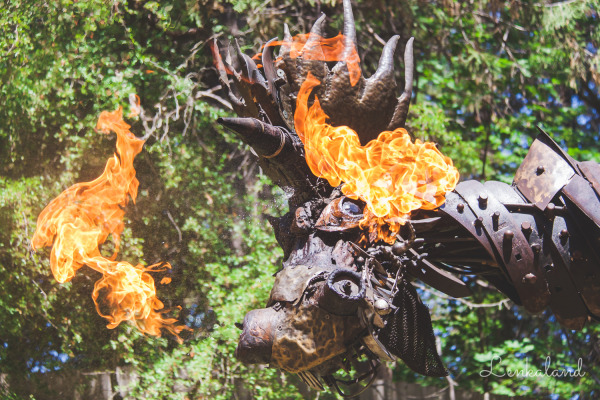
And a real fire-breathing dragon!
The entire day is an experience! We can't wait for another journey to the enchanted forest next year!
The entire gallery with lots of photos is here:
Go to The Children's Festival on Facebook for updates about next year's event. Inspiring children (and adults) every year :)

Off to Neverland! Or the Enchanted Forest! Or ... ?
:)
Five Ways to Personalize a Fairy


Fairies love to be gifts. Or special projects. And each time a fairy is crafted, they love to be unique. Fairies have a special magic. Because you create a fairy, you make her (or him) unique.
I give fairies as gifts all of the time. For new babies to hang over the crib, for birthdays, for children in difficult times. I have a few tricks for making a fairy unique. I hope they help you craft a fun fairy for friends, family, or yourself.
1. Favorite Colors
Ask about colors. Ask a parent or child about their favorite colors. Especially in childhood, colors change quickly. Use the colors to inspire your felt and petals.
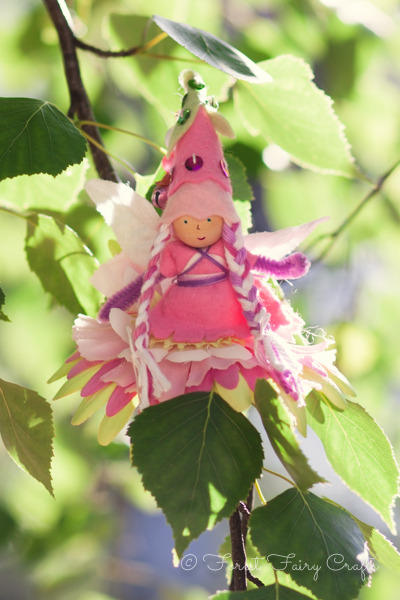
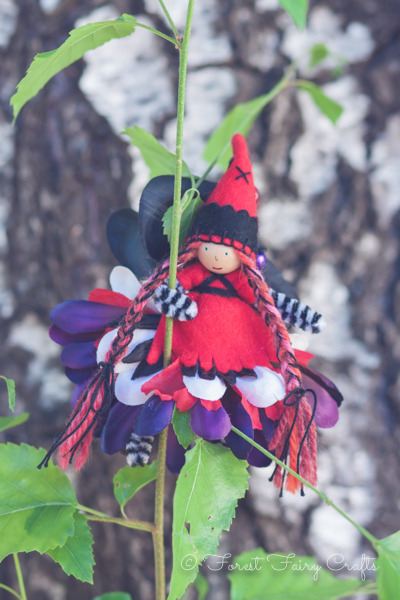
Children often grow from pink, purple, pink, and more pink, to red, black, and dark purple.
Every age is fun! And using another person's favorite colors is fun.
2. Matching features
Match the family, match the details.
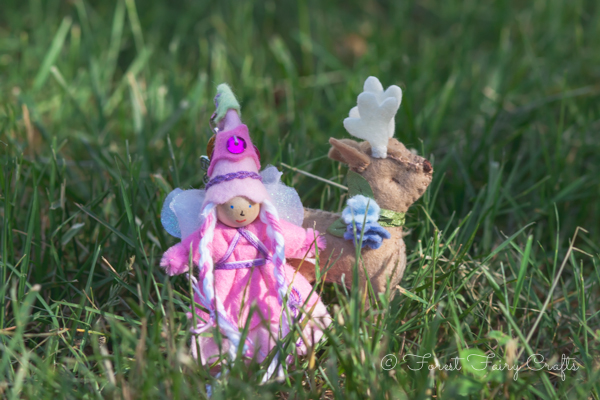
 Fairy Deer by Margaret Bloom at We Bloom Here
I love fairy families! We create big sisters and little brothers. I will use a little gnome for a baby or toddler. Children love when the fairy is part of a family!
Matching hair color and eye-color always delights children.
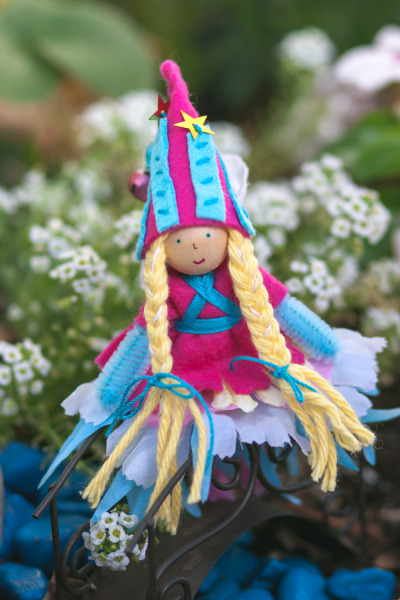
I gave this fairy yellow hair to match my friend's hair. I threaded a strand of sparkly white in to add texture. Of course, I love colored hair for fairies- pink! green! rainbow! so I don't often matchy-match. Still a fun plan now and again :)
3. Using numbers
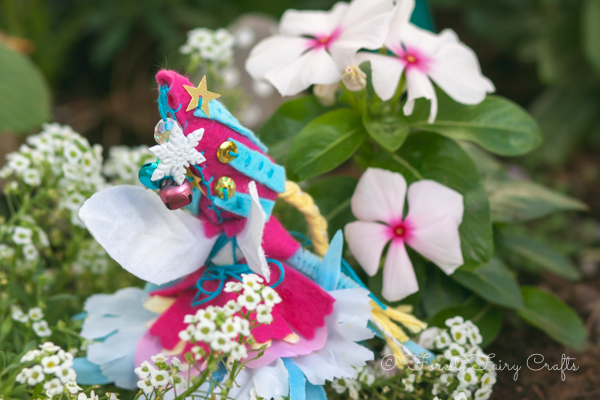
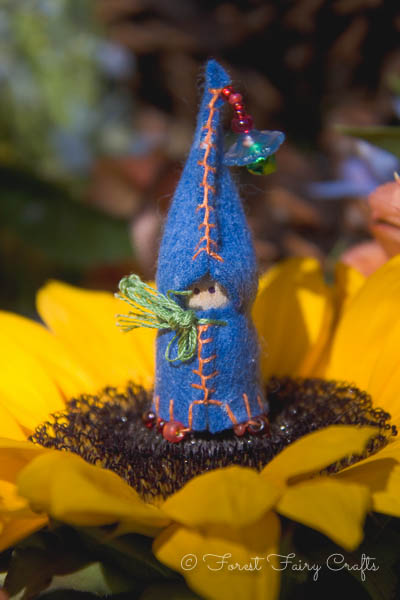
Numbers add a layer of significance to any fairy. The birthday fairies (pictures above with the blue candles on her hat) always have the number of candles matching the number of trips around the sun. Numbers can be used in other ways, too.
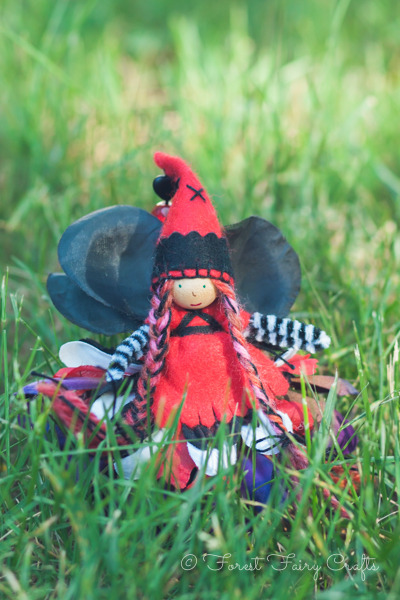
For this fairy, I sewed four Xs on her hat for the four people in her family (they wrap around so you don't see all of the Xs at once).
I use numbers all of the time with custom fairies. I will put a number of points on a crown, or beads on a hat. The numbers can reflect anything. From trips around the sun. To family. To dreams and goals. Numbers create another link between a fairy and her (or his) new home.
4. Charms and tokens
Bead stores can be my toy stores! A little charm can be the difference between an everyday fairy and a custom fairy.
For these fairies, I found beads with the same letter as the child's first name.
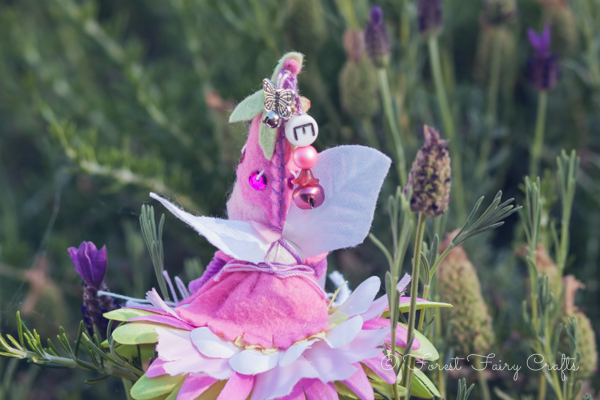
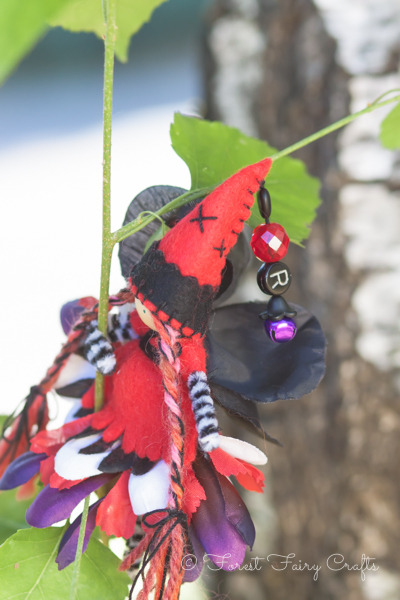

I had to treasure-hunt since the letters were buried in bowls of random beads. I need to find more letter-beads :).
I had a bead with the year for awhile which will help me in the future (I need 2014 beads :)). I also have charms with Made With Love on them. I adore charms with HOPE, or DREAM, or WISH on them. My challenge is that I often forget all my choices until the fairy is in the mail. Oops. This list will help remind me.
I also use charms to share a moment in time, favorites, or memories. This birthday fairy has a snowflake charm even though she has a spring birthday. Can you guess why?
I expect fairies to be loved, played with, and taken on adventures. My friend may not have this fairy forever. If she does, though, I want her to remember that this was the year she discovered a new favorite story and sang the songs with all of her heart. I want the fairy to reflect her life.
And my children do keep their fairies in a collection. We have everyday fairies and sentimental fairies :)
5. Stories, friends, and accessories
As I write this, I hear the stories that I hold as I create these fairies. Every once in awhile, I include a written note with the custom features of each fairy. Usually I let the fairy speak for itself. Most people notice matching elements, or discover the number of candles. Every once in awhile, though, I write a story to give with a fairy. Such as with the emotional Fairy Road that travelled with a fairy to a family in a very difficult time. Fairies are celebrations. They can also be a source of great comfort and strength. Fairies have been given to children who need extra support (my son carried one in his pocket the first days of school). They have also been angels in challenging times for health or grieving. Fairies have stories too. Writing a quick note can create an immediate connection between a fairy and a child (or adult).
I actually rarely give fairies a name. I often give that opportunity to the child. Naming is a connection as well. And they often choose a name that I would never imagine on my own :)
Fairies love friends! You can make your own, like Margaret Bloom made this darling deer to live in our Forest :)
We also give stuffed friends with fairies. We might give a cat or dog that looks similar to a family pet. Or magical friends. Often, I don't have time to make my own animal friends (I wish!). Luckily, the world makes awesome unicorns, dragons, foxes, and more that can accompany a fairy.
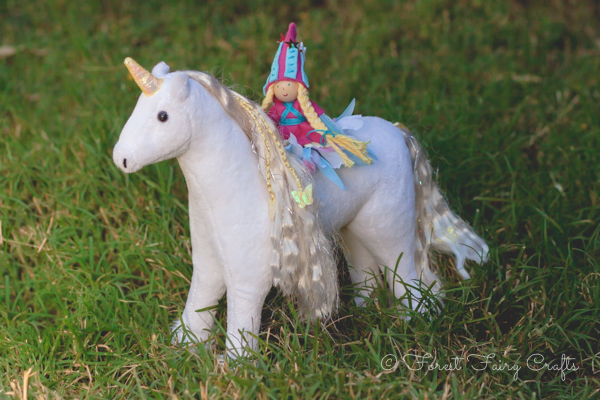
This unicorn is no longer available (unfortunately) the same company makes a similar Only Hearts Club Unicorn. Or you can click here to find many, many unicorns.
We also adore dragons
.
My almost-last idea (I have so many ideas!) is to give a bottle of Pixie Dust/Fairy Dust with your fairy.
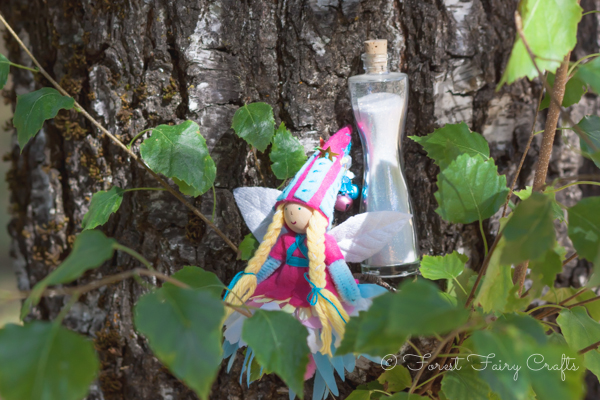
Of course, again, I cannot find this exact bottle to share, but these look very similar- Pixie Dust Bottles with Fairy Wand. I need these wands to prop in the fairy's hand!
I just thought of necklaces or bracelets, too, that can travel with a fairy.
Every fairy has their own unique magic. Making your own means that no one else in the world can create the exact same fairy. That is magic right there :)
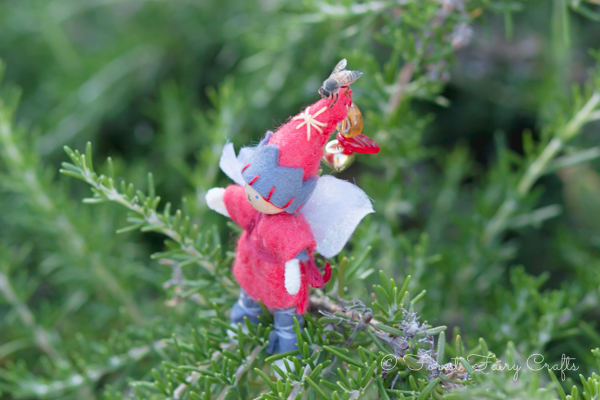
Fairies make lovely gifts. Even bees know the magic of fairies :)
Enjoy creating and giving the magic away!
Bonus sixth way! Of course, a very simple way to customize fairies is to choose a special fairy. A mermaid or zombie or warlock may be just what your friend loves these days. Our book has many, many choices!

All of the fairies in this post use tutorials found in our book. We want to inspire creating of all kinds (these tips are great for gnomes too). I am happy to answer any questions!
Now, I'm off to pack up the Birthday Fairy for a special friend. Share the magic :)
*please note: This post contains affiliate links. Should you choose to purchase any items through links on this post, a small amount returns to the Forest. Your price remains the same. We both win. And thank you!
Happy Fourth of July!
Hello fairies!
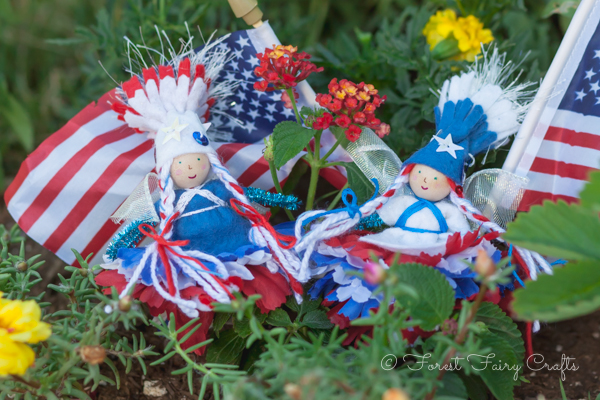
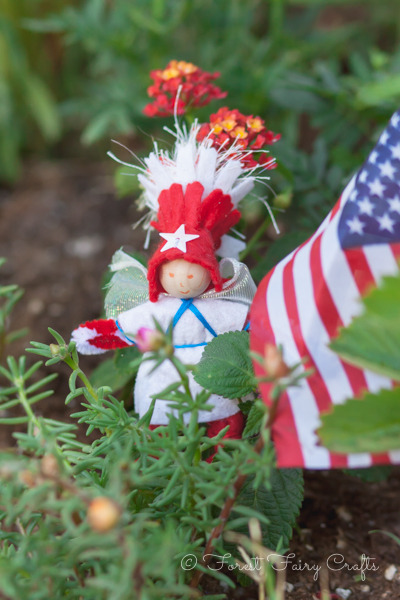
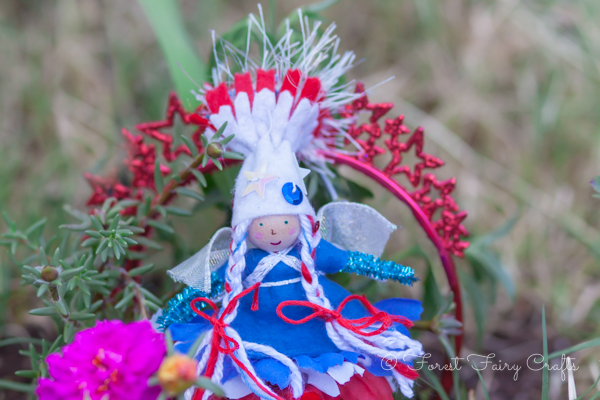
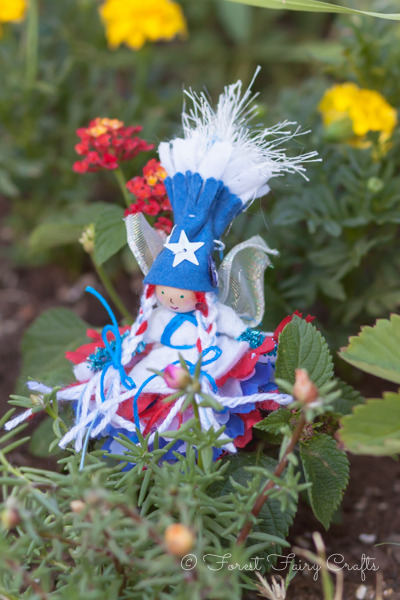
This week we made fairies to celebrate the Fourth of July. They are so festive and fun!

We were inspired by carnations in the craft store with red, white, and blue petals. We found great supplies with my Christmas collection of pipe cleaners, sequins, and sparkly threads. We realized that pompoms make perfect fireworks :)
So we sewed the design of the Leprechaun Hat with a long top (layered with another color). We tucked the pompom inside. Magic :)

Ian made a boy that had Fireworks Power. The blue thread going down his arm is how he shares his power to make fireworks.
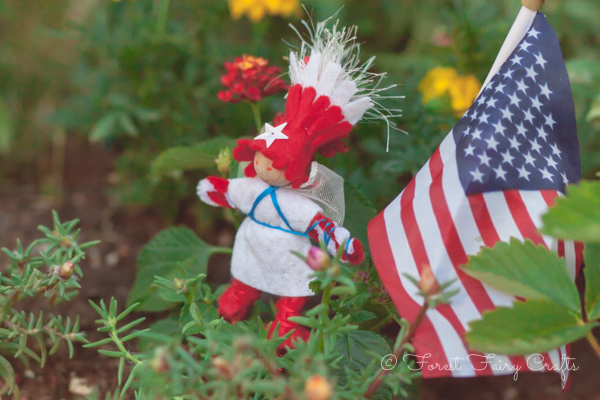
And he wanted an orange face. This boy loves orange (he has a collection of All Things Orange by his bed).
We have a big party today (it's my birthday!) so I better go decorate :)
Enjoy the holiday! Happy Fourth of July! Happy Fairy Crafting!
Peg Doll Swap Fairies
These fairies inspired me! I joined the Peg Doll Swap at We Bloom Here. My partners were the super-talented Maureen from Twig and Toadstool and Jess from Bits and Bobbins/Mosey Handmade. How lucky am I?
Not only did I get to connect with these amazing crafters, they inspired me to make fairies for their families.
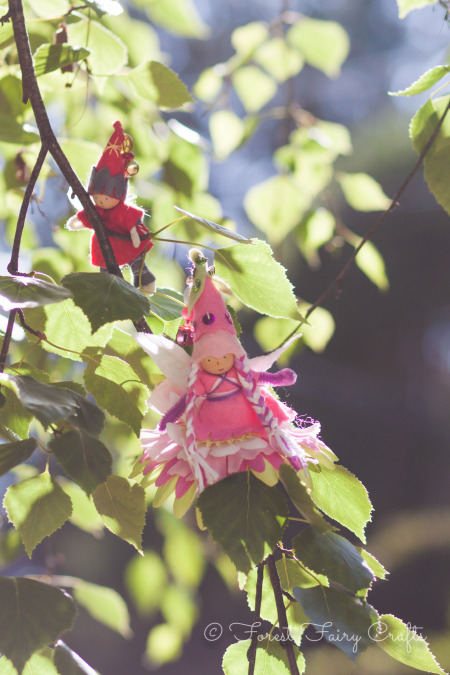
Crafting for children is a treat. As a crafty mama, my children often see me create and send treasures to other people. I make sure to set a few aside for them, of course. I saw the swap as an opportunity to give a personalized fairy to the children of crafty-mamas. I asked their favorite colors. I created a little brother/big sister, and little sister/big sister for my new friends.
The curious thing was that favorite colors were red/pink, and pink/red so the fairies matched in opposite ways :)

The darling deer is our new forest mascot sewn by Margaret Bloom just for us :). We love our deer friend!

The fairies are on their way to homes in Maine and Ontario, Canada. I bet they will go on many adventures with their new friends!
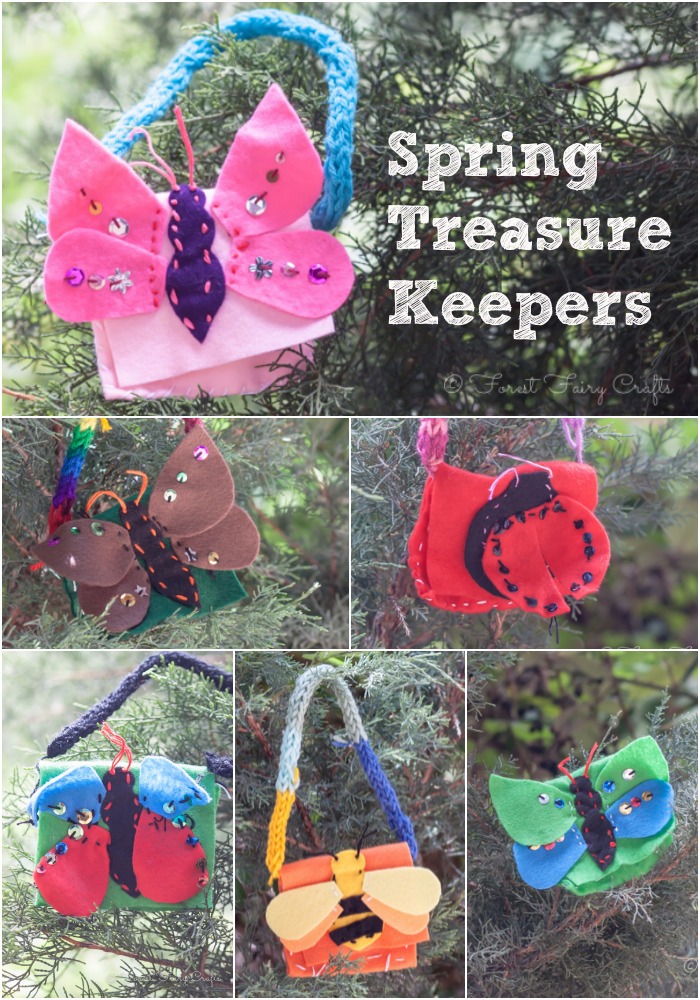
Spring Treasure Keepers
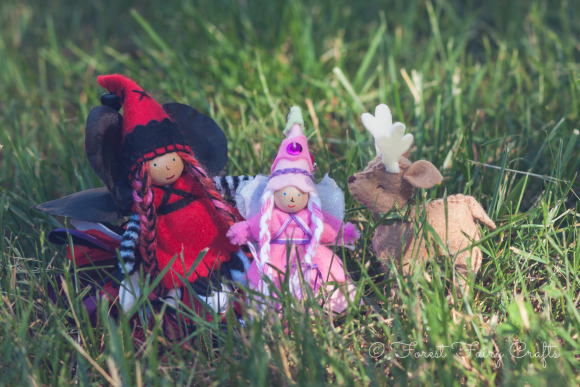
Spring means longer days, sunshine, and outdoor adventures. Every adventurer needs a place to keep stones, shells, and little treasure. Asia designed the perfect project for spring. First grade students (6 years old) at the Nevada City School of the Arts sewed these wonderful Treasure Keepers.
Aren't these adorable?
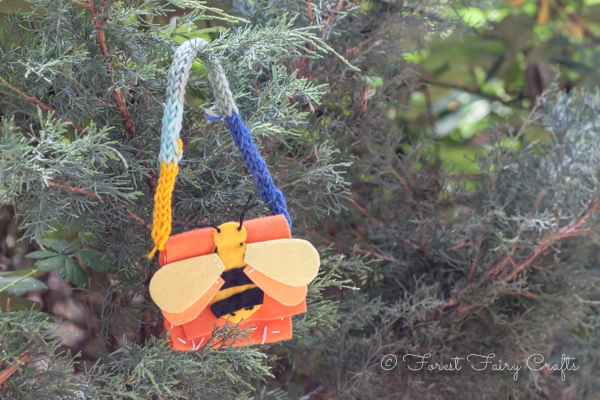
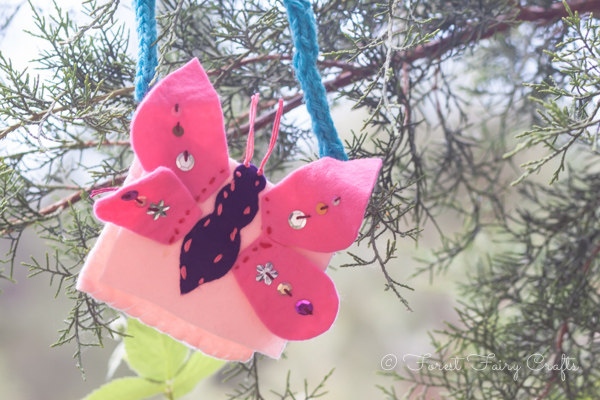
The class was studying insects. Each student chose an insect to feature on their treasure keeper bag.


Butterflies were popular for decorating the little bags.
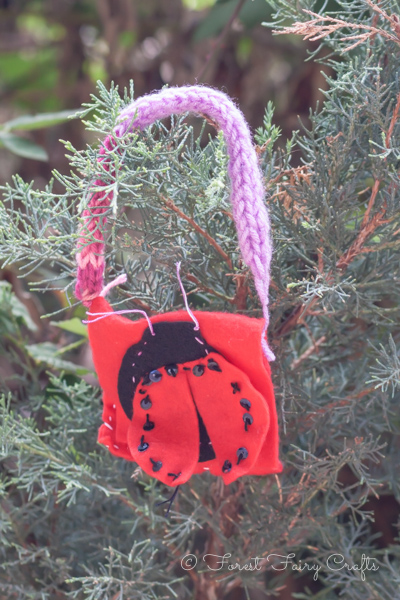
Asia and I both love the Ladybug too :)
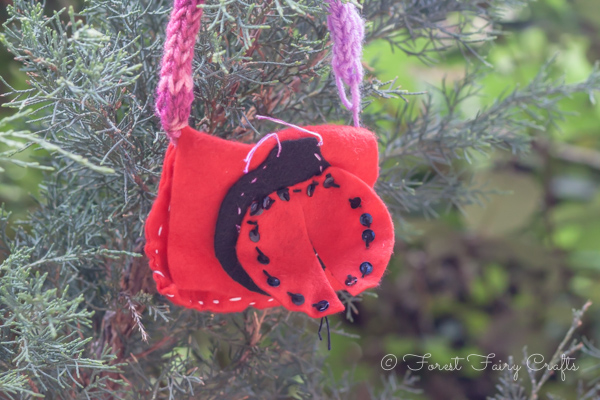
And this little one is so original. He's a little tricky to photograph with the black on dark blue felt, but he's an awesome beetle.

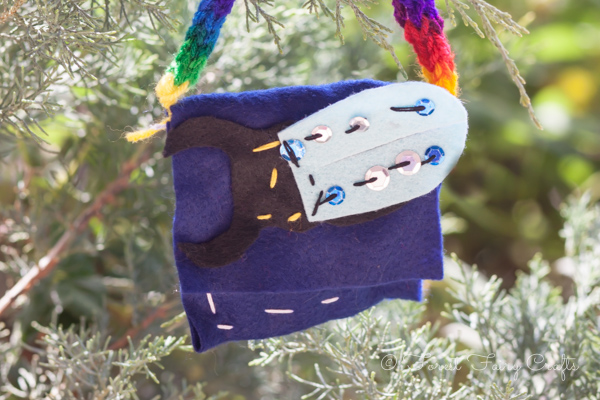
So cool!
Asia made the bags using the pattern on page 123 of our Forest Fairy Crafts book. The handles were created with fingerknitting, shown on pages 124-125 and castle-knitting. Castle knitting isn't in the book (sorry!). We are working on a tutorial for making your own. Or you could use one like this
.
The children have lots of ideas for going on nature walks to fill their bags with found treasures. Welcome spring!

*Please note, this is an affiliate link. Should you decide to purchase, a small amount returns to the Forest while your price remains the same. Win-win. Thank you!

Happy Spring!
Peg Doll Swap by We Bloom Here
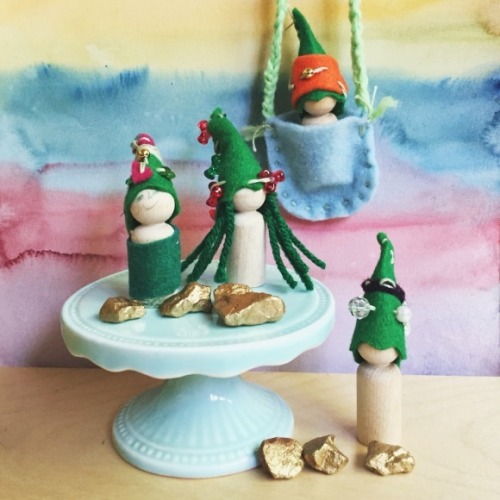
What a treat for spring! We Bloom Here (one of my favorites) is hosting a Peg Doll Swap! Inspire yourself with sweet peg dolls, and sign up to share. I am super-excited to see what everyone creates. I love little pegdolls. I call them gnomes. They can be seasonal, like these summer gnomes.
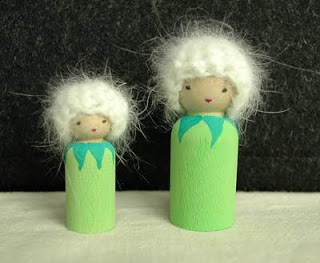
 Summer Gnomes by Lenka
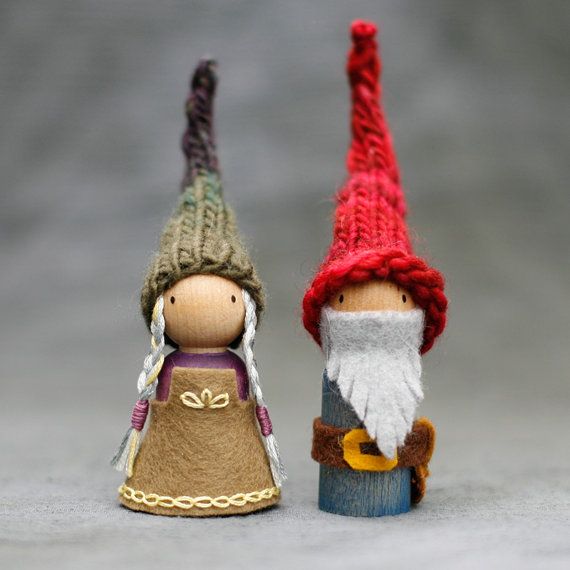
Or to celebrate events. The bride and groom were gifts for my friend's wedding. They appeared at the top of her wedding cake.
 Bride and Groom by Lenka
This was also an itty bitty gnome for my cousin's wedding. For them, I made the entire family using bendy fairies. They also got to be atop the wedding cake :)
 Baby Gnome by Lenka
See more images of his family here.
Margaret has wonderful ideas for the swap. Her inspiration is Matryoshka style peg dolls. She is open to many ideas. Want more inspiration? Check out the collection she features here and here.
A few of my favorites...
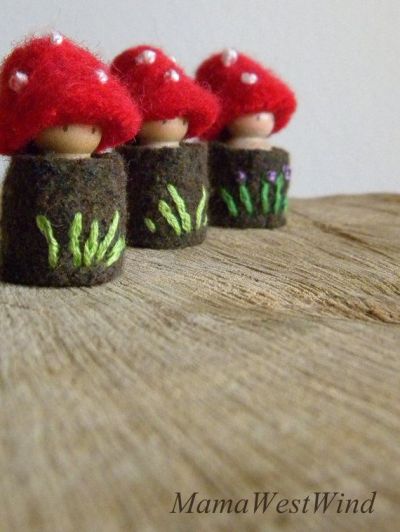 Toadstools by MamaWestWind
 Gnome Couple by Beetle and Fern
 Wish Gnomes by We Bloom Here
 Spring Dolls by This Cosy Life
I have my own inspiration board on
Pinterest with all the peg and fairy dolls that I love all over the web. So much talent! So many cute creations.
Follow Lenka Vodicka-Paredes's board In the Magic Forest on Pinterest.
I hope you can join the swap! The deadline is May 5, 2014, so hop on over to We Bloom Here to participate! Let's create :)
If you want serious inspiration (and directions!) for lovely peg dolls, check out Margaret Bloom's book, Making Peg Dolls.

*please note: these are affiliate links. Should you decide to purchase, a small amount returns to the Forest. Your price remains the same. Win-win :) Thank you!
I look forward to seeing what we share with one another! The little wooden pieces are available at A Child's Dream Come True (not an affiliate) and most local craft stores. Margaret says that other styles of little people are welcome too. Going to be fun!
Wishing you a delightful day!
PS- we do have a free Knitted Bunny Gnome pattern if you would like to give that a try :)
Inspiration: Pirates!
A new movie was released this week! A certain favorite fairy around here is going on pirate adventures! We can't wait to see The Pirate Fairy ourselves.
Pirates are popular in the forest. We love to build dangerous ships and search for buried treasure. Just in case pirates are popular in your world right now, I want to share a little inspiration.
 photo copyright: C&T Publishing
%3B&description=Pirate%20Fairies%20by%20Forest%20Fairy%20Crafts.%20Photo%20by%20C%26T%20Publishing)
Argh! Directions for these scallywags are in our Forest Fairy Crafts book. We share patterns and tutorials for the coats and two styles of hats (along with detailed directions to make many different fairies). My plan today is to blend the garden fairies with a few pirate accessories to make our own pirate fairy heorines (and heroes).
We hope they inspire you too! Happy sailing the high seas :)
*Please note: this post contains affiliate links. If you decide to click and purchase, a small percentage returns to us (your price is exactly the same). Thank you so much for supporting the forest!
Playing with Craft
Children love inspiration. Don't we all?
Making toys inspires children. They delight in the power of their hands and ideas. I recently sewed these lovely baby leprechauns with six year old students. Children sewed all their own sequins, around the fairy baby, and added stuffing. They were delighted with the little toys they made.What a treat, to see that magic through their eyes. Look what we can create!
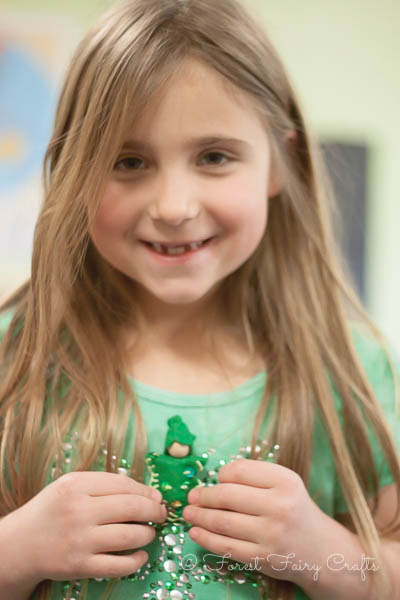
Sorry this one is a little blurry- classrooms have tricky lighting for my camera :)
Then the children reminded me the real fun of sewing and crafting. Crafting is inspiration. And the craft is just the beginning. Crafts inspire play. And play inspires storytelling. And learning.
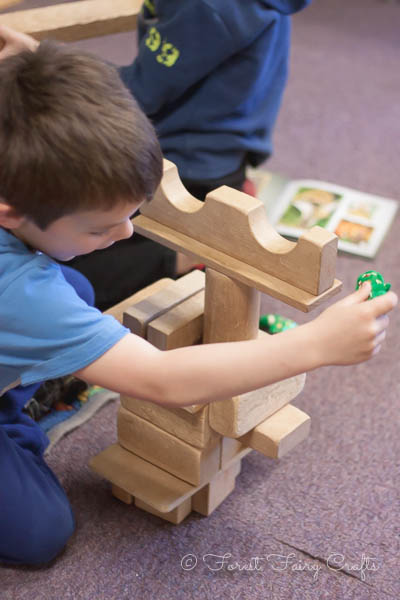
Now that they had little friends, they needed houses. What could build a house?
Blocks of course!

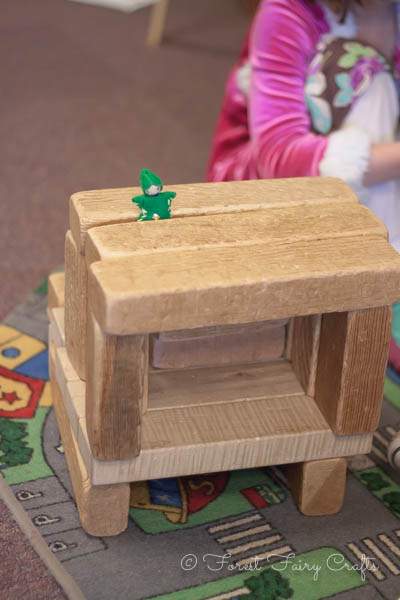
And some homes need a diving board into a lovely cool pool.

With a luxury view from the bedroom.
Legos also make awesome homes. With an open door :)


I encourage students to leave blank faces so they can imagine any expression, but a few insist on adding features. I let go when they have strong feelings towards needing eyes or mouths. After all, if I wanted it to look 'my way', I would make my own :)
I loved her idea to put a ring over the ruffled hat for an even fancier crown.
And finally, dollhouses are wonderful homes. Especially when they come with a pet tiger :)

Enjoy what you create!
Happy day :)
Many of our crafts are "Keepsake Crafts", meaning they look nice for years and become a treasured memory alongside the sweet sewing. Every now and again, I sew "Process Crafts" with children. These are the crafts to shove in pockets and forget outside after playing in the trees. They are the crafts that are meant for playing. They are a chance to let go. Don't worry overmuch about colors or forever. Let them become a memory. Become part of a story. Have fun crafting and playing :)
P.S.- if you would like detailed directions for making little fairy/gnome friends, check out our Forest Fairy Craft Book. Please note- is an affiliate link. Thank you from the forest should you decide to purchase one! Directions for the little hats are online here. Enjoy!
Leprechaun Baby
Hello wee leprechaun!
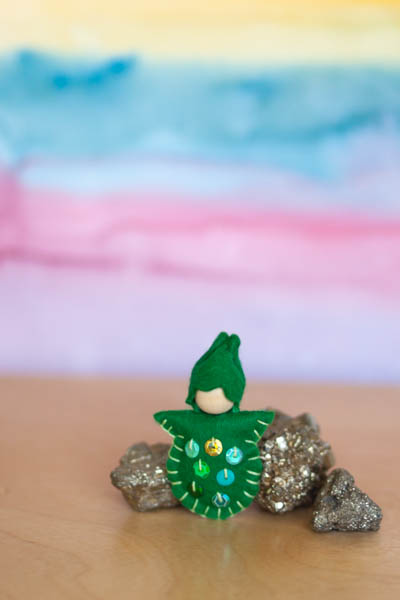
Happy Saint Patrick's Day!
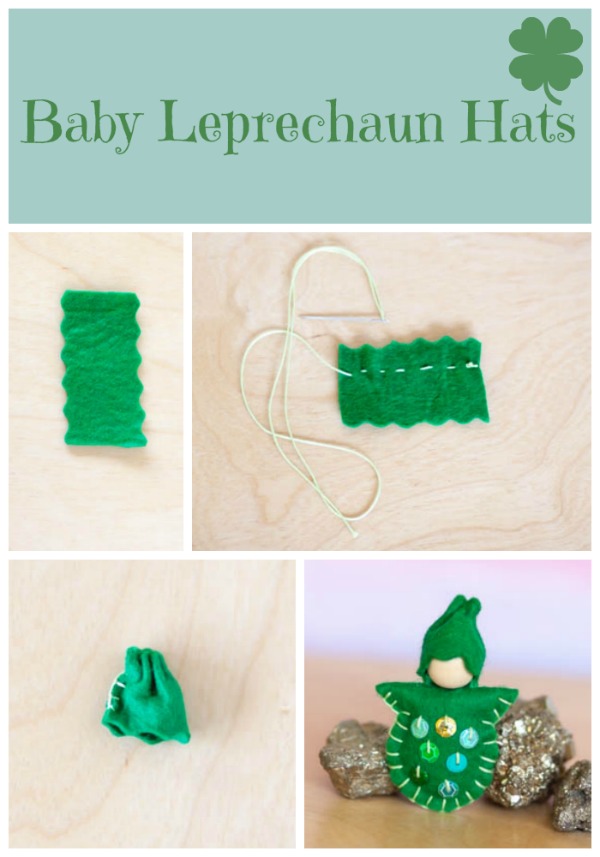
Today I get to sew with little friends in first grade. I will be taking photos to share of course. I had to make a sample for them. And it's so fun to make these little leprechauns. I used the Blossom Baby pattern on Page 99 of our Forest Fairy Crafts book. I used green felt and green and gold sequins.
I was a little creative with the hat. I didn't have enough acorn caps for my class project. And I want to finish them and send them home today. That means I needed to glue hats the day before. I made the hats ahead of time. And I had fun with the design.
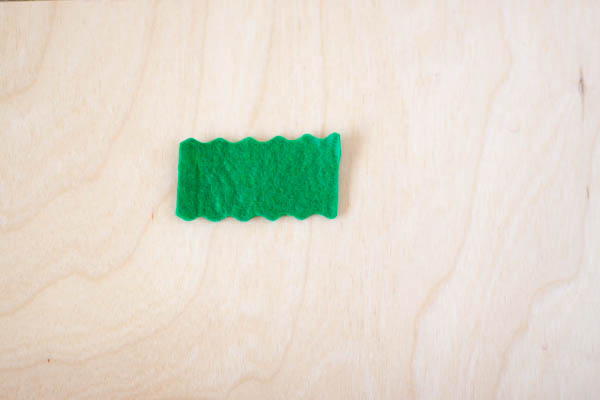
I cut a rectangle with curvy lines (I just measured around the 5/8" bead, very scientific). It came out to 2" if you are curious. I made a few taller and a few shorter. I like every fairy to be unique :)
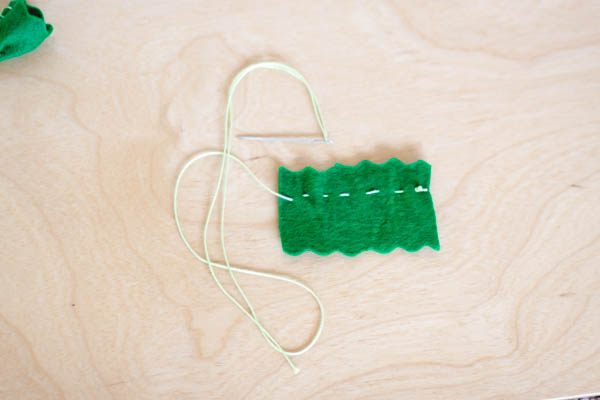
The next step would be tricky for children, but I sewed all these hats so I was okay with a few tricks :). I ran a stitch near the top of the hat. Note: for children, I always double the thread and knot so the needle won't pull off. These were for me. I've had a lot of practice :)
I cinched the thread tight and tied a knot so it wouldn't come loose. I am pondering how to best teach this to children... more on that soon. Anyway, I folded the hat in half and sewed a few stiches along the back.
Easy cuteness!
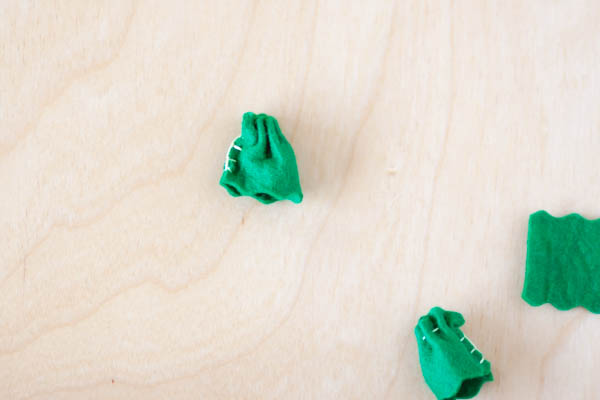
Ready to glue :)
I could have added sequins or a clover of course, but I have one day to finish these. I wanted the children to sew sequins on the body, sew around the outside, stuff, and close up. Will be fun!

Wishing you lots of magic today!
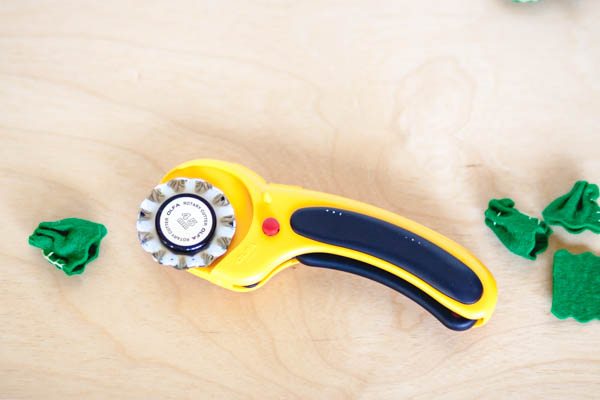
Tip: Last summer I realized that curvy lines were a challenge for cutting, yet looked wonderful. I took the leap and treated myself to a rotary cutter. I love the curves for blossoms and mermaid waves. It took me ages to choose, so here's the link in case you are interested: OLFA Rotary Cutterwith the Olfa Scallop Blade
. And I use a small cutting mat
(not photographed). It's been a great investment!
*Please note: this post does contain affiliate links. Should you purchase anything, your price doesn't change, but a small percentage commission returns to the Forest. Thanks for helping us buy more felt :)
For sharing:
 Enjoy!
Forest News and What's New in the Etsy Shop
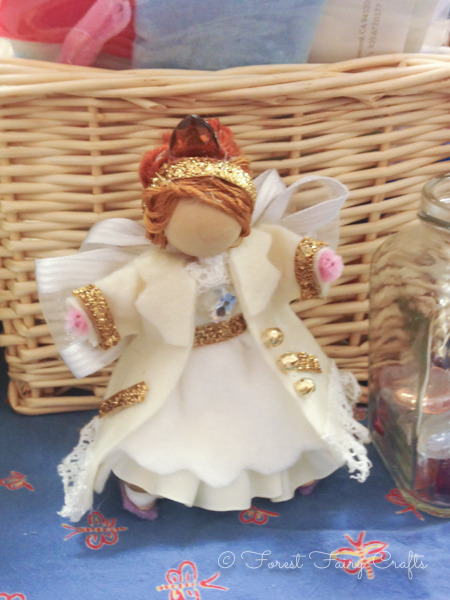
I met this pretty fairy this week.
Her colors are perfect on days with overcast skies. She reminds me that spring will be here soon! Our winter is terribly mind here in Northern California this year with drought conditions. But I still use warm socks and cozy pajamas. I look forward to sunshine and flowers.
I made her especially for the yearly school auction. Asia and I both teach at a public charter school. The Nevada City School of the Arts is also our childrens' school. We donated this fairy, a signed book, and a natural supply kit to A Matter of Taste. If you are in the Nevada County area, this event is a treat for everyone. We'd love to see you there :)
I also updated our Etsy Shop.
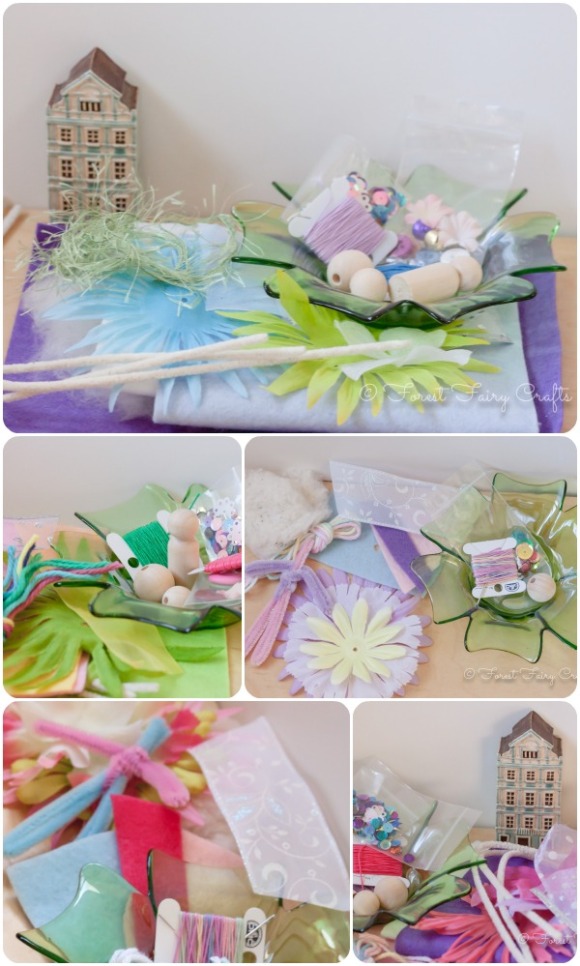
We now have Natural Supply Kits, which have all the goodies that you need to make a fairy, little fairy, gnome, and treasure-keeper in our book (except glue and colored pencils to draw faces). These kits now have wool blend felt. The felt has lovely colors and is soft and wonderful for keepsakes. We also added cotton pipe-cleaners (again, soft). Asia and I put together each kit. Each one is unique. This makes them a little tricky for listing- I need photos for each kit, but I love how there isn't one exactly like another. The color combinations get me every time- I want the blue and lavender, no- maybe the green and pink. Choose yours before it disappears :)
I also created Fairy Kits by request. This kit has the supplies for one fairy.
This is a perfect gift idea. I even create the body since that can be tricky. Children can have fun sewing the hat and creating their own magical doll.
Both kits depend on the Forest Fairy Crafts book for directions. You can create your own felt treasures of course. I am glad that I have them for giving our book to friends. It's so hard to wait if you need supplies! I hope they bring fun and creativity wherever they go.
We also learned that our projects appeared in two magazines. Yes, two! We were in Kiwi magazine. Thank you for the lovely review! And we are in BYou magazine. So exciting to see the fairies, gnomes, and crafts in print!
We are so grateful for everyone supporting the Forest. These little treasures mean the world to us and we appreciate being able to share them with you :)
*note: the link to our book is an affiliate link
Favorite Valentine Crafts
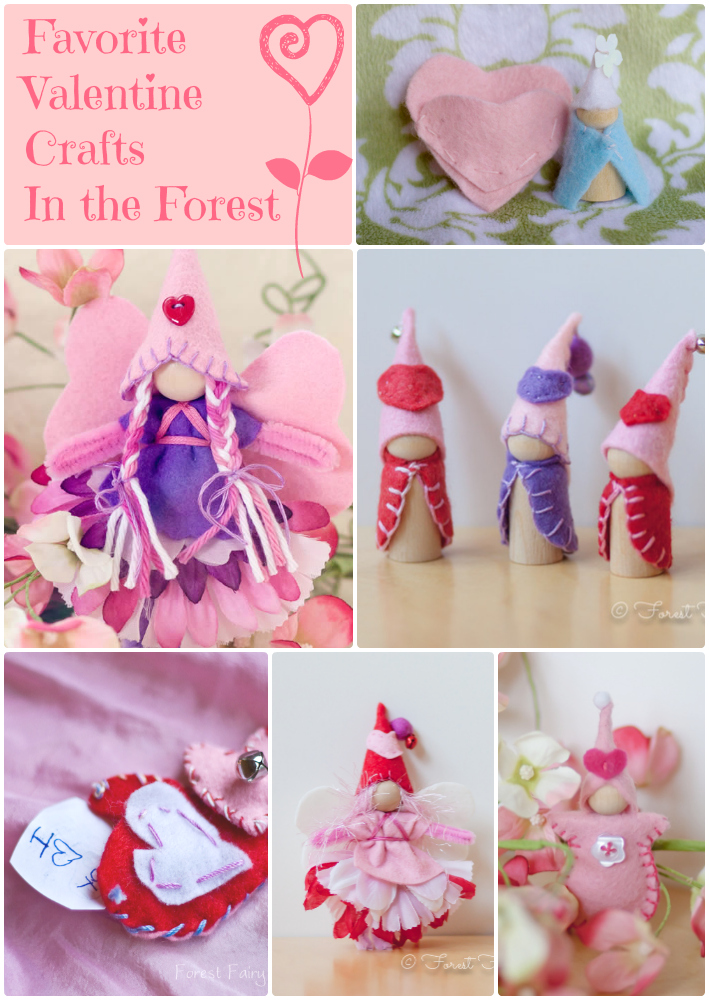

Time to collect our favorite Valentine Crafts in the forest!
Valentine's Day is the holiday of love and friendship. With children, we notice all the gifts that love brings into our lives. The time we spend together, the sweetness of a hug, the joy of shared laughter. Our families and our friends are tremendous gifts.
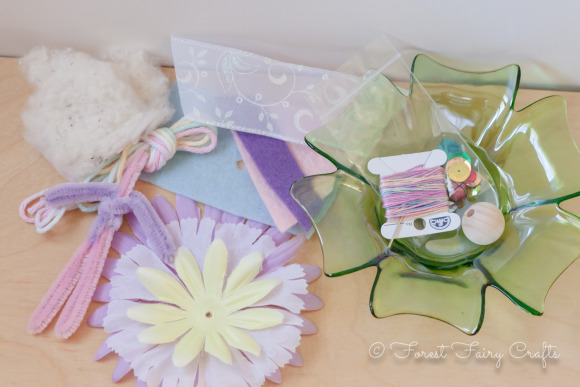
The crafts here have been created over the years to show appreciation for the ones we love. We hope they inspire you to create and share!
Most of these links show ideas and do not have patterns or tutorials included (a few have step-by-step directions). You can find detailed instructions (with many photos) in our Forest Fairy Crafts book. The book is also available for instant download using Kindle
, iBooks, or Nook.
Wishing you lots of love this week and all year :)
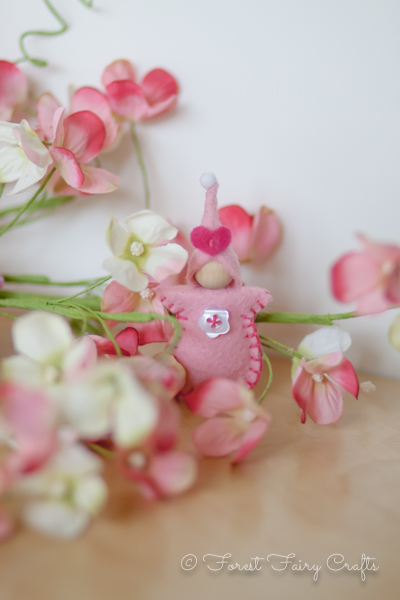


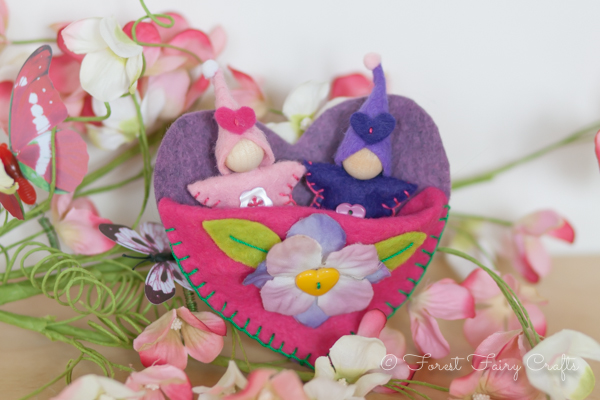
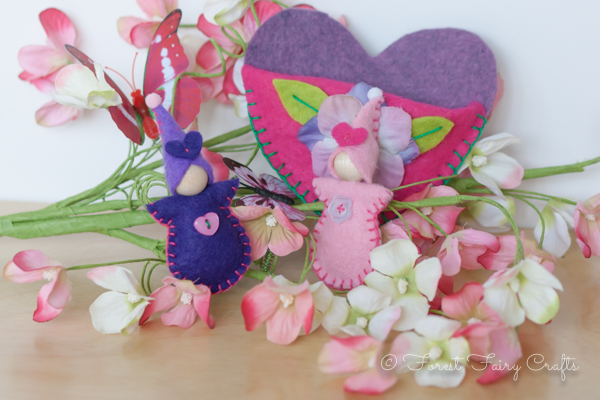
Sweetheart Fairy Babies
Fun in the forest sounds like, "Guess what I made?"
Aw, welcome little sweetheart fairies!
Asia shared these darlings with me last week. We love being inspired by the season.
Asia used ideas from our Forest Fairy Crafts book and switched them around to match the holiday. We've been getting more requests for holiday-theme projects. We aren't able share the exact directions, but we can point you towards inspiration.
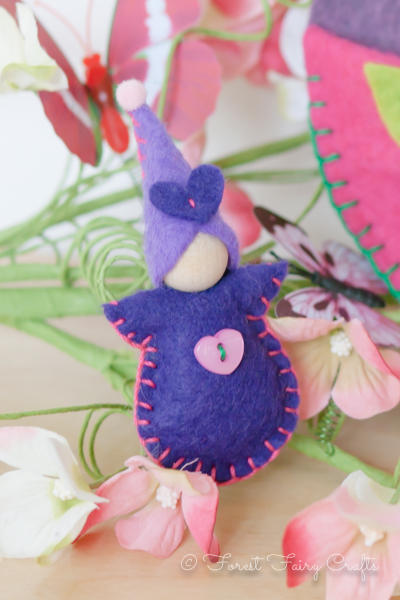
The wee babes started as Blossom Fairy Babies (page 100). Instead of a leaf bed, Asia made a heart similar to the heart pockets on page 114. She then took the hat from the Love Fairy on page 66 and made the heart-shaped hat small enough for a baby.
Putting it all together is brand-new magic!
Certain things, like the pom-poms on their hats and felt heart decorations, are not in our book. The pom-poms are in most craft stores and can be sewn with a little stitch at the top of the hat. The hearts are cut freehand and secured wtih a stitch.
We keep hearing about mixing and matching ideas from the book. We love that!
Of course, each idea began as a question. "How could we...?" I have a few ideas tumbling in my thoughts right now. "How can I...?" And the results are so much fun!
We wish you lots of love as you create :)


Winter Fair Inspirations
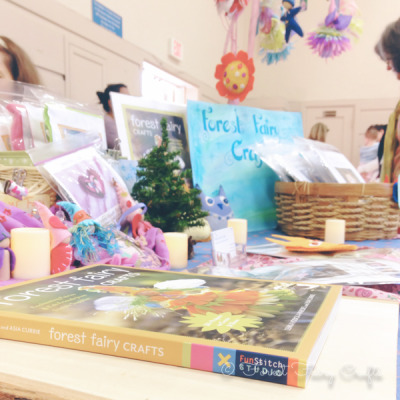
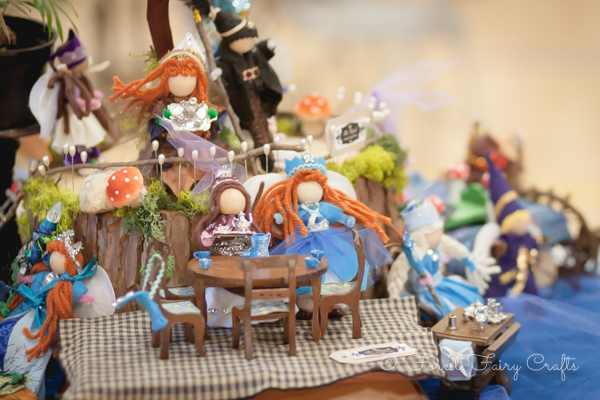
We are setting up our display when our kids dash over.
"Guess what? She has fairies that look like your ninja, Mom!"
Just across from us was a delightful booth with trees and swings and fairies galore. Her inspiration?

Our book!
She bought our book right before Christmas and started creating an entire world of fairies.
And I can imagine how she felt when she saw us setting up with our book right across from her display. Of course we made fast friends. And she loved sharing all of the new ideas that she brought to Fairyland.
We feel amazing to see and hear how the book is being used, combined, and built upon to send magic out into the world. What a wonderful enchanted forest!
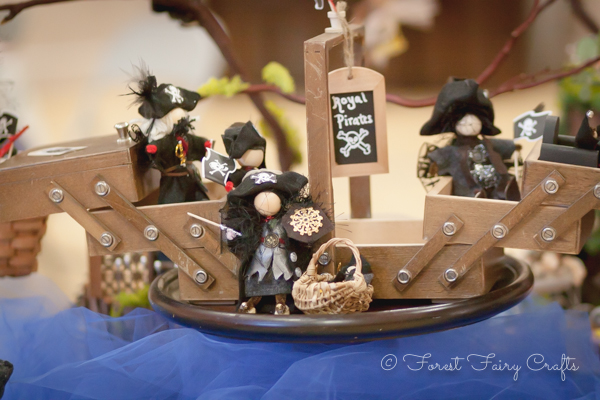
A pirate ship!
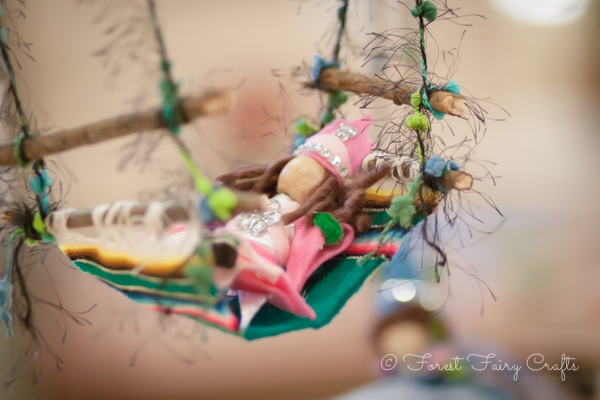
And a hammock. Every princess needs a hammock.
So many clever inspirations. She said that she hadn't made anything like these before, and she was browsing in a local fabric and craft store, Humble Fabrics. She made one and was enchanted!
The cool thing for us was seeing children interect with the display. Quite a few brought a princess of a pirate home for more play.
We love seeing the magic forest grow. Inspiration is delightful!
We found other treasures at the fair as well.
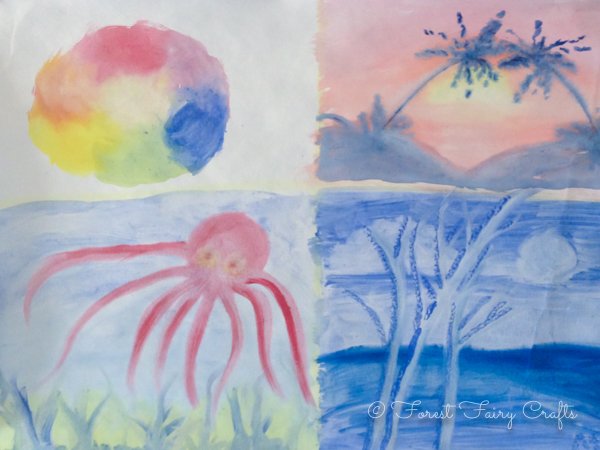
Lovely watercolor display. I want to paint an octopus like this one.
And another crafter created this magic.
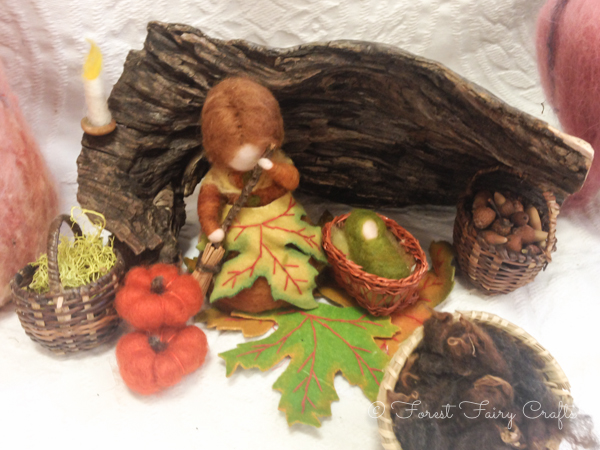
Oh my goodness, such sweetness! Even a little felt candle. Beautiful!
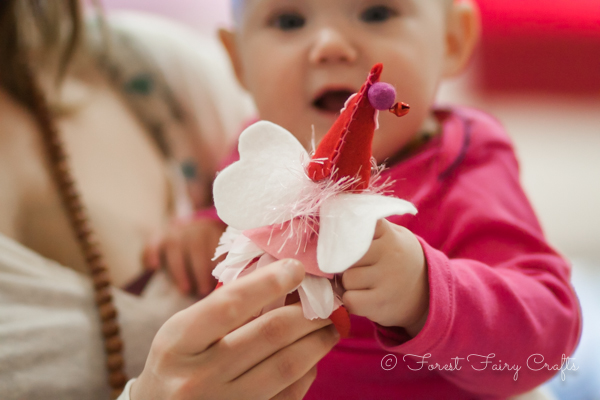
As for our own fairies and crafts, they found new friends too.
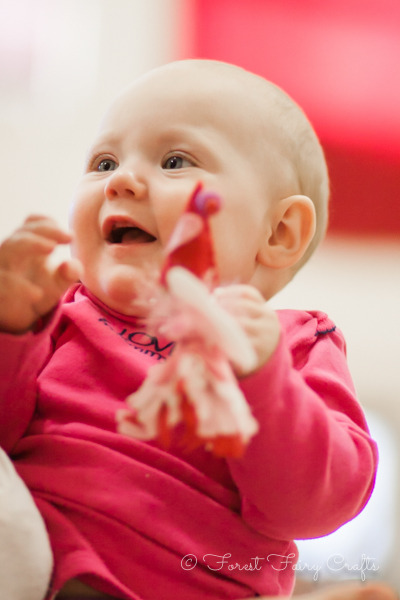
Babies need lots of supervision with fairies, of course. Little beads and bells are not good for eager tasters. Mom was careful and is going to put the fairy on a shelf for celebrating the season. And baby can play now and again. When she wants a good laugh :)
When a new baby laughs for the first time, a fairy is born...
~J.M. Barrie
We believe :)
Winter Fair Sweethearts
This week we are going to a Winter Faire which was rescheduled due to snow last month. At the time, missing the holiday season was disappointing.
But winter days are long (even with the strange early spring we have this year). I look forward to a fun day for us and our children.
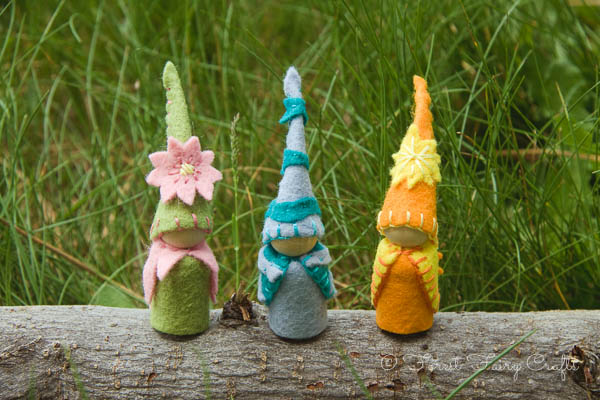
The fair inspired me to sew these little gnomes to bring along.
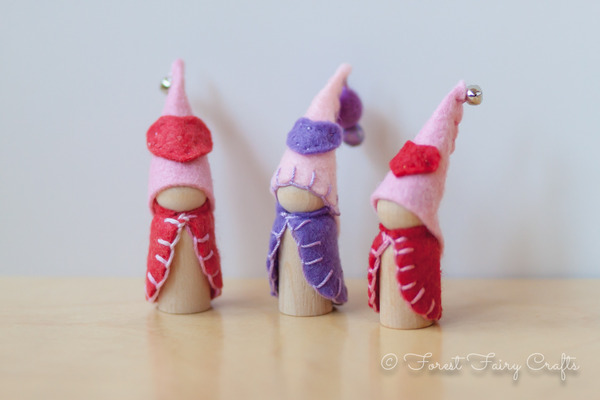 Sweetheart Gnomes by Lenka
Each new season is new inspiration :)
And I had to make a fairy, too.
 Sweetheart Fairy by Lenka
Children (and adults) ask sometimes why the fairies or gnomes don't have faces. We like to create them both ways. Many of my fairies have faces. I love the little smiles and impish personalities.
At the same time, I find the wood-bead charming. The idea is that our imaginations create the face. We can 'see' the happy or worried or surprised fairy in our mind. We create the expression and the details. This sounds novel in an age when everything can be made to be more real and toys come with soundtracks so we don't need to make a train whistle or a firetruck siren-song.
I adore simplicity. And I appreciate getting to make these types of toys. Just waiting for a little magic. To come alive :)
You can find us at the Winter Fair at the Yuba River Charter School tomorrow. I can't wait to see all of the toys and crafts and games. I am sure to find more inspiration :) More information is here if you are in the Nevada County area.
We hope to see you!
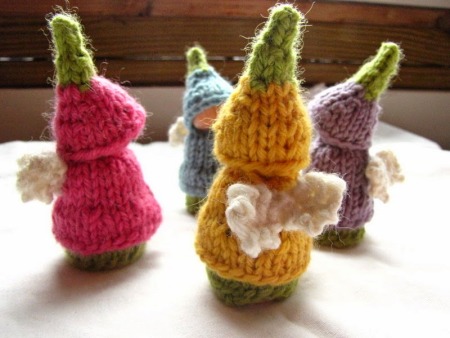
Sweet Gnome Homes
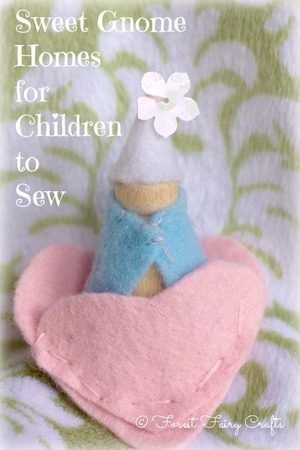
A few years ago, my daughter made me a precious gift. She asked for a few supplies. Felt scraps. A tiny wood gnome.
She made me this treasure. She designed and sewed everything herself. She was seven years old.
She had a lot of practice with needles and thread (her mama is Queen of the Fairy Forest after all (her title for me)). But the design and creating of this little gnome is a perfect beginning sewing project.
All you need is felt scraps, needle, thread, a couple decorations, and a wee gnome. This project allows for a lot of trial and error because the felt pieces are small.
She cut the hearts first. They didn't match. She liked that one was bigger than the other. She trimmed them to fit together (mostly). If your child doesn't know where to start with cutting hearts, your child can make a pattern on a piece of paper. Draw a few sketches and pick your favorite. Cut and trace onto felt. Or fold the felt in half and cut just like folding a paper heart (this is a little trickier for little hands).
She could have decorated the hearts with sequins, buttons, or beads. She didn't feel like making it too fancy. I love the simplicity, myself. She sewed them together with straight stitches.
She didn't use a pattern for the gnome. She cut scraps into shapes that she liked and tried them on the peg doll. She sewed the cape with a few stitches. Then she did the same thing for the hat. She folded it in half and sewed it together. She added a flower sequin to the top.

She had sewn before using lots of the ideas in our Forest Fairy Craft Book. If this had been her first sewing project, I would have sat with her and given support as needed.
What I appreciated about this project was how she was able to plan and test ideas. She found a project- cape and hat, with a little home- where she could try her own patterns. I could have cut the shapes and orgazined the project step by step. But I enjoyed how this gnome gave her a lot of freedom. Yes, I had a pile of teeny-tiny piece of felt at the end. I didn't care.
Visualizing, planning, and creating are all valuable life-skills. A little toy for your efforts is a big bonus!
And it's one of my favorite gifts ever.
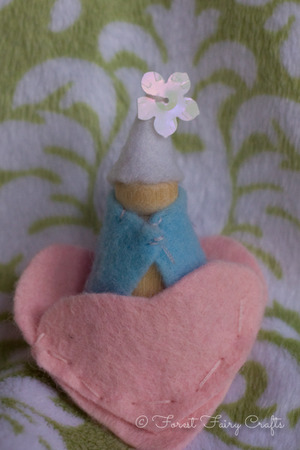
Welcome home, little gnome :)
