

Make a Yarn Ball
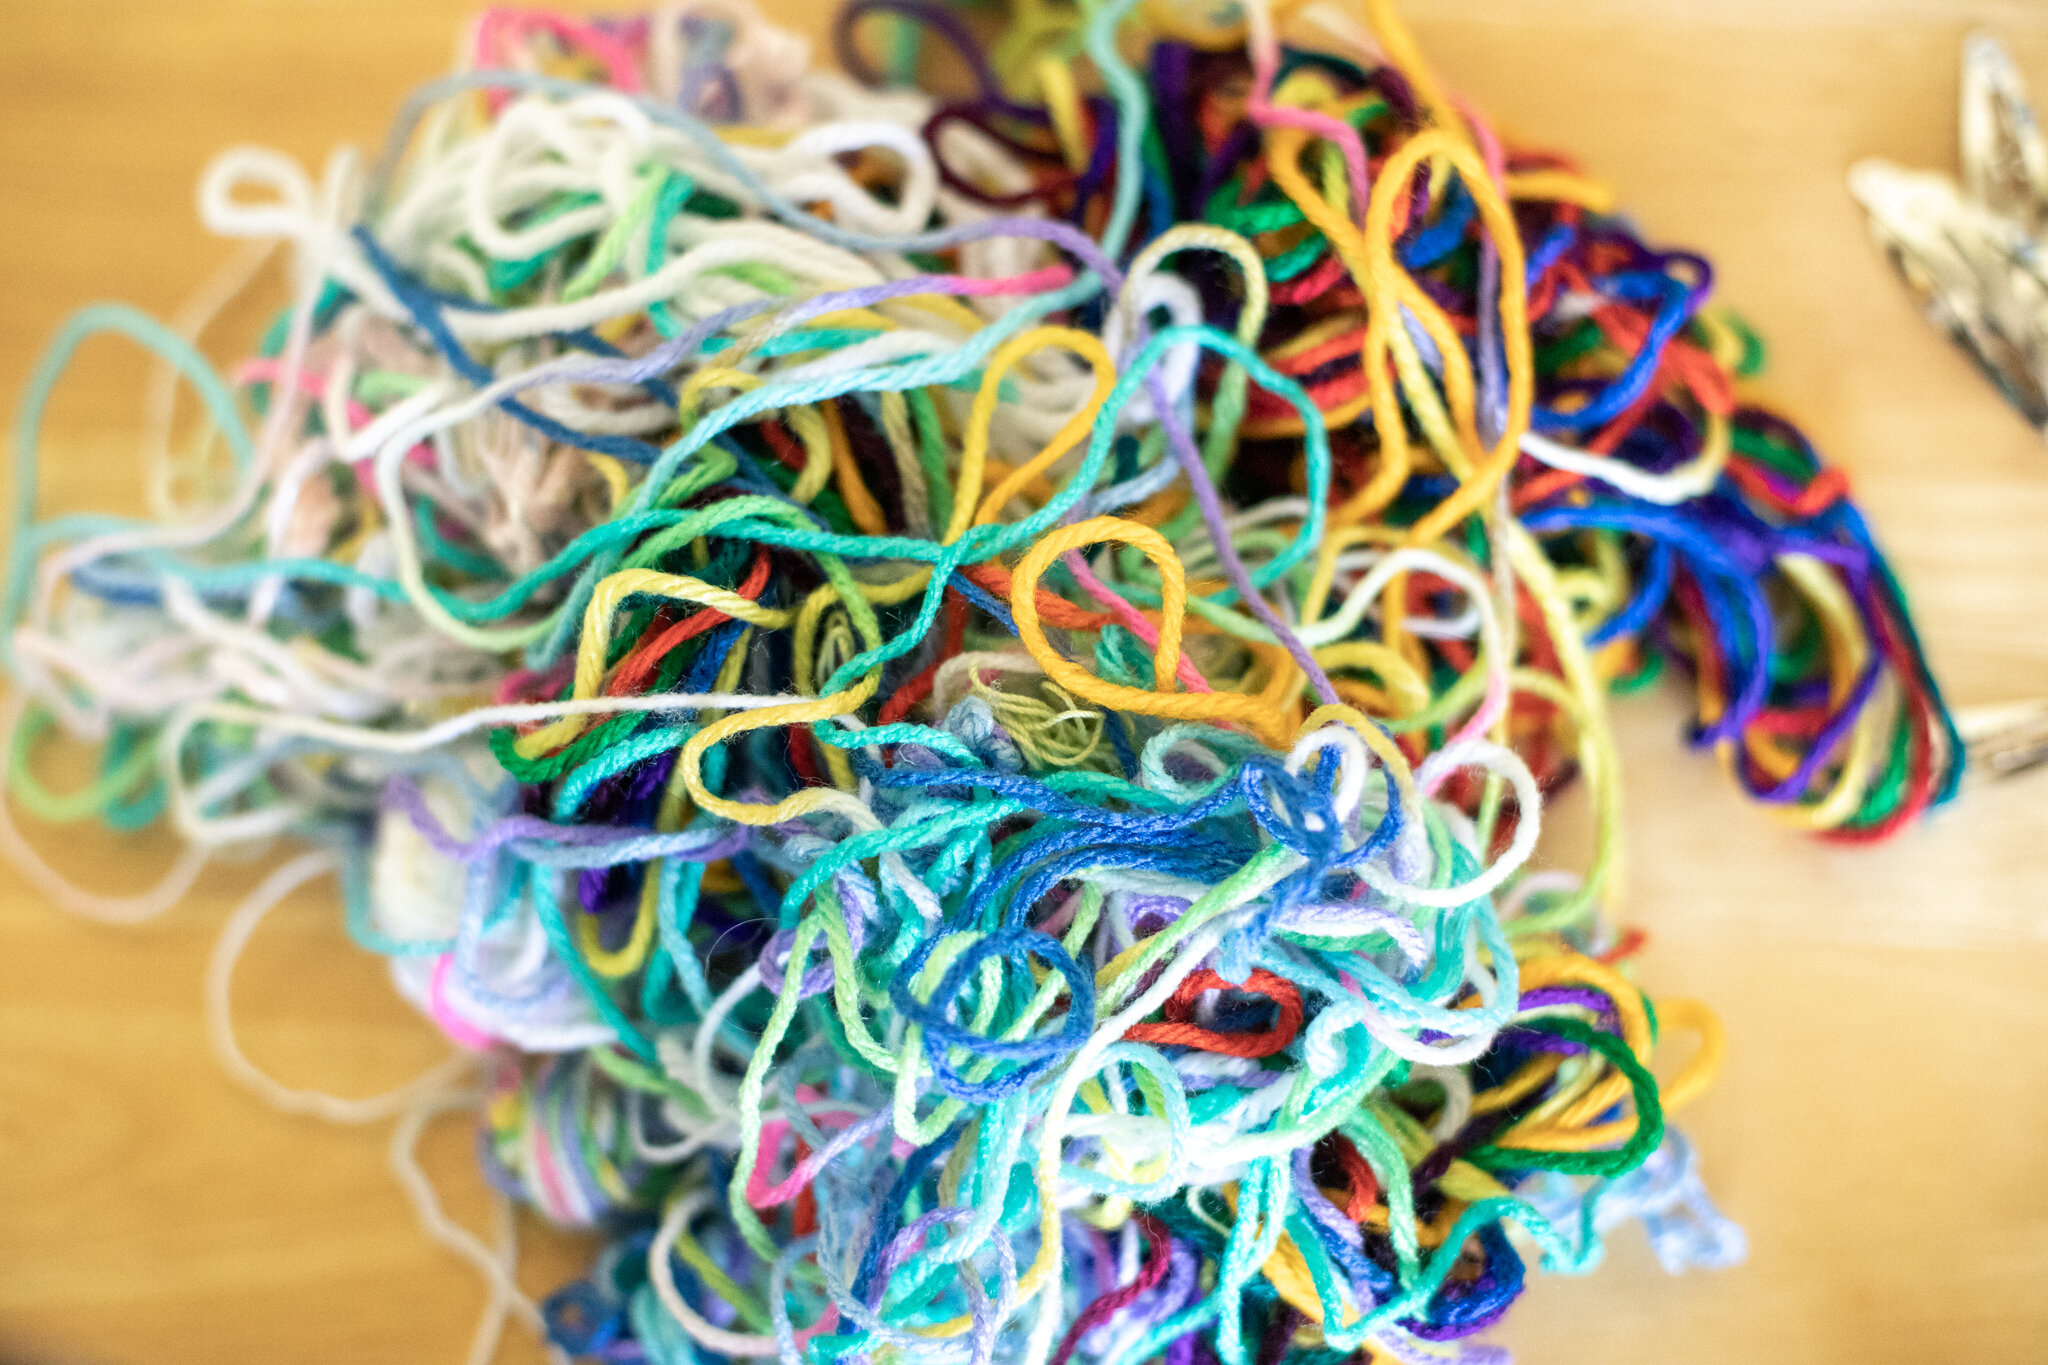
Anyone that has enjoyed yarn projects with children (or as an adult) knows this pile of tangled yarn all too well. An easy way to avoid this headache is to wind the skein of yarn into smaller balls. This can be especially handy if you work with different children, because then one skein of yarn can easily be made into many balls of yarn.
And children love making yarn balls. It’s a soothing and satisfying process. When you make them soon after bringing new yarn home, you can avoid the tangled mess photographed above. I have two different ways to start the yarn ball. You can try each and choose the way that’s easier for you. We would teach “granny’s glasses” (the first way) because it was a little easier for kids to start the ball after they figured out how to get it around their thumb and finger successfully.
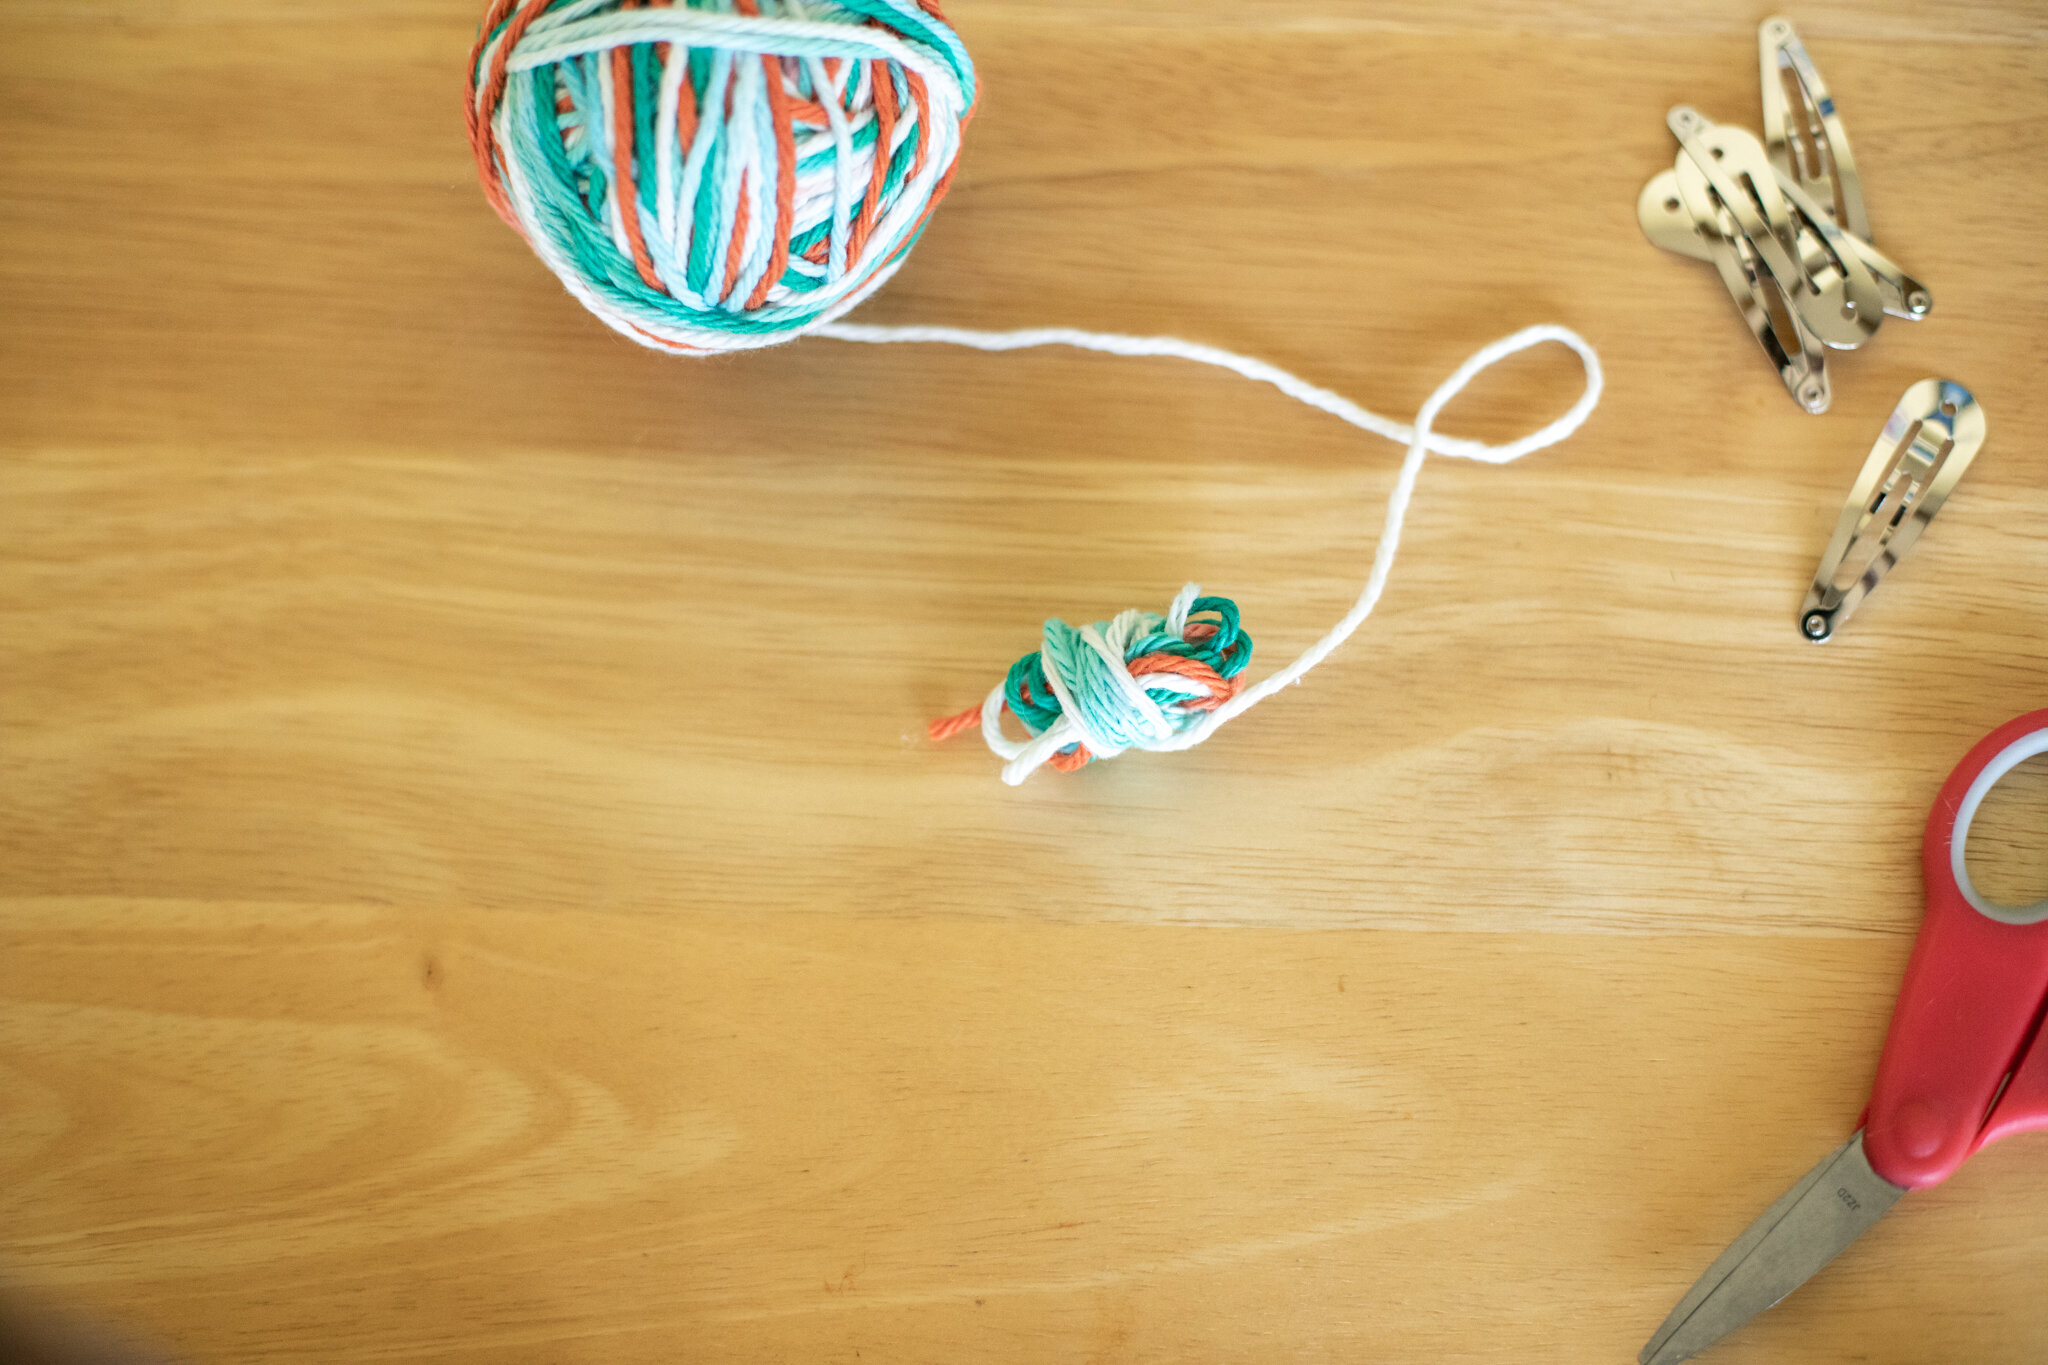
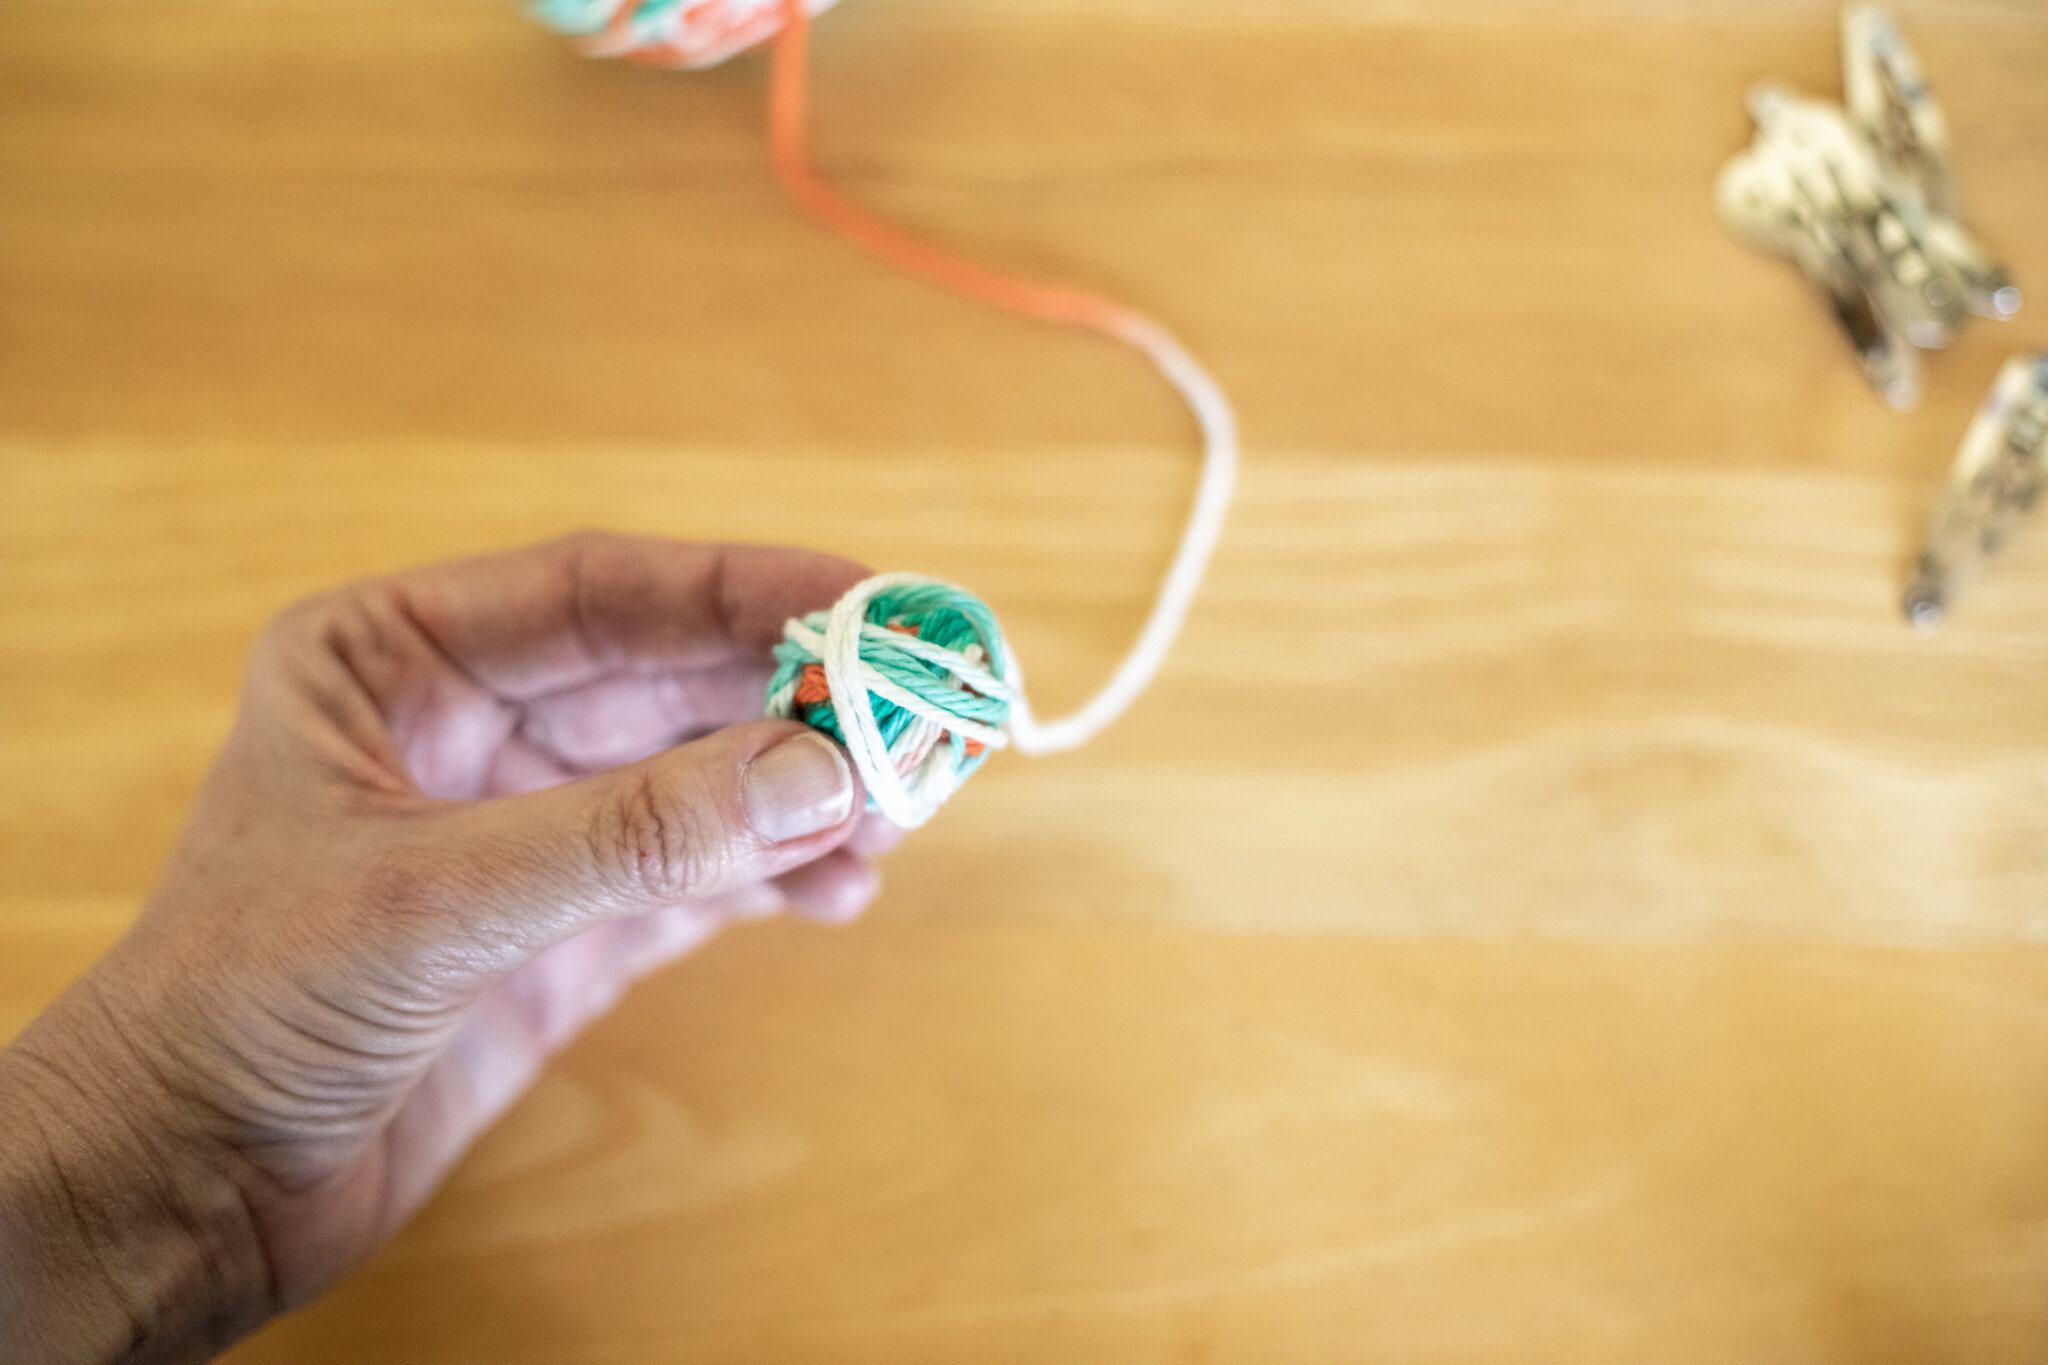
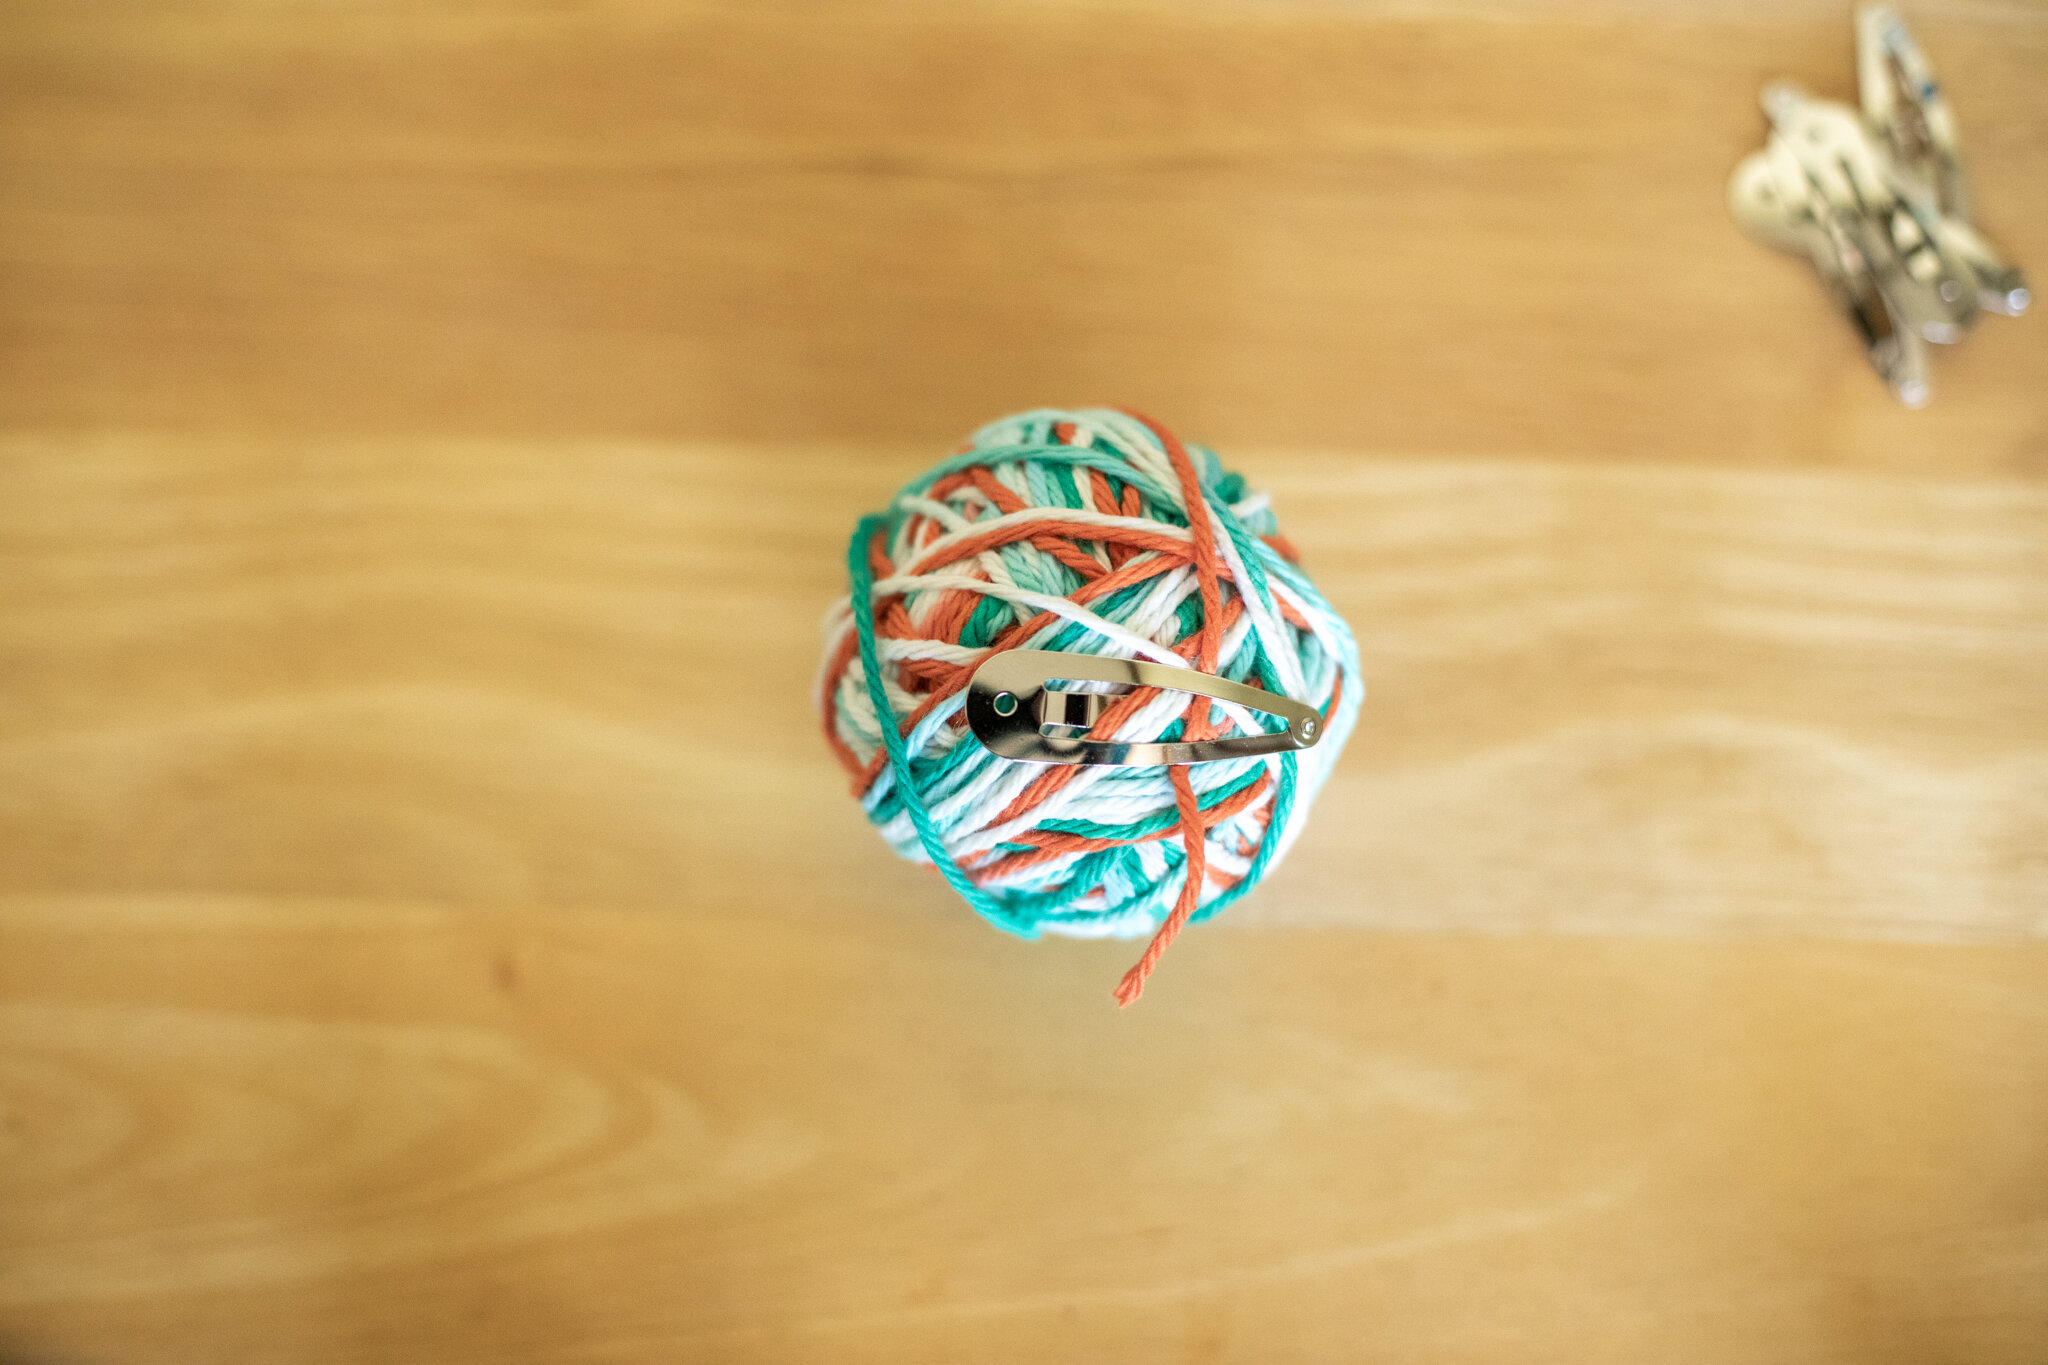
For young-young children, we would start the ball for them (because the first few steps require the most fine motor skills), and then hand it over so they could wind it bigger. For classes, we would make the ball a few inches wide (not very big) because projects didn’t need very much yarn and that way no one monopolized a color for very long (ten smaller balls was easier in a classroom than 1 giant ball). At home, I wind the cotton yarn for fairy hair into one big ball because I don’t need to share (and fairies only need a little). You can stop the ball anytime. Simply clip the yarn and secure it with a bit of tape or a springy hairclip so they won’t unwind and tangle in a basket.

Supplies:
Yarn
Scissors
Optional: springy clips or scrap of tape to hold down the “tail” of yarn when finished

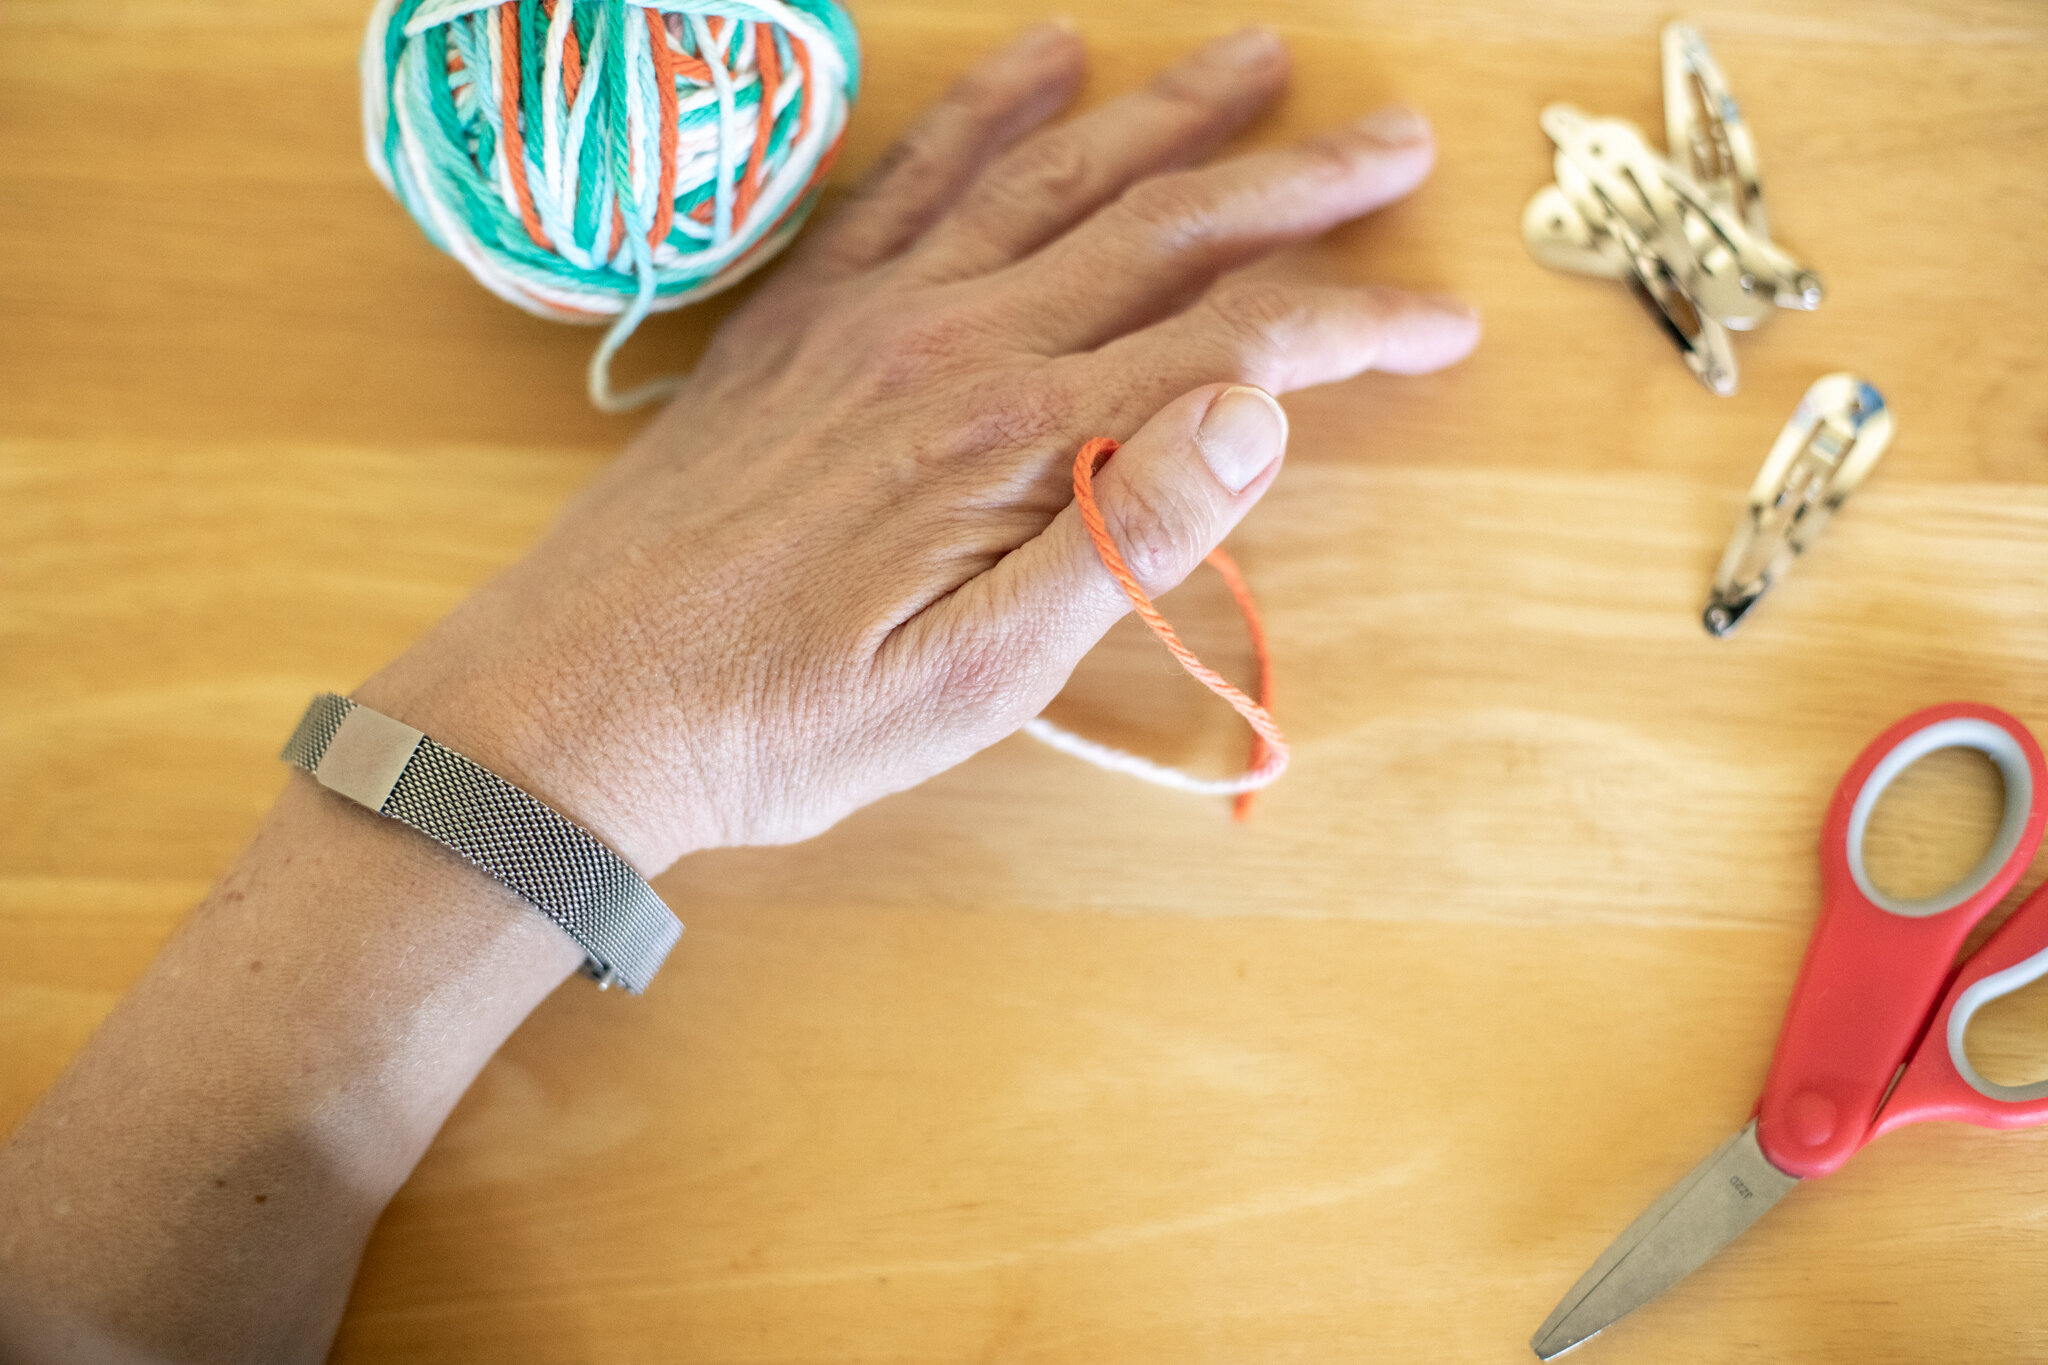
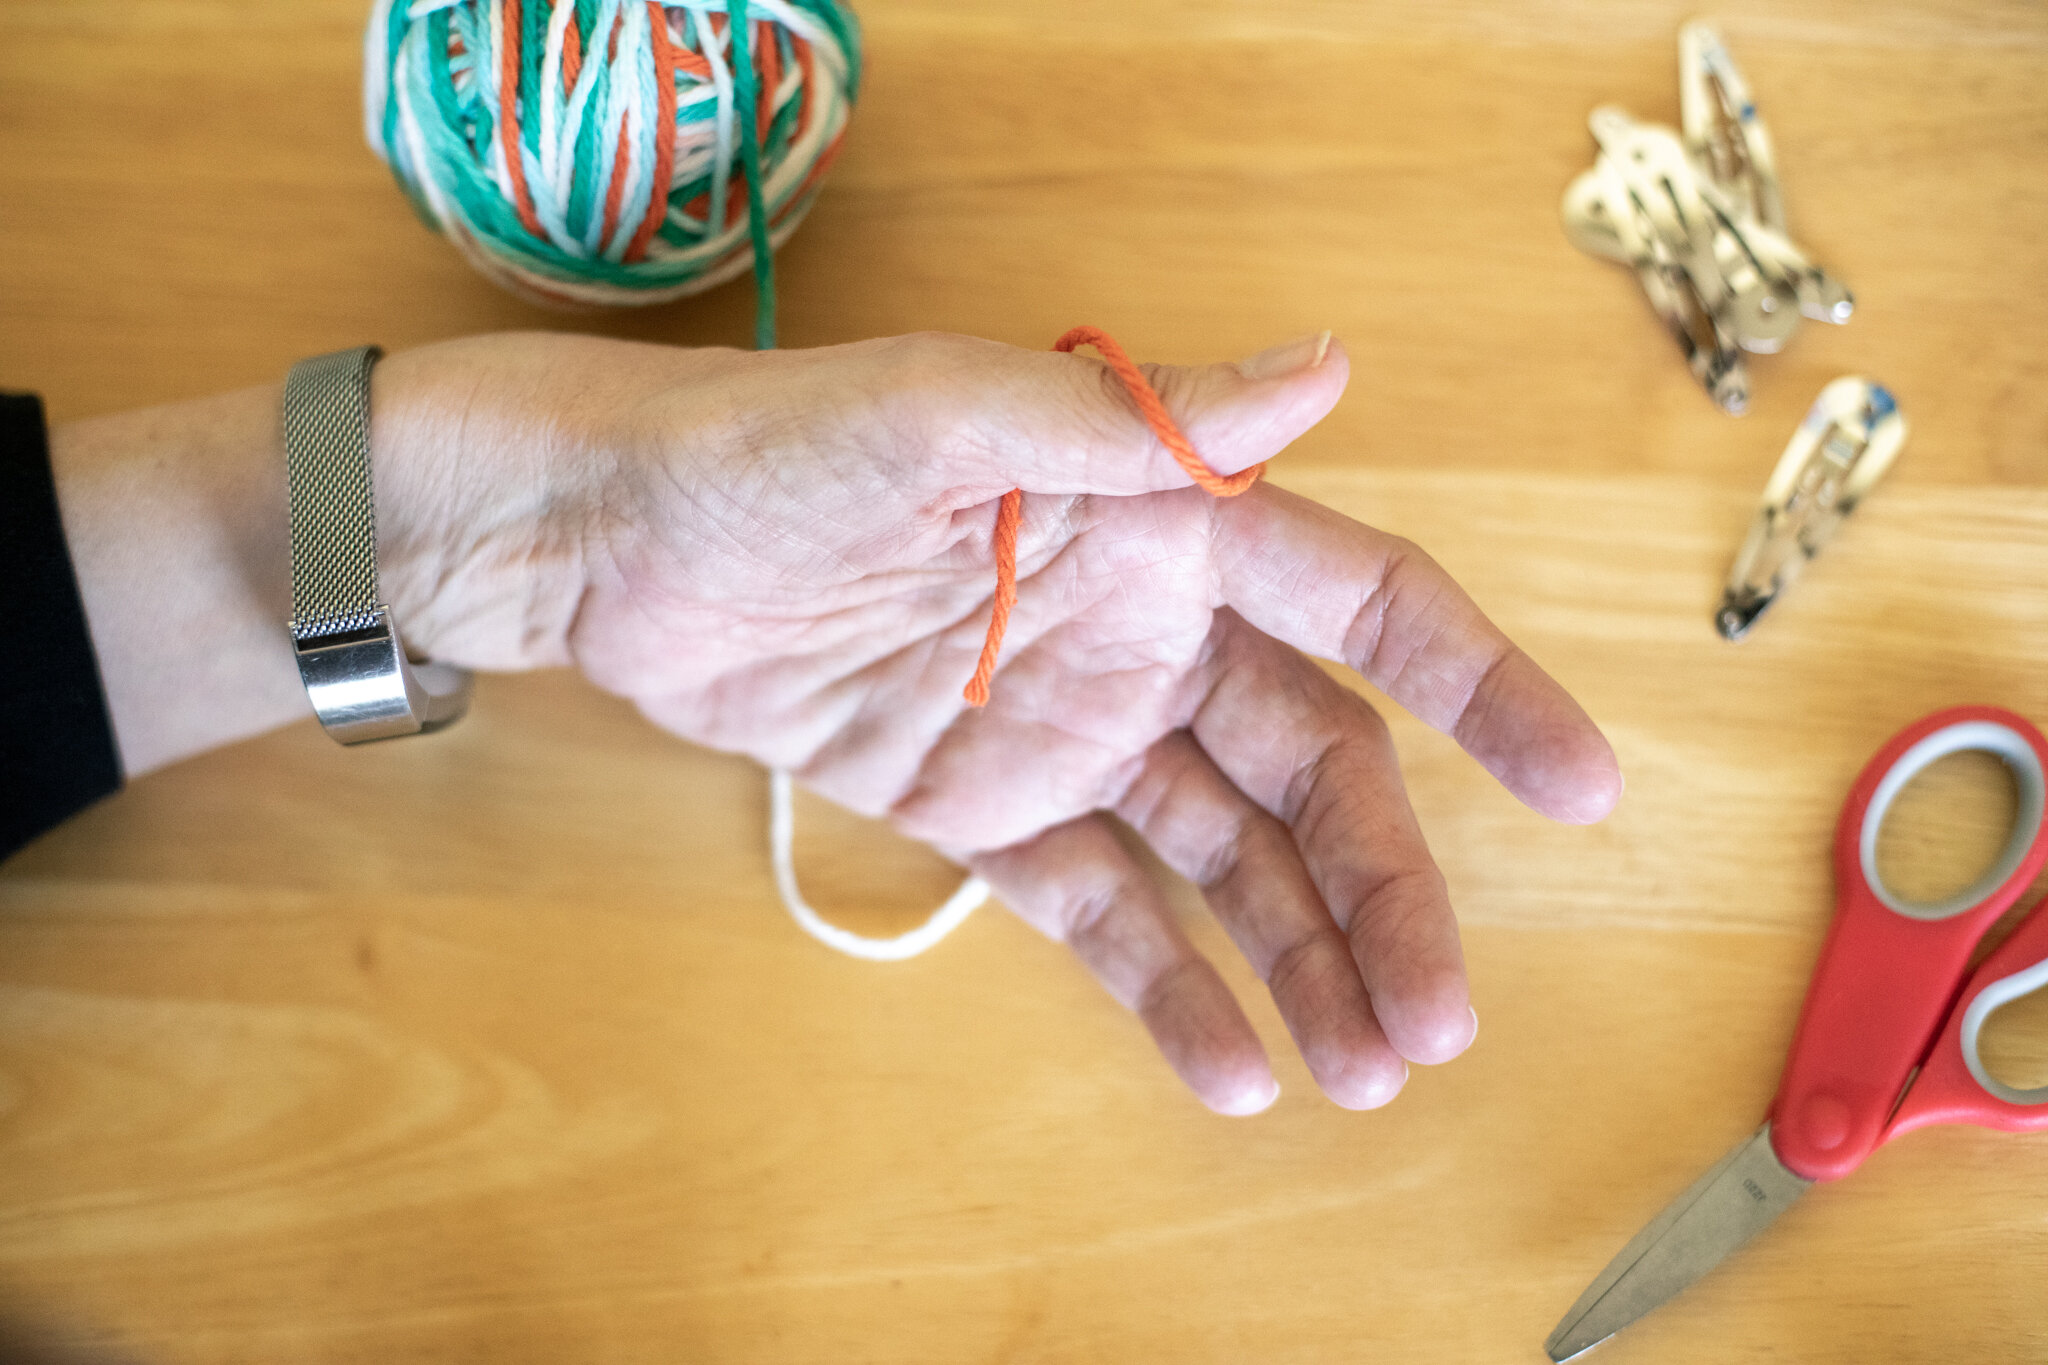
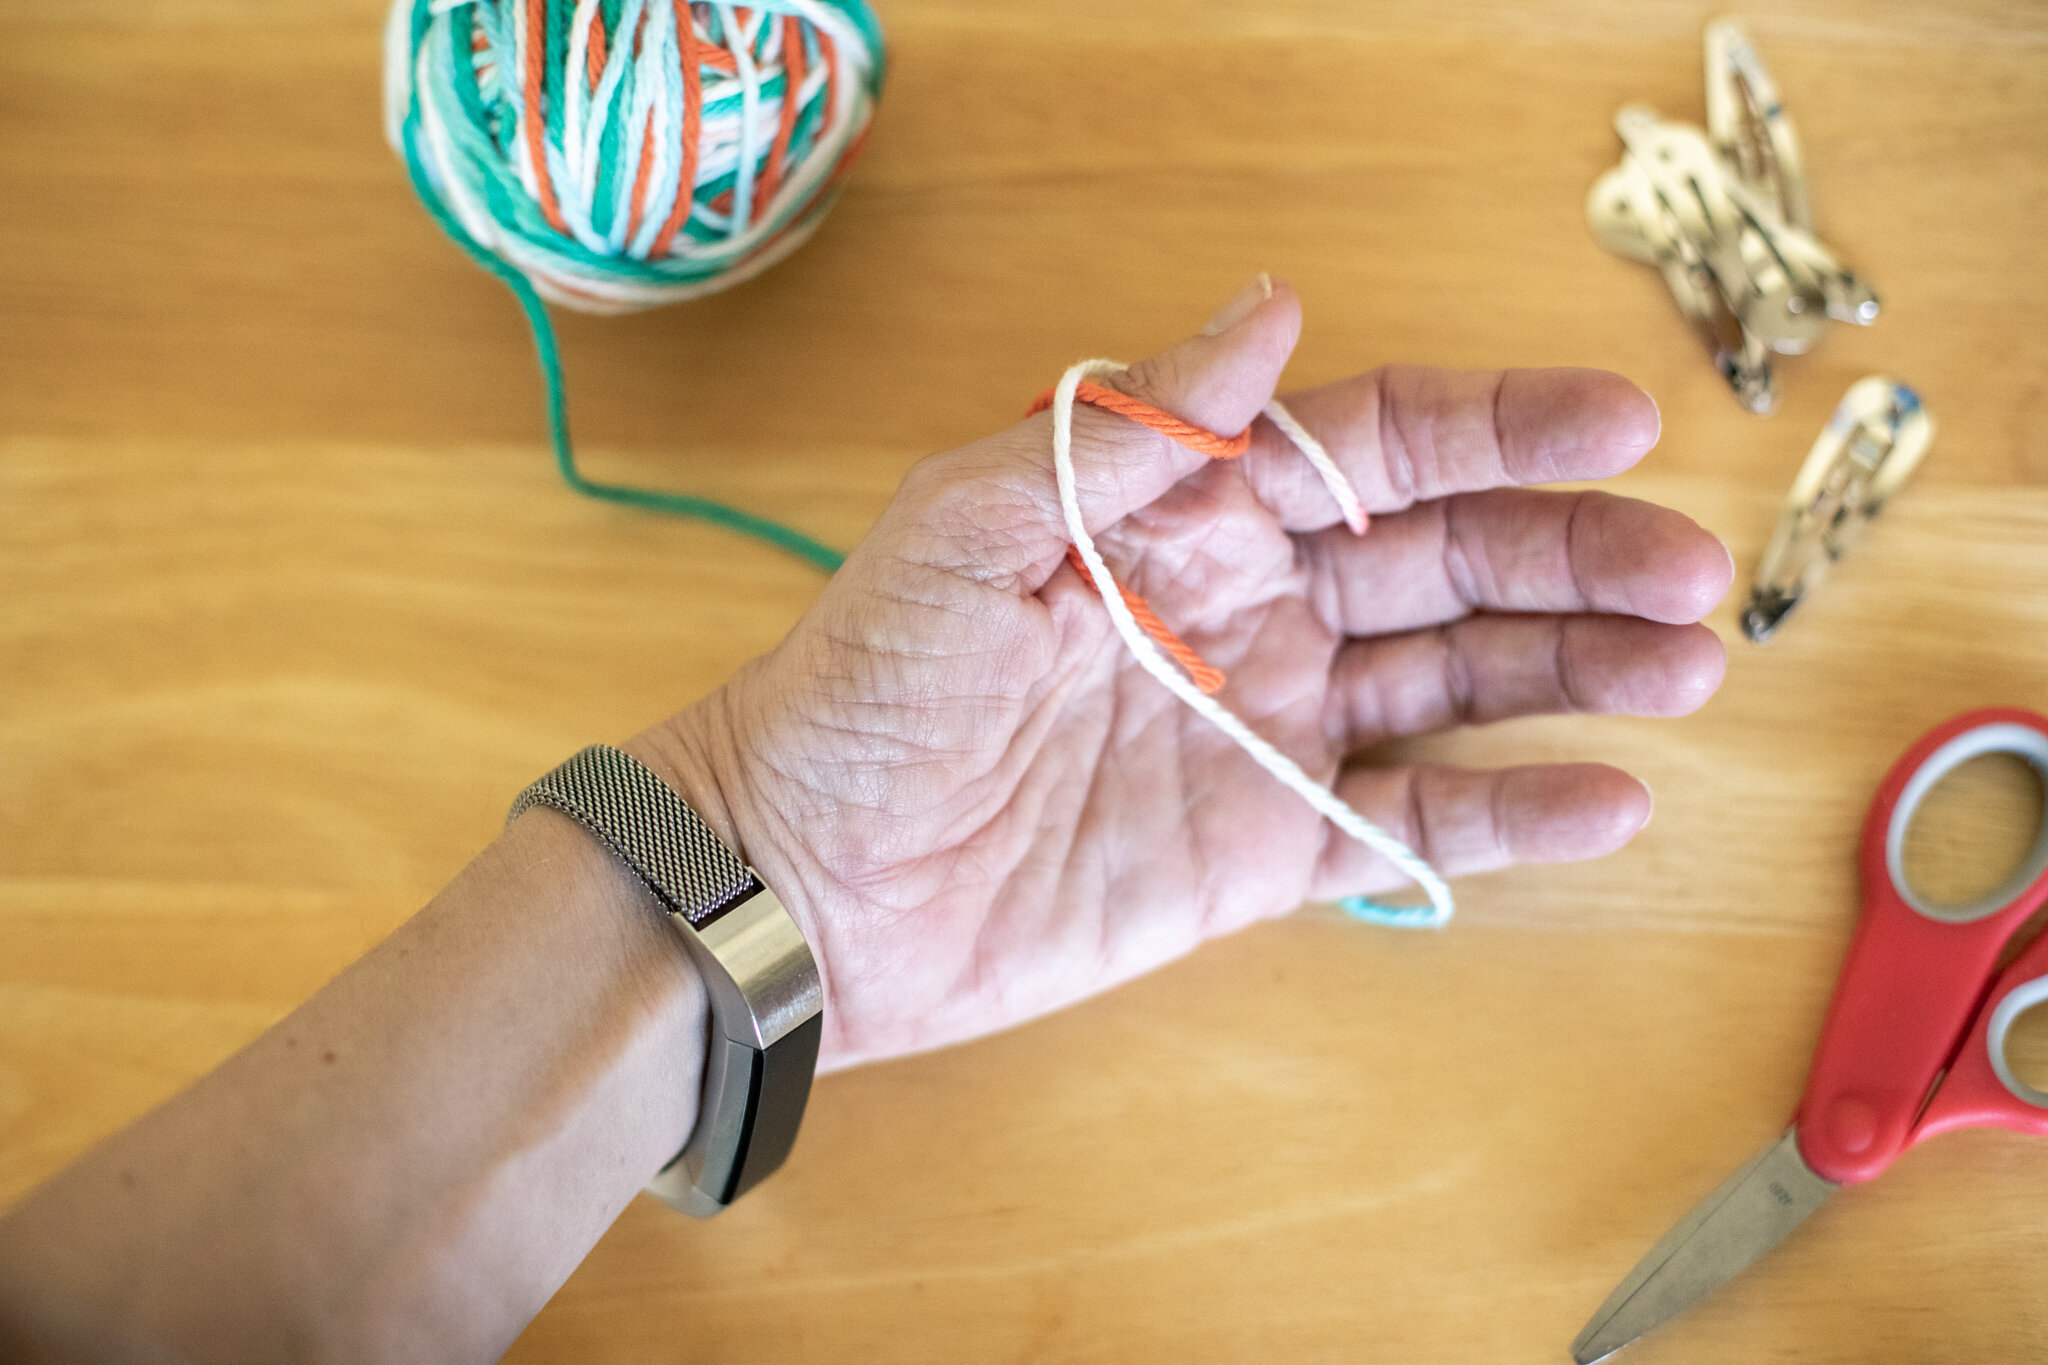
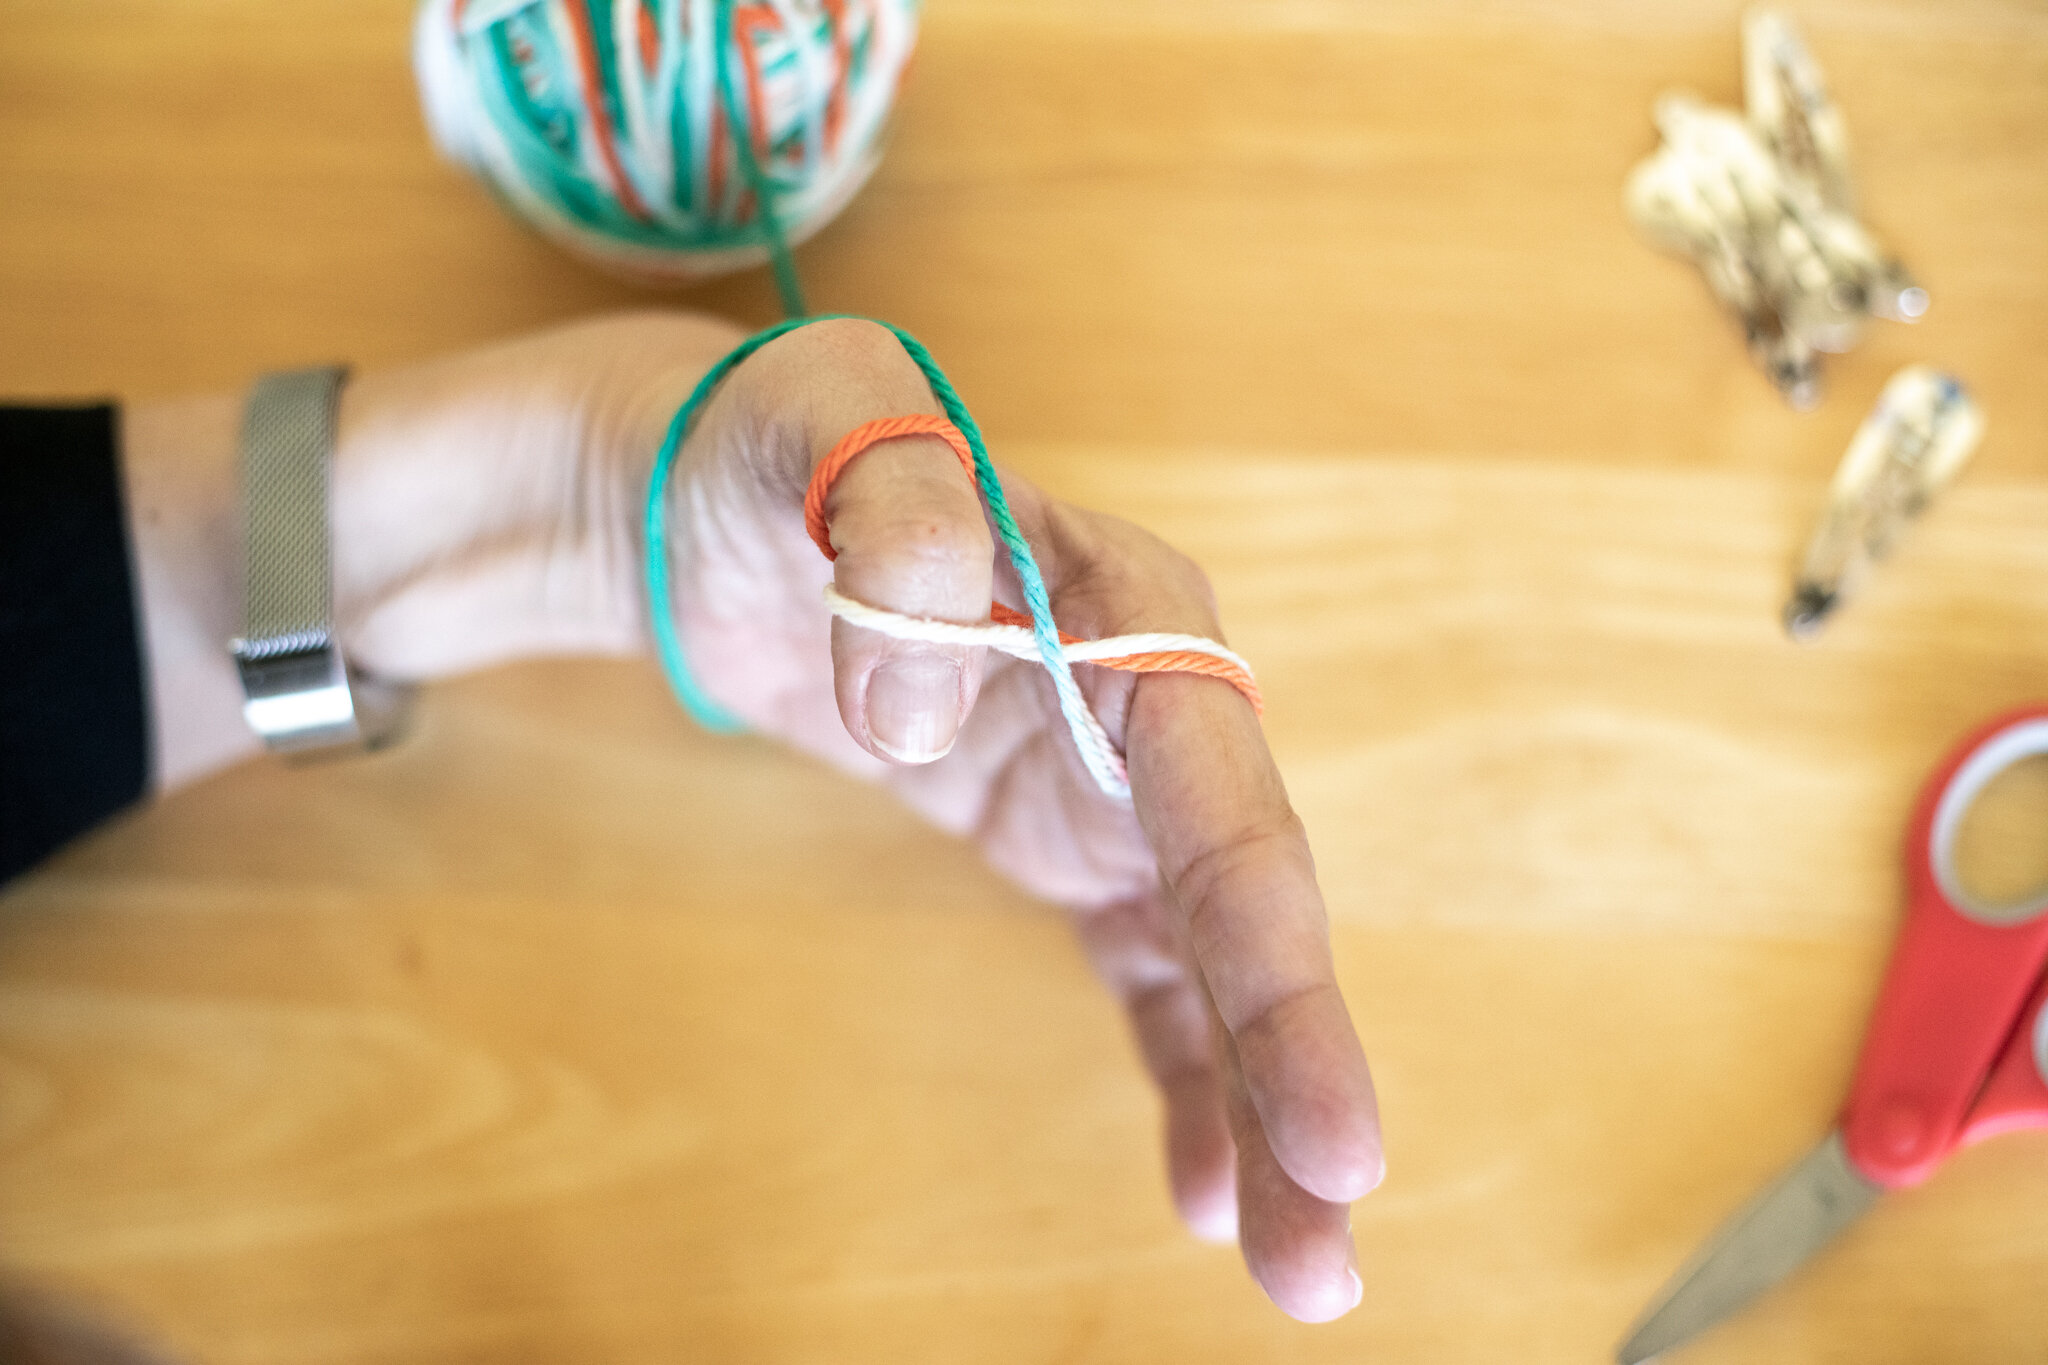
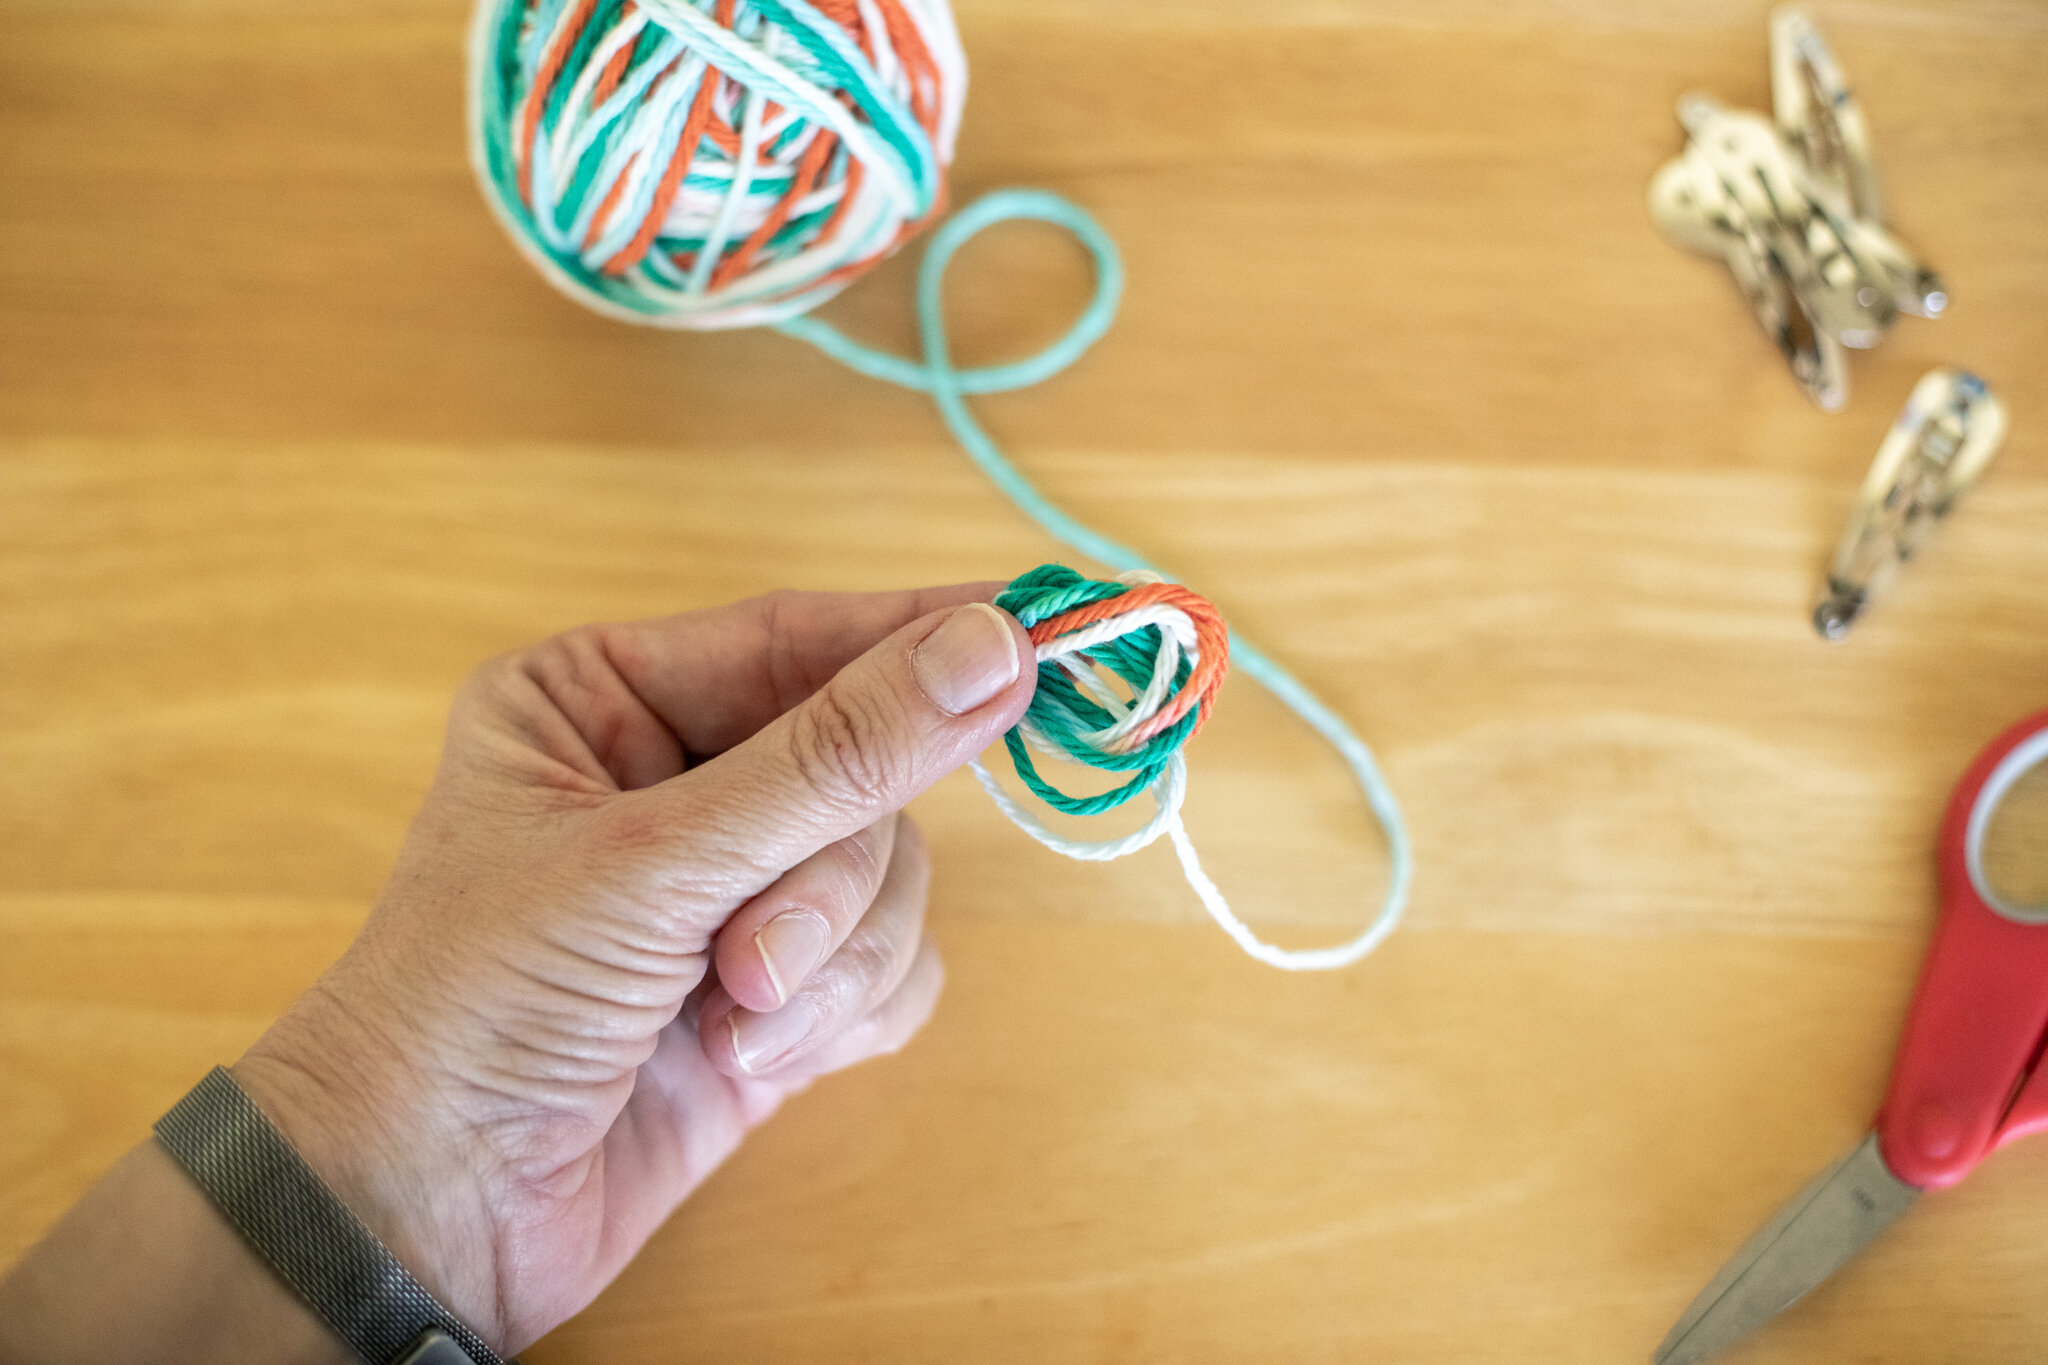
To start, tuck the yarn between you thumb and finger. I am right handed, so I hold the yarn with my left hand. You can try different hands to see which hand works better for you. Hold the yarn so it doesn’t come loose. The second photo shows the end of the yarn between the thumb and finger. The end can be fairly long so it doesn’t come loose too easily.


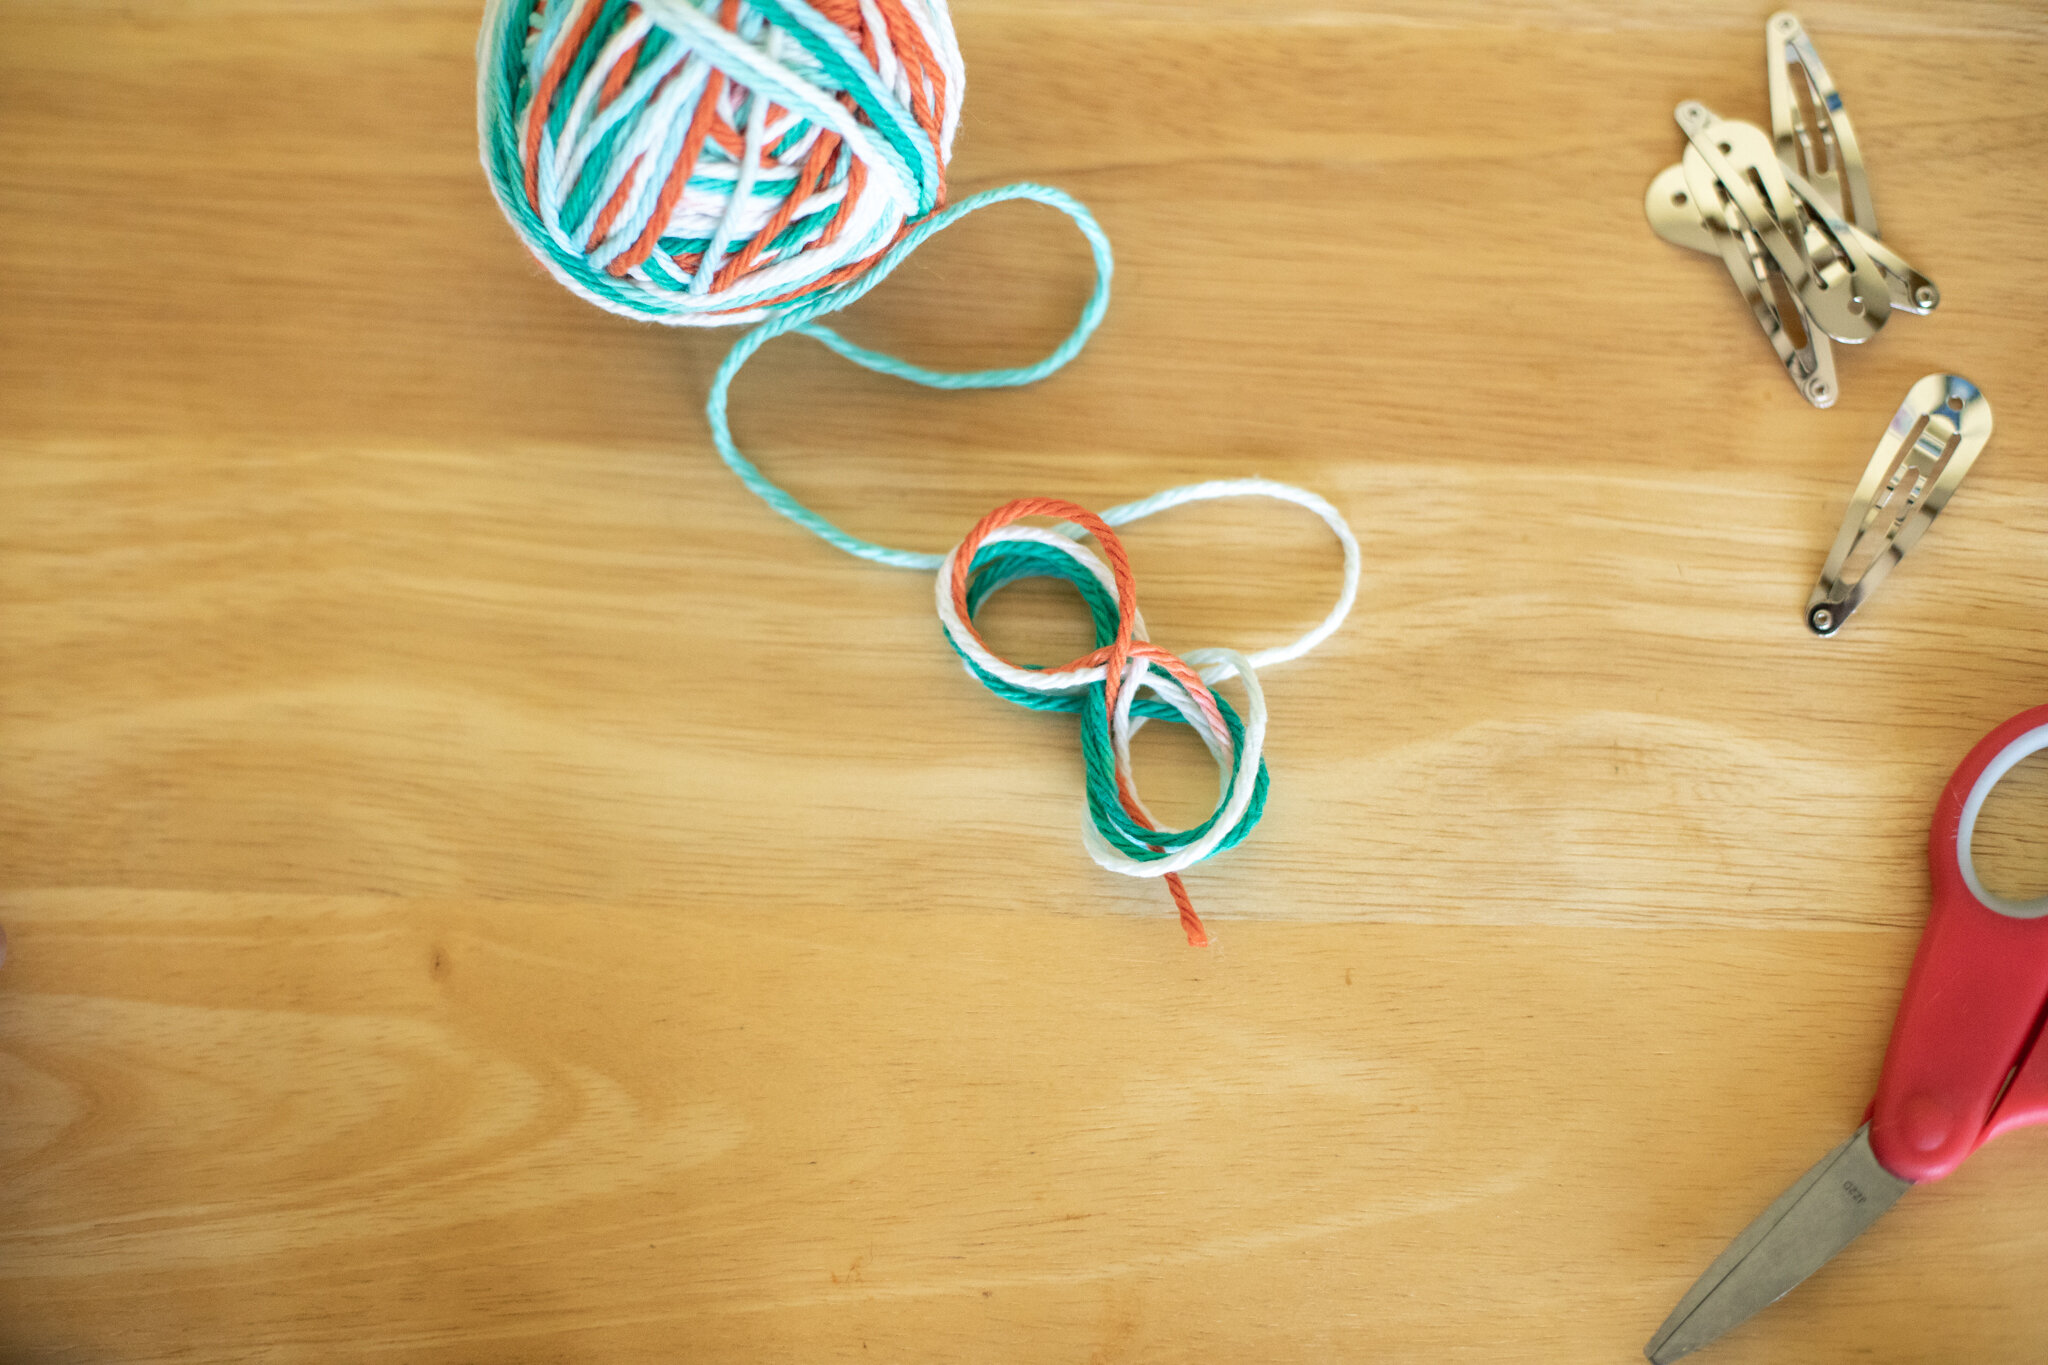
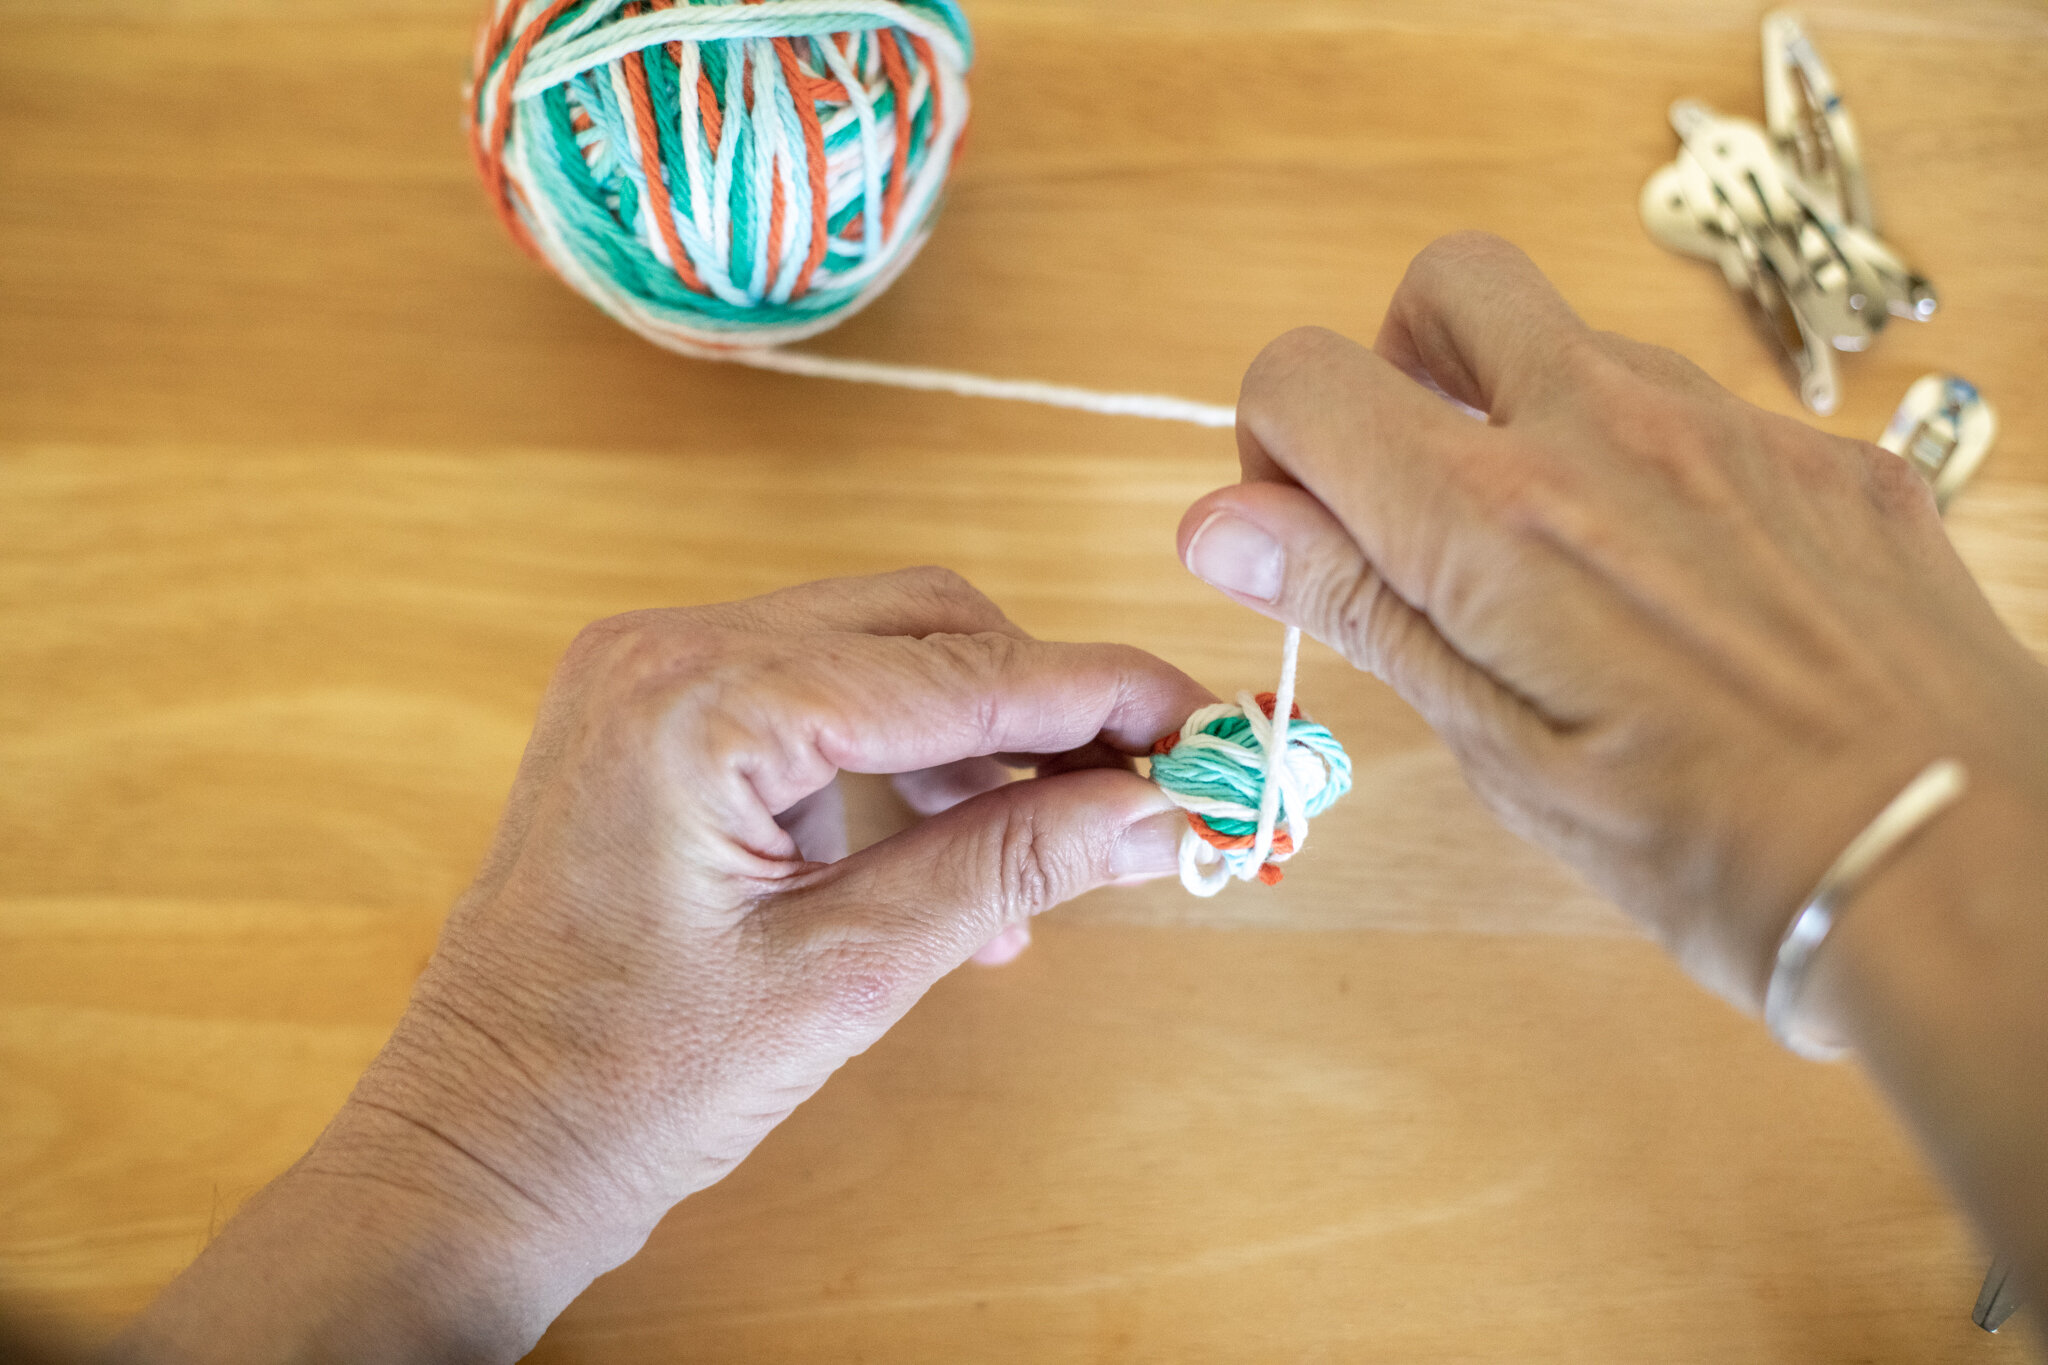

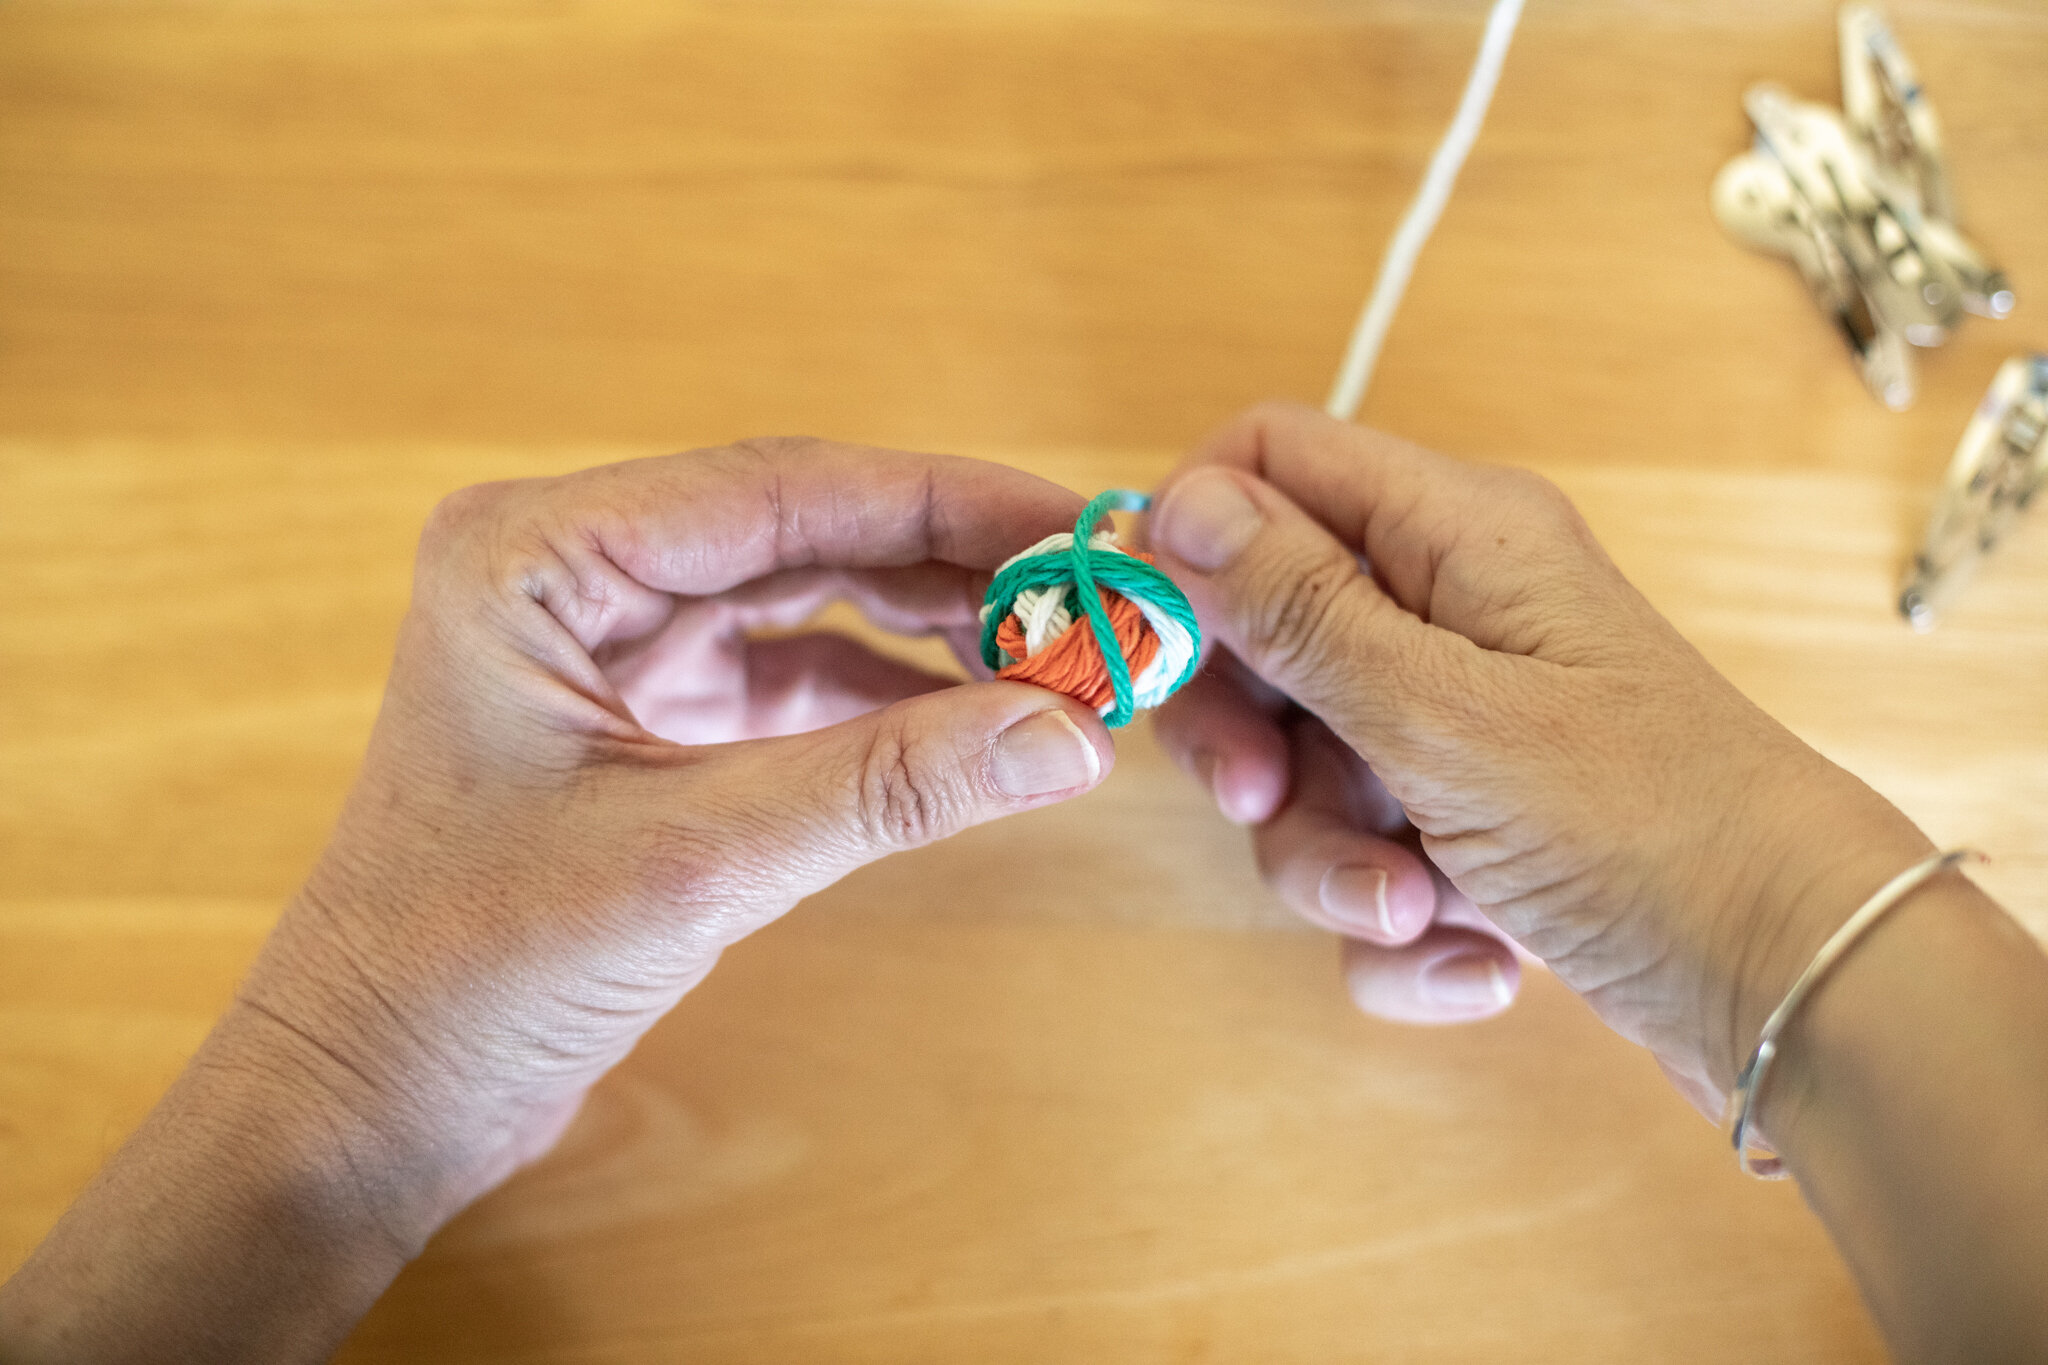

You can choose how big (or small) to make your yarn ball.
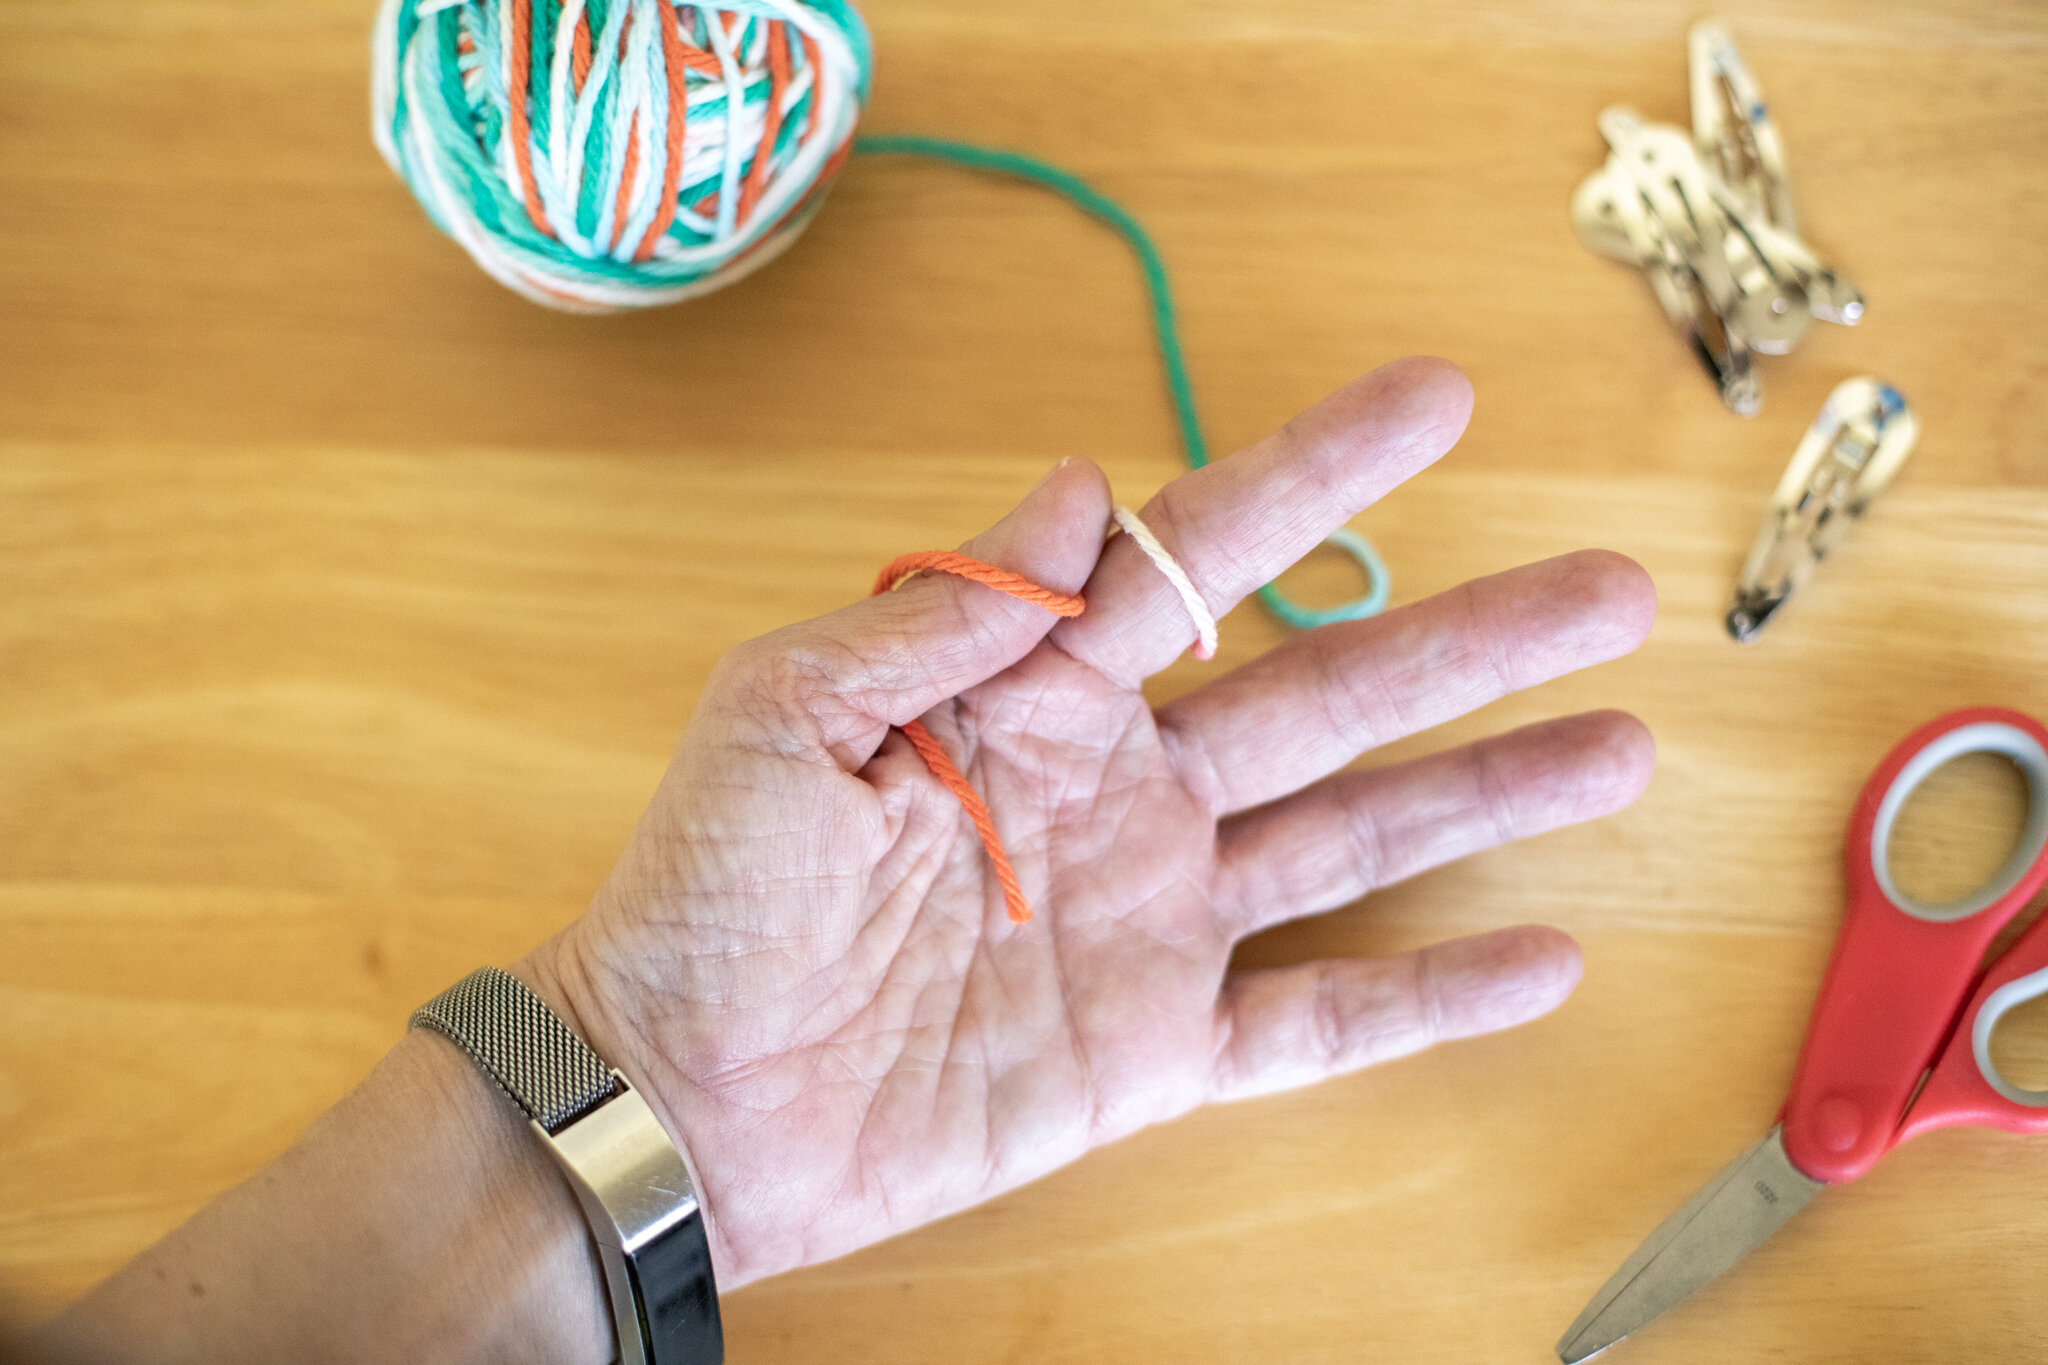
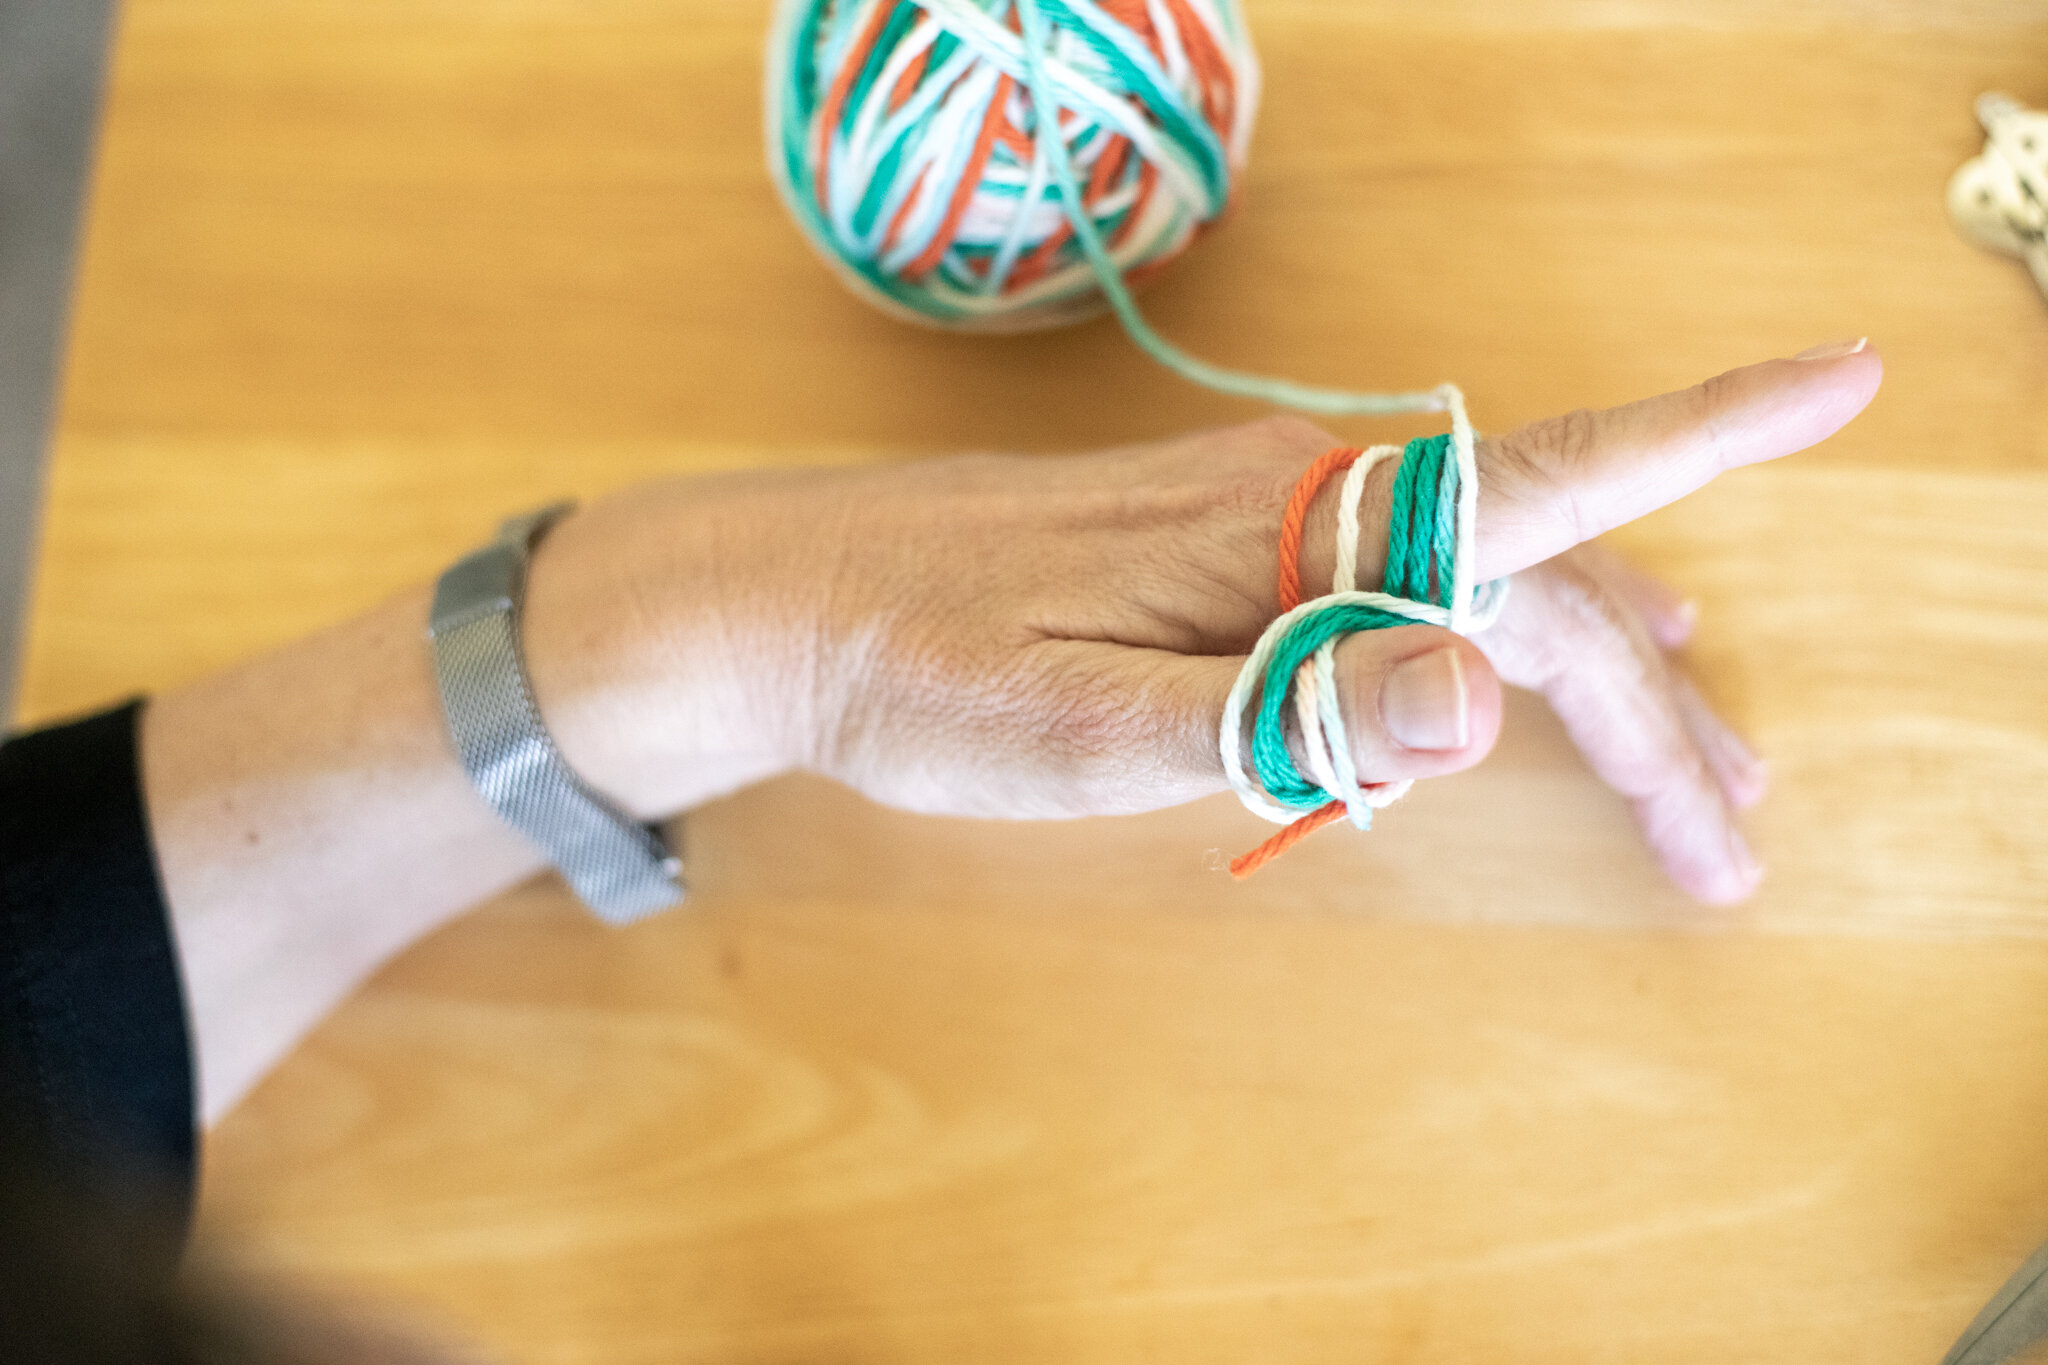
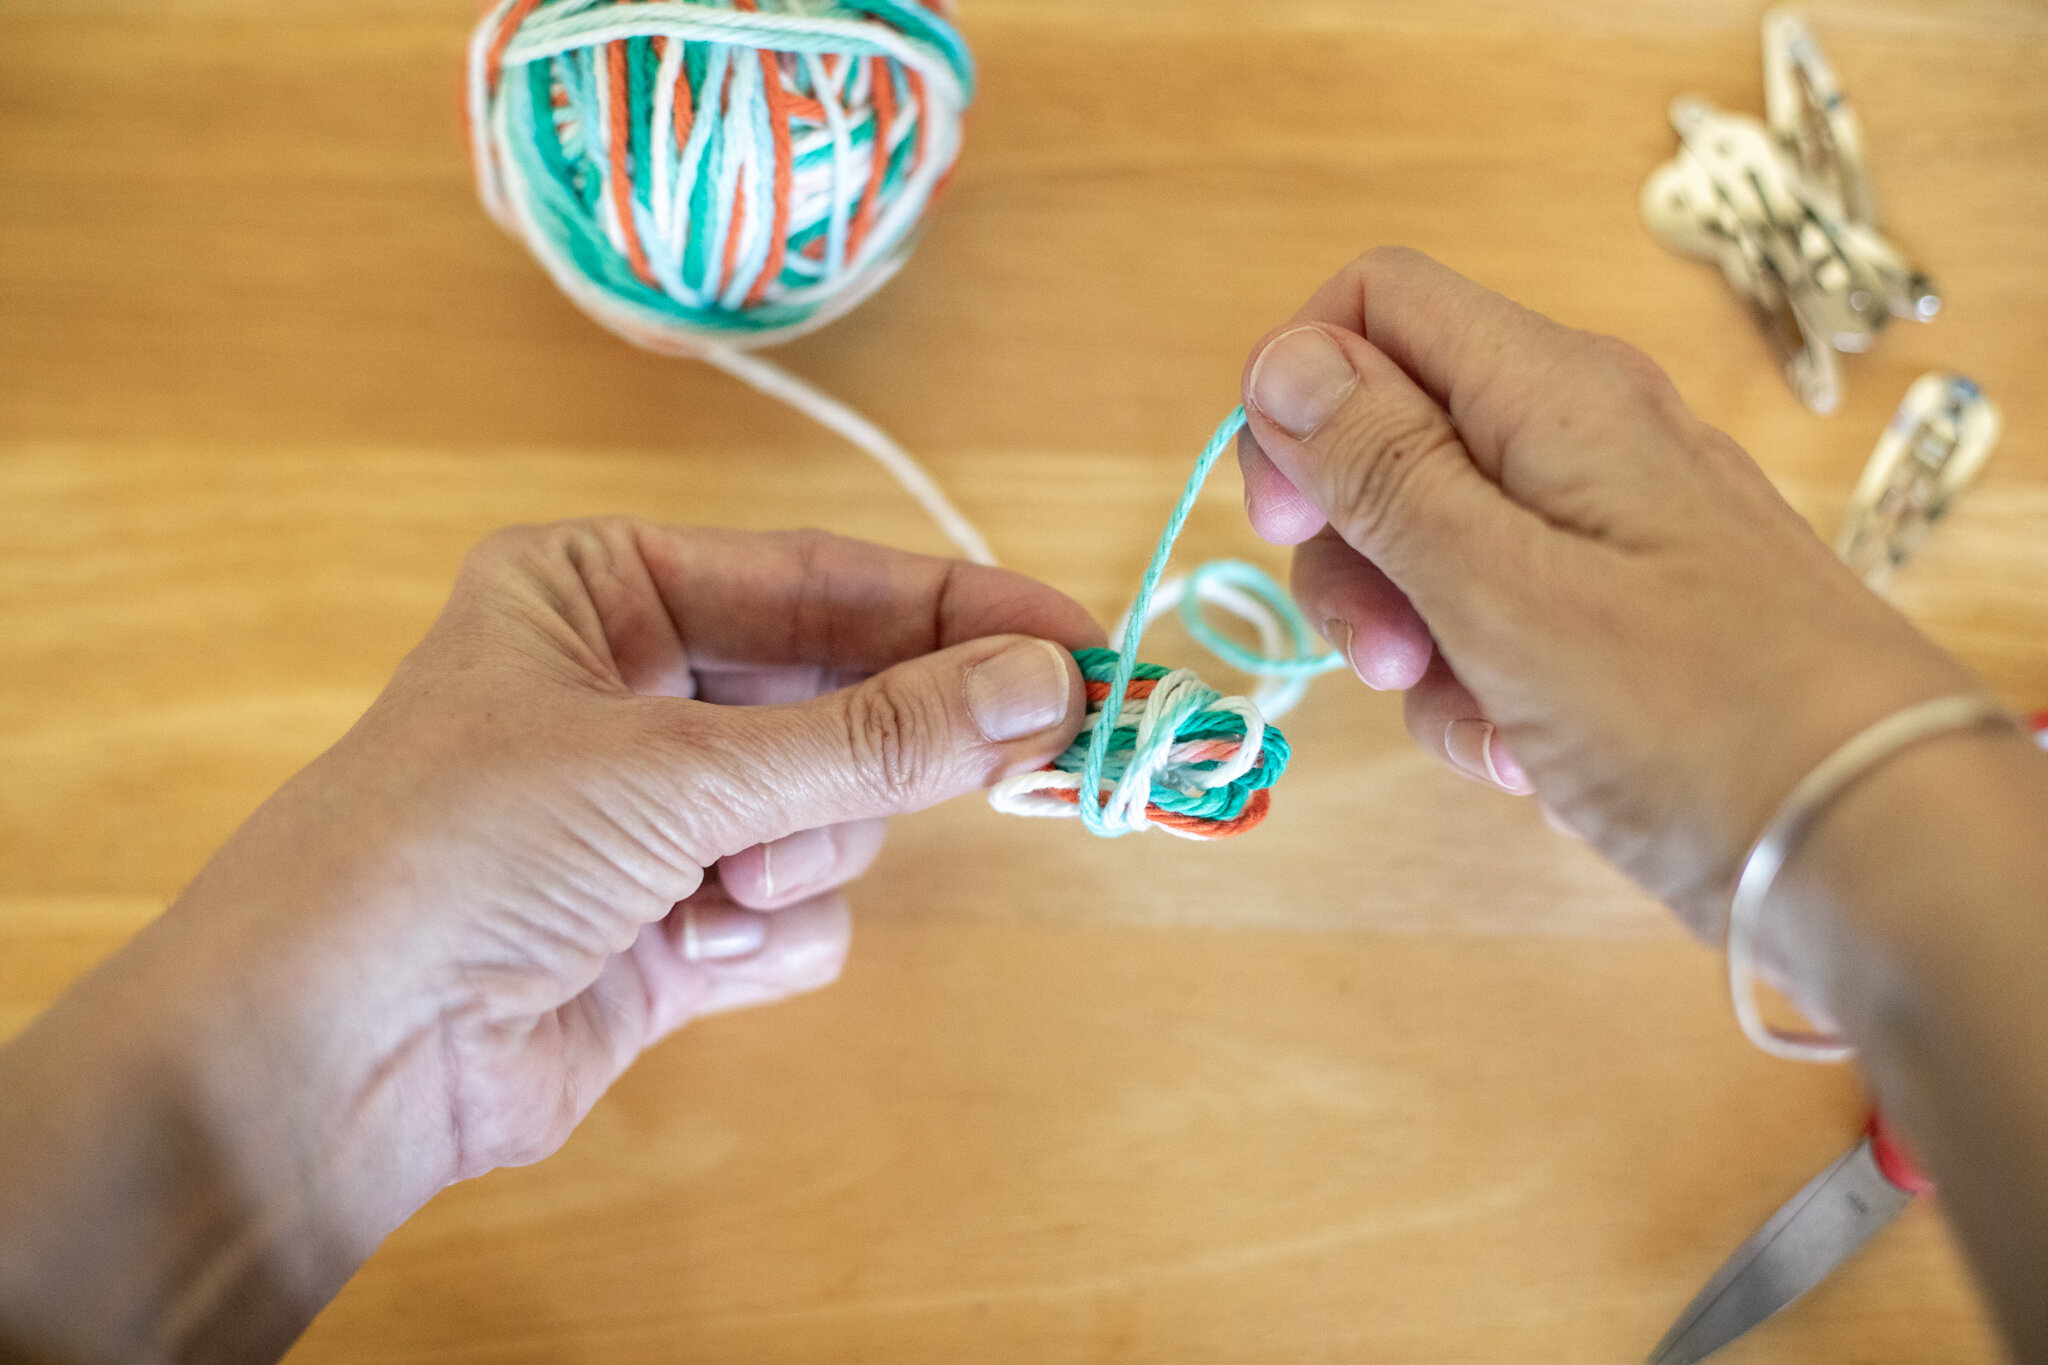
Supporting kids: If your child is frustrated with having to control two things at once- pinching a tail while winding yarn, you can always show them how by using your hand for the “glasses”. So you pinch and hold the tail, then hold their hand to guide them with the yarn into going back and forth, back and forth between your finger and thumb. When they have the hang of it, you can let them continue adding loops on your fingers independently. You may notice that they pass the yarn from their one hand to the other as they wind it around your finger and thumb. This is a developmental stage where they need the hand closest to the “action” to be in charge. So reaching across is harder for them than handing the yarn to the other hand. One day it stops because they made the “leap” developmentally, so don’t worry if you wonder how is passing the yarn back and forth between left and right hands possibly efficient.
You can also reverse this teamwork asking the child to pinch the tail between their finger and thumb, then you wind the first few loops so it’s not so easy to pull loose.
You know the children best so do whatever helps them (and you) feel successful. The more that they make, the easier all the steps become. And it’s ok to start over! Crafting is all about adjusting and learning and trying again. Let them practice resilience :)
You can also start the most fiddly beginning part of the ball and hand it off to them when it’s manageable for them.
I also highly recommend practicing on your own before trying to teach children. It’s so hard to be “hmmm, what is happening here?” while a child is eagerly waiting for progress. If you’re comfortable, it’s easier to coach them through the process.
With this said, it is good to model learning a new skill with children, so feel free to dive in together if you want to learn together.
Phew, photograph turotials are more time-intensive than I remembered :). So I’ll make a post soon with the second way to wind a yarn ball.
I enjoyed sharing this idea for creating a tidy collection of yarn that’s easy to share. This process project is a great way to organize. And then you’re ready for the next epic project using your yarn balls!
PS- many children choose making yarn balls over and over and over. They don’t necessarily need more projects :). You could even make little collections of yarn balls to gift a neighbor or family member or send in a care package. They’re fun to make and share. Enjoy 💕
We hope this week finds you healthy and inspired ✨
Click here for the second way to wind yarn balls. Which way is easier for you?

Spiderwebs and Spider Craft
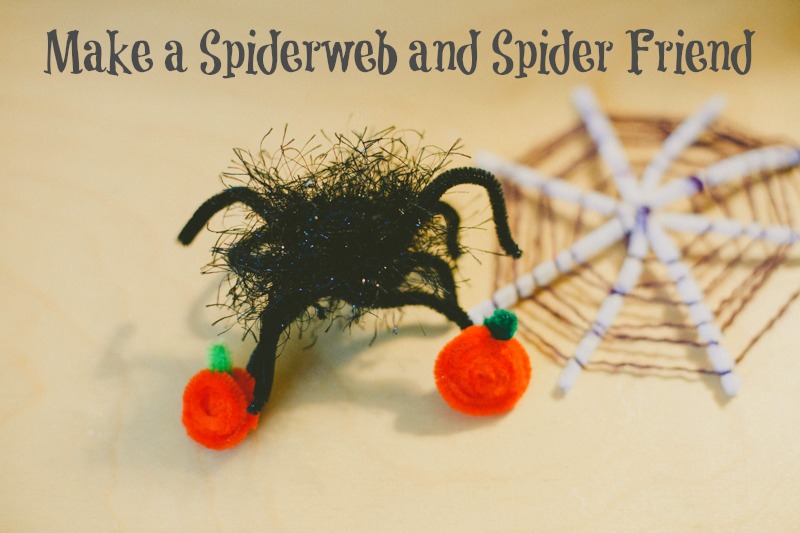
My girl and I love Halloween! As we brought out this year's decorations, she really really wanted to decorate her room. In our family, that means creating new goodies!
She wanted to create cute spiderwebs and spiders. They're fun, easy, and quick. My niece visited and she had just finished reading Charlotte's Web so this craft especially inspired her. That gave my girl the chance to be Teacher, which is always fun.
Along the way, we learned more techniques for different looks. We hope you enjoy!
Supplies:
- Pipe Cleaners
- Wire Clippers (or scissors if you don't mind possible nicks in the metal when cutting wire)
- Yarn
- Fuzzy Yarn (we used Festive Fur)
The Making:
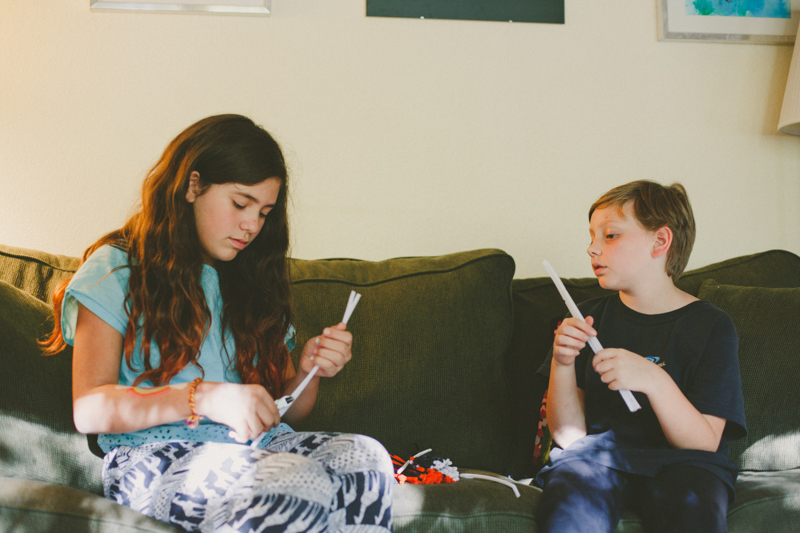
Clip three pipe cleaners in half so you have six in all. If you don't clip the pipe cleaners, they get weak towards the outer edges of the circle. I've also seen this project made with dowels which lets you make larger spiderwebs. The fuzzy pipe cleaners are easier for the yarn to stick in a spread out design.
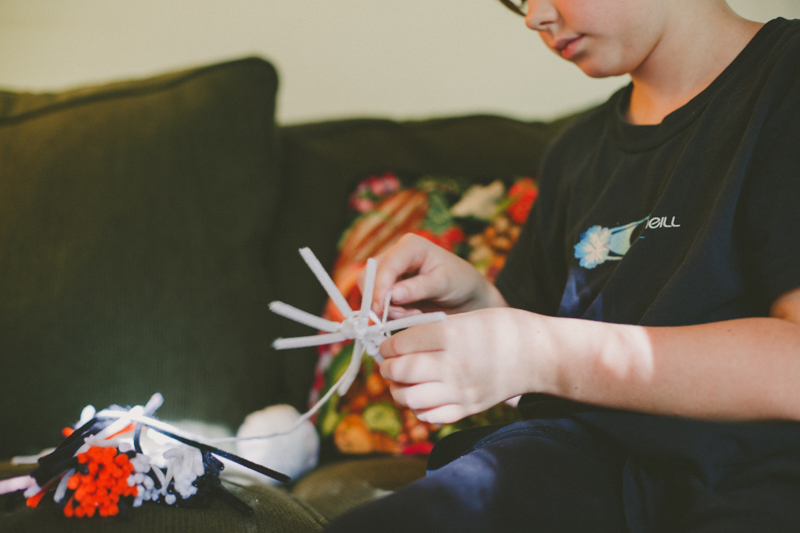
Lay them them down and tie a piece of yarn around the middle. Spread them out and start winding the yarn around the center to hold them together.

The yarn can be white or black or purple (or any color). You can tie the pipe cleaners together while they are straight and then fan them out. My daughter insisted on tying them while they were all spread apart, which is trickier but still doable.

Start wrapping the yarn around the pipe cleaners, going around one, then the next one and the next one. Give yourself a little space between each layer as you go around and around the spiderweb. It may take a few passes to get the hang of it, but even spiders must practice making their webs (don't they?).

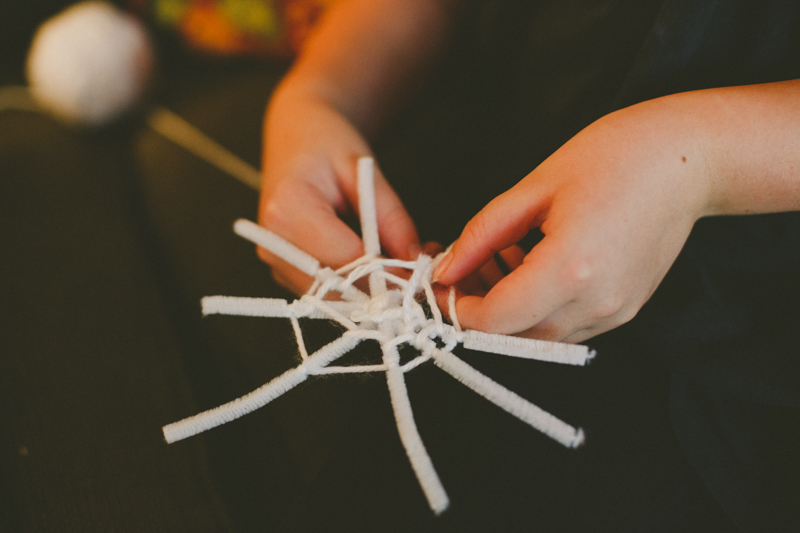
Continue to the outer edge of your spiderweb. Clip the yarn and tie around a pipe cleaner. Leave a little extra that you can use to hang the web.
For the spider, clip three pipe cleaners again to make six. The fuzzy yarn is a little tricky for little hands, so I helped with making the first spiders. We tried two ways that both worked.
First, we wrapped the fuzzy yarn around three fingers a few times. We clipped a length of plain purple yarn and tied around the middle. After our little fuzzy ball was secure, we tied it again around the middle of the three pipe cleaners to give our spider six legs.

Spread out the legs and bend to give your spider personality.
This version of the spider was a little flopsy (which was totally fine) except it inspired us to try again.
This time, we wrapped the fuzzy yarn into a ball. To learn how make a yarn ball, you can visit here. Basically, wrap the yarn around a few fingers, take off your fingers, wrap a few times in another direction, and again, and again. Once you get the hang of it, yarn balls are simple and fun.
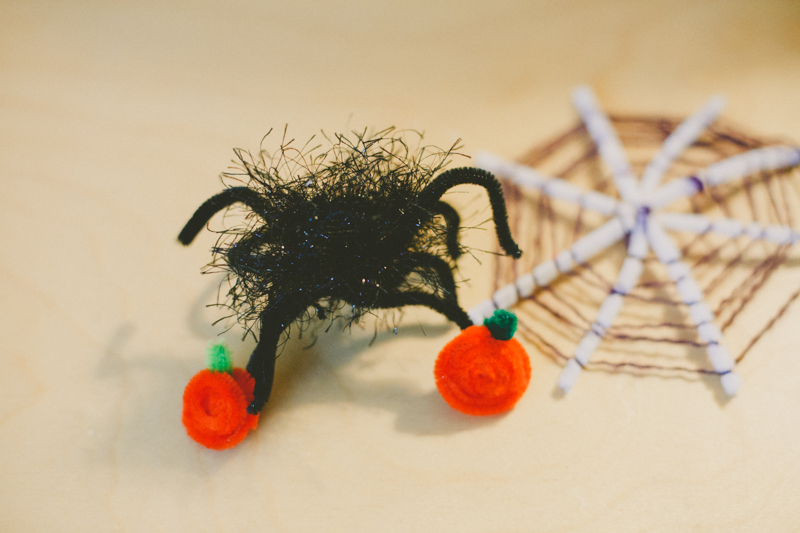
Once the ball was about the size of a grape, we laid the three pipe cleaner legs across and wound around them too. Now we had six legs. We could fan them out and wrap the yarn between the legs. This technique made the spider more durable.

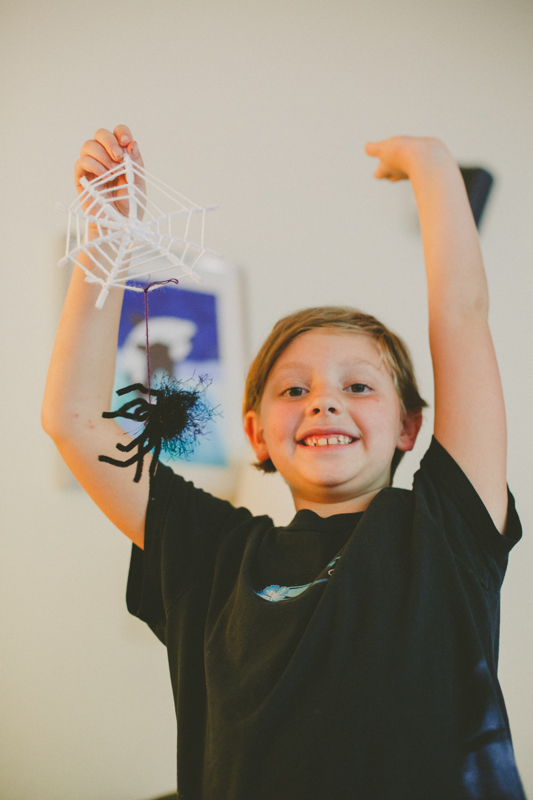
Isn't she cute?
Once our spider was nice size, we tied the yarn around the middle to secure it. The nice thing about fuzzy yarn is that it hides all the knots and loose ends. We tied a strand of plain yarn around it to give a thread/web for hanging.
Hurrah! The excitement kids show when they love their creating gets me every time!
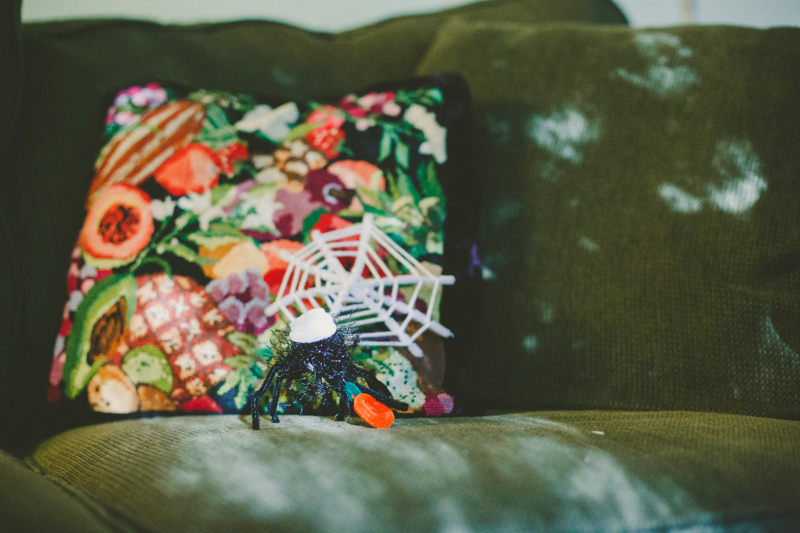
Meanwhile, the girls realized they could spin a piece of orange pipe cleaner in a spiral to make pumpkins! So many pumpkins! A tiny pice of green tucked into the spiral became perfect stems.

What lucky spiders getting decorations of their own!
Then, my favorite part of creating! The kids took off with their own ideas. My niece spiraled a white piece of pipe cleaner into a hat.
And my girl realized white pipe cleaners and white yarn can make an awesome ghost. Little pieces of orange pipe cleaner tucked into the yarn made perfect eyes.

Sometimes, all we need to do is give children the opportunity (and supplies). I am constantly amazed!
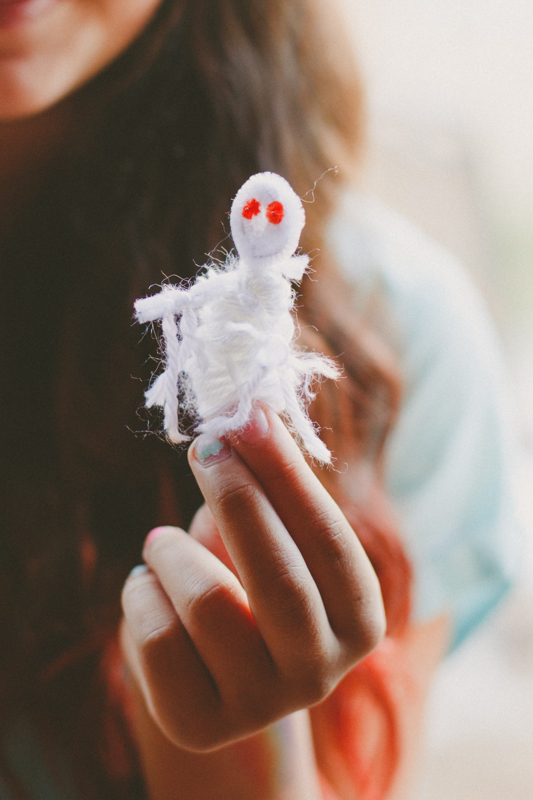
What a darling little ghost!
*I might need to write a tutorial for her ghost because I'm so curious how she made it :)
I hope these inspire your own decorations. A few pipe cleaners and yarn sure gave us a fun afternoon. And now our house is pleasantly spooky!
Wishing Heart
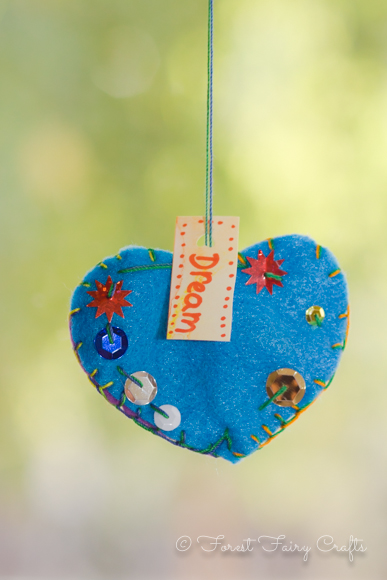
Let's begin with a wish. A hope. A dream. Let's made crafts to celebrate our wishes. Because the best wishes are from the heart.
This was my first sewing project of the year with second and third grade students (7-9 years old). Most had used needle and thread before. I wanted a project that would let them explore. A project that let everyone be successful. Whether they wanted one decoration. Or a hundred and one :)
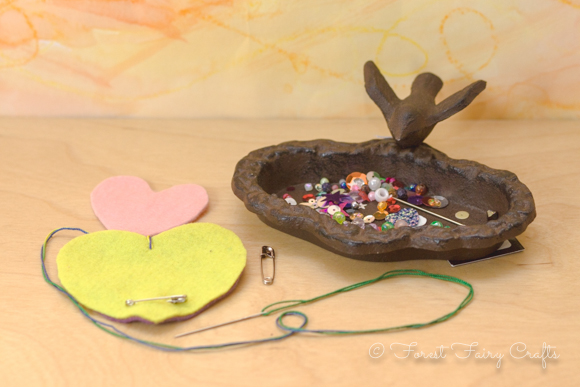
Supplies:
- Felt (two colors for each heart)
- Needle and thread (chenille needles and crochet thread)
- Safety pin
- Beads and sequins
- Slip of pretty paper for name and wish
- Optional: a third, smaller felt heart to decorate
Age: 6+
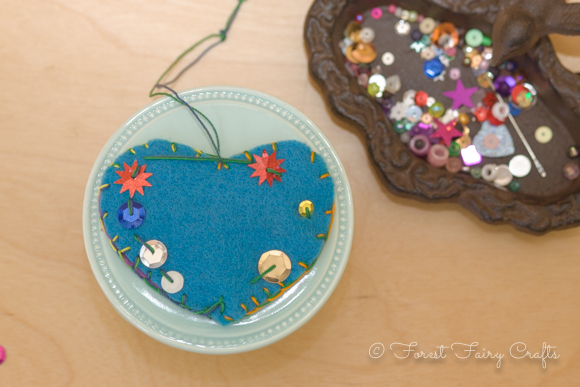
Prep: Cut hearts. Secure them together with a safety pin. Double and knot thread on the needle. Sew one stitch at the top hiding the knot between the two hearts. The stitch and the safety pin keep the felt together while children sew.
Children: These hearts are a lovely first sewing activity because almost everything is beautiful (expect for tangles). Children add a bead or sequin to one side of the heart. They push the needle through felt anywhere they like. Big stitches work just fine.
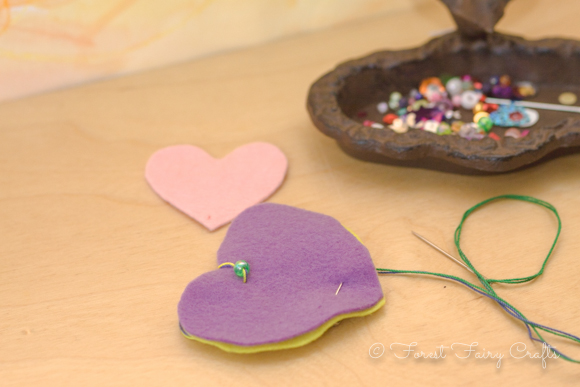
Now the needle and thread is on the other side. Add another sequin, bead, or both.
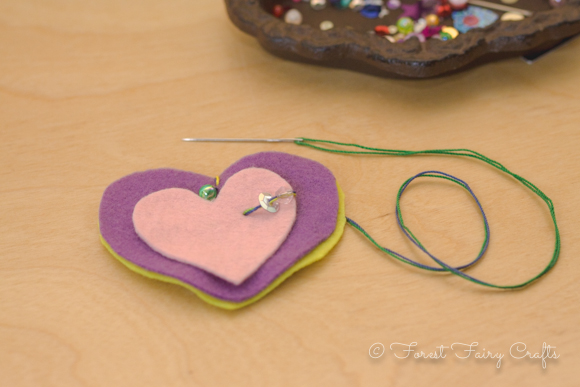
You can also add the little felt heart. Be careful when going through three layers of felt. It may take a little practice.
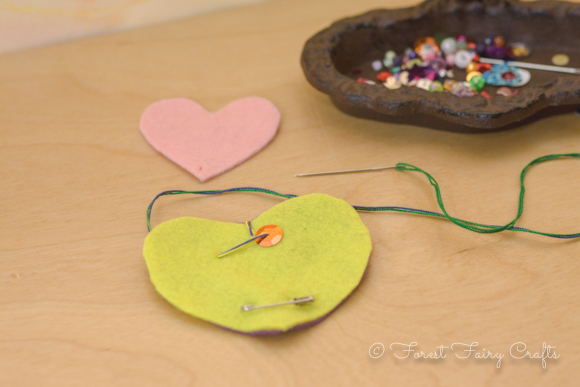
Add all of the sequins and beads that make your heart happy.
Helper: Just encourage. Sort out any tangles. Take off the safety pin once the two pieces of felt are secure.
Most design choices will be fine. Long strings of beads. Loops around the outside of the heart. Crisscross stitching. It's all okay. This allows children to experiment with sewing. And have fun! They can stitch around the outside if they like, but it's not needed.
Tie a knot. Move the string to the center for hanging if there is enough string left. If not, add a string. Many children strung beads on their hanging thread to catch the light. If beads go on the hanging thread, be sure to tie a knot around the last bead so they don't slip off.
Children: Write your name and a wish on a pretty slip of paper.

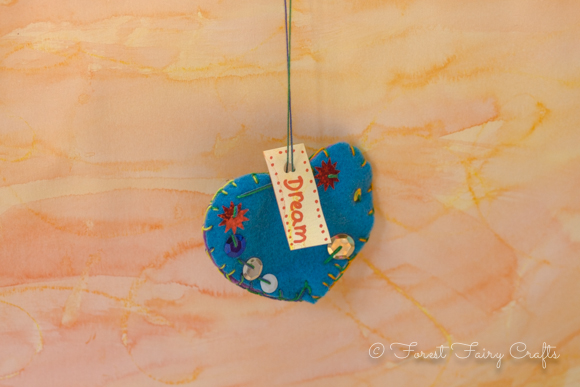
Each class hung their hearts in a special area of the room.
One is lovely. A collection is gorgeous.
Have fun sewing this week!
For more insights about sewing with children and teaching children how to sew, consider our Forest Fairy Crafts book. It shares our favorite needles and threads along with stitches, troubleshooting, and more. The link is an affiliate link. Should you decide to purchase, a small amount returns to the Forest. Enjoy :)
The First Fairy Mobile

Last month, I wanted to create a gift with our class of kindergarten and first grade students. Our beloved teacher was going to have a baby! What a perfect chance for me to try a long-time idea. How could I make the fairies into a mobile?
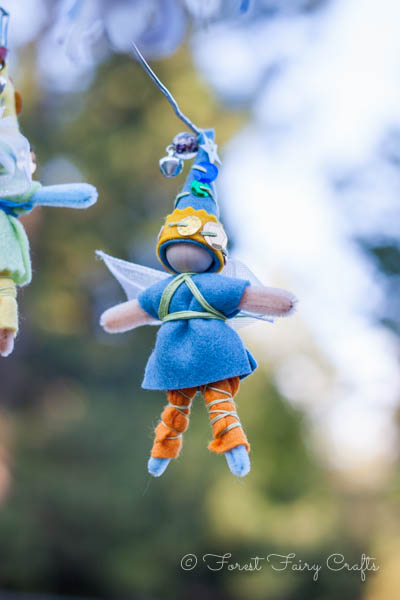
This was the perfect gift. Each student helped with one of the six fairies. We didn't know if the baby would be a boy or a girl, so we kept neutral colors. I chose the felt and cut the pieces before we sat down to sew- orange, blue, yellow, and green. The children helped sew hats and sequins so we had three girls and three boys.
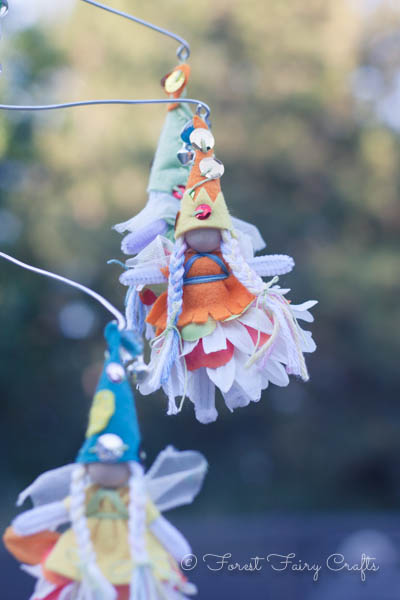
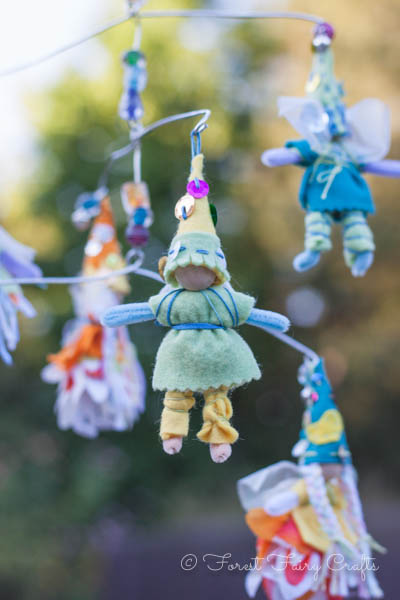

I also kept the thread choices blue or green. This way, the fairies looked similar with their unique personalities. Children also chose the beads for the hat that would end up matching the beads I used to connect the wires (I didn't plan that ahead of time, but it worked out perfect).
Once I had the six fairies, I used floral wire and the heaviest beading wire that I could find in our local craft shop. The beading wire was pretty, shiny, and soft. The floral wire was thin, but strong. I ended up using both wires. I liked the 'character' of the softer wire. The uneven bends here and there just added to the charm. I used beading pliers to make simple loops at the ends and the center. Each wire balanced with a girl and a boy. I attached these together with short pieces of wire. I felt like the middle sections needed a little something, and the beads were a perfect solution!

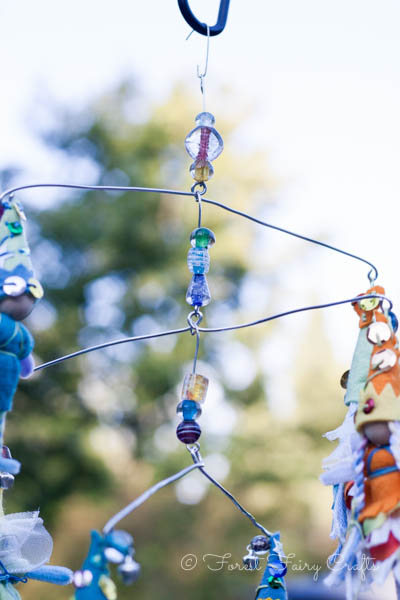
I could make a tutorial if people are interested in all the details of putting the mobile together. My magic was seeing how each child contributed to a collaborative gift. I have wanted to make a fairy mobile for ages! I am glad that I got the perfect opportunity. I have also seen lovely mobiles using a hoop. I would love to try sticks, too, for the natural elements.
I loved creating this fairy mobile with the children. We hope the baby loves our hanging Fairyland!
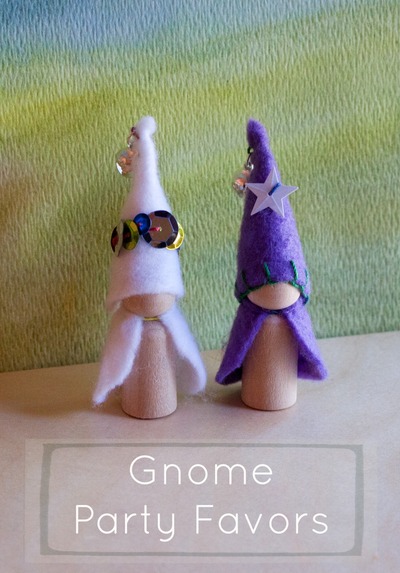
Gnome Party Favors
Last week my girl turned ten. My, oh my, how time flies! We thought about different favors to give her friends at the party. We both loved the idea of gnomes! A little magic to send home with each guest :)
We made the gnomes appeal to older children with different colors. We chose teal and black, white and purple, instead of pastels. Every child is different, of course, and these colors appealed to her friends. Even the boys!
The gnomes disappeared too fast for me to even take photos. Luckily, my girl and boy brought home a gnome of their own so I could photograph these two.
I can see the gnomes being fantasic party favors even as she gets older. They are good luck charms :)
To make a big batch of gnomes (we crafted seventeen altogether), these tips helped me a lot:
- Buy gnome forms in bulk (if you can). They sell in craft stores a few to a package, but there may not be enough on the shelf. I order sets of the from A Child's Dream Come True in groups of 12 for $3- sweet! (1 and 5/8" size)
- Choose colors all at once. Pick a few colors of felt that work together as mix-and-match. Think of your friends. What are their favorite colors?
- Cut capes. I cut a couple of capes out of each color. I saved everything in a basket.
- Cut hats. Same story :)
- Use varigated thread for different colors. We used rainbow crochet thread (size 10)
- Sew the capes on the wooden gnomes. I did this in a batch where I didn't even tie knots in the thread. I started in the back, sewed a running stitch around, and knotted the two threads together. I didn't hide the threads, which was a shortcut for me. I knew the hats would cover the knots in the back.
- Sew hats. Add sequins, blanket stitch the bottom edge, whatever sounds pretty. Enjoy making each hat unique.
- Stuff a little wool or cotton stuffing in the hat and glue it on. Let the glue dry and enjoy your party!
I was busy getting her party ready, so I didn't photograph the process. One day :)
You could, of course, sew them at the party as a craft. That would be fun, too!
We knew that children would be busy playing so we made ours ahead of time.
You can find more detailed gnome-sewing directions in our book on page 107. If you need help, I am happy to answer questions.
Have fun sharing your gnomes.
P.S. My daughter sewed hats too. She loved giving her creations away :)
