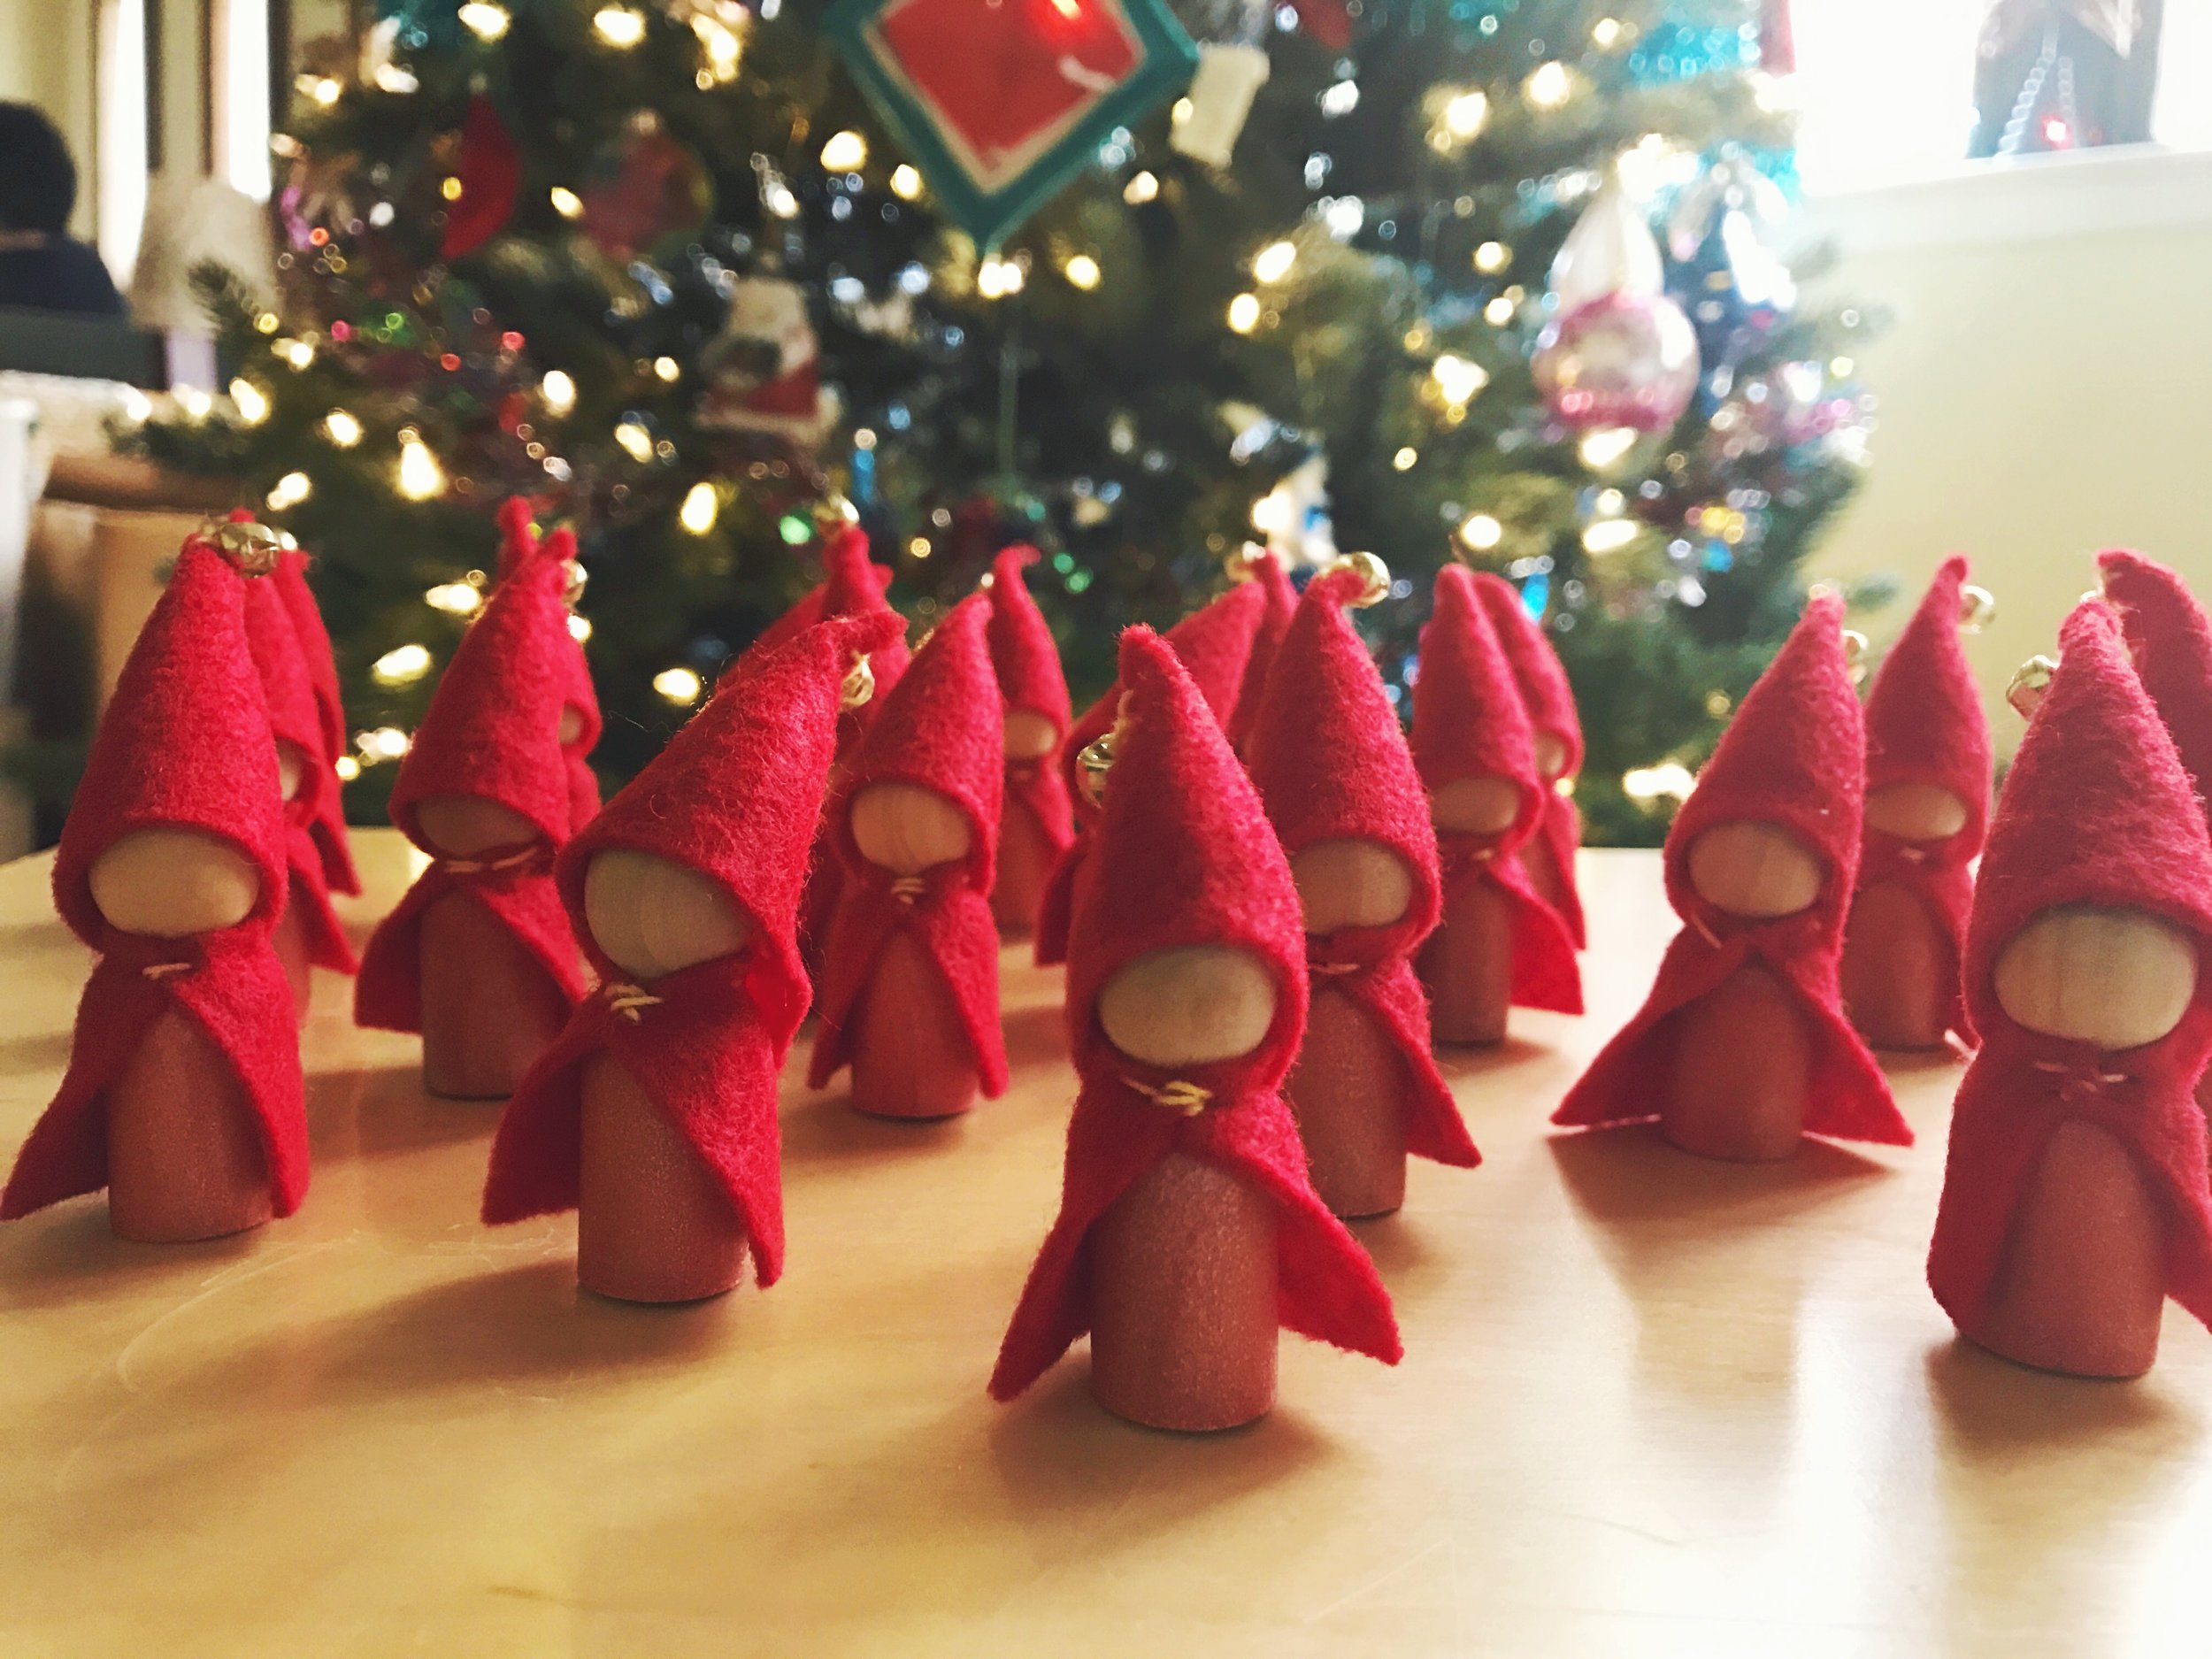
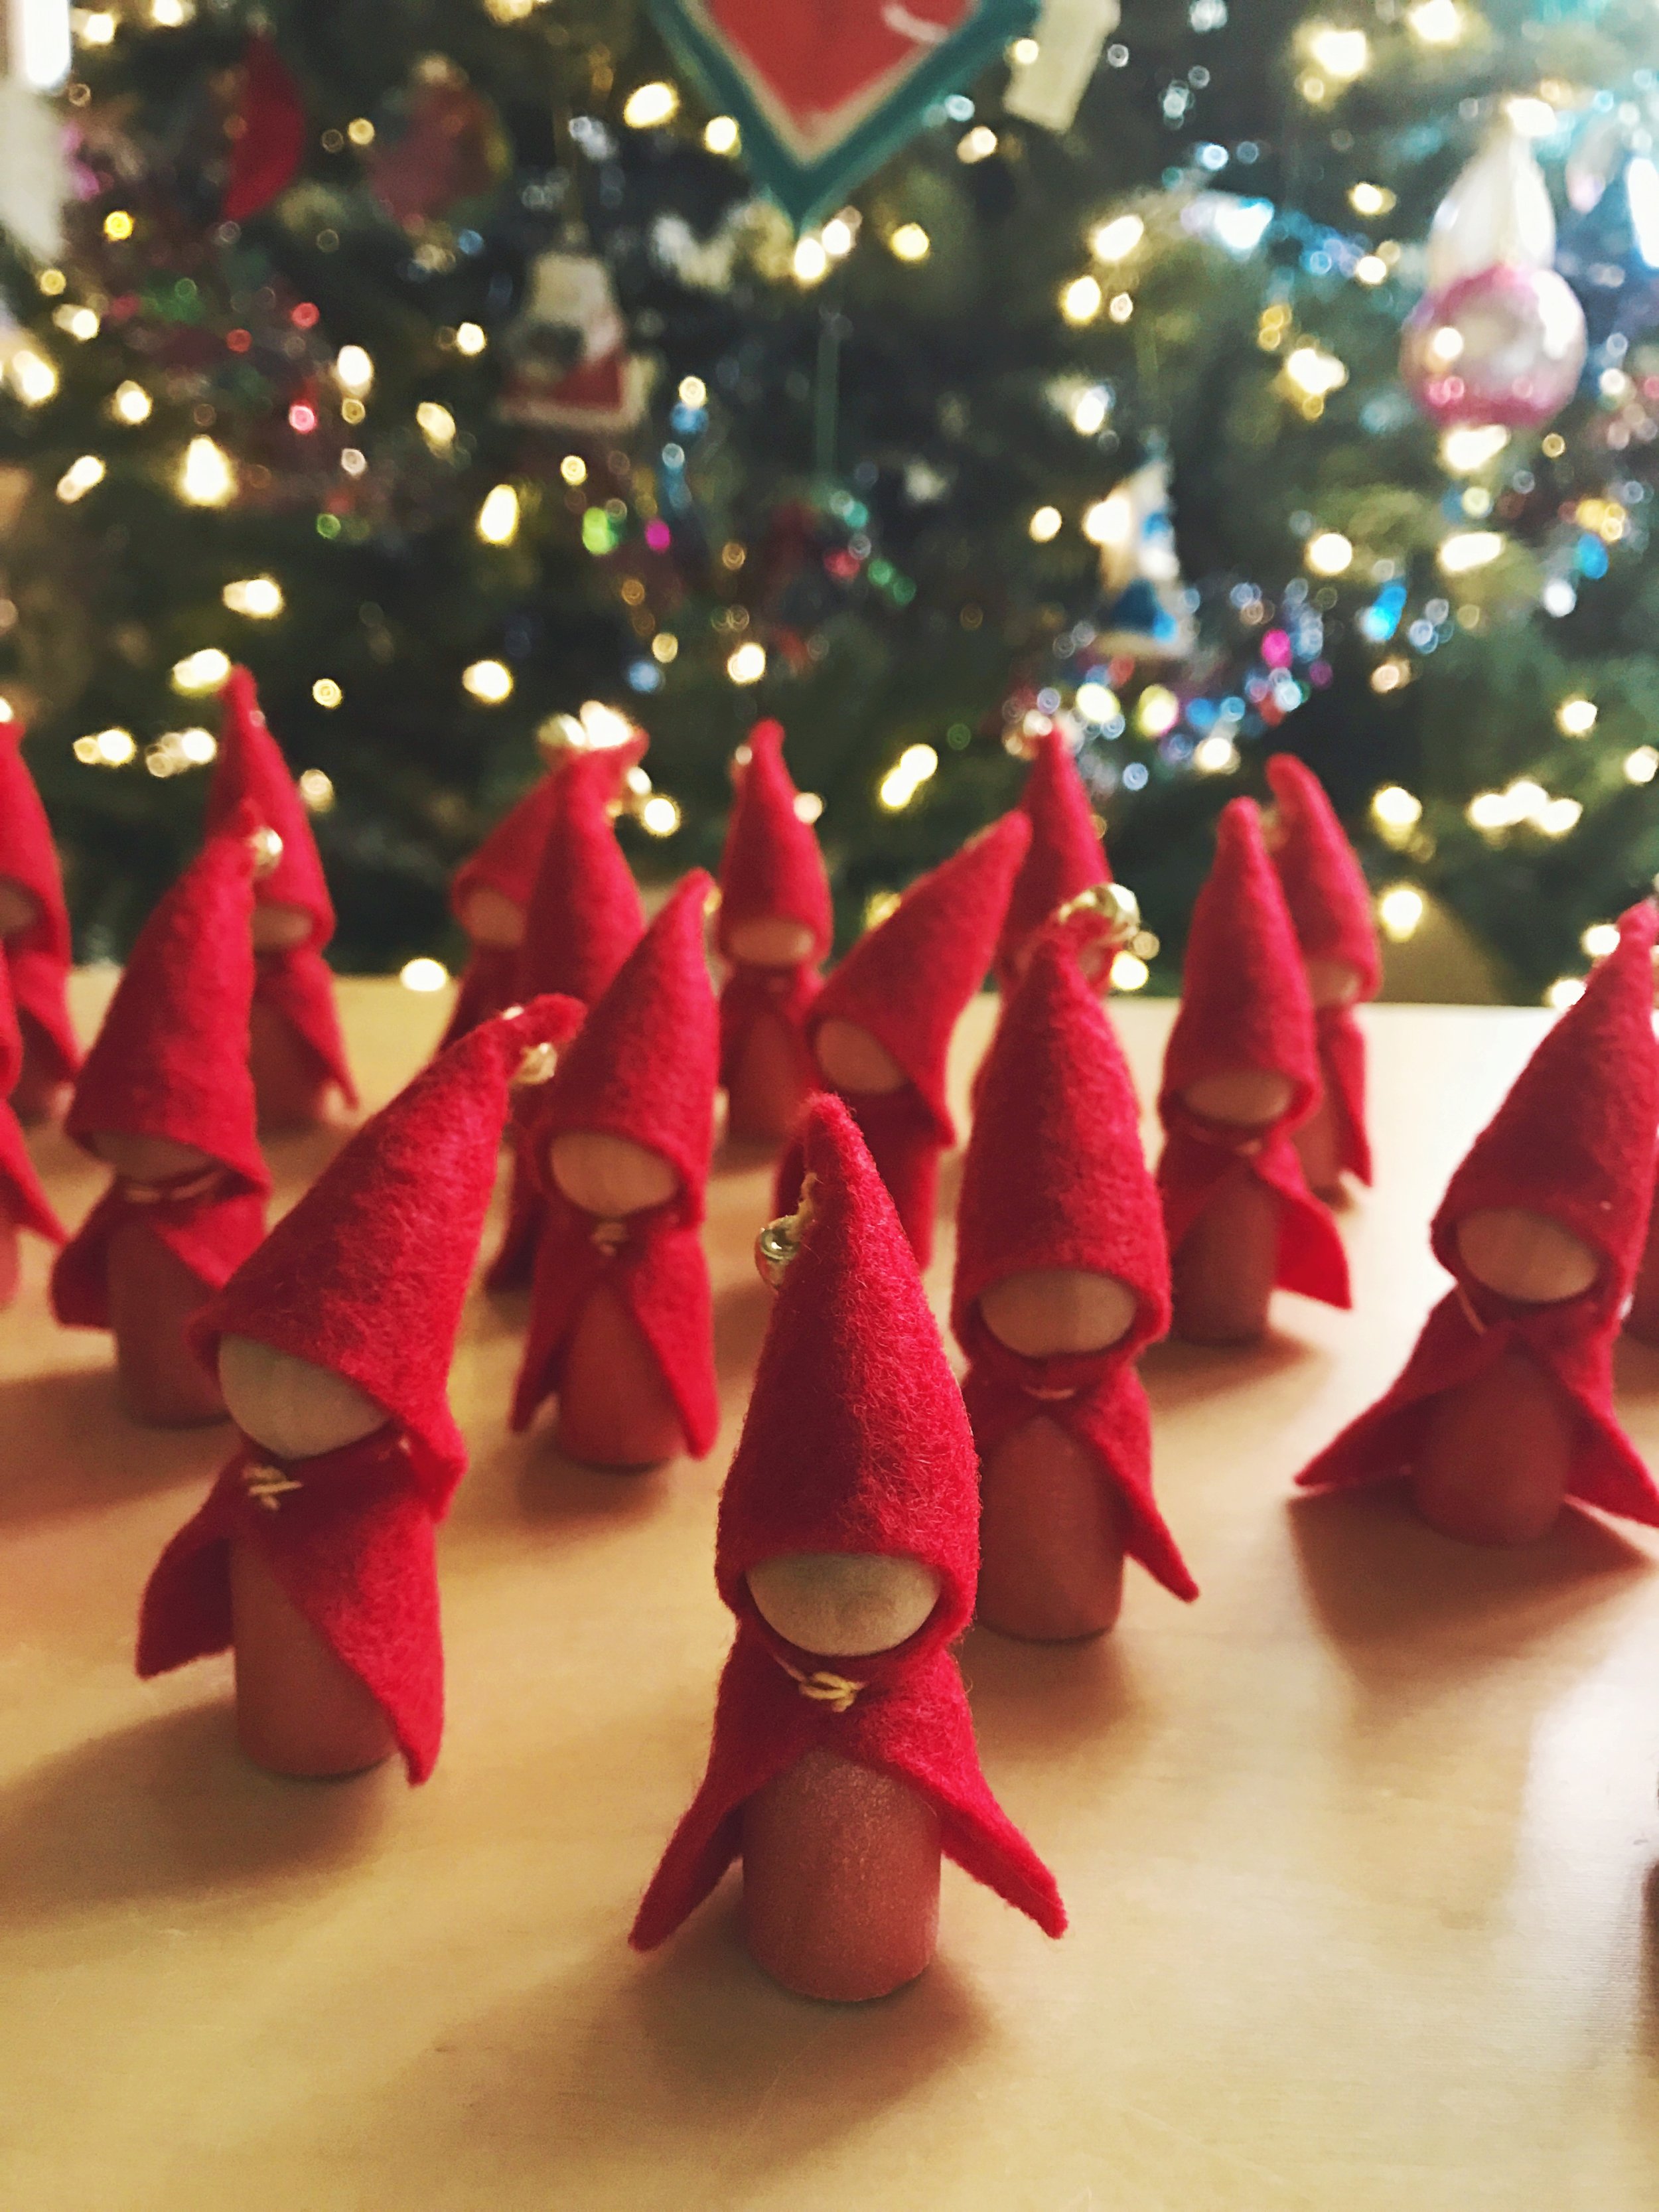
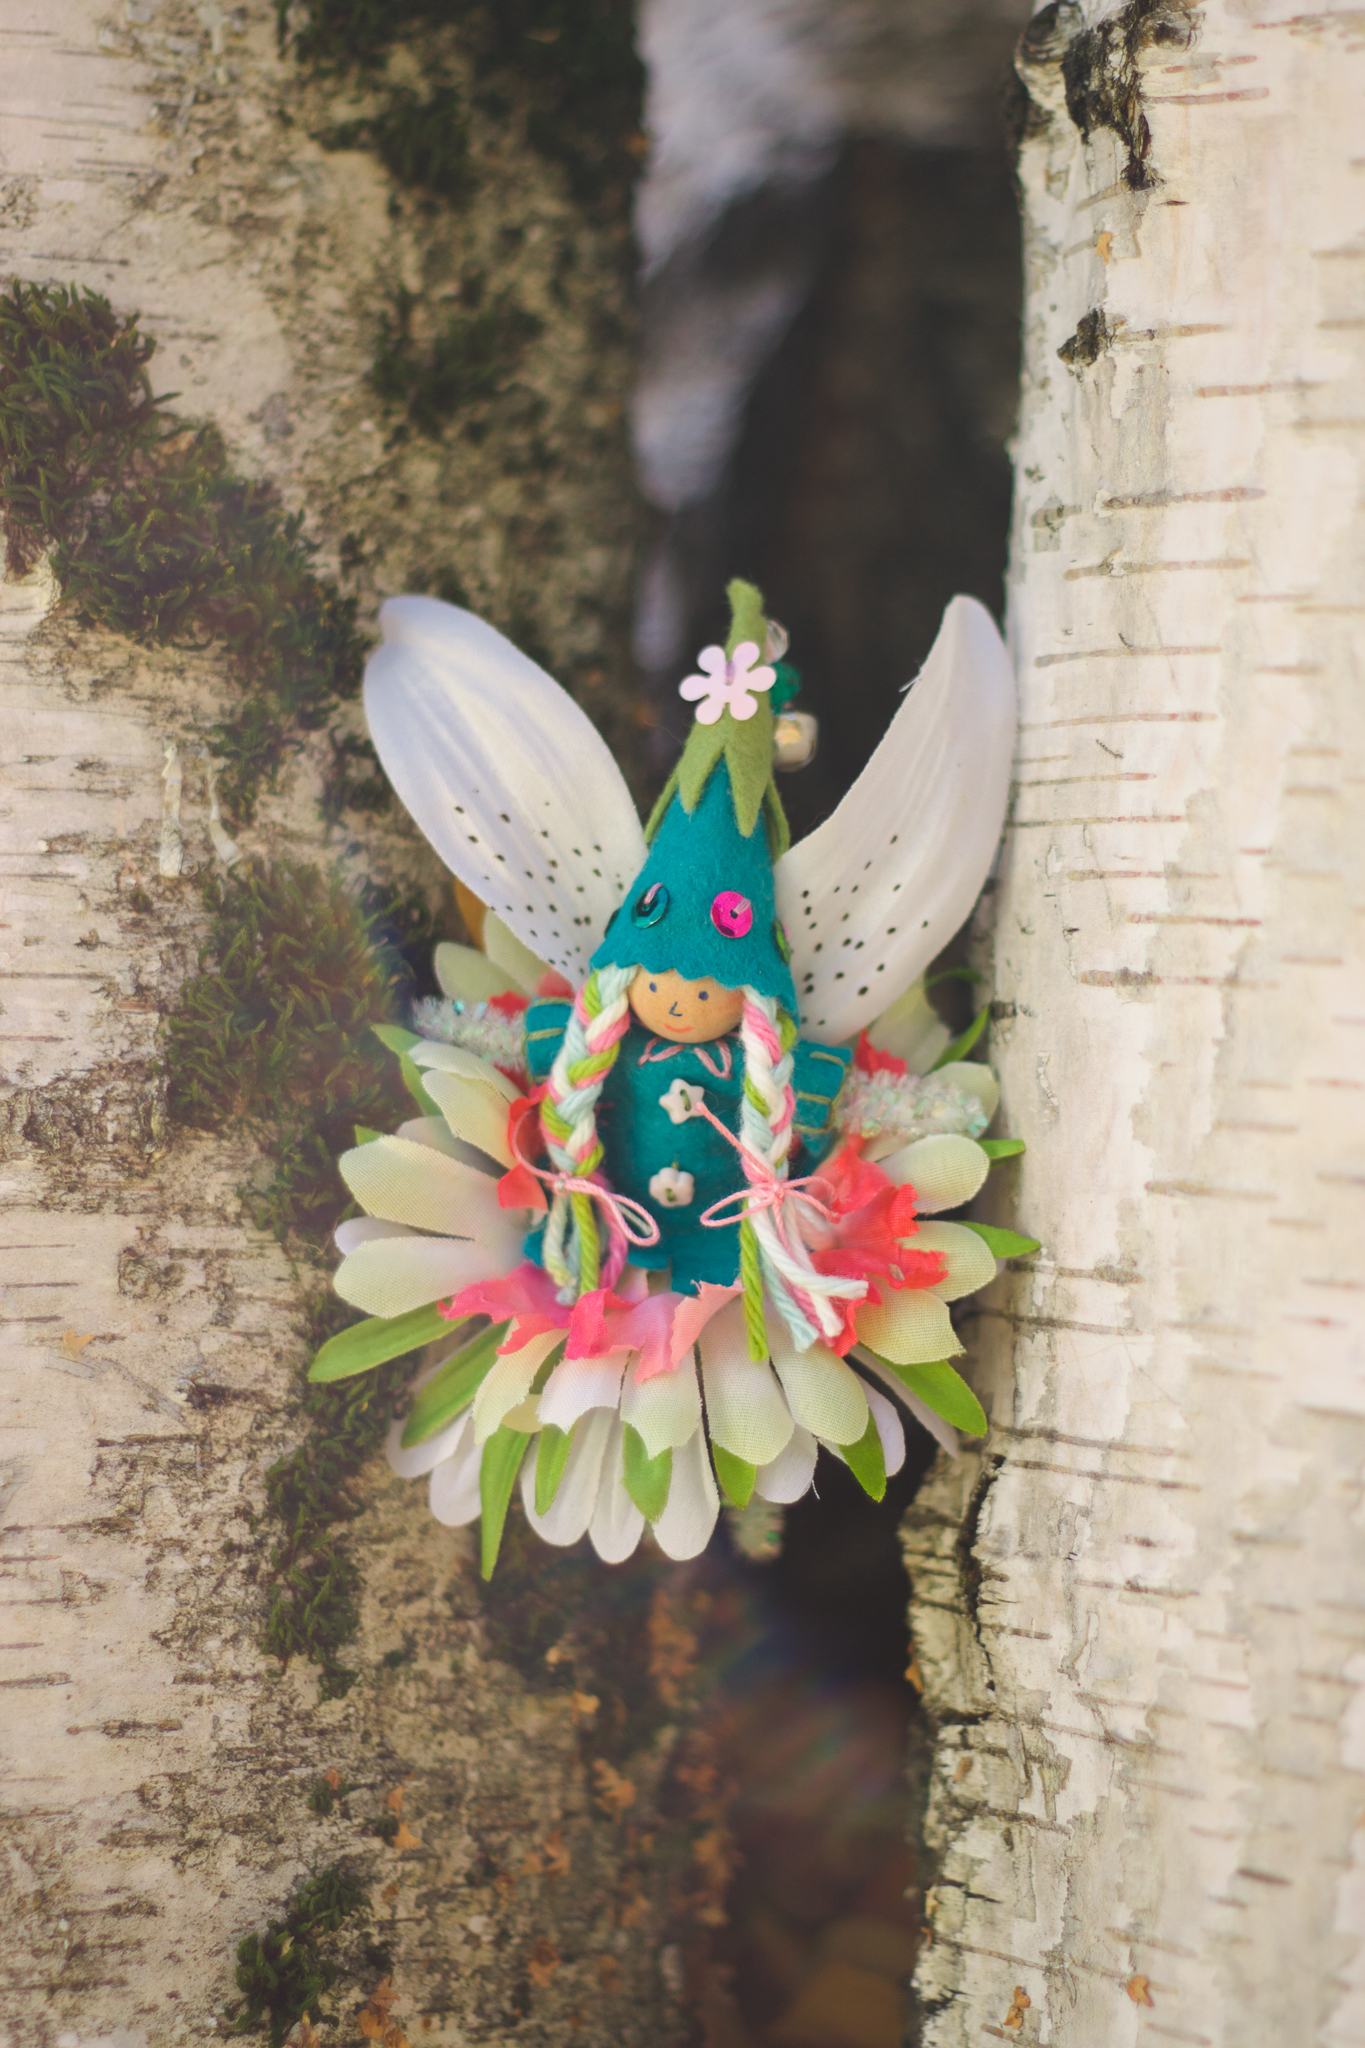
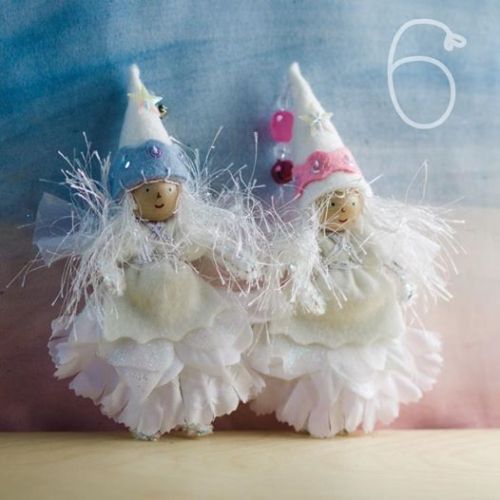
Happy Saint Nicholas Day

Little gnomes are off to help my son's class celebrate Saint Nicholas Day! Many European children leave a sock, stocking, or shoe by the fire in the hopes of a little treat from Saint Nikolas.
My dad is Czech. We celebrated Saint Mikulaš. He visited on a carriage led by a white horse. An angel and a čert (pronounced chert) traveled with him. The cert is a trickster devil who told Saint Mikulaš all the naughty things while the angel told all the kind, good things. You hoped that the angel had more to say than the devil :)
My son is learning about celebrations all around the world. He left slippers that they sewed together out in class today in case Saint Nicholas visited their school (spoiler alert! he did!)
These little gnomes didn't take very long for me to make. I kept things simple while my son was at school one day. In case you need to make many gifts quickly, here's how I made this collection.
- I painted the bases with watercolor paint and just a bit of sparkle with Iridescent Watercolor Medium mixed together.
- While the paint dried, I cut a little triangle and adjusted until I liked the height for the hat. I cut twenty by holding one and cutting felt without tracing. After all, imperfections are part of the fun. I sewed them with a few stitches, starting from the bottom and going up. I added a bell at the top and tied off. Set aside and repeat nineteen times.
- The capes are simple rectangles. I could have curved the corners at the bottom. Saint Nicholas wears a long cloak anyway. I cut a long strip of felt, measured around the peg person to find the right fit, then cut twenty. I tied a knot in the thread, started in the back midway, then ran a stitch towards the front. I secured onto the dry peg dolls with a few stitches at the front (pulling the first stich to help gather the cape a little). I ran a few stitches towards the back and tied a knot. The hat would hide all of the knots. Repeat nineteen times.
- Finally, I tucked a tiny bit of stuffing into the hat and glued onto each little gnome. Magic!
My daughter helped sew a few hats and cloaks. Thank you!
I have found, when creating larger projects, it helps me to complete all of an element at once. Say, sew twenty hats, instead of trying to complete one character at a time. It sure is gratifying to see them all come together at the end!
My son came home bubbling with stories about everything he found in his little stocking. Here's to all the gift-givers and magic-makers :)
*this post does contain an affiliate link. If you choose the iridescent medium, a small portion returns to the forest while your cost remains the same. Thank you!

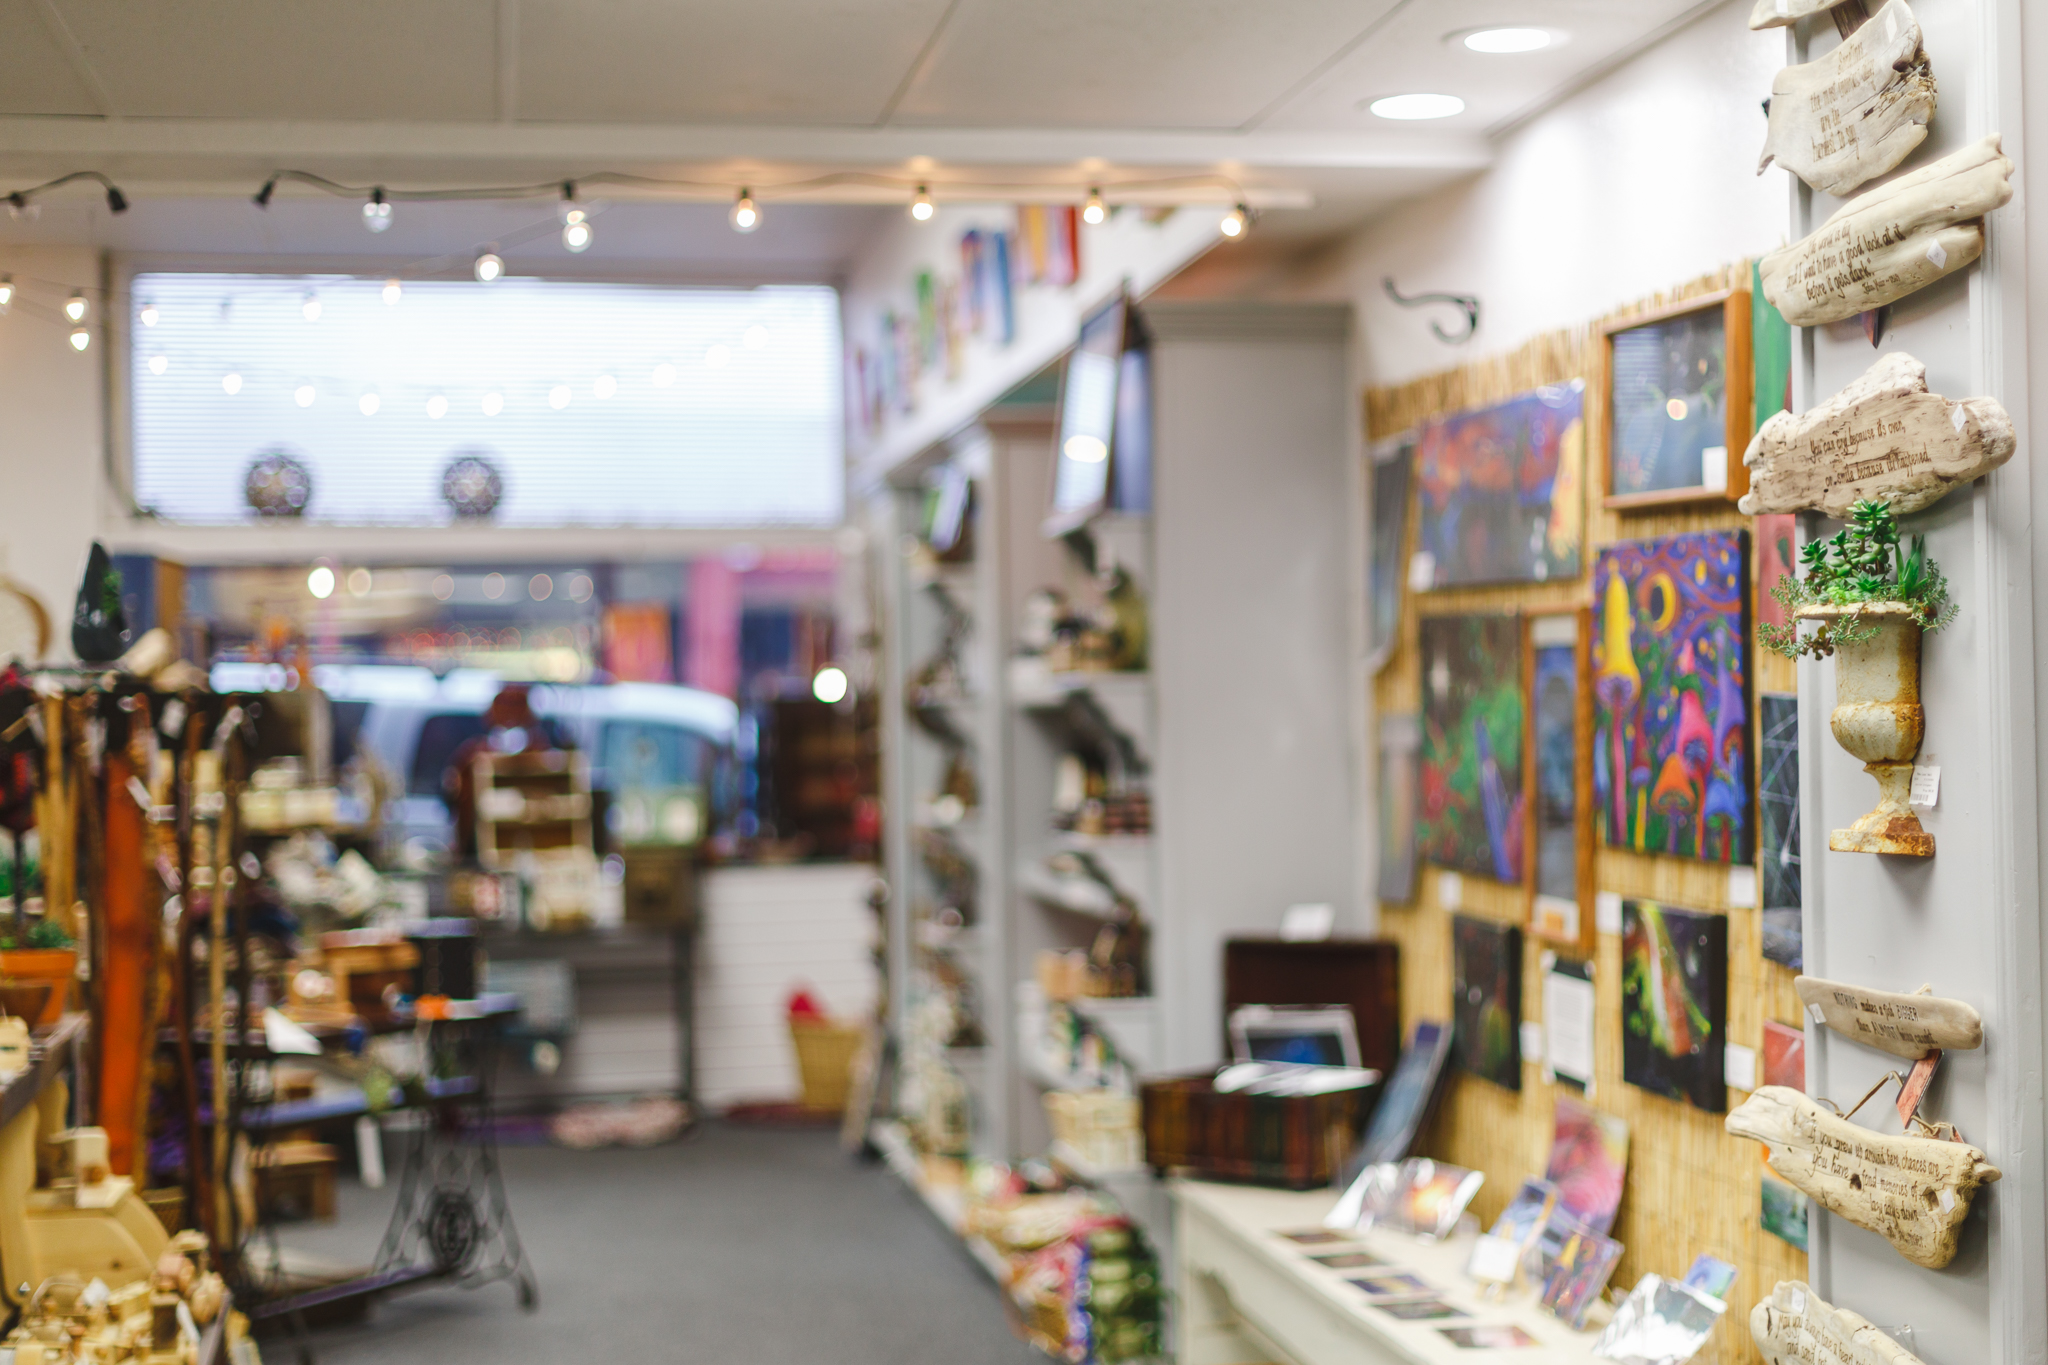
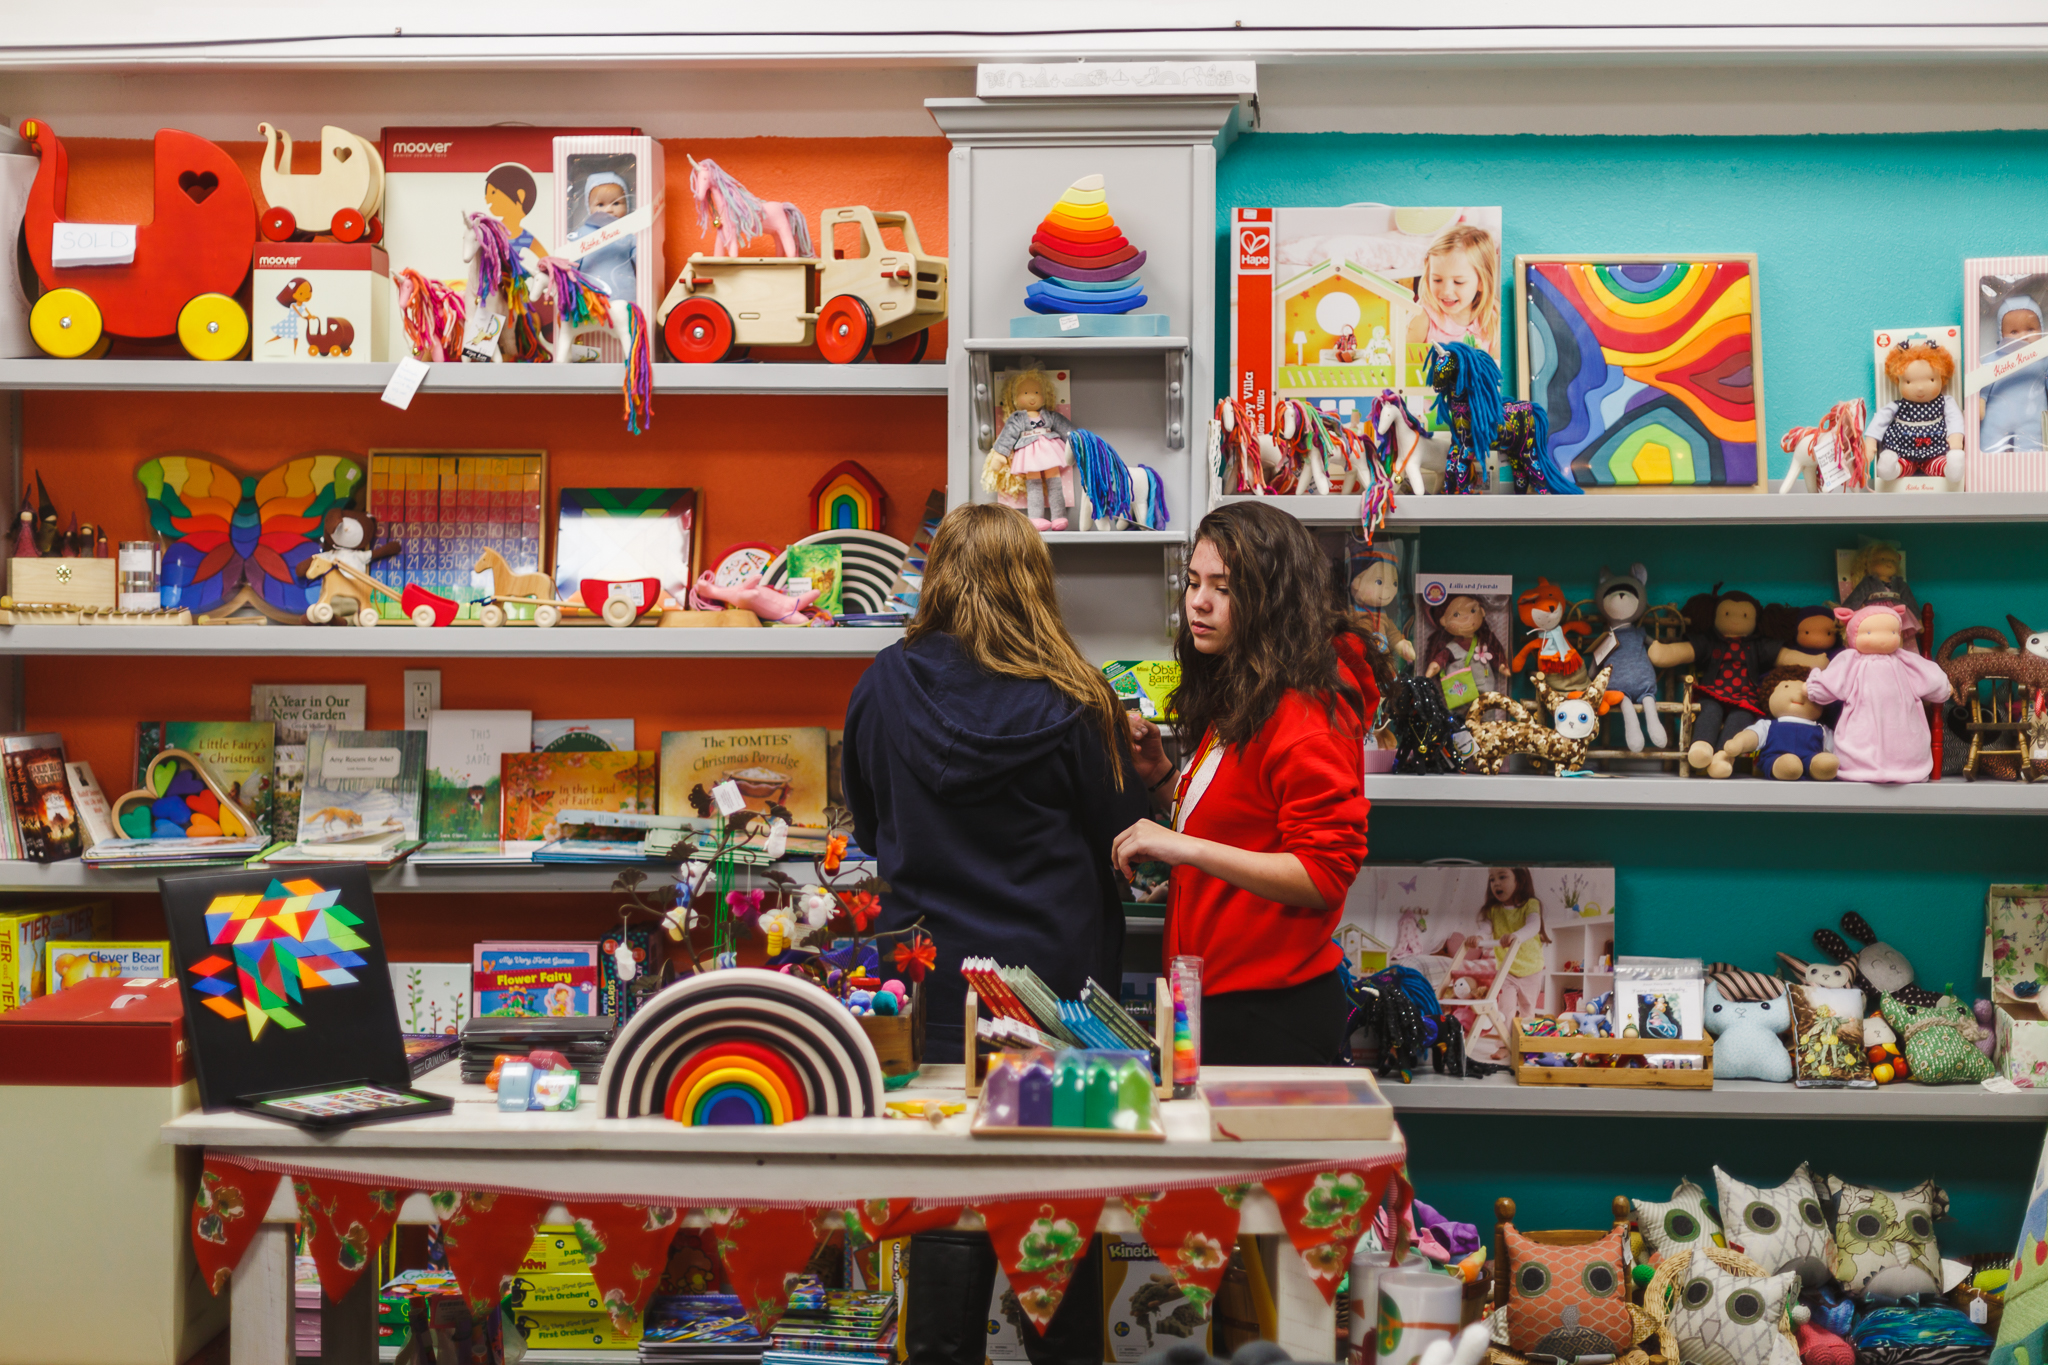
At Make Local Habit
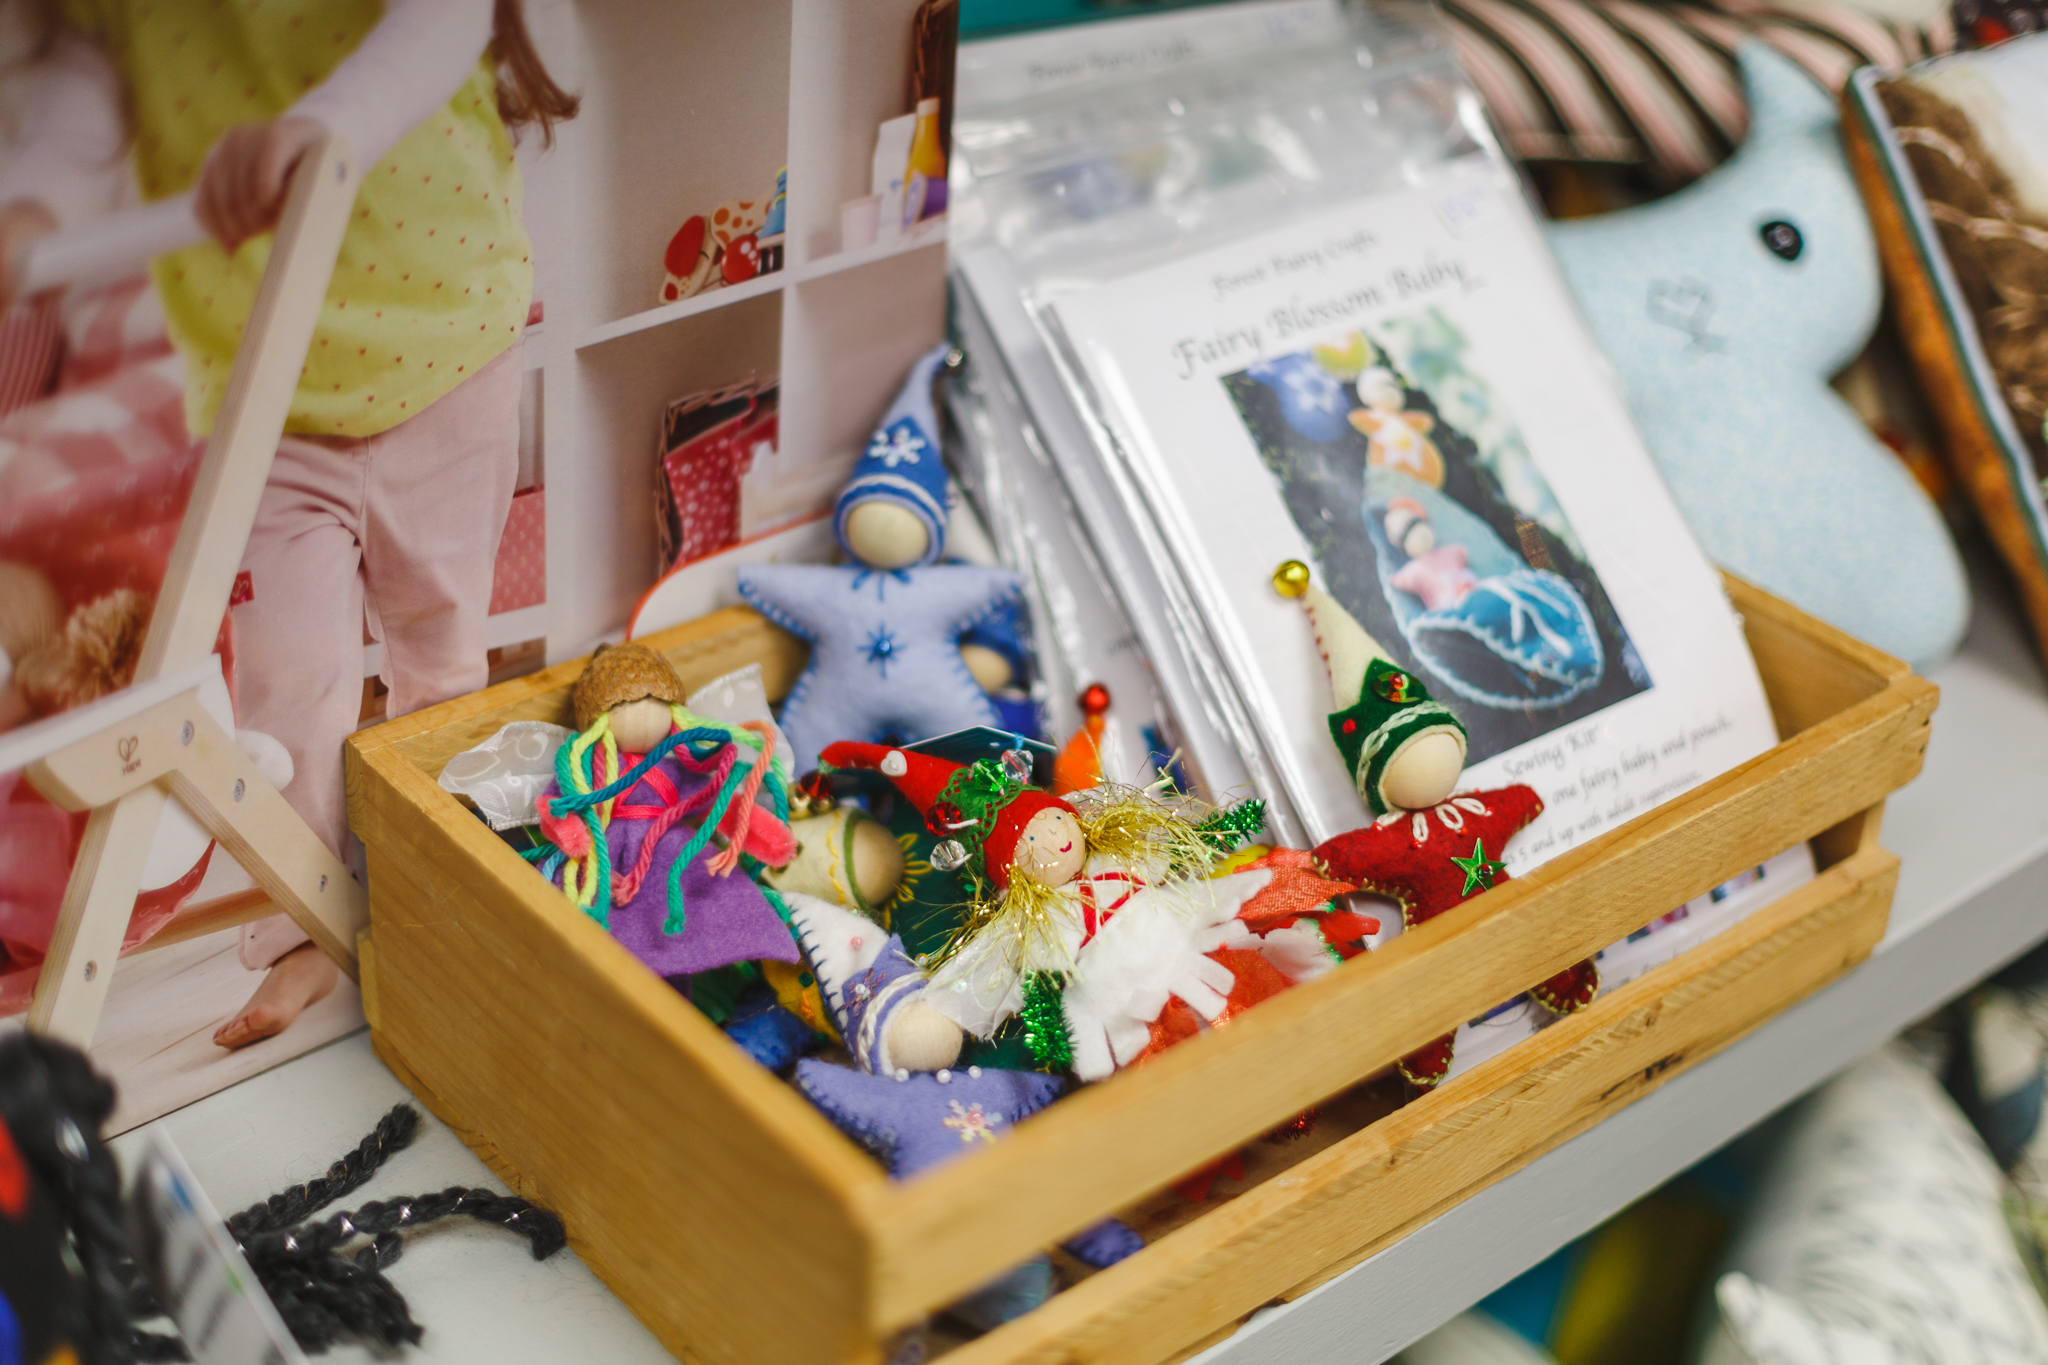
Fairy Crafts are back at Make Local Habit in Grass Valley. We brought kits and finished fairies to the shop this week. Of course, while in the shop, I find dozens of treasures that I my kids and I want as well. Make Local Habit carries local artists along with natural toys, beautiful books, and creative games.
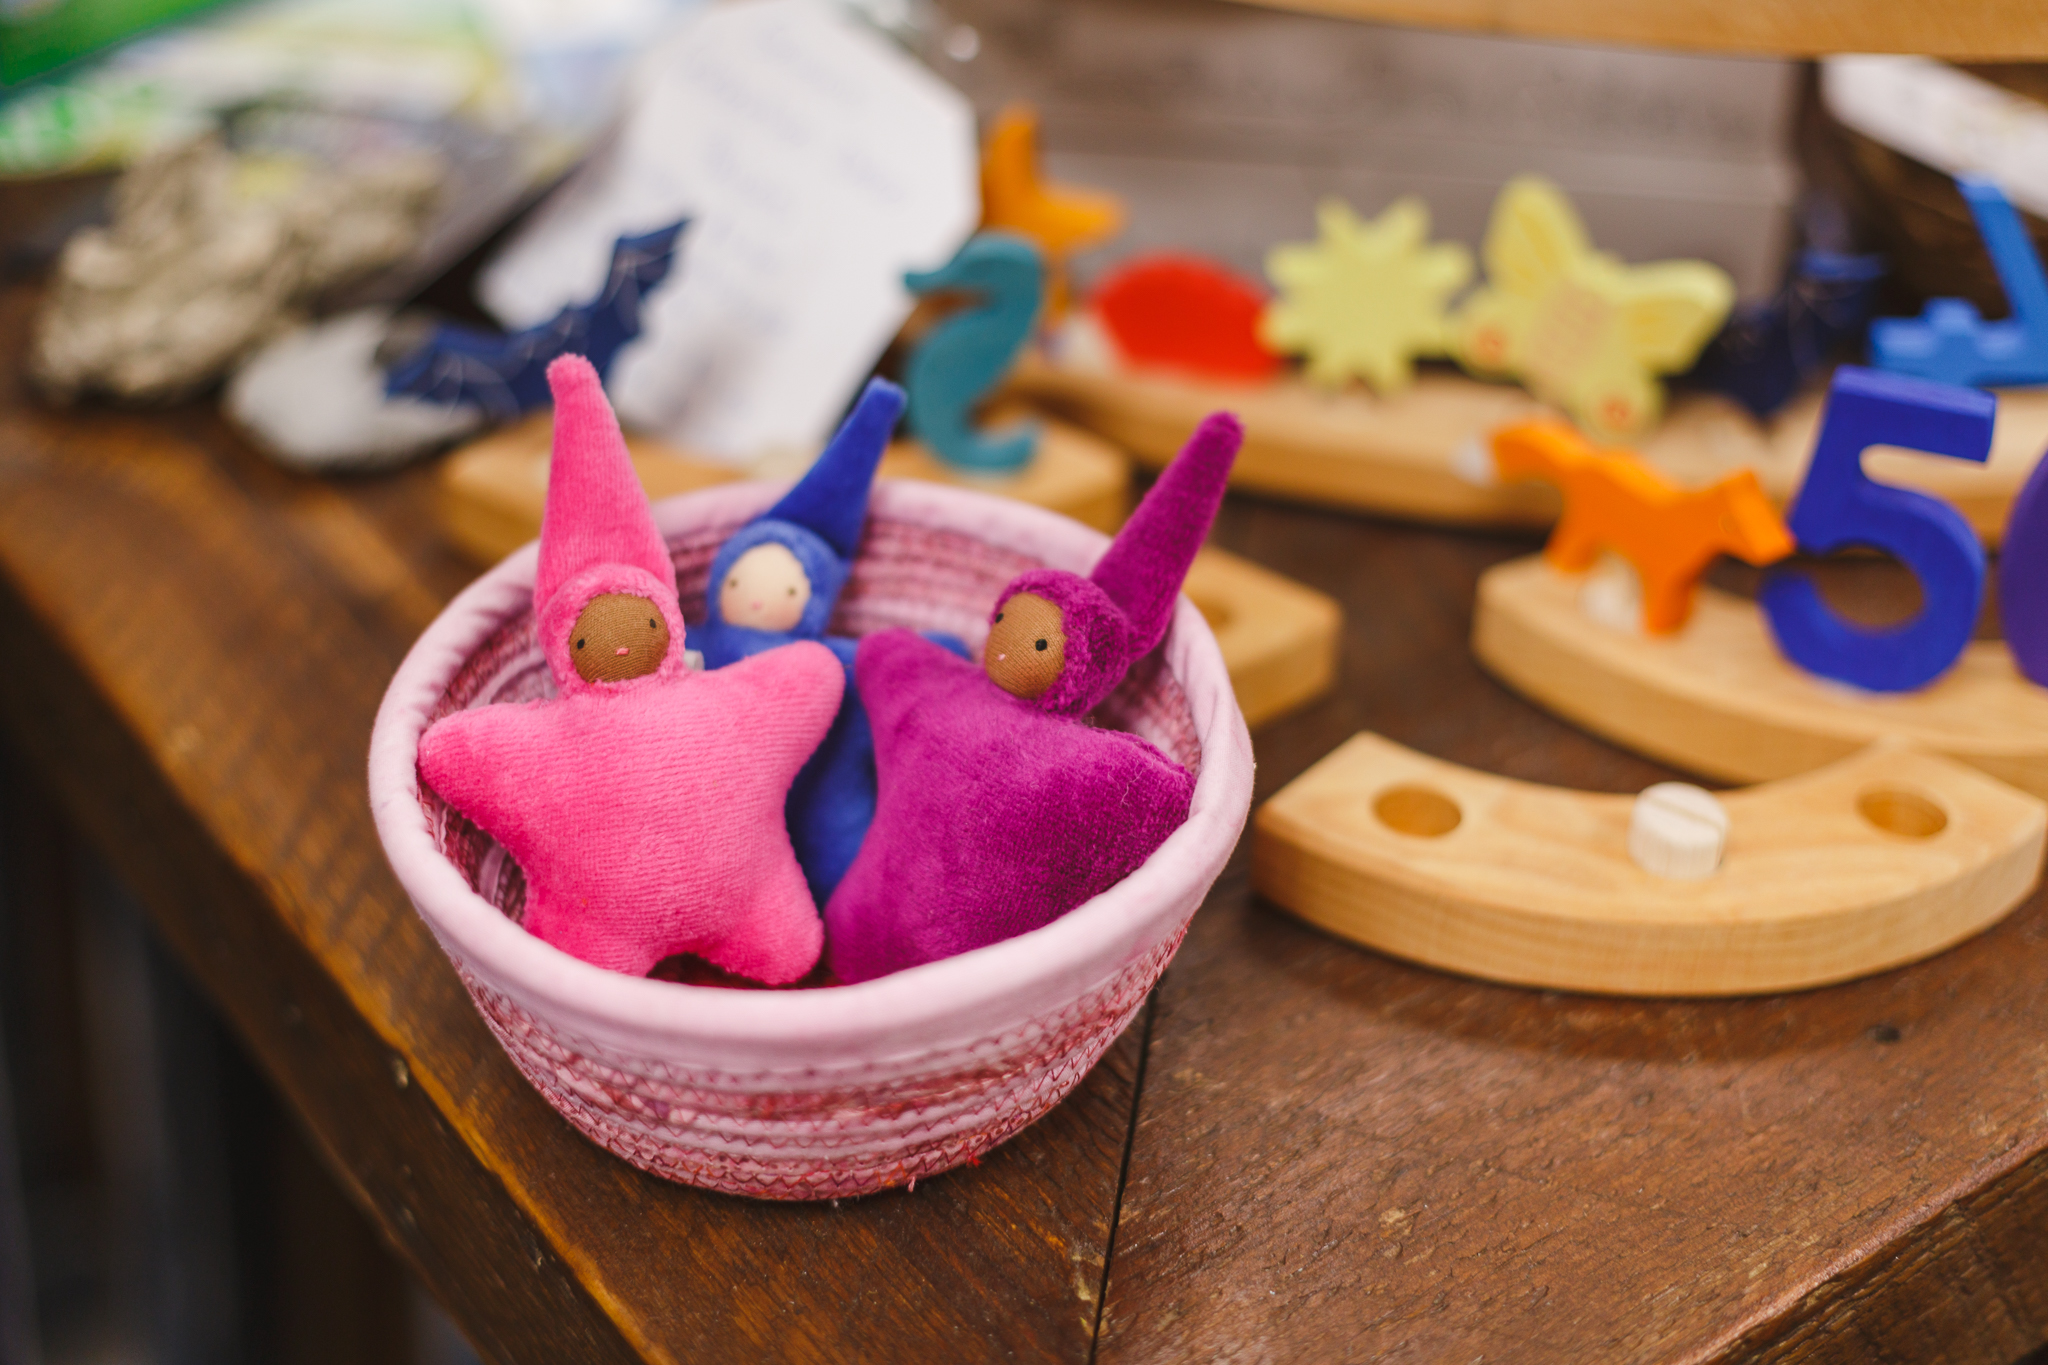
Our fairy is having fun playing with unicorns handmade by Kiya's Naturals Childhood Treasures. At least until he gets to go home with a new friend.
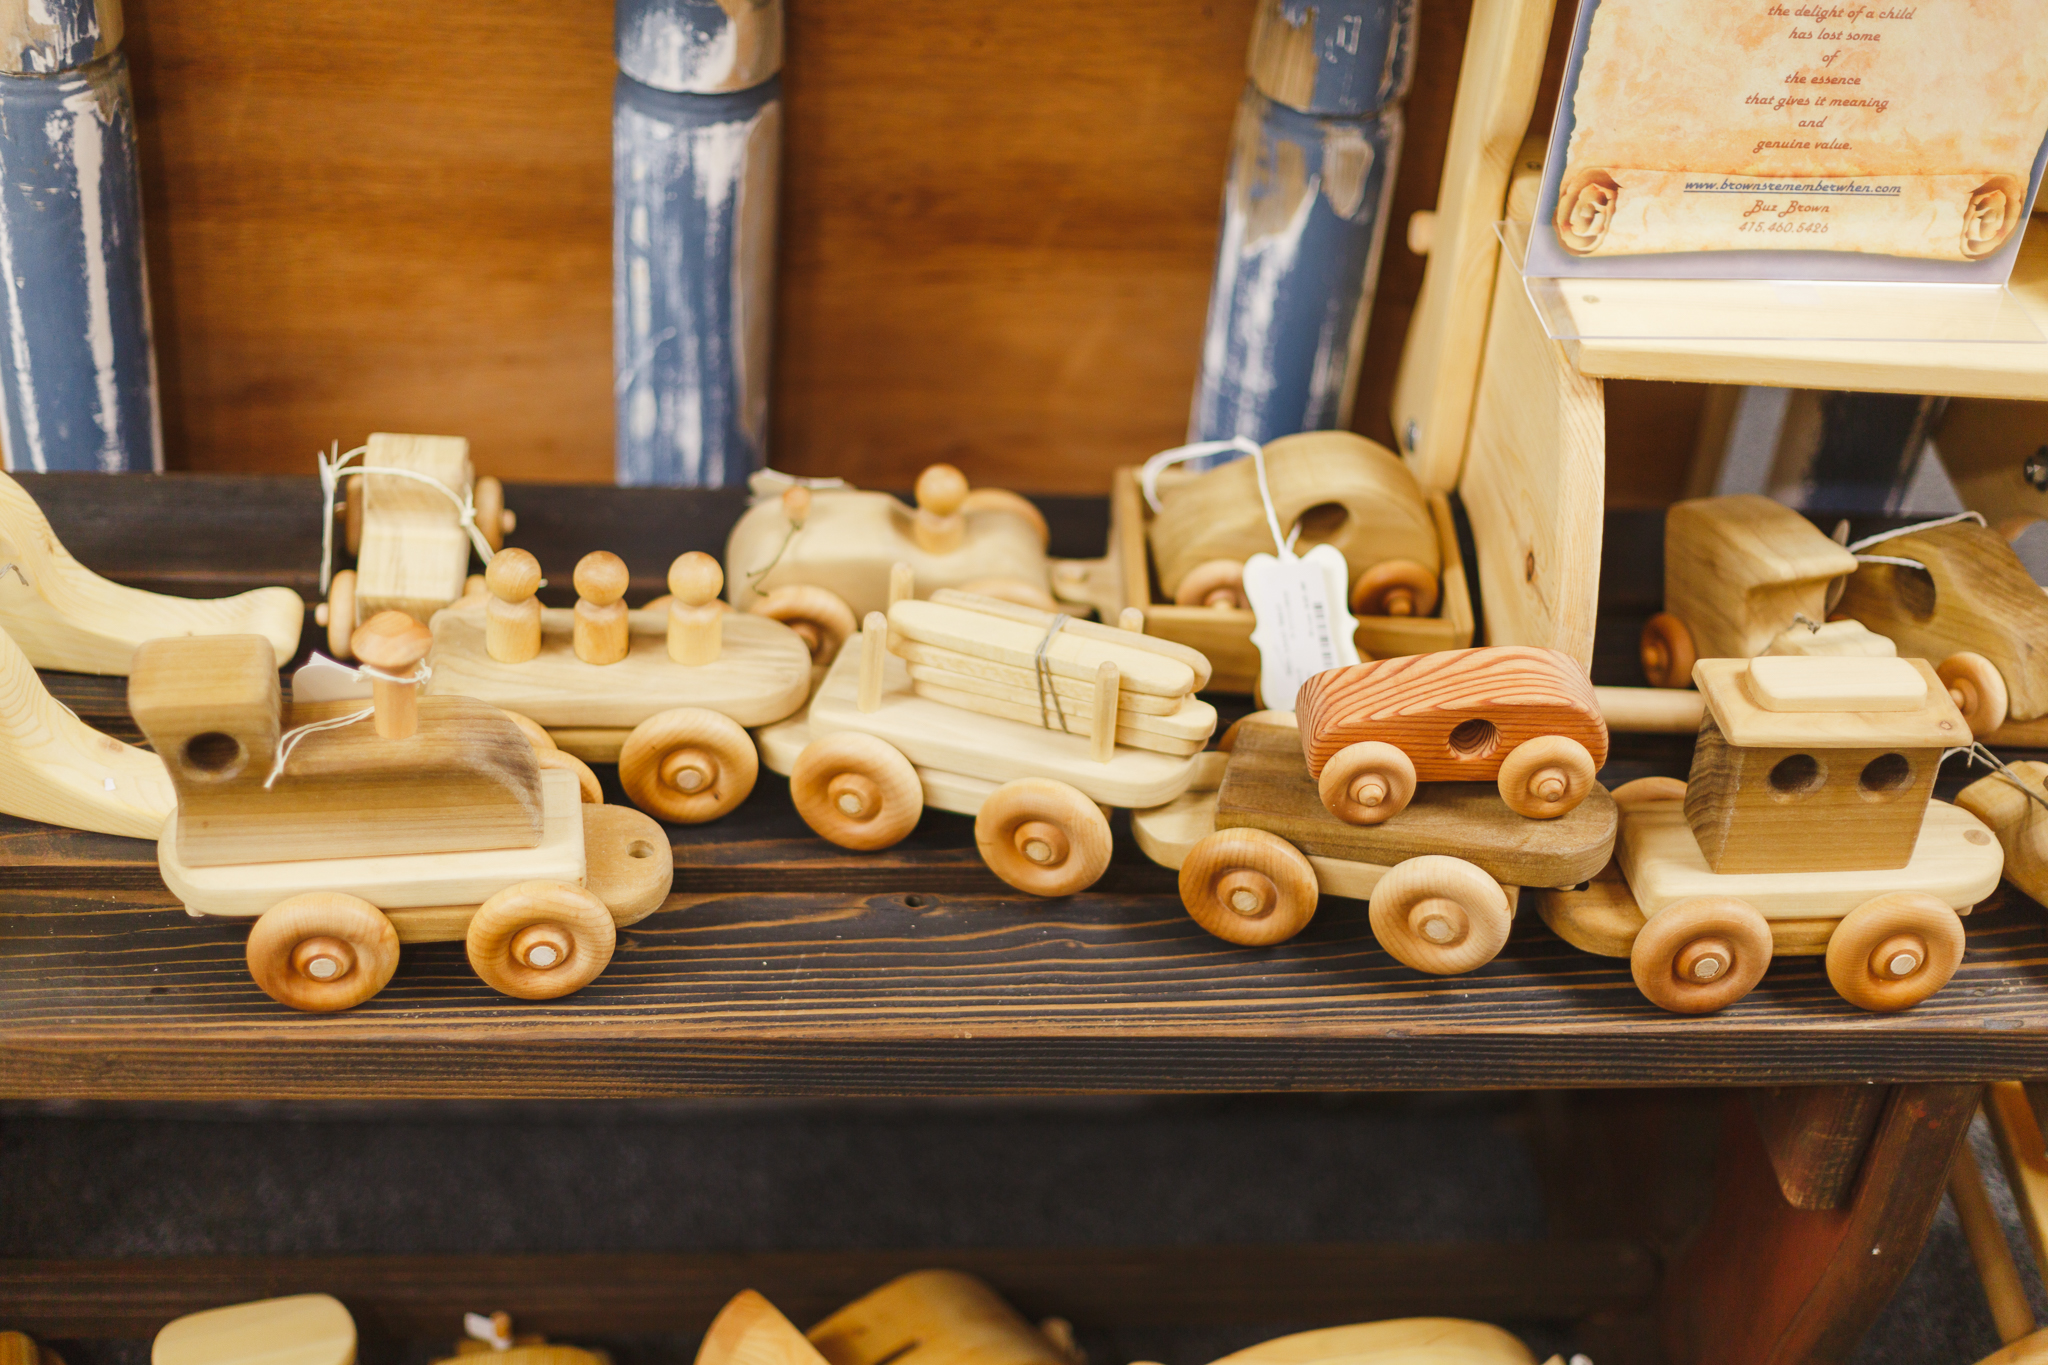
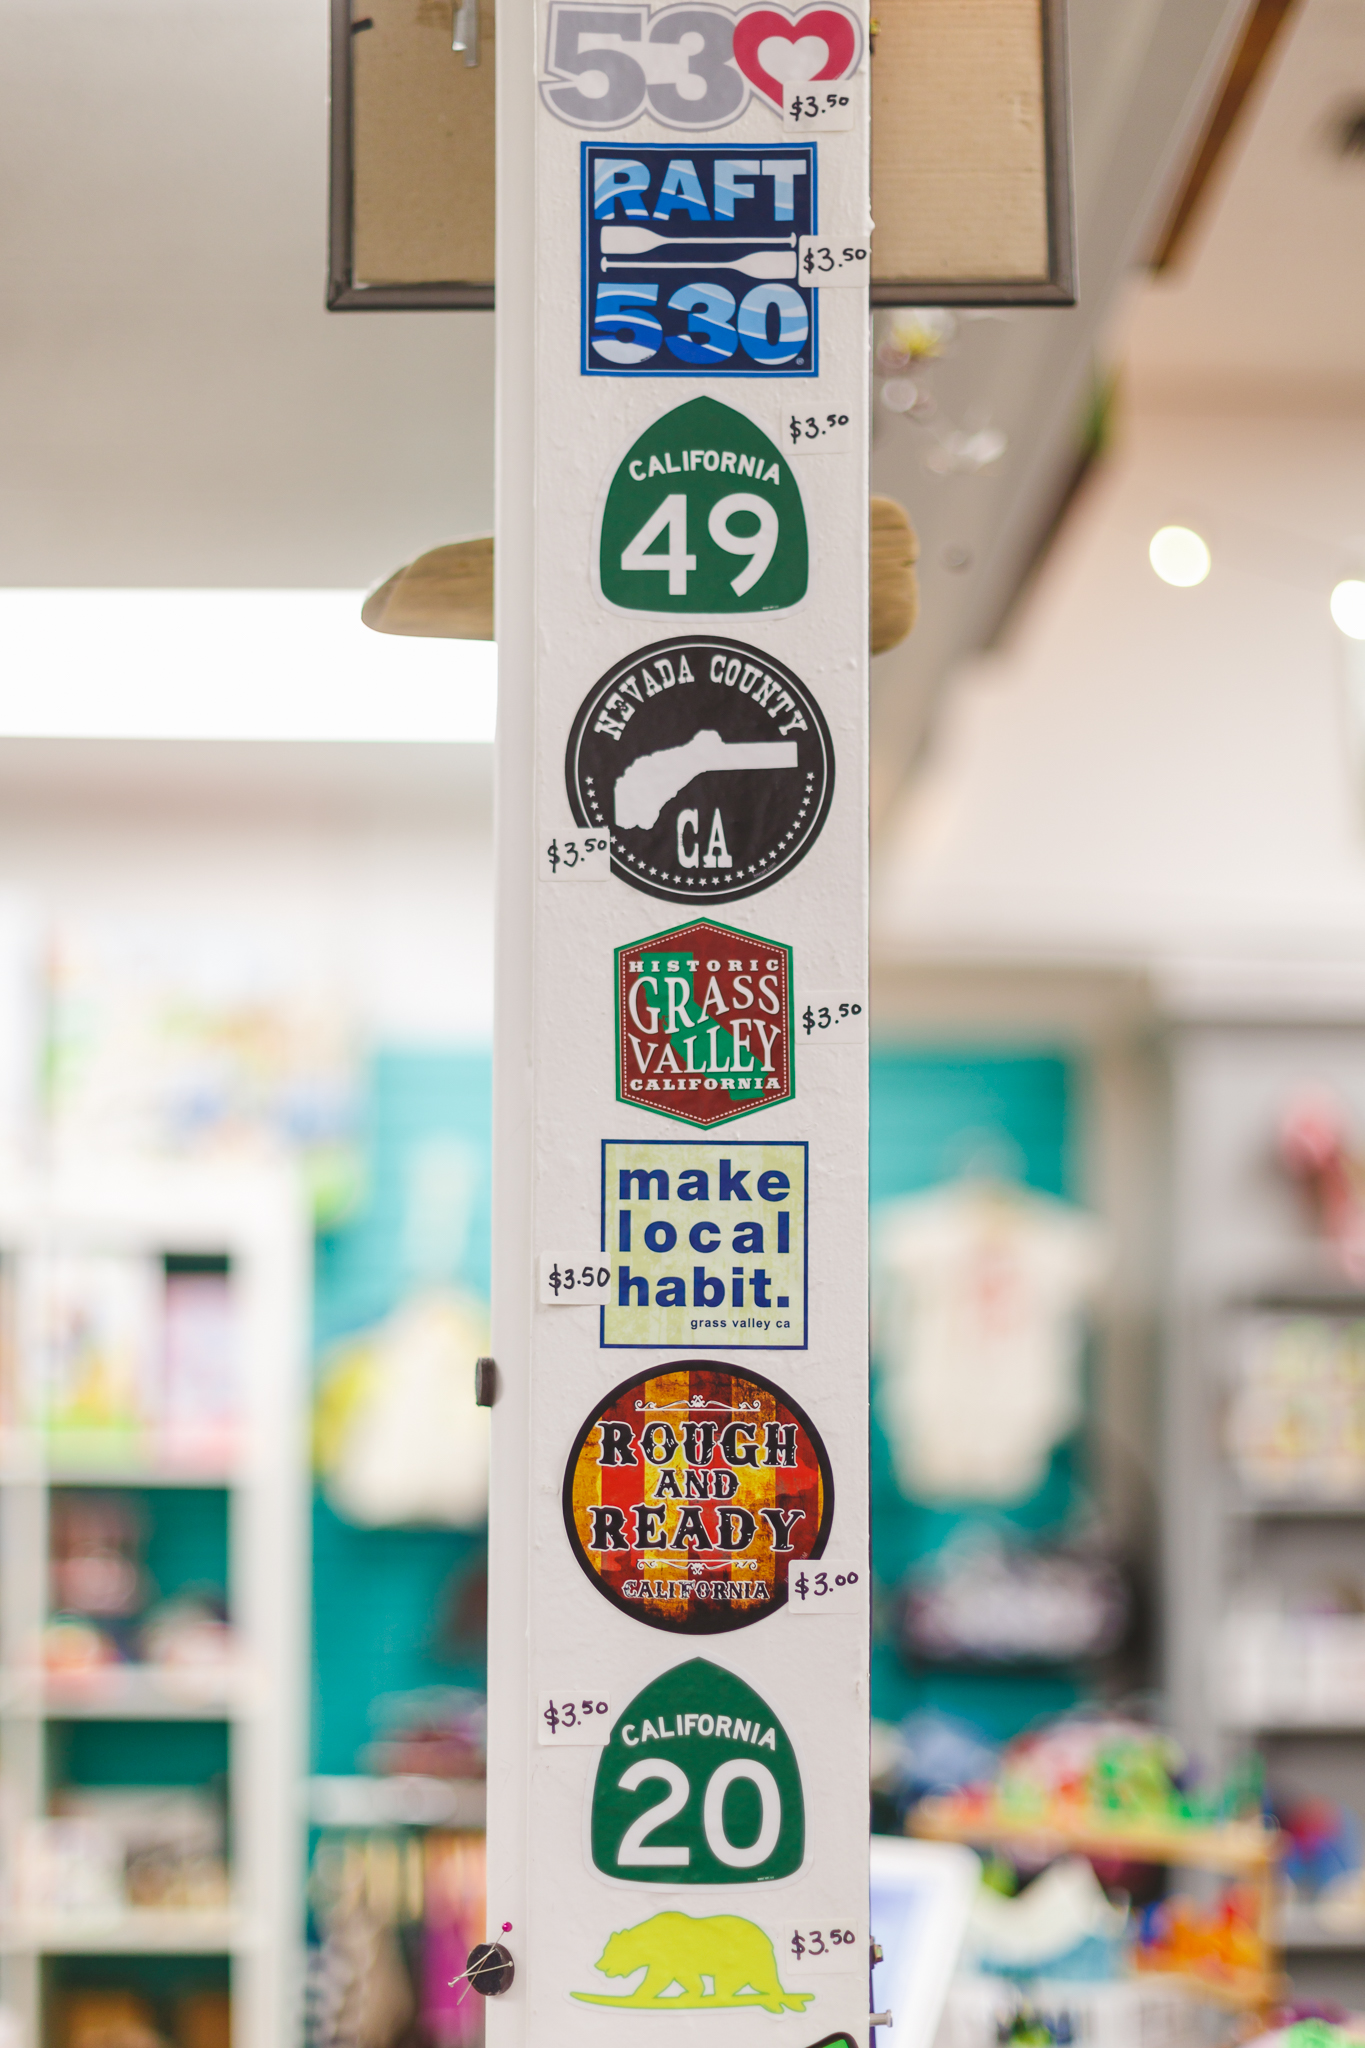
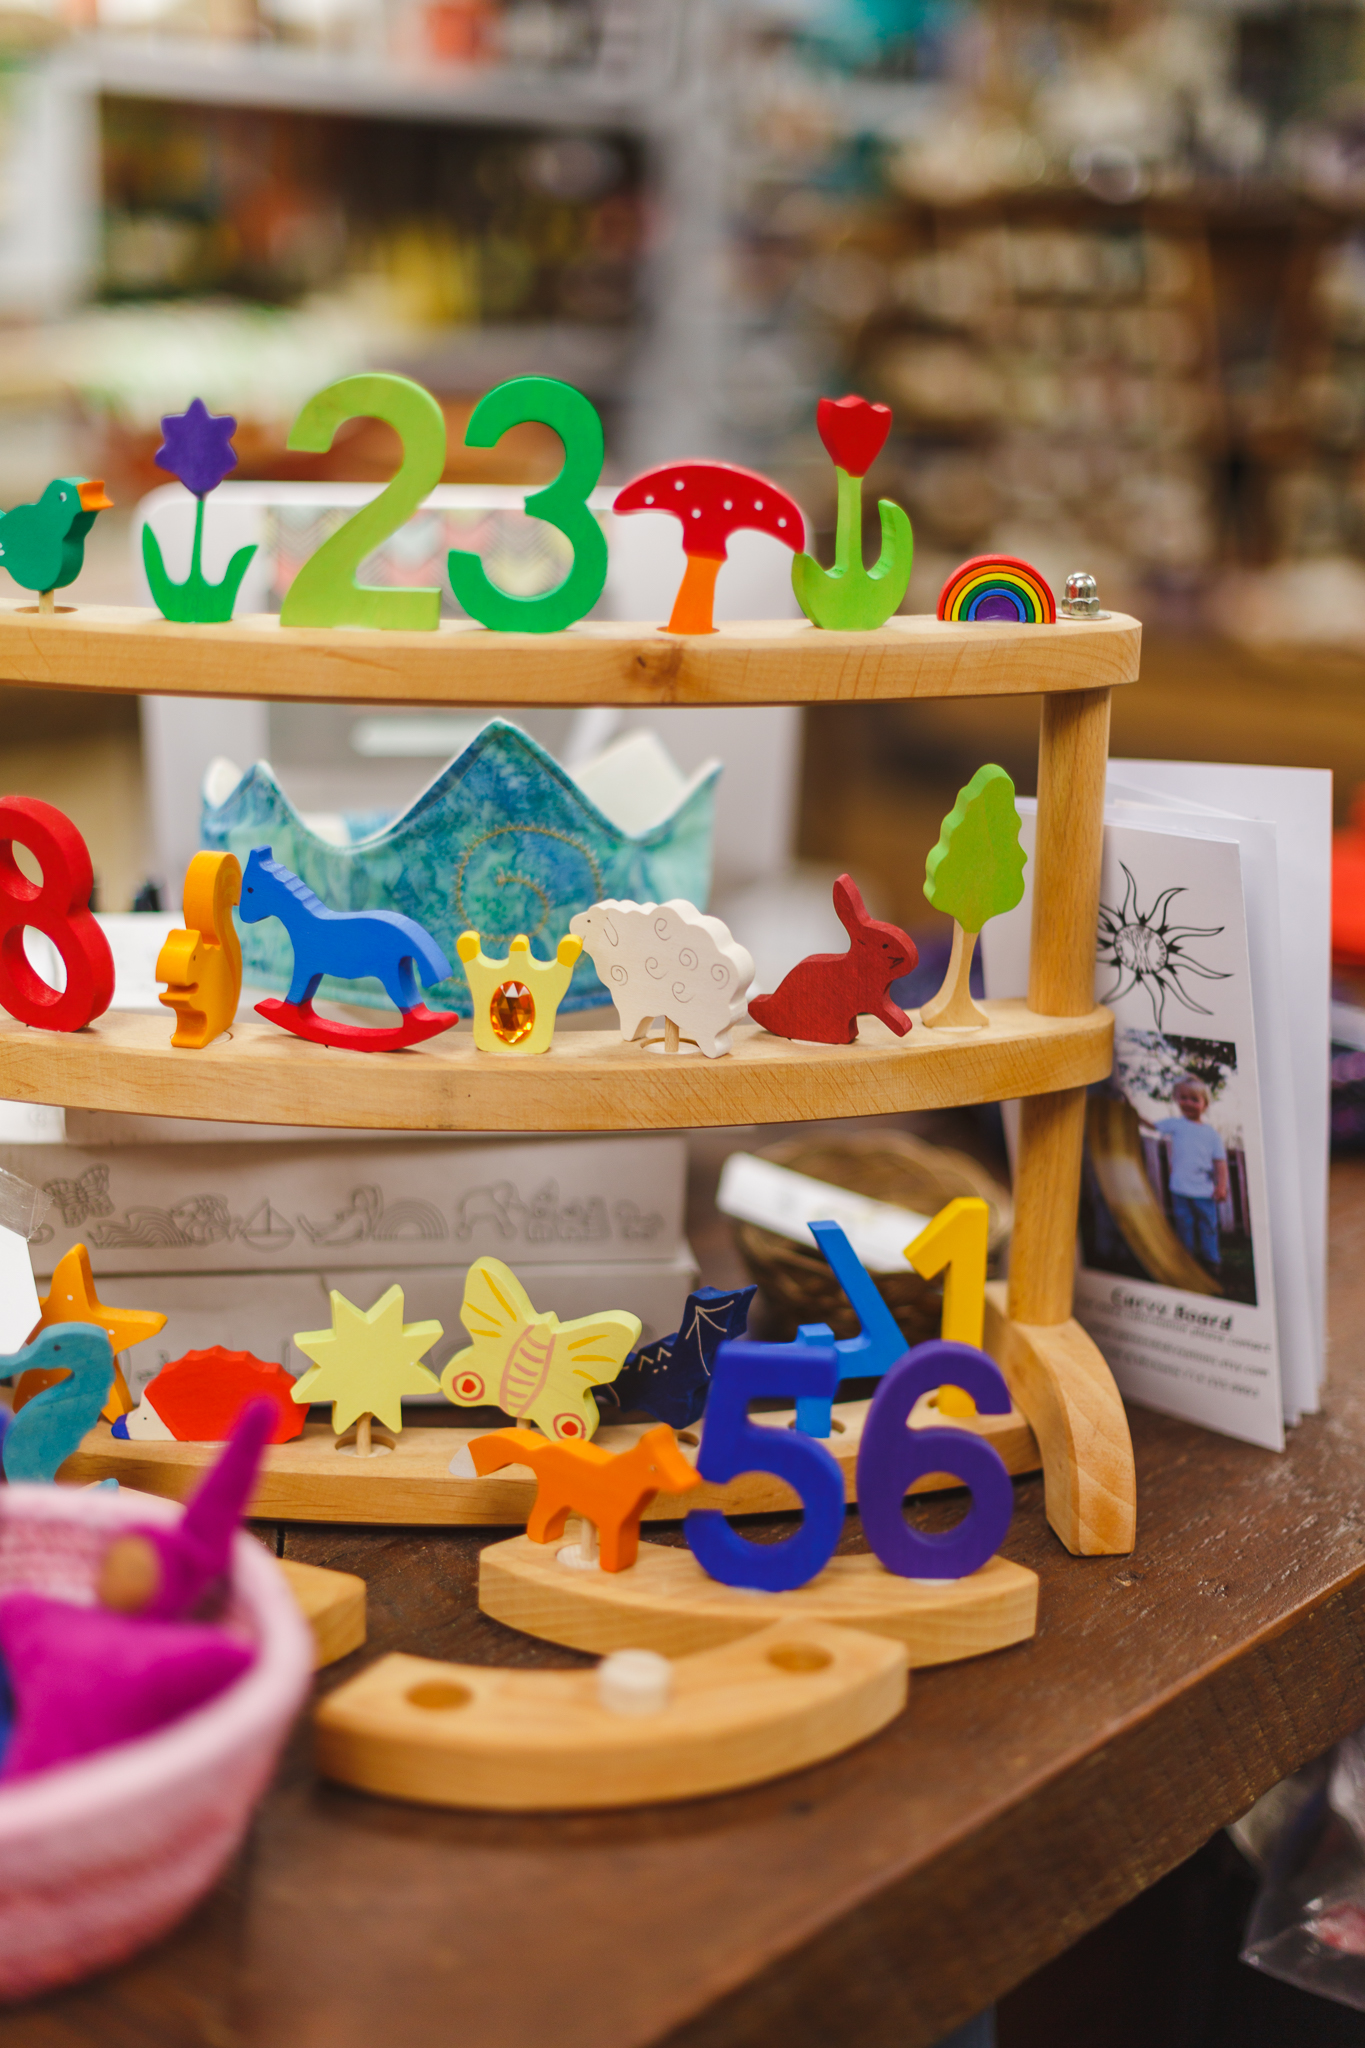
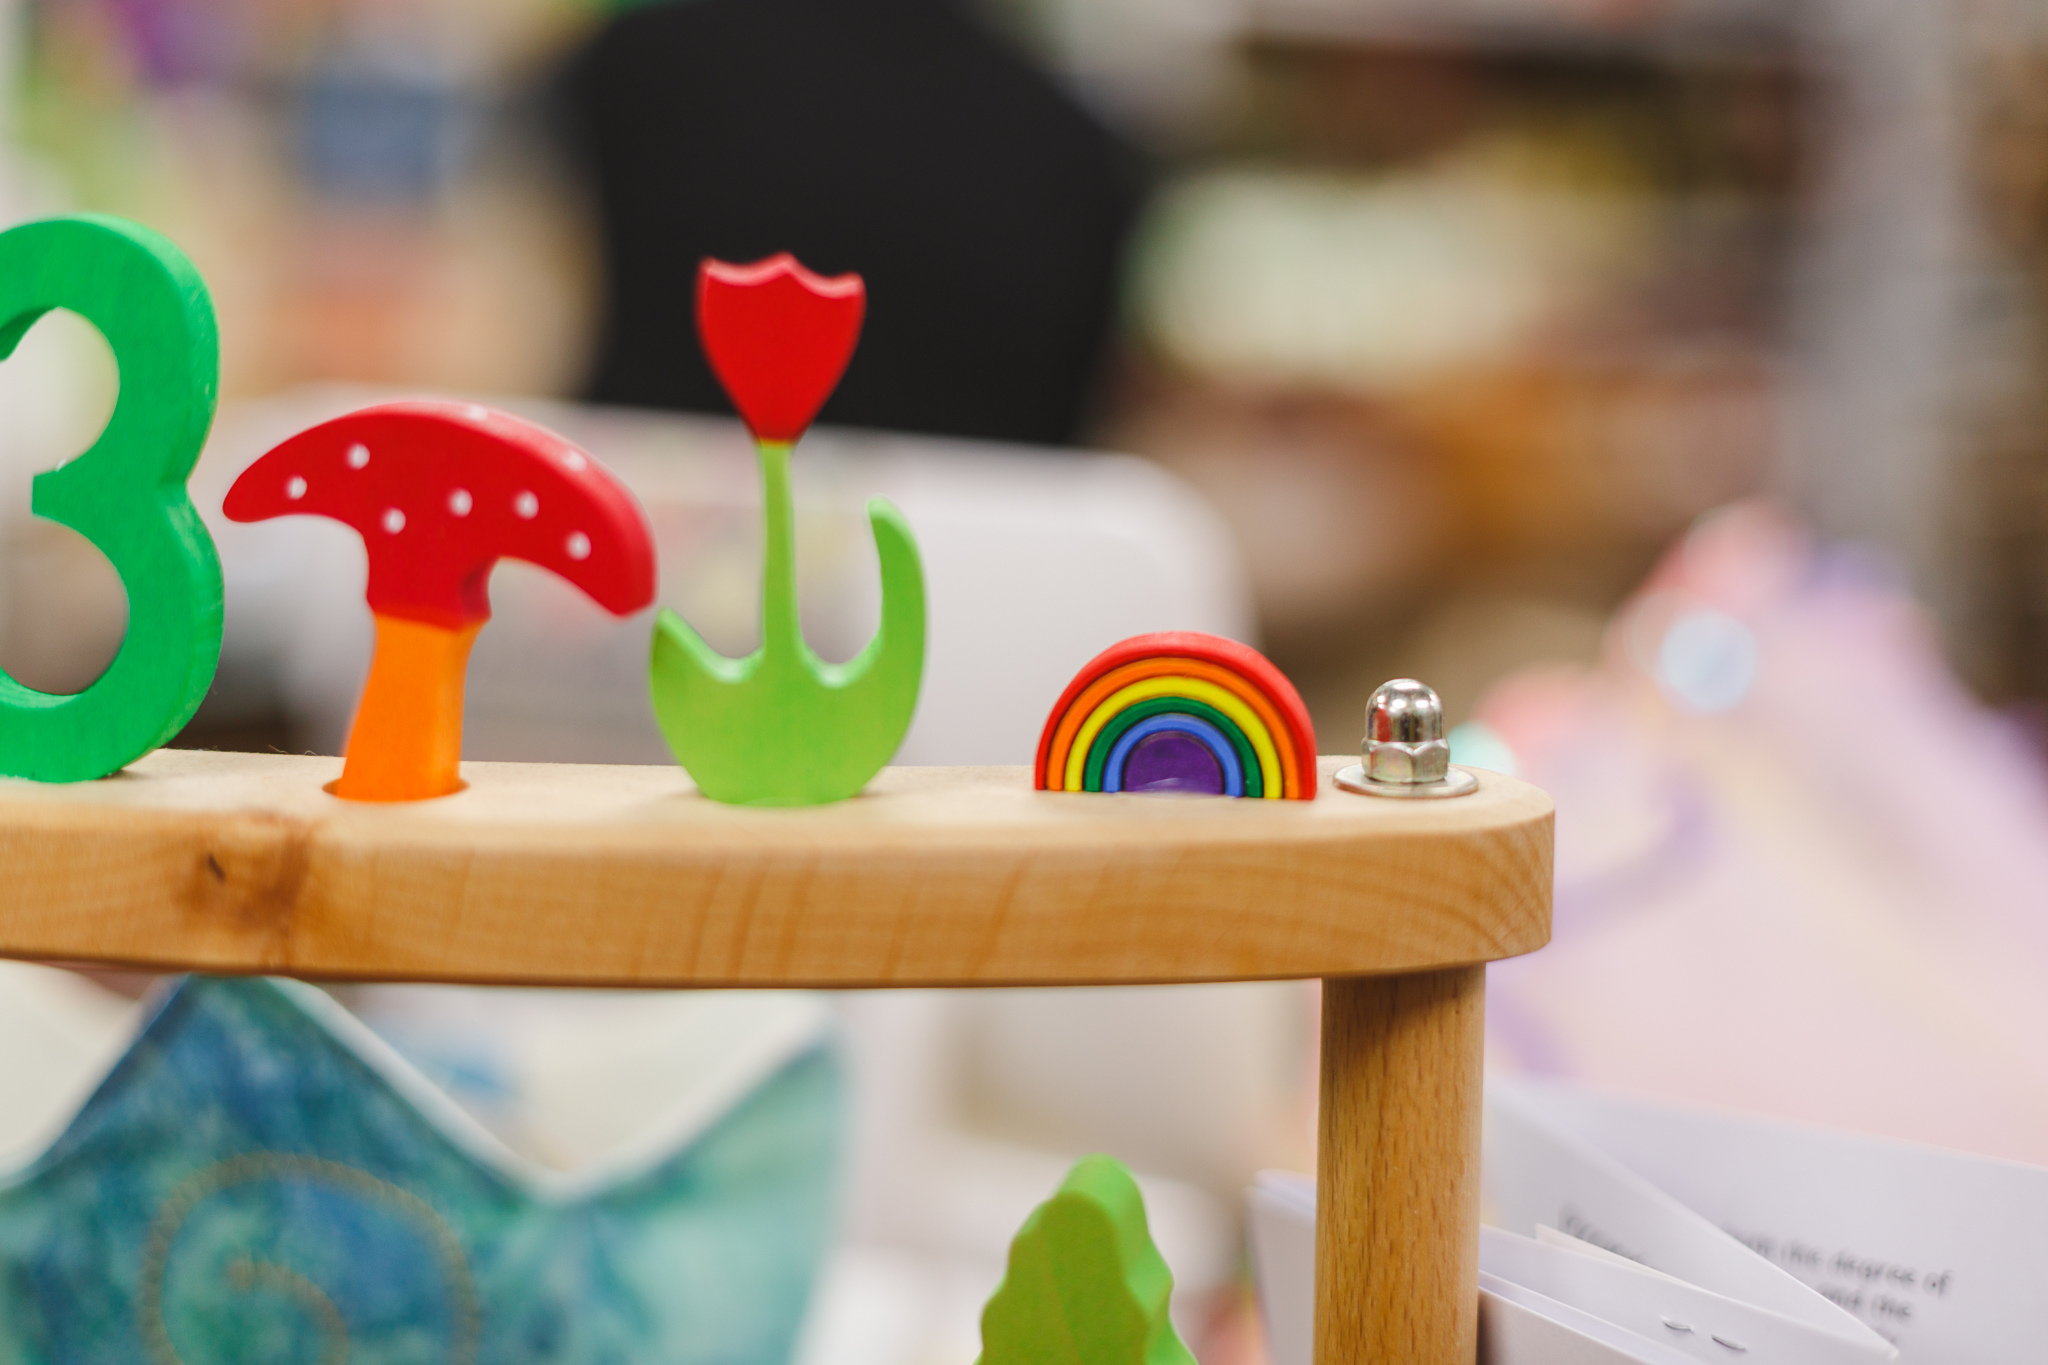
I know that we will be going here for holiday shopping. From the carved wood toys to Nevada County stickers, all sorts of treasures are waiting to be found. Asia and I are bringing new things every couple of weeks. If you have a special order, let us know. We're excited to be back on the shelves at this special store!
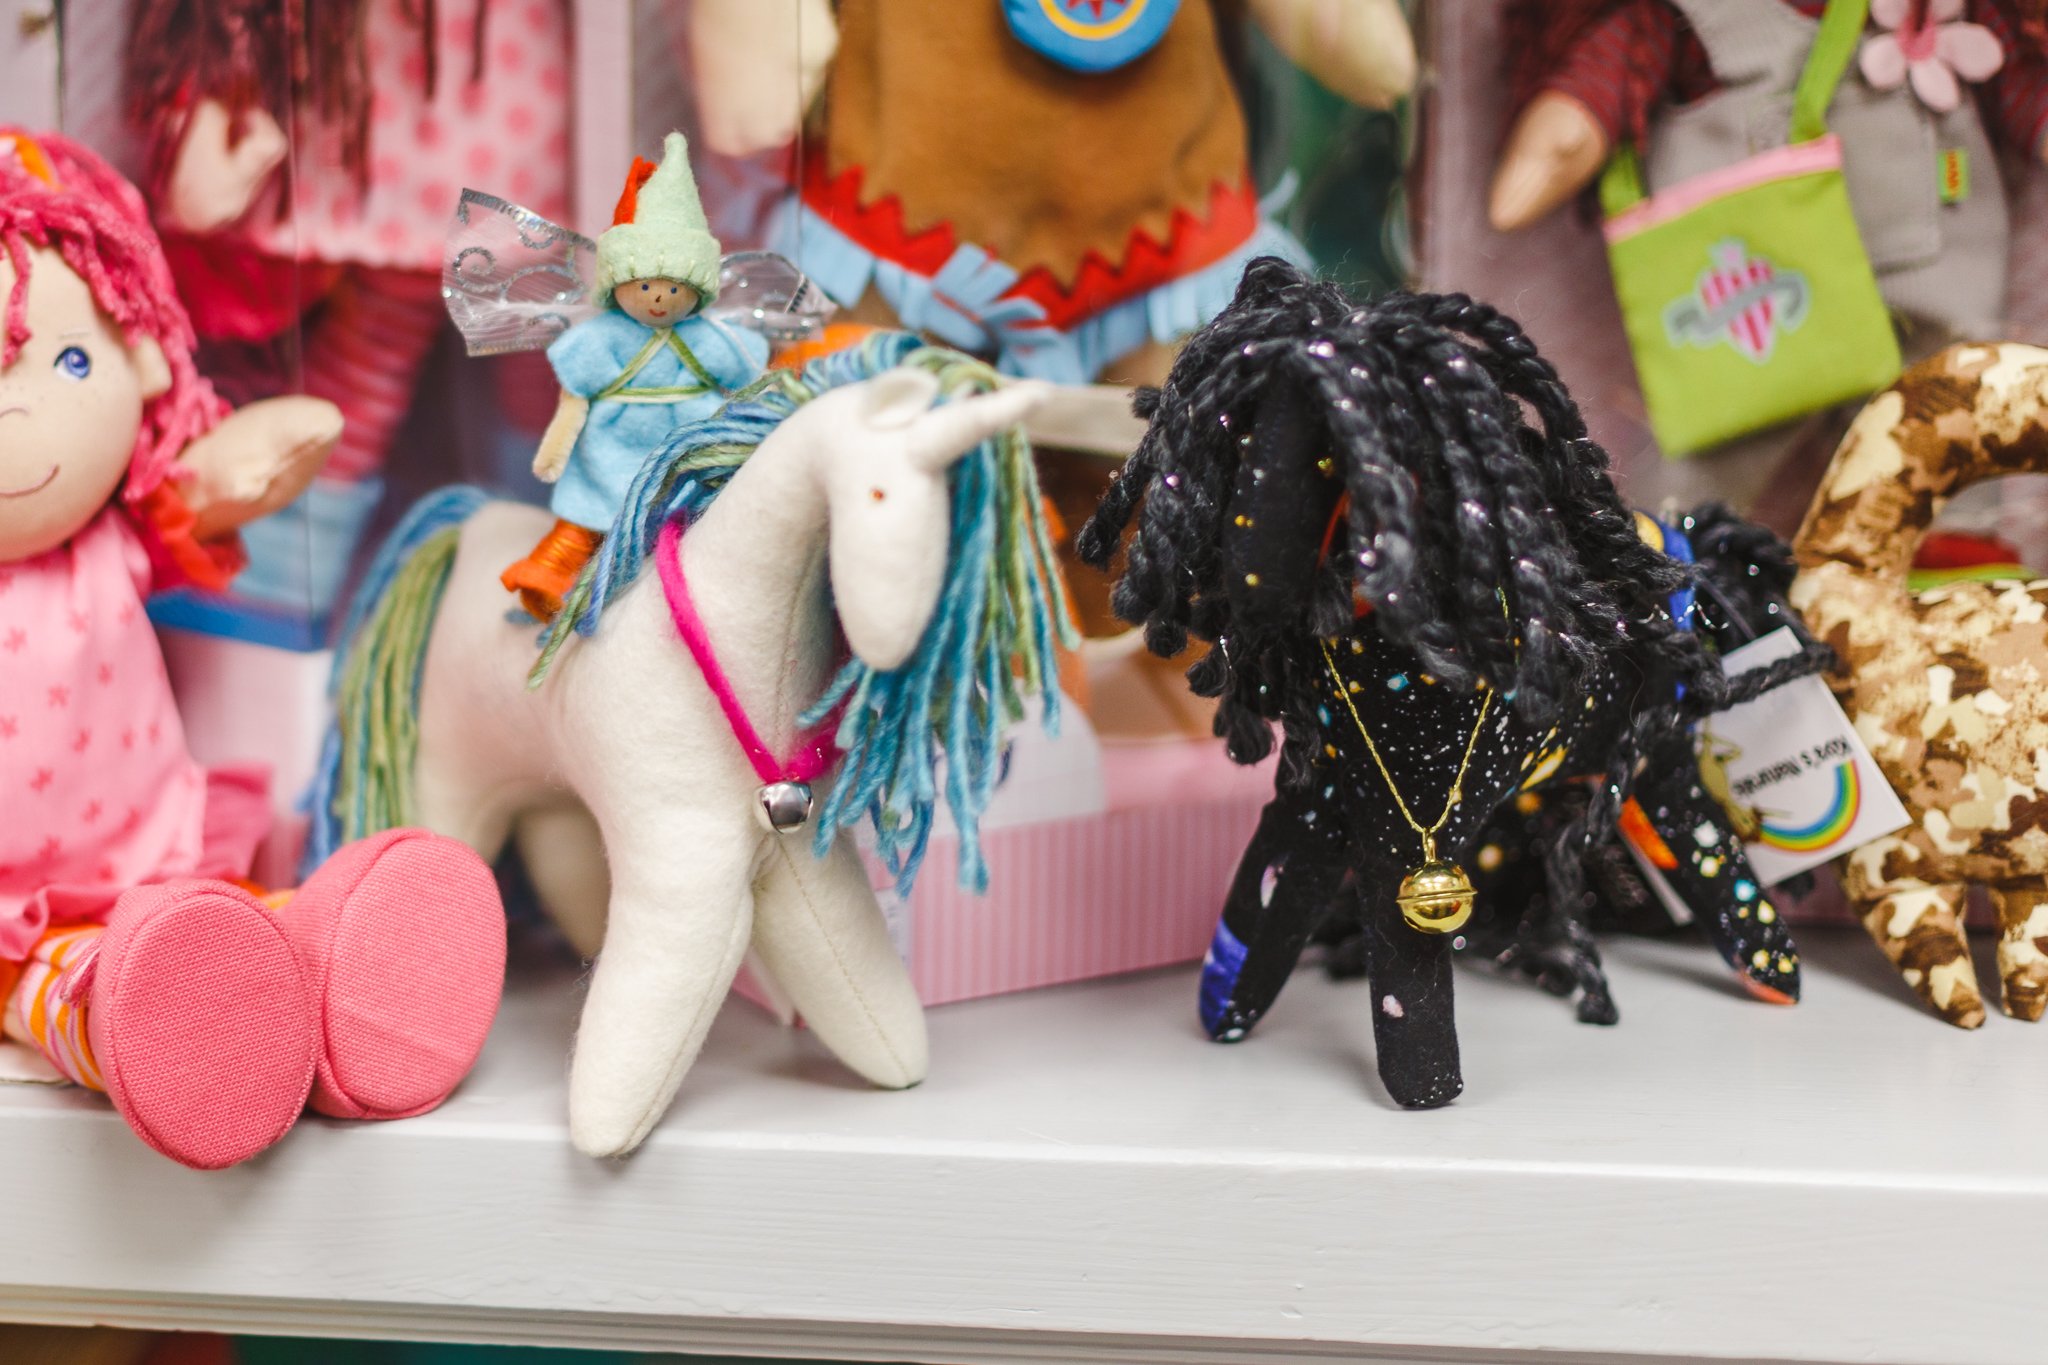
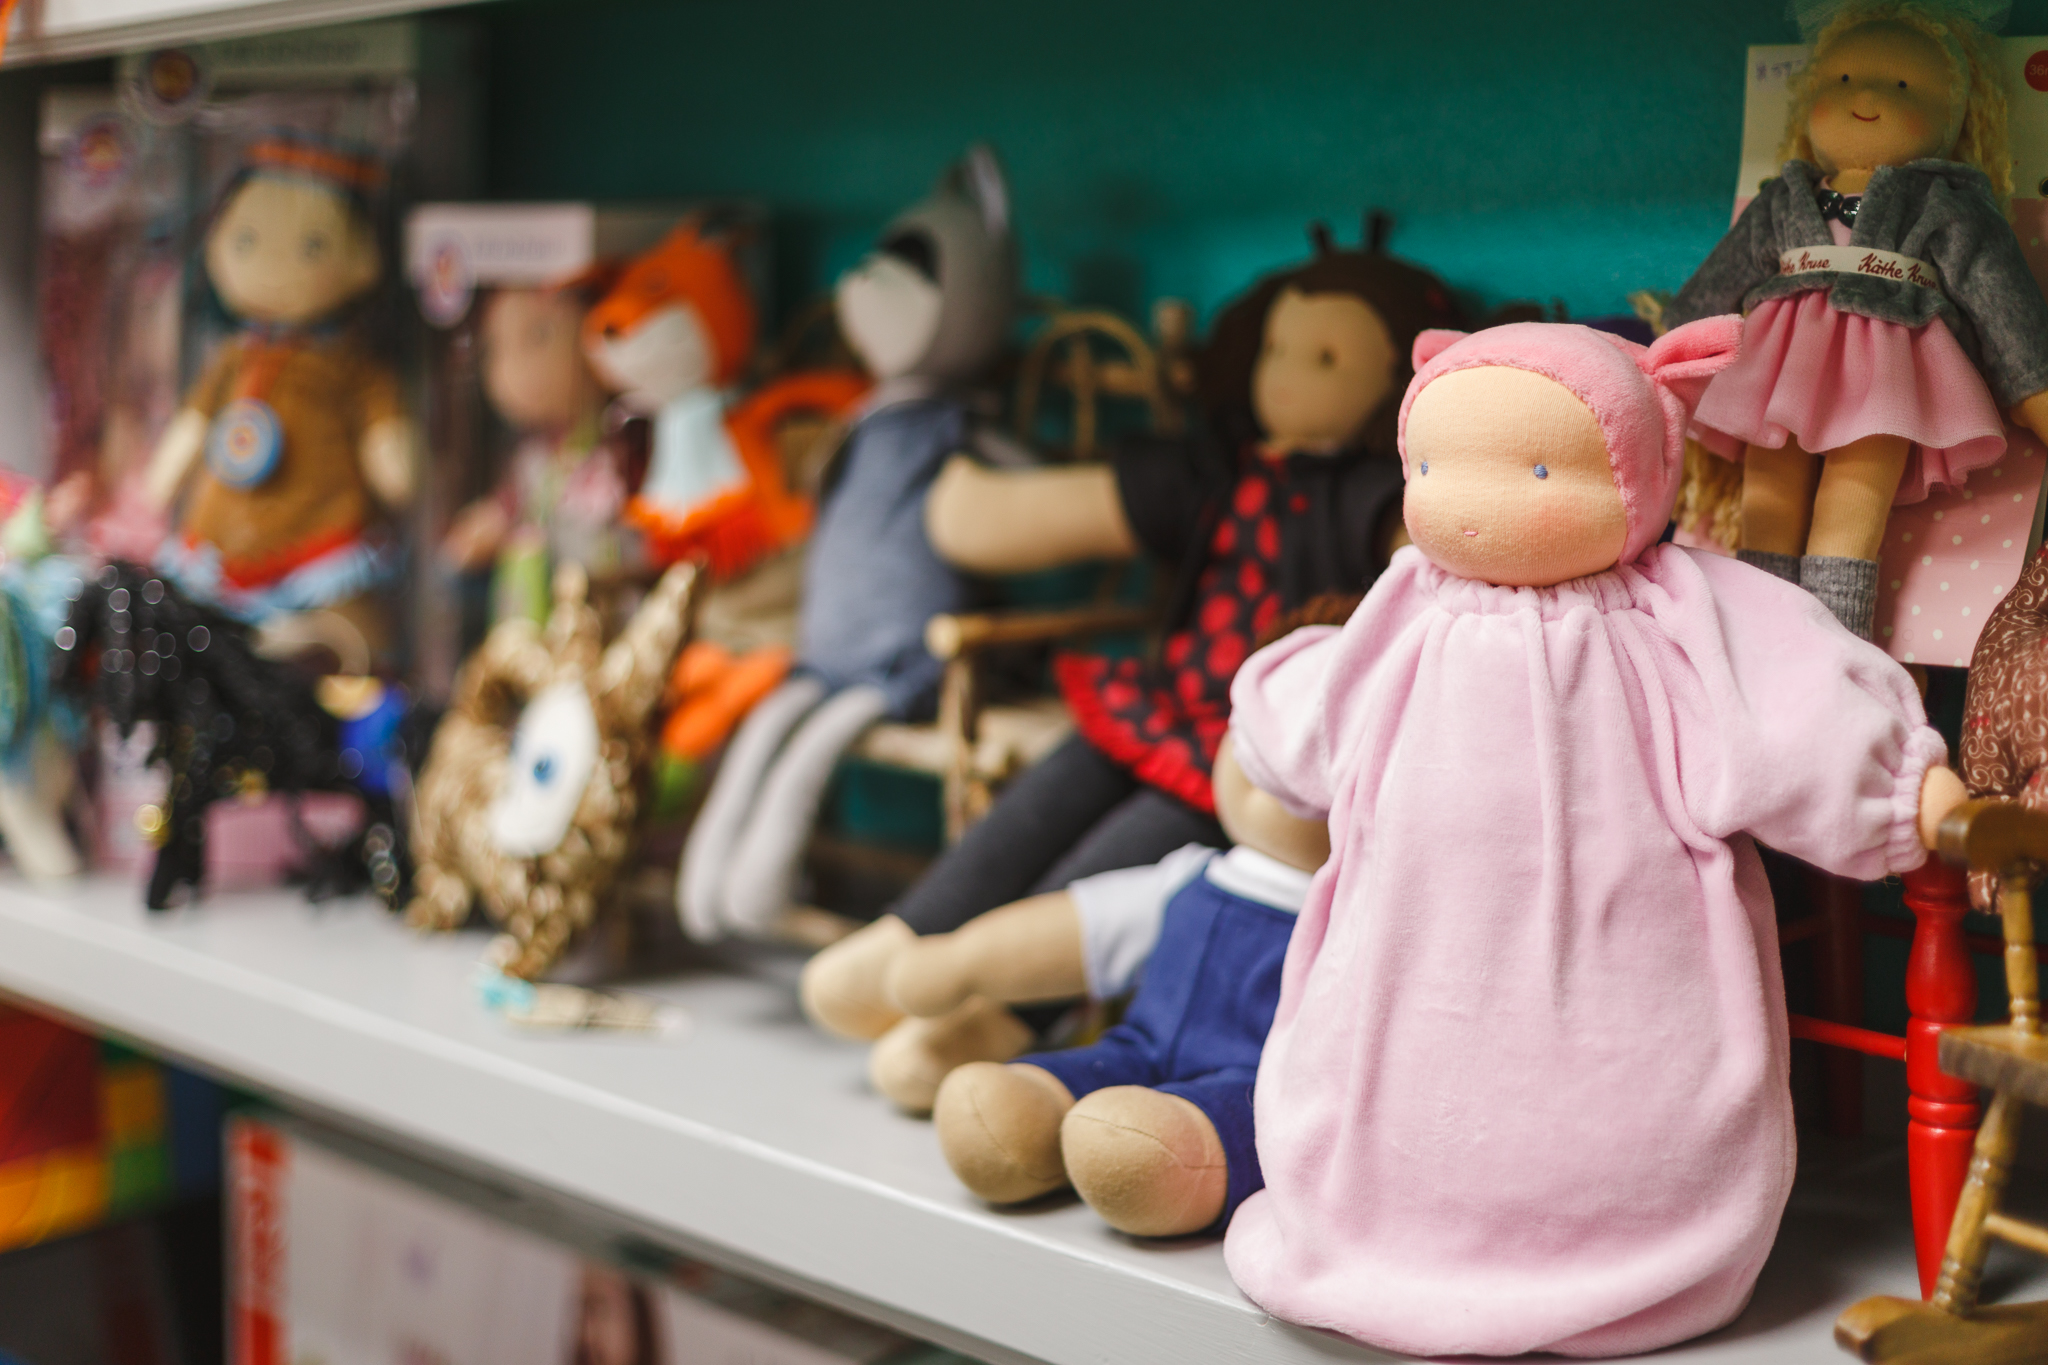
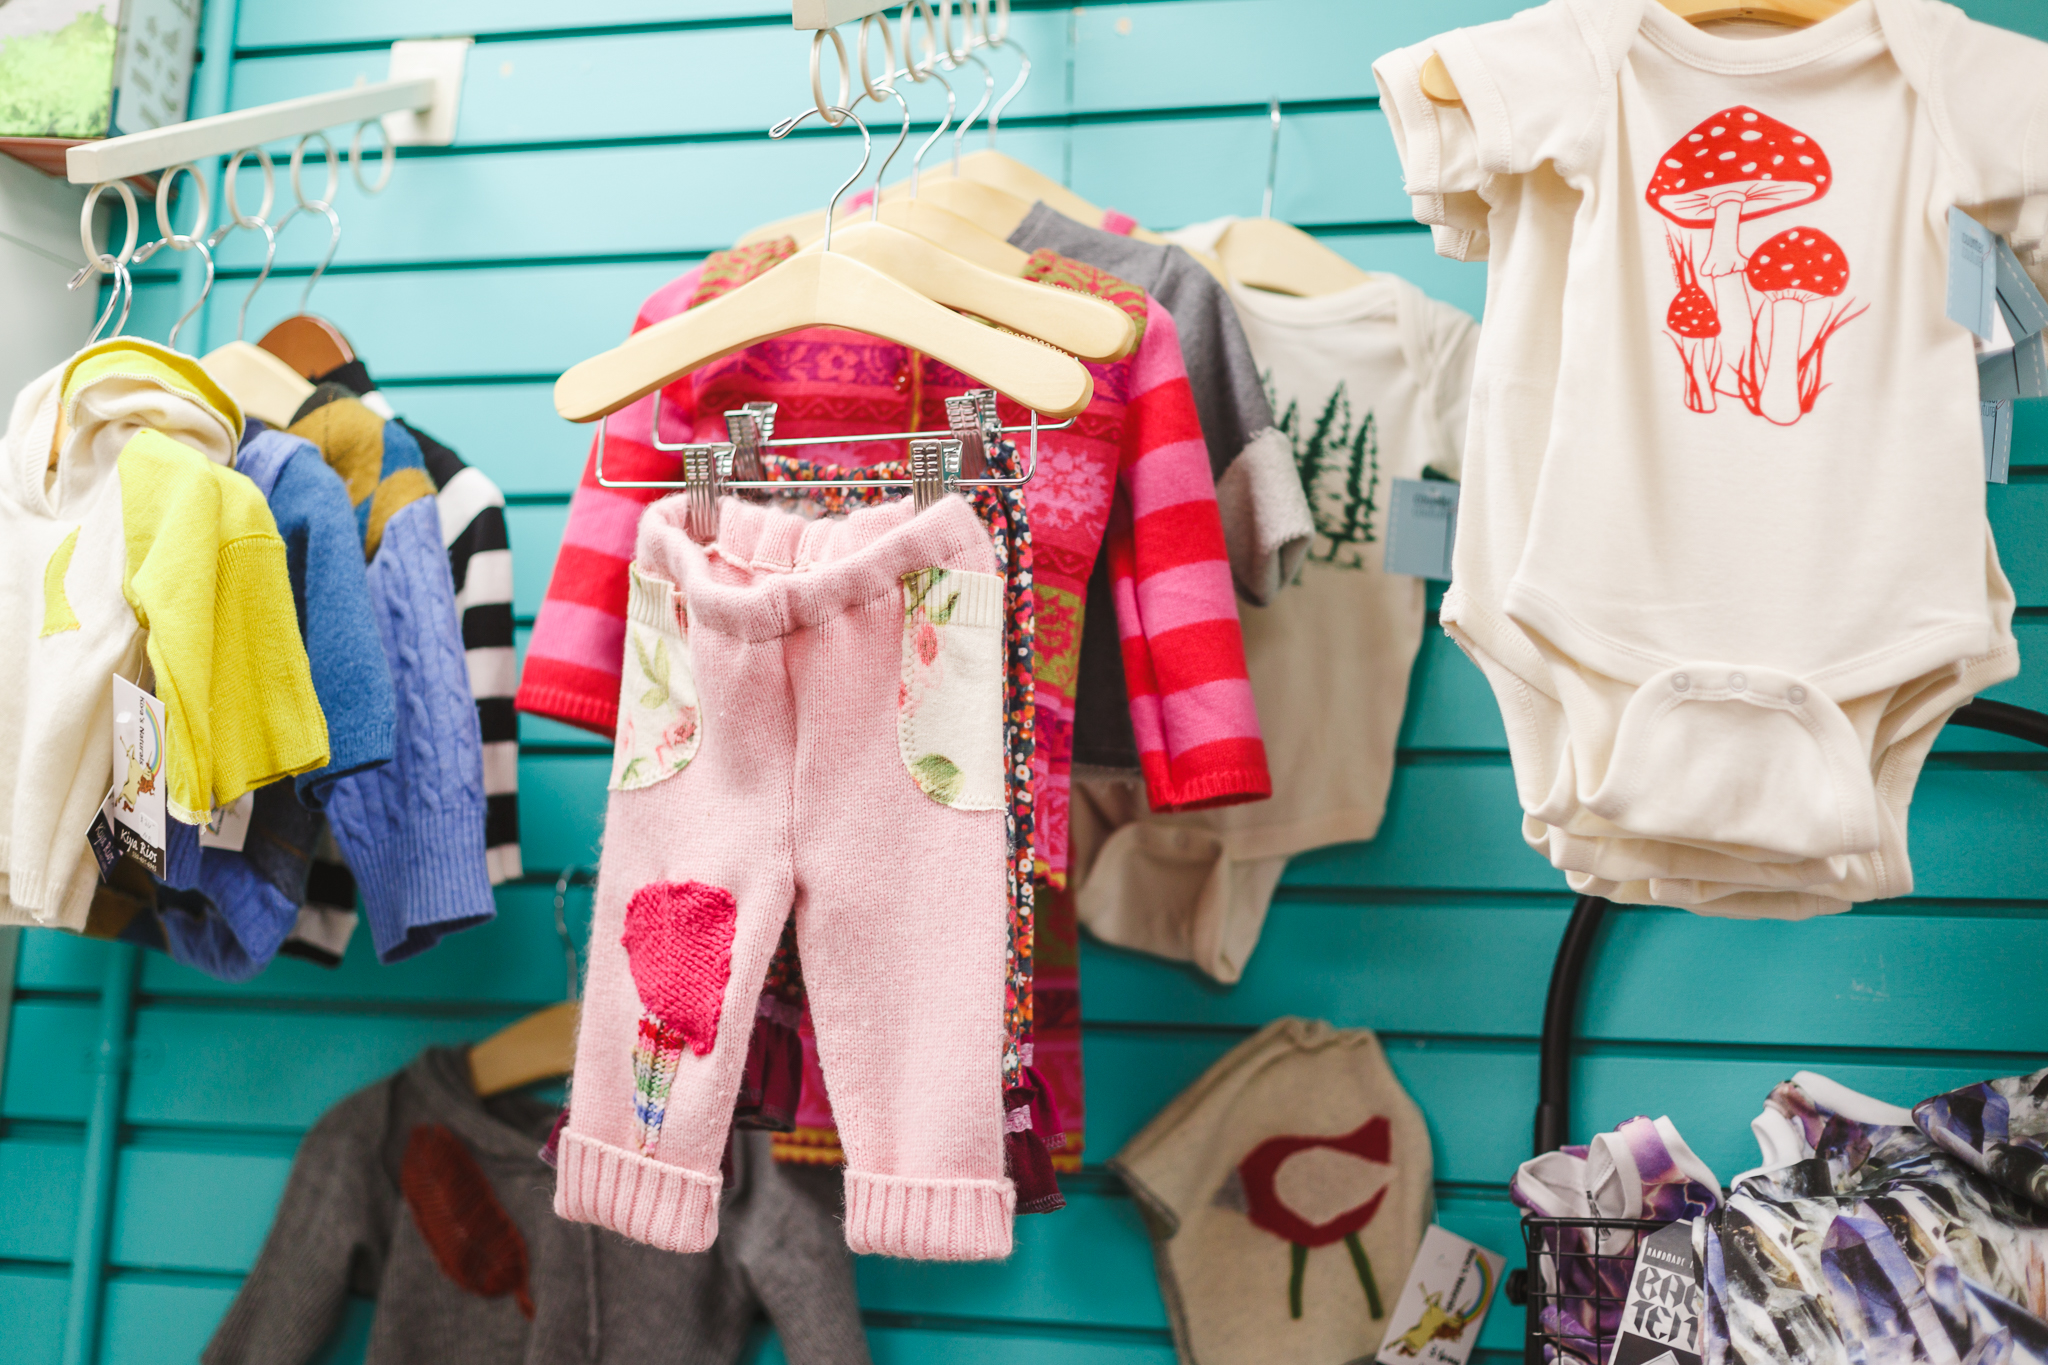
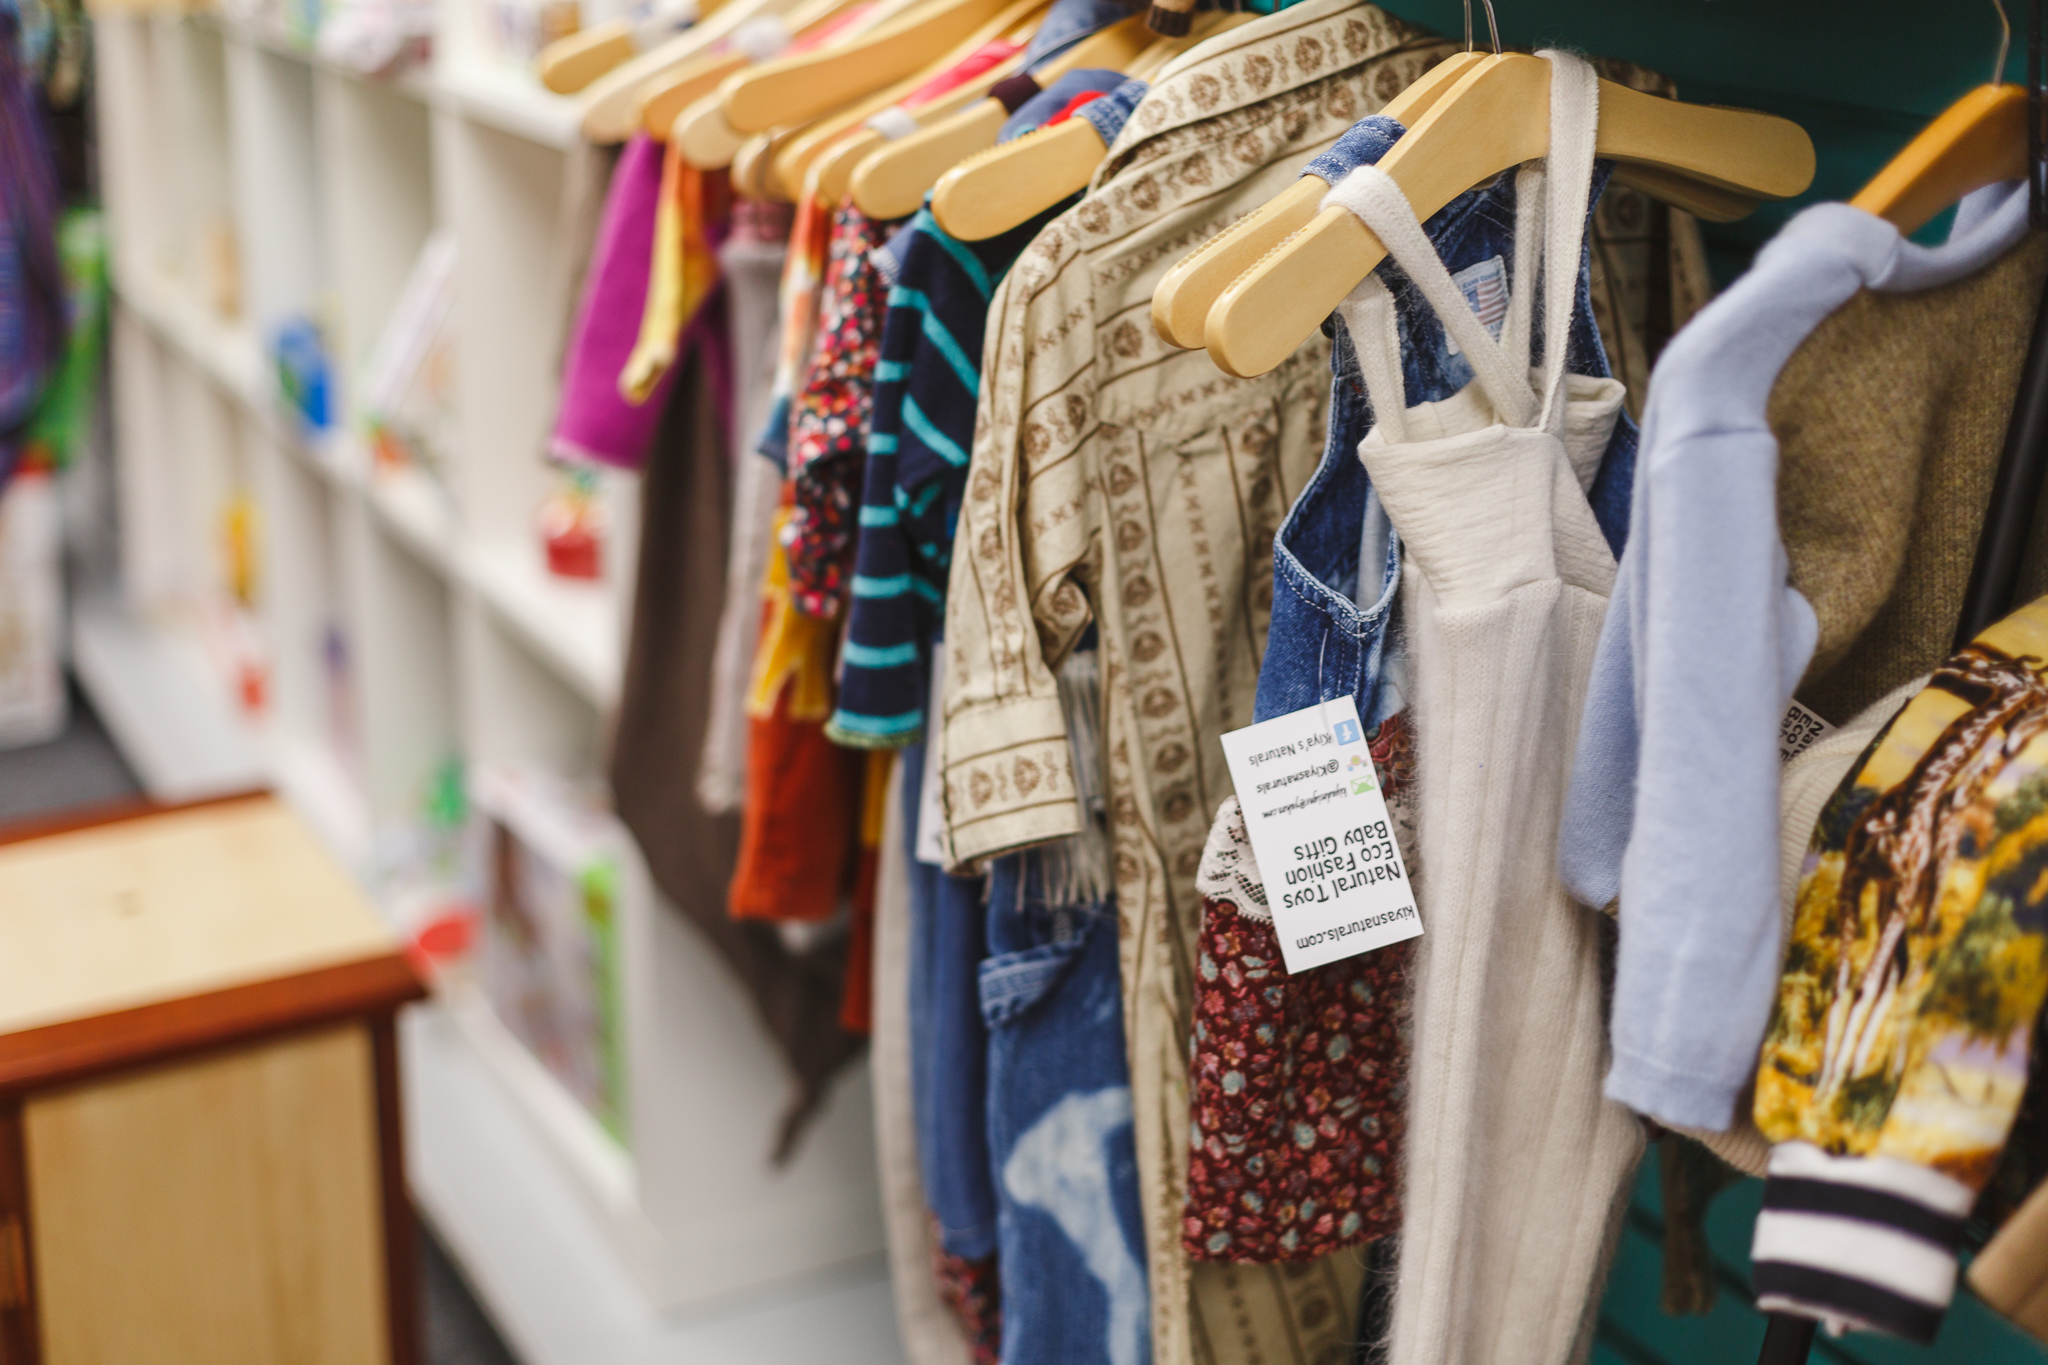
In addition to the other goodies, Kiya sews clothing for children and adults by upcycling quality clothing. Her styes are eclectic and fun.
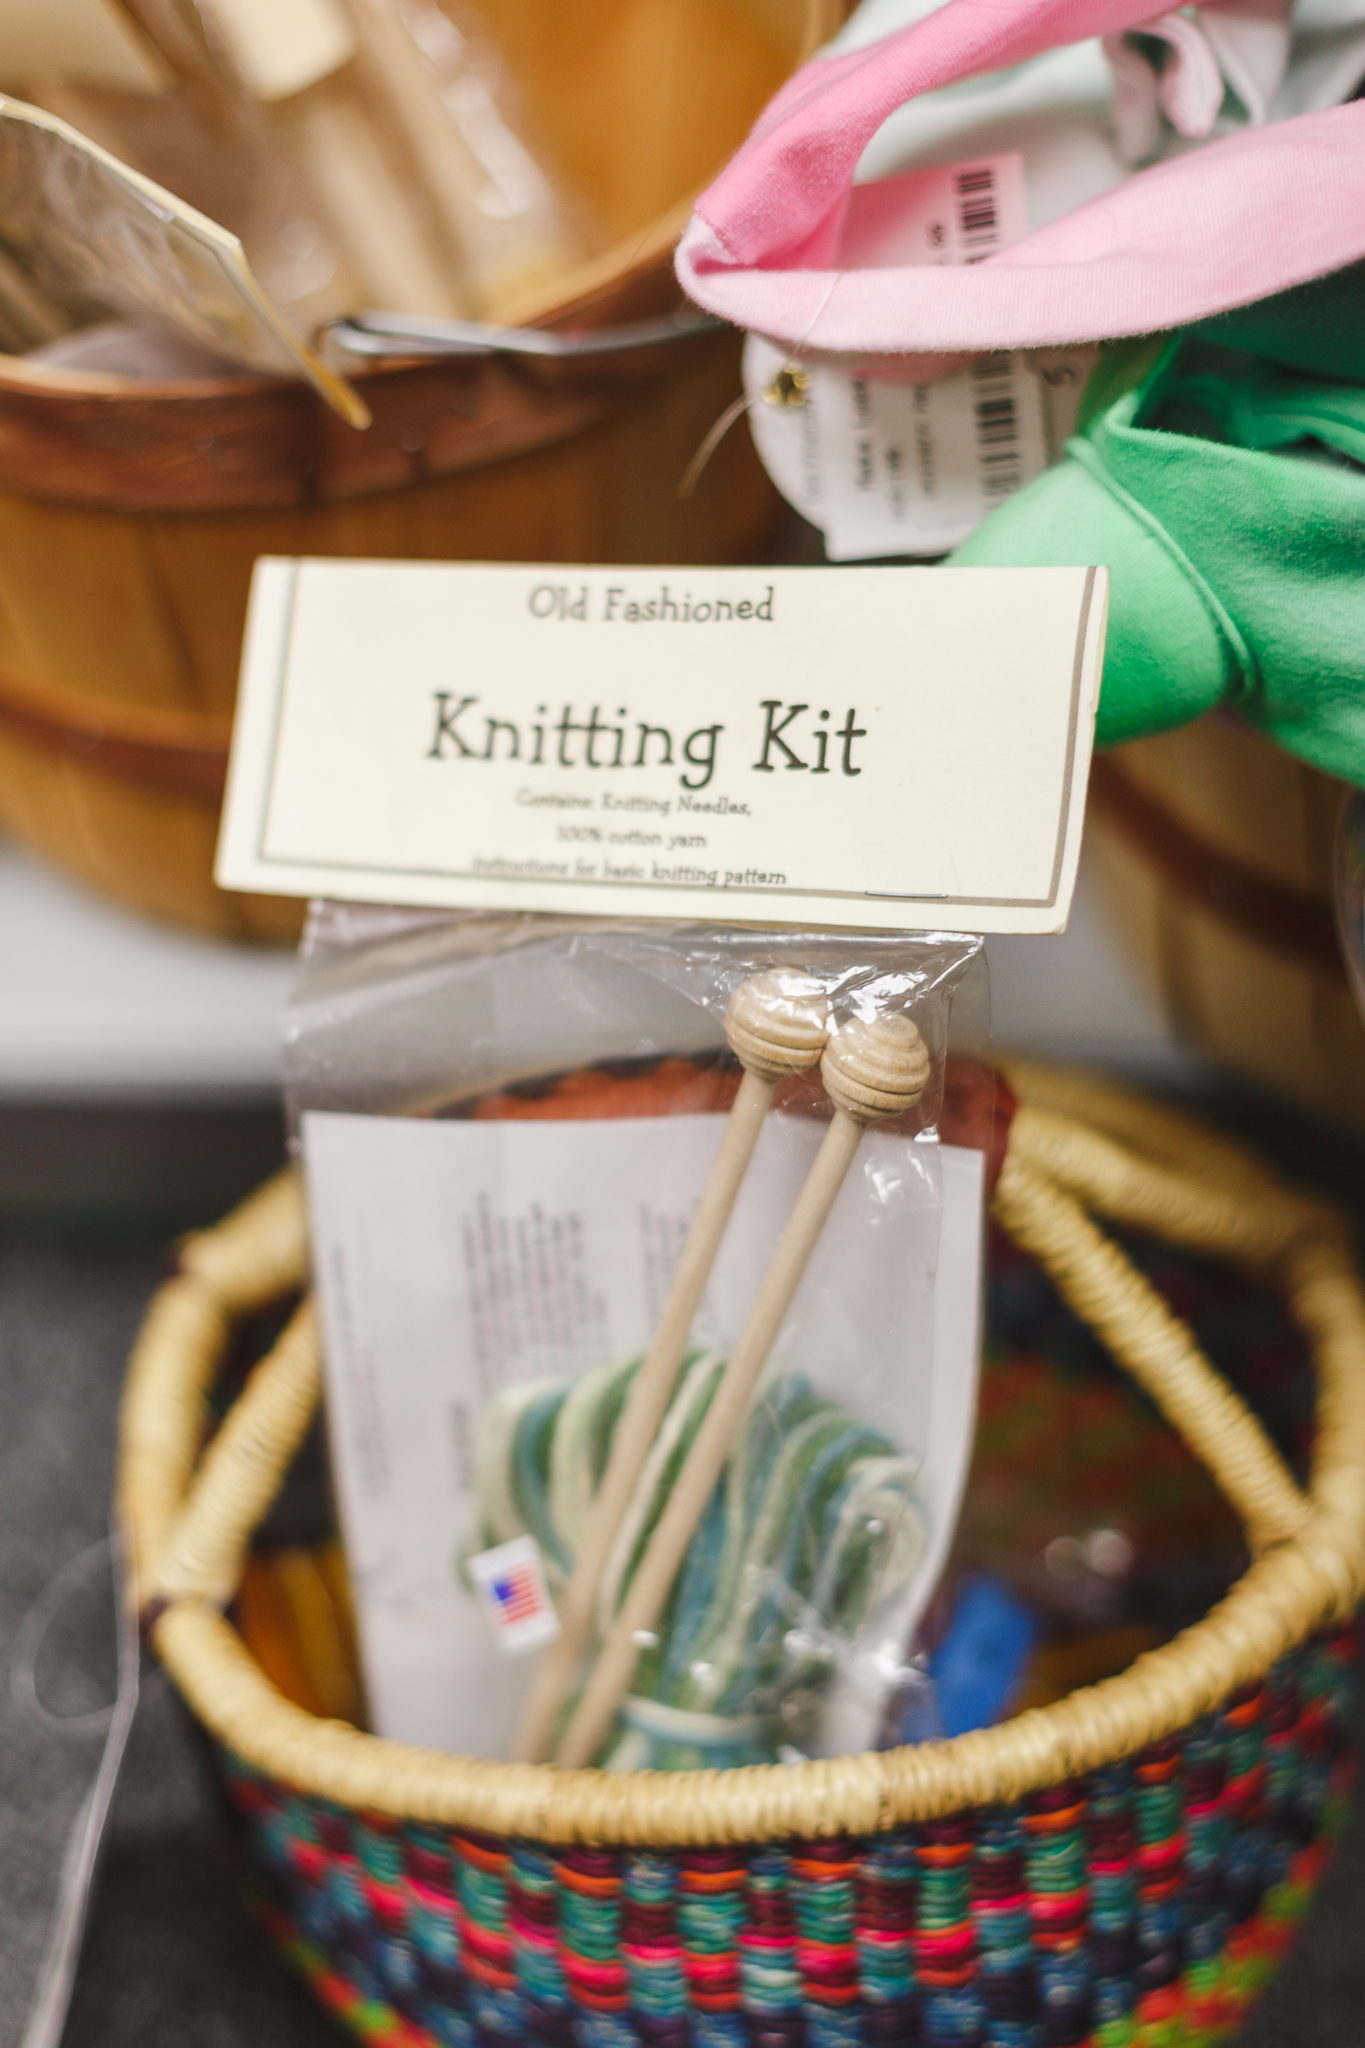
Not all of the toys featured here are Fairy Crafts- I love the little soft star babies, knitting kits, and pegs for birthday rings. We are constantly inspired by new ideas. The little knitting kit is a brilliant way to inspire a young knitter.
We look enjoy being part of this a community of local artisans!

A Mermaid Birthday Gift
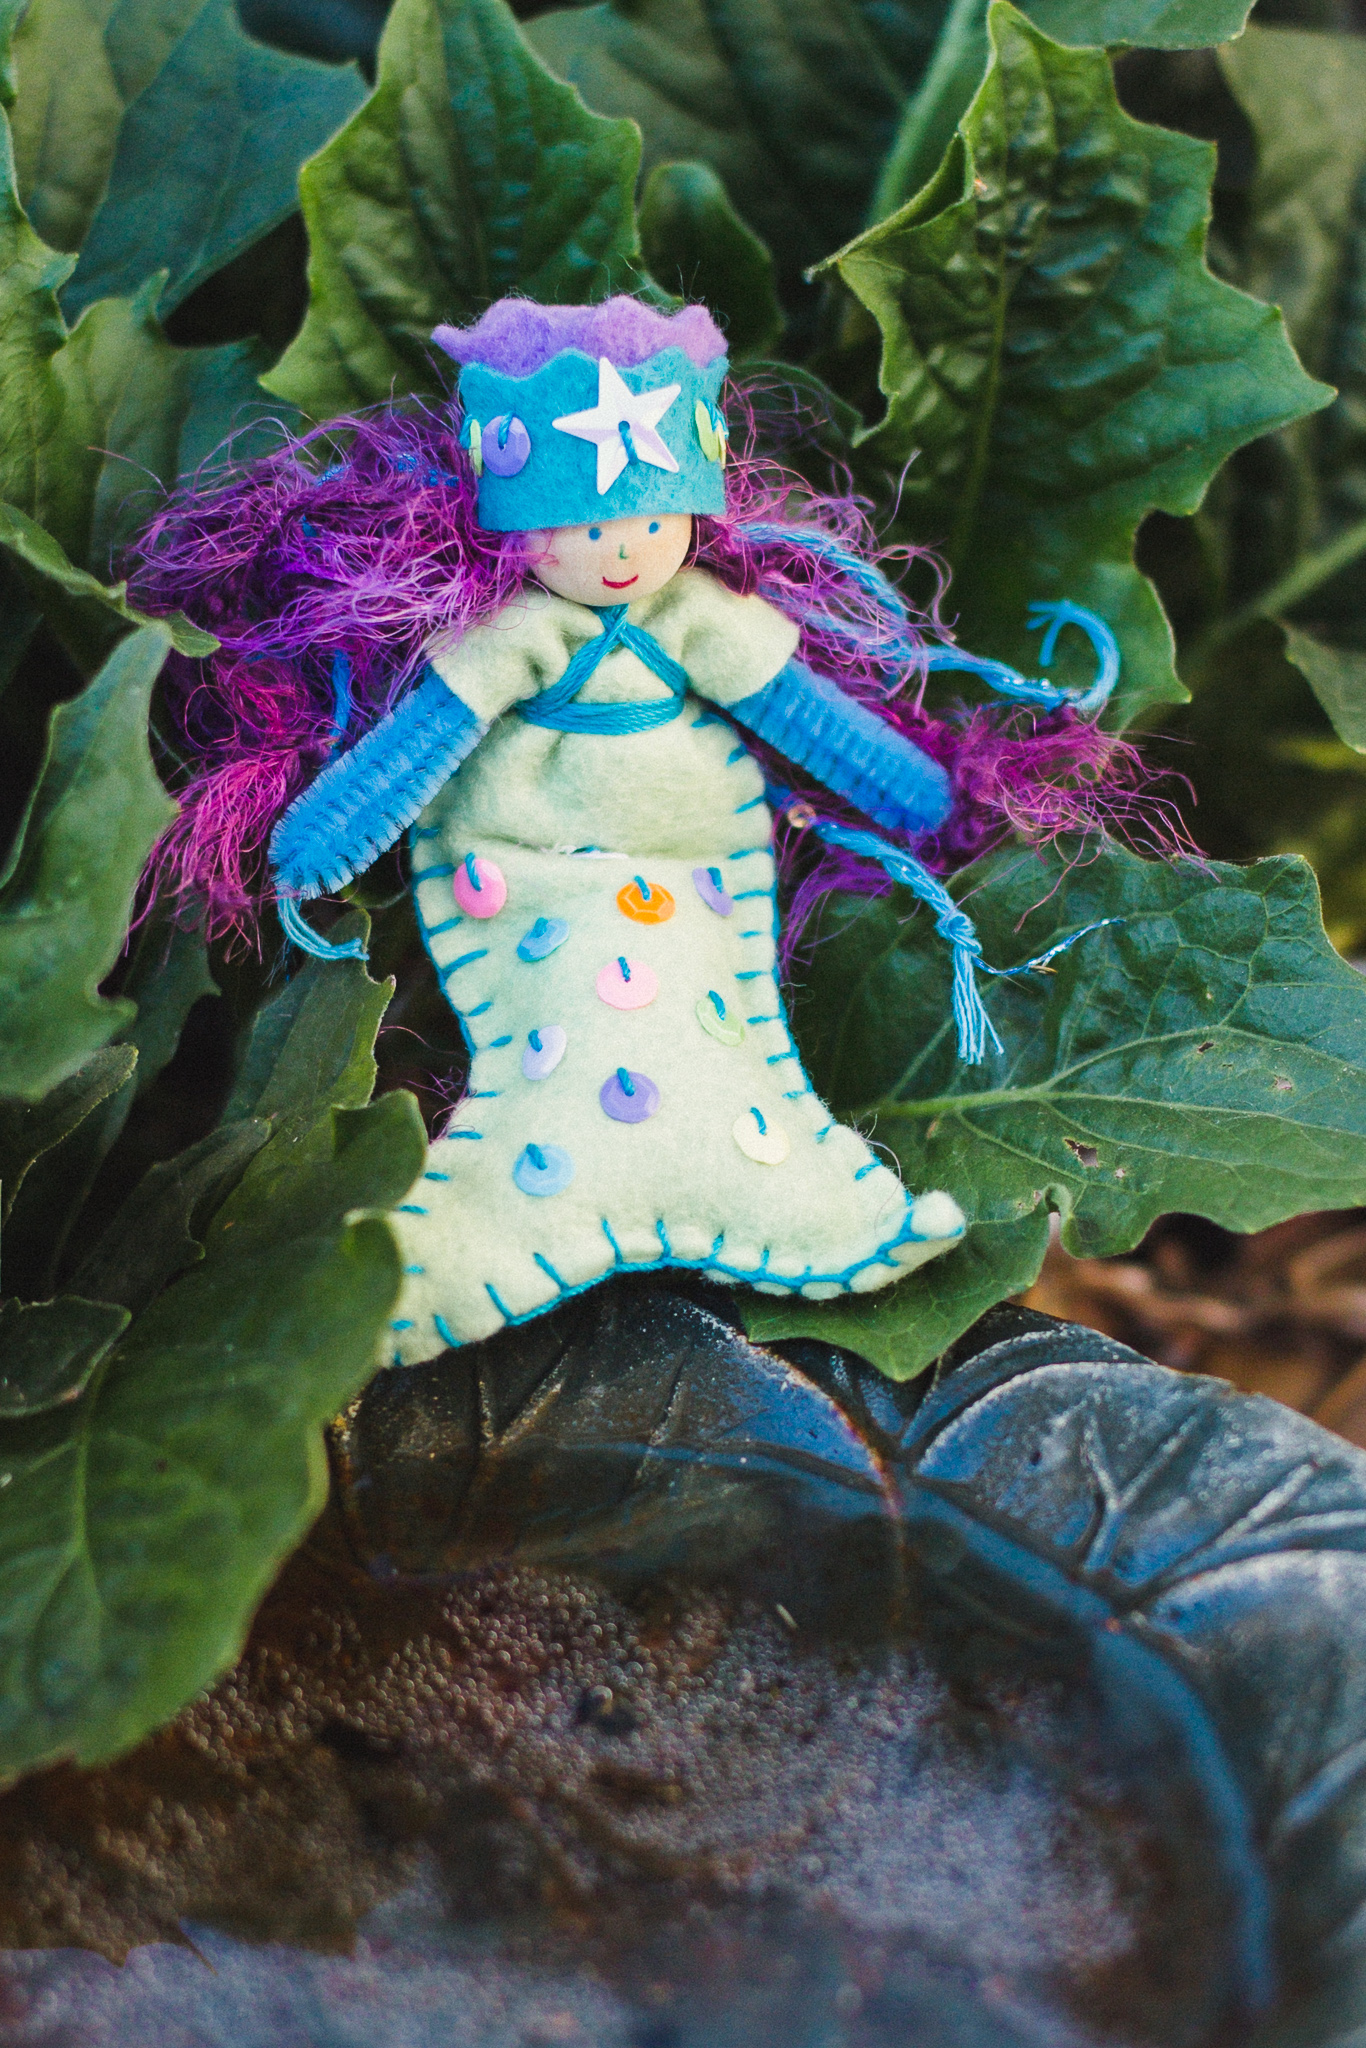
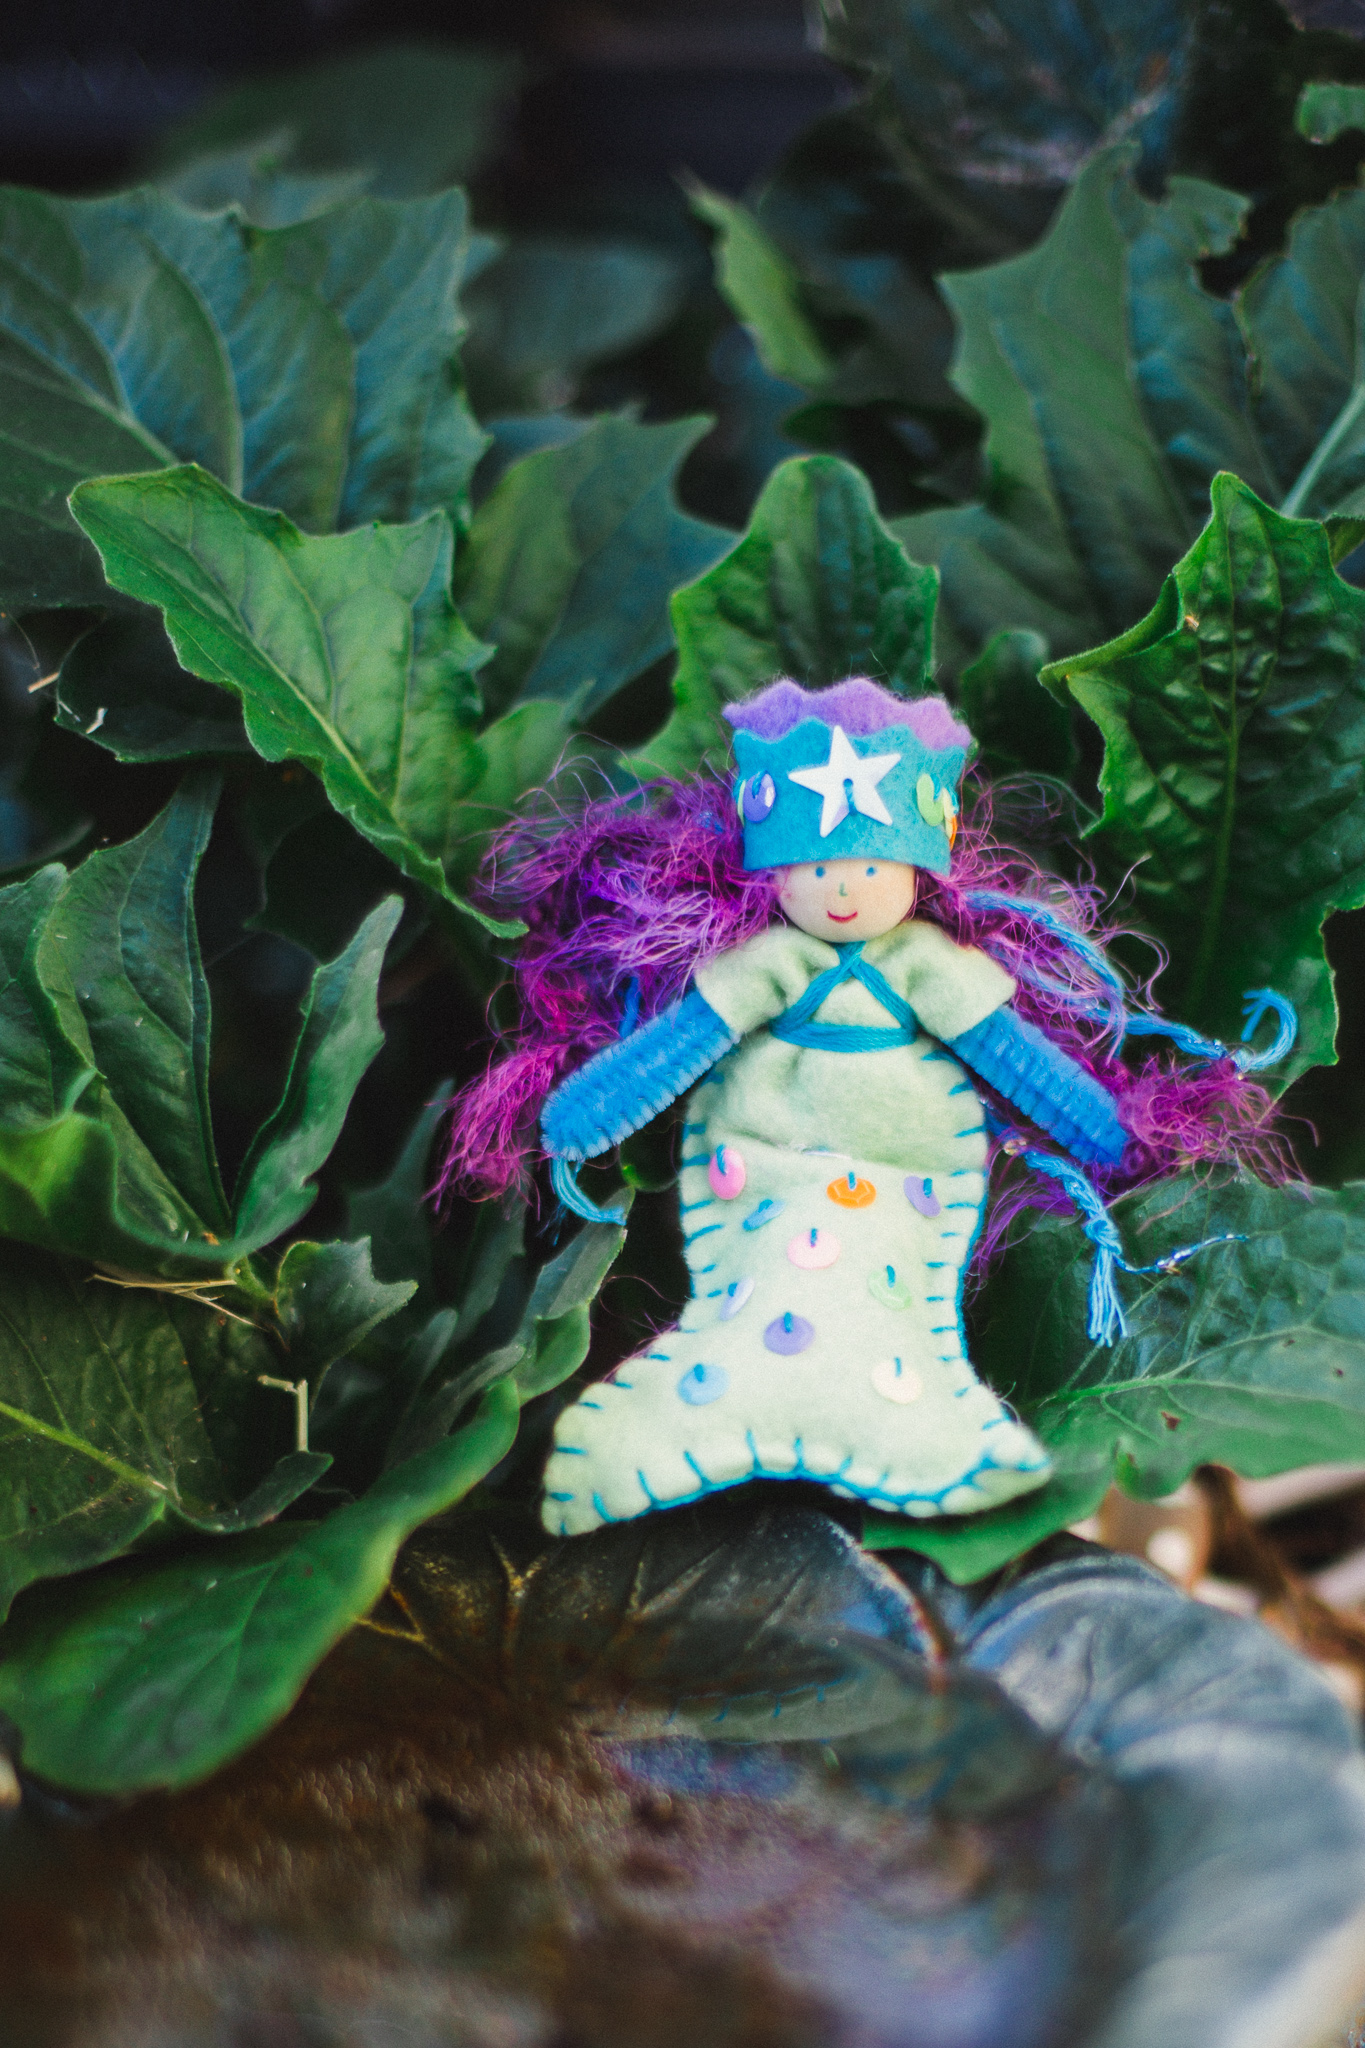
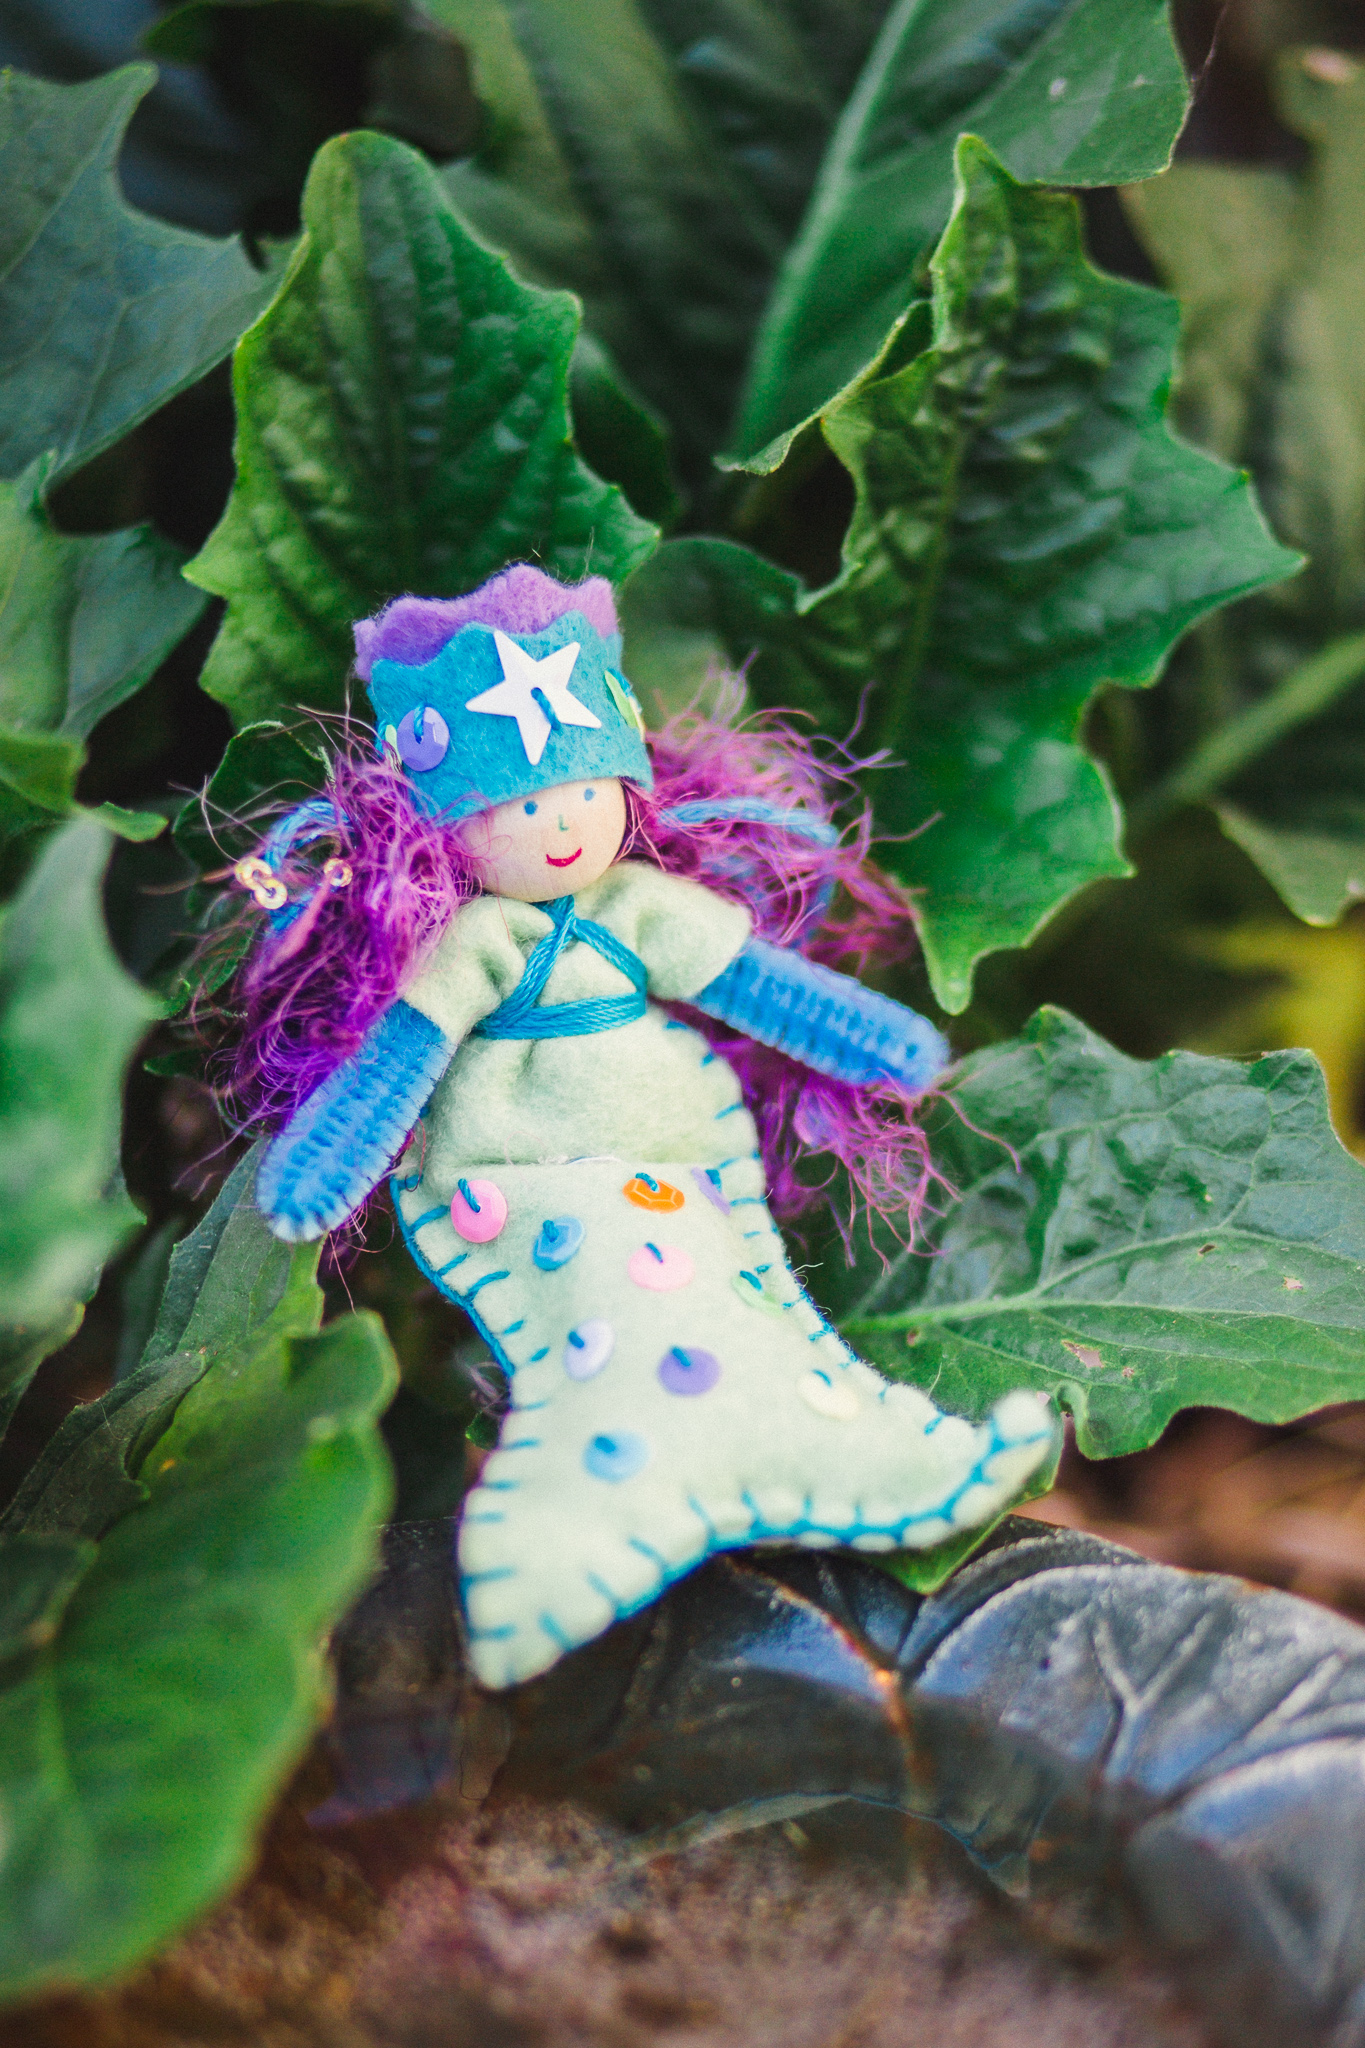
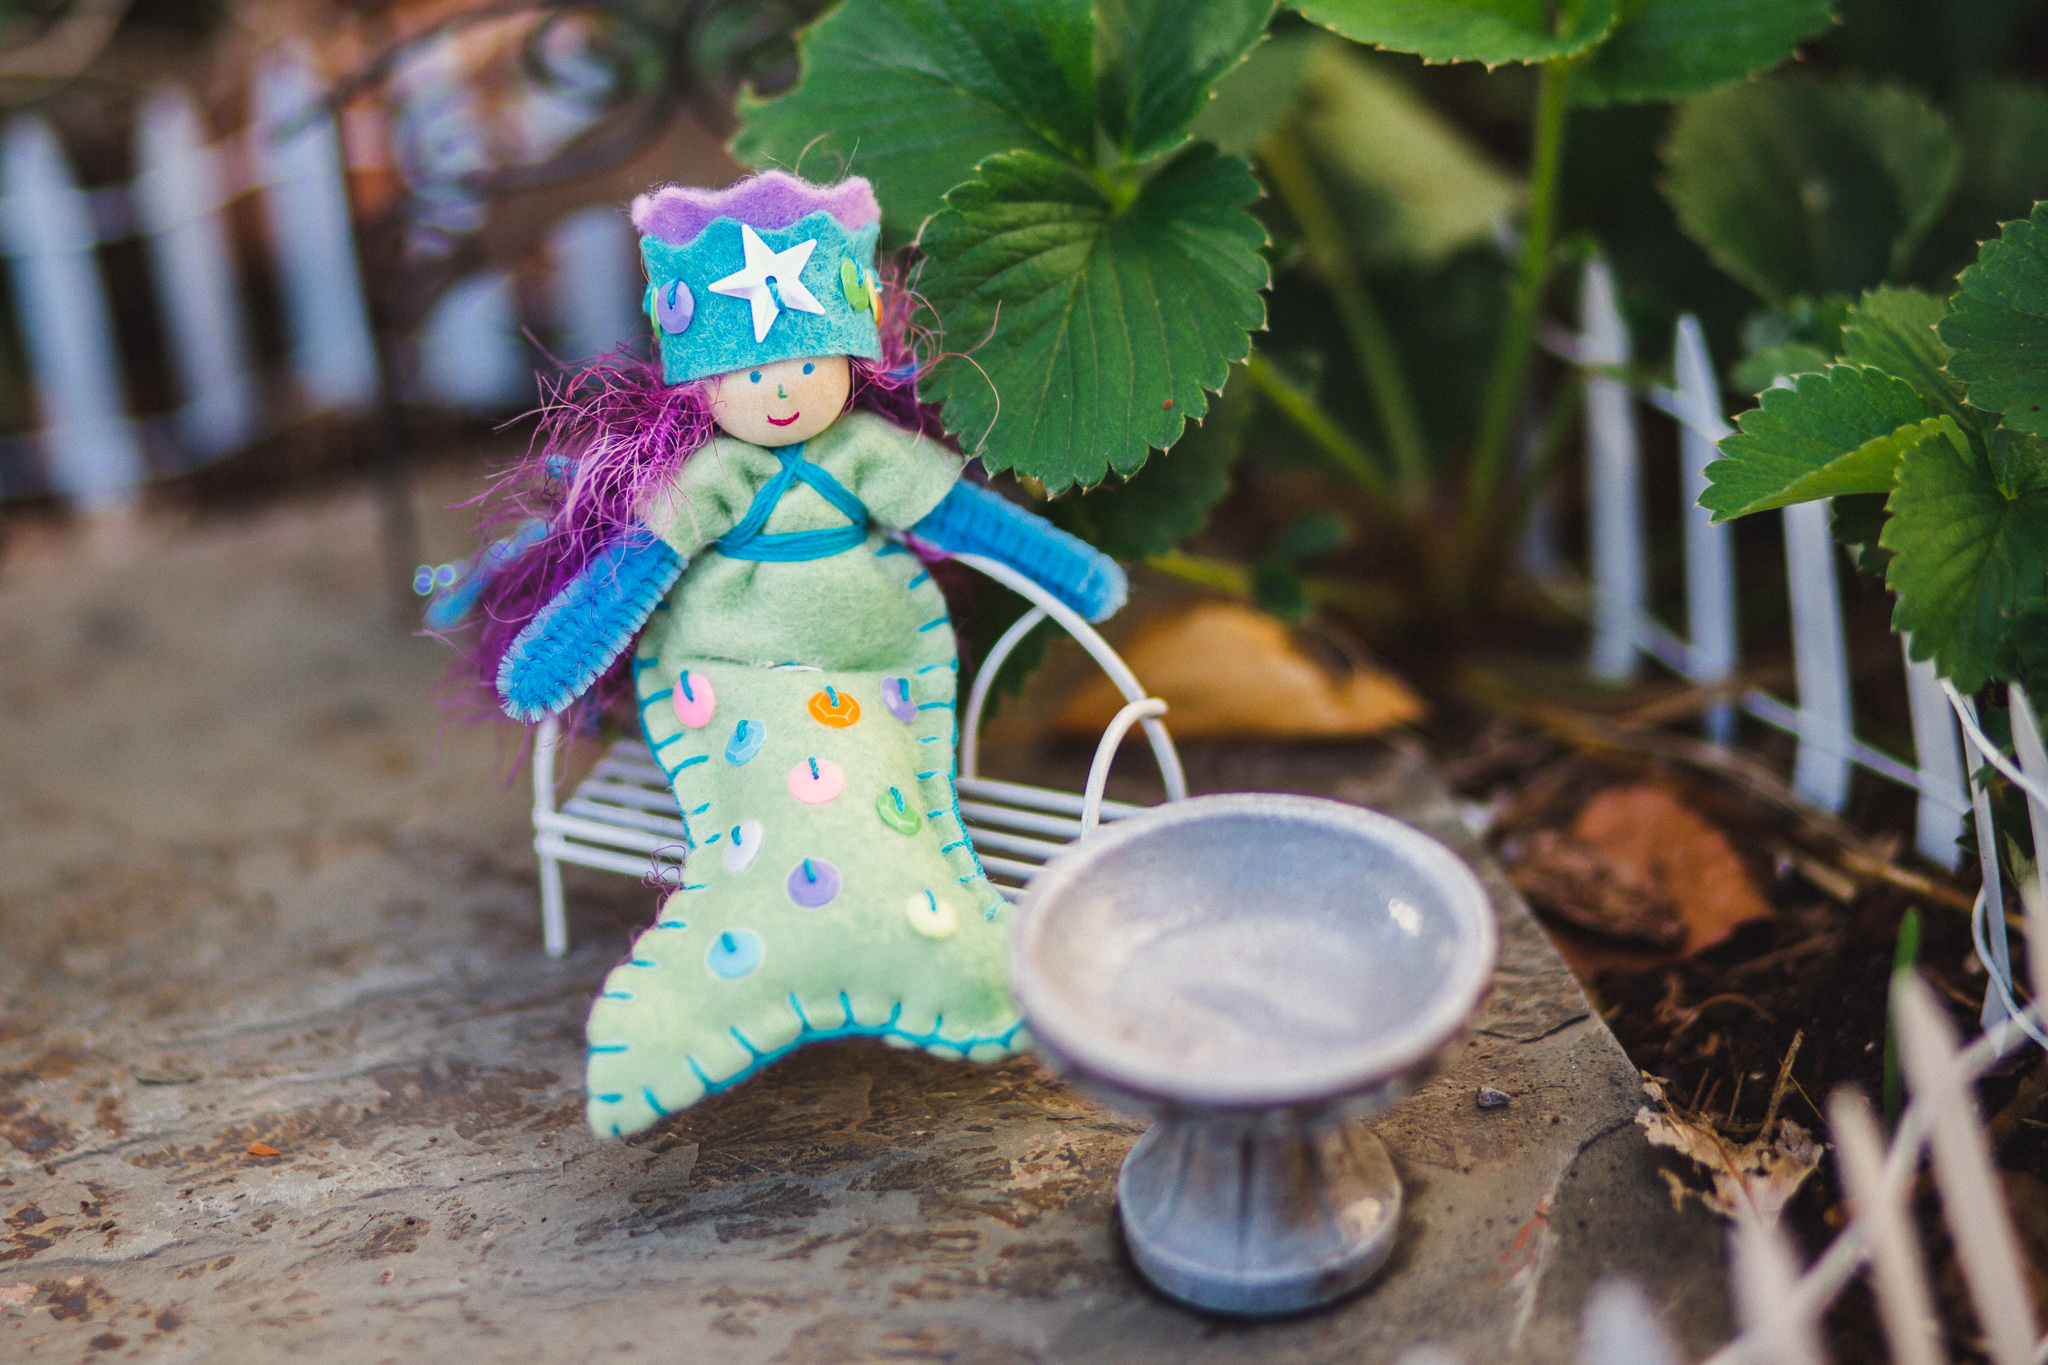
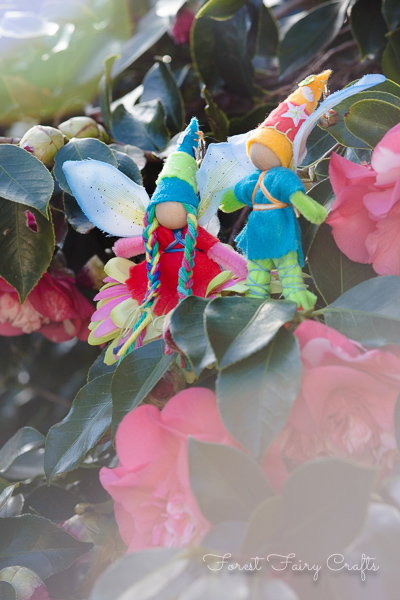
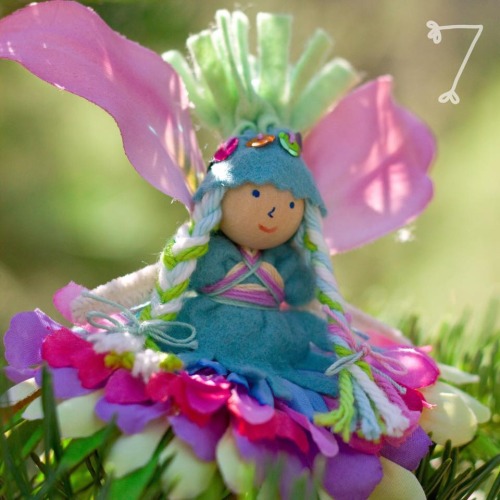
Summer isn't done here. The sun is still warm, even though the air gets cool in the evenings. We were recently invited to a birthday celebration for a girl what loved mermaids. The entire party had an amazing attention to under-the-sea details. I decided to bring a little mermaid doll as our gift.

I sprinkled sequins along the tail. For her crown, I wanted to her to remember this birthday. She was turning nine. I sewed the star to the center first. Then I moved to one side and sewed four sequins. I tied the thread and started a new thread on the other side of the crown to sew four more sequins- nine in all. The extra steps tying knots saved me the trouble of measuring out how to make sequins even across the crown. I could have made light dots with a marker to space out sequins as well.

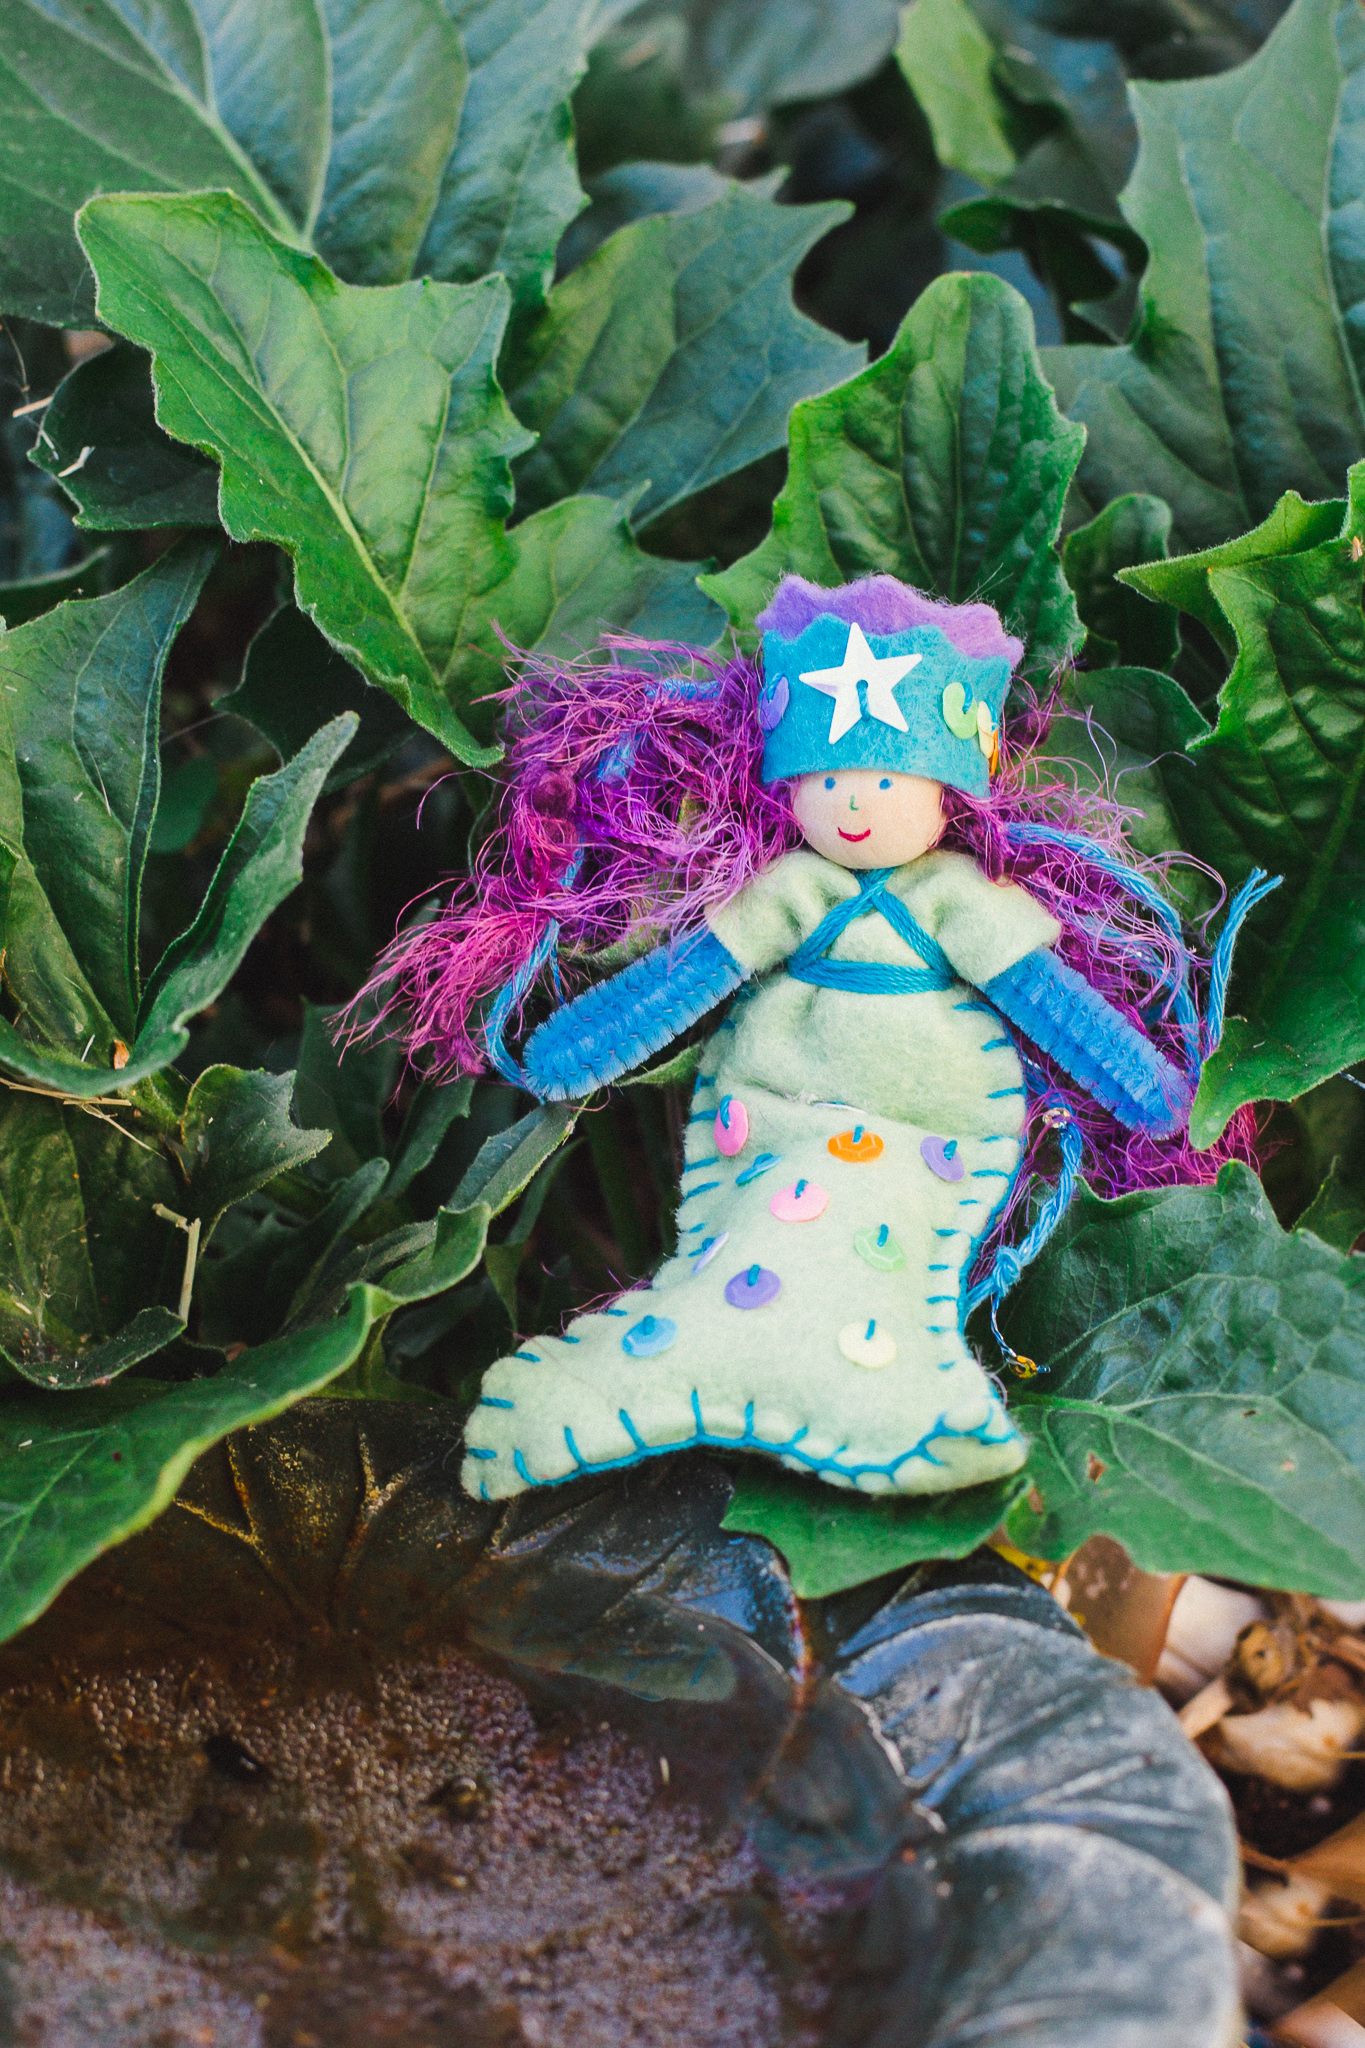
Her hair was a little tricky because these fluffy yarns tend to fall apart at the ends (because they are often a few different threads wound together on the skein). I usually solve this by creating braids, which tie off the ends. This way, if it unravels, the yarn is still held together in the braid.

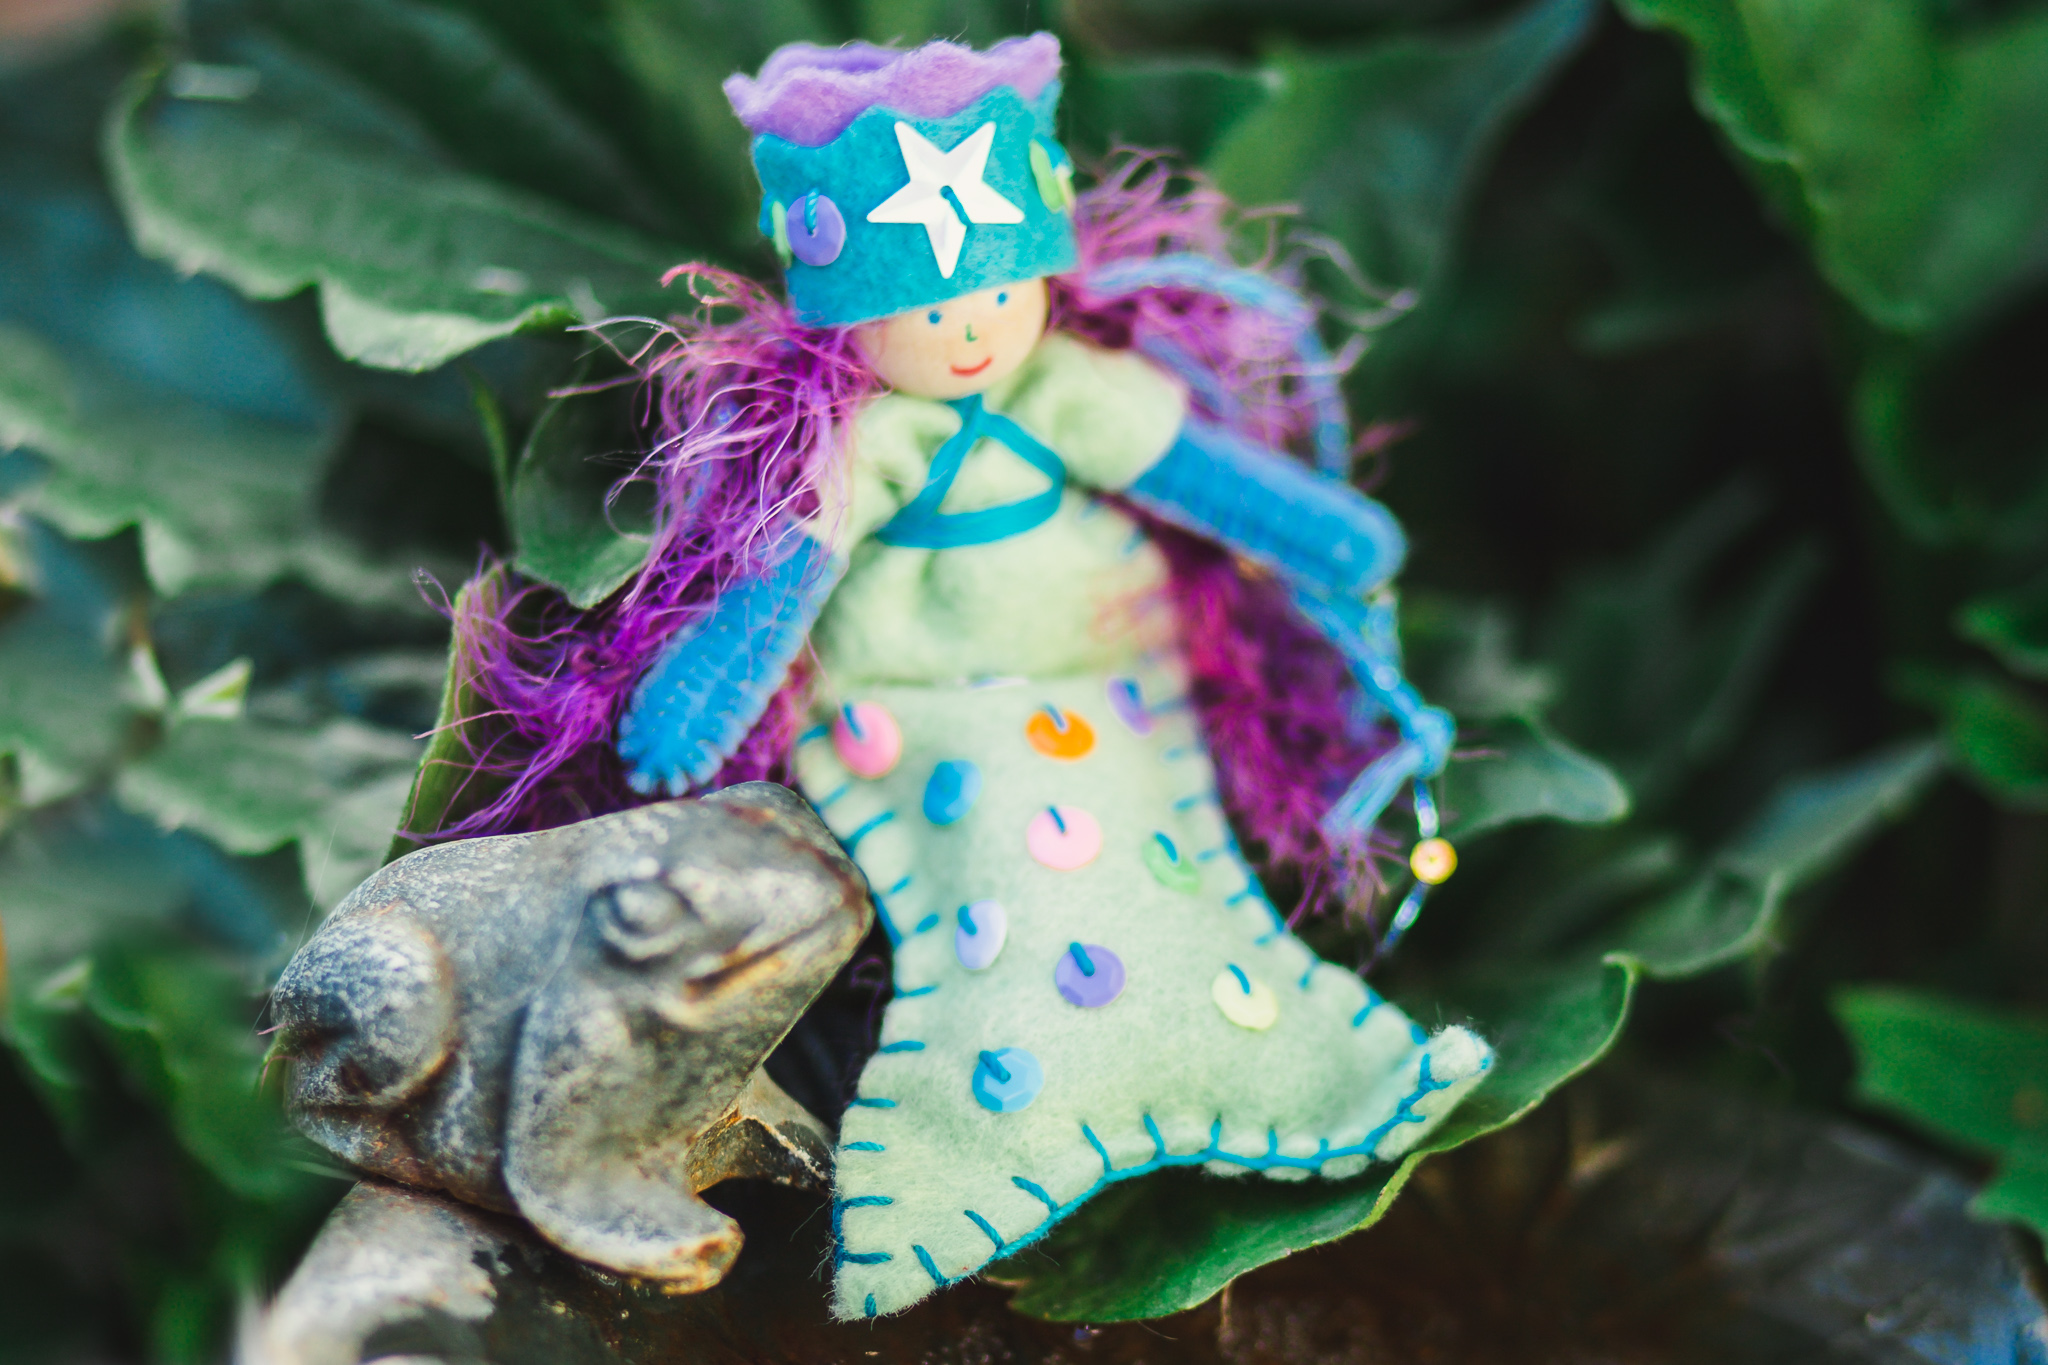
However, for this mermaid, I wanted long, loose hair. So I tied a knot at the end of each strand. You can see the little knot in the blue strand of yarn in photos above. Tying those knots may sounds like a lot, but I only use about six strands of yarn, which is twelve knots in total. You can see the technique I use to glue hair onto the bead in our book. The fuzzy yarn is nice and forgiving about hiding the little knots. I may show the technique in another tutorial for those crafters who love the long, loose hair.

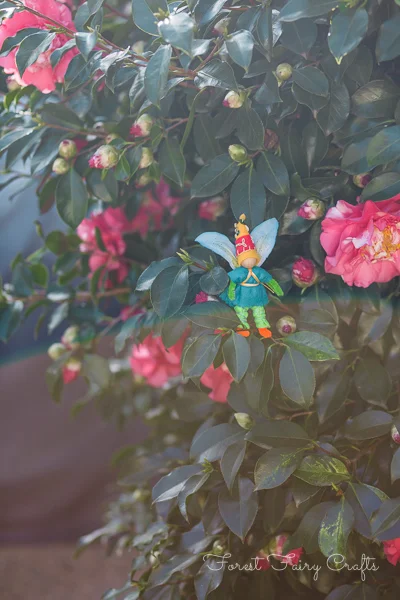
Best wishes on your next adventures, little mermaid!
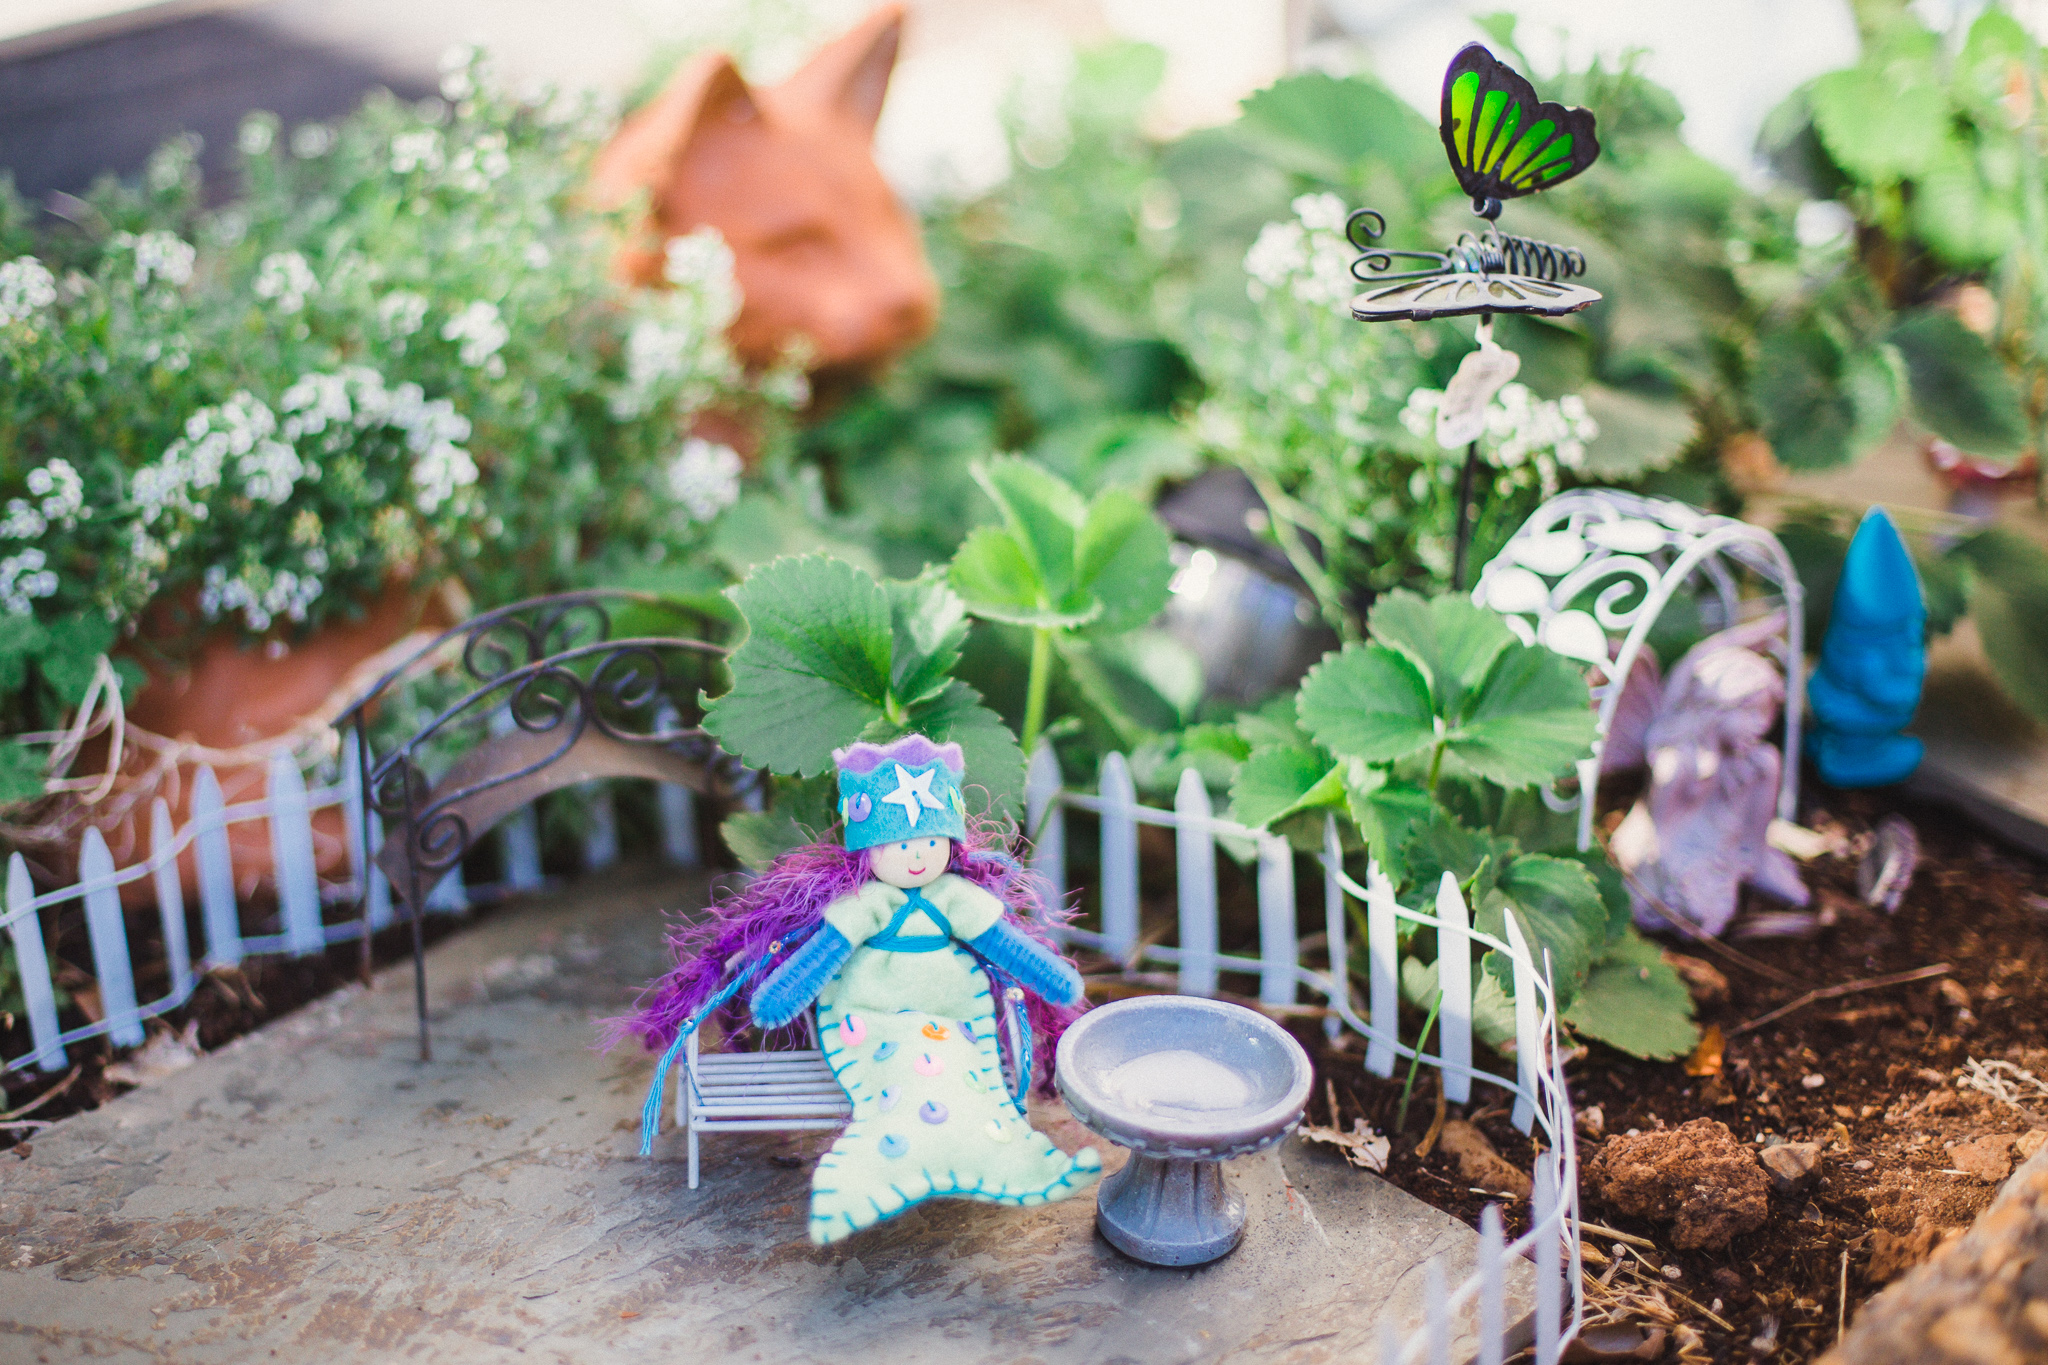

You can learn how to make your own mermaids with our book, Forest Fairy Crafts.
The links in the article are affiliate links. If you decide to purchase a book, a small amount returns to the Forest while your price remains the same. Thank you for supporting us! Happy crafting!

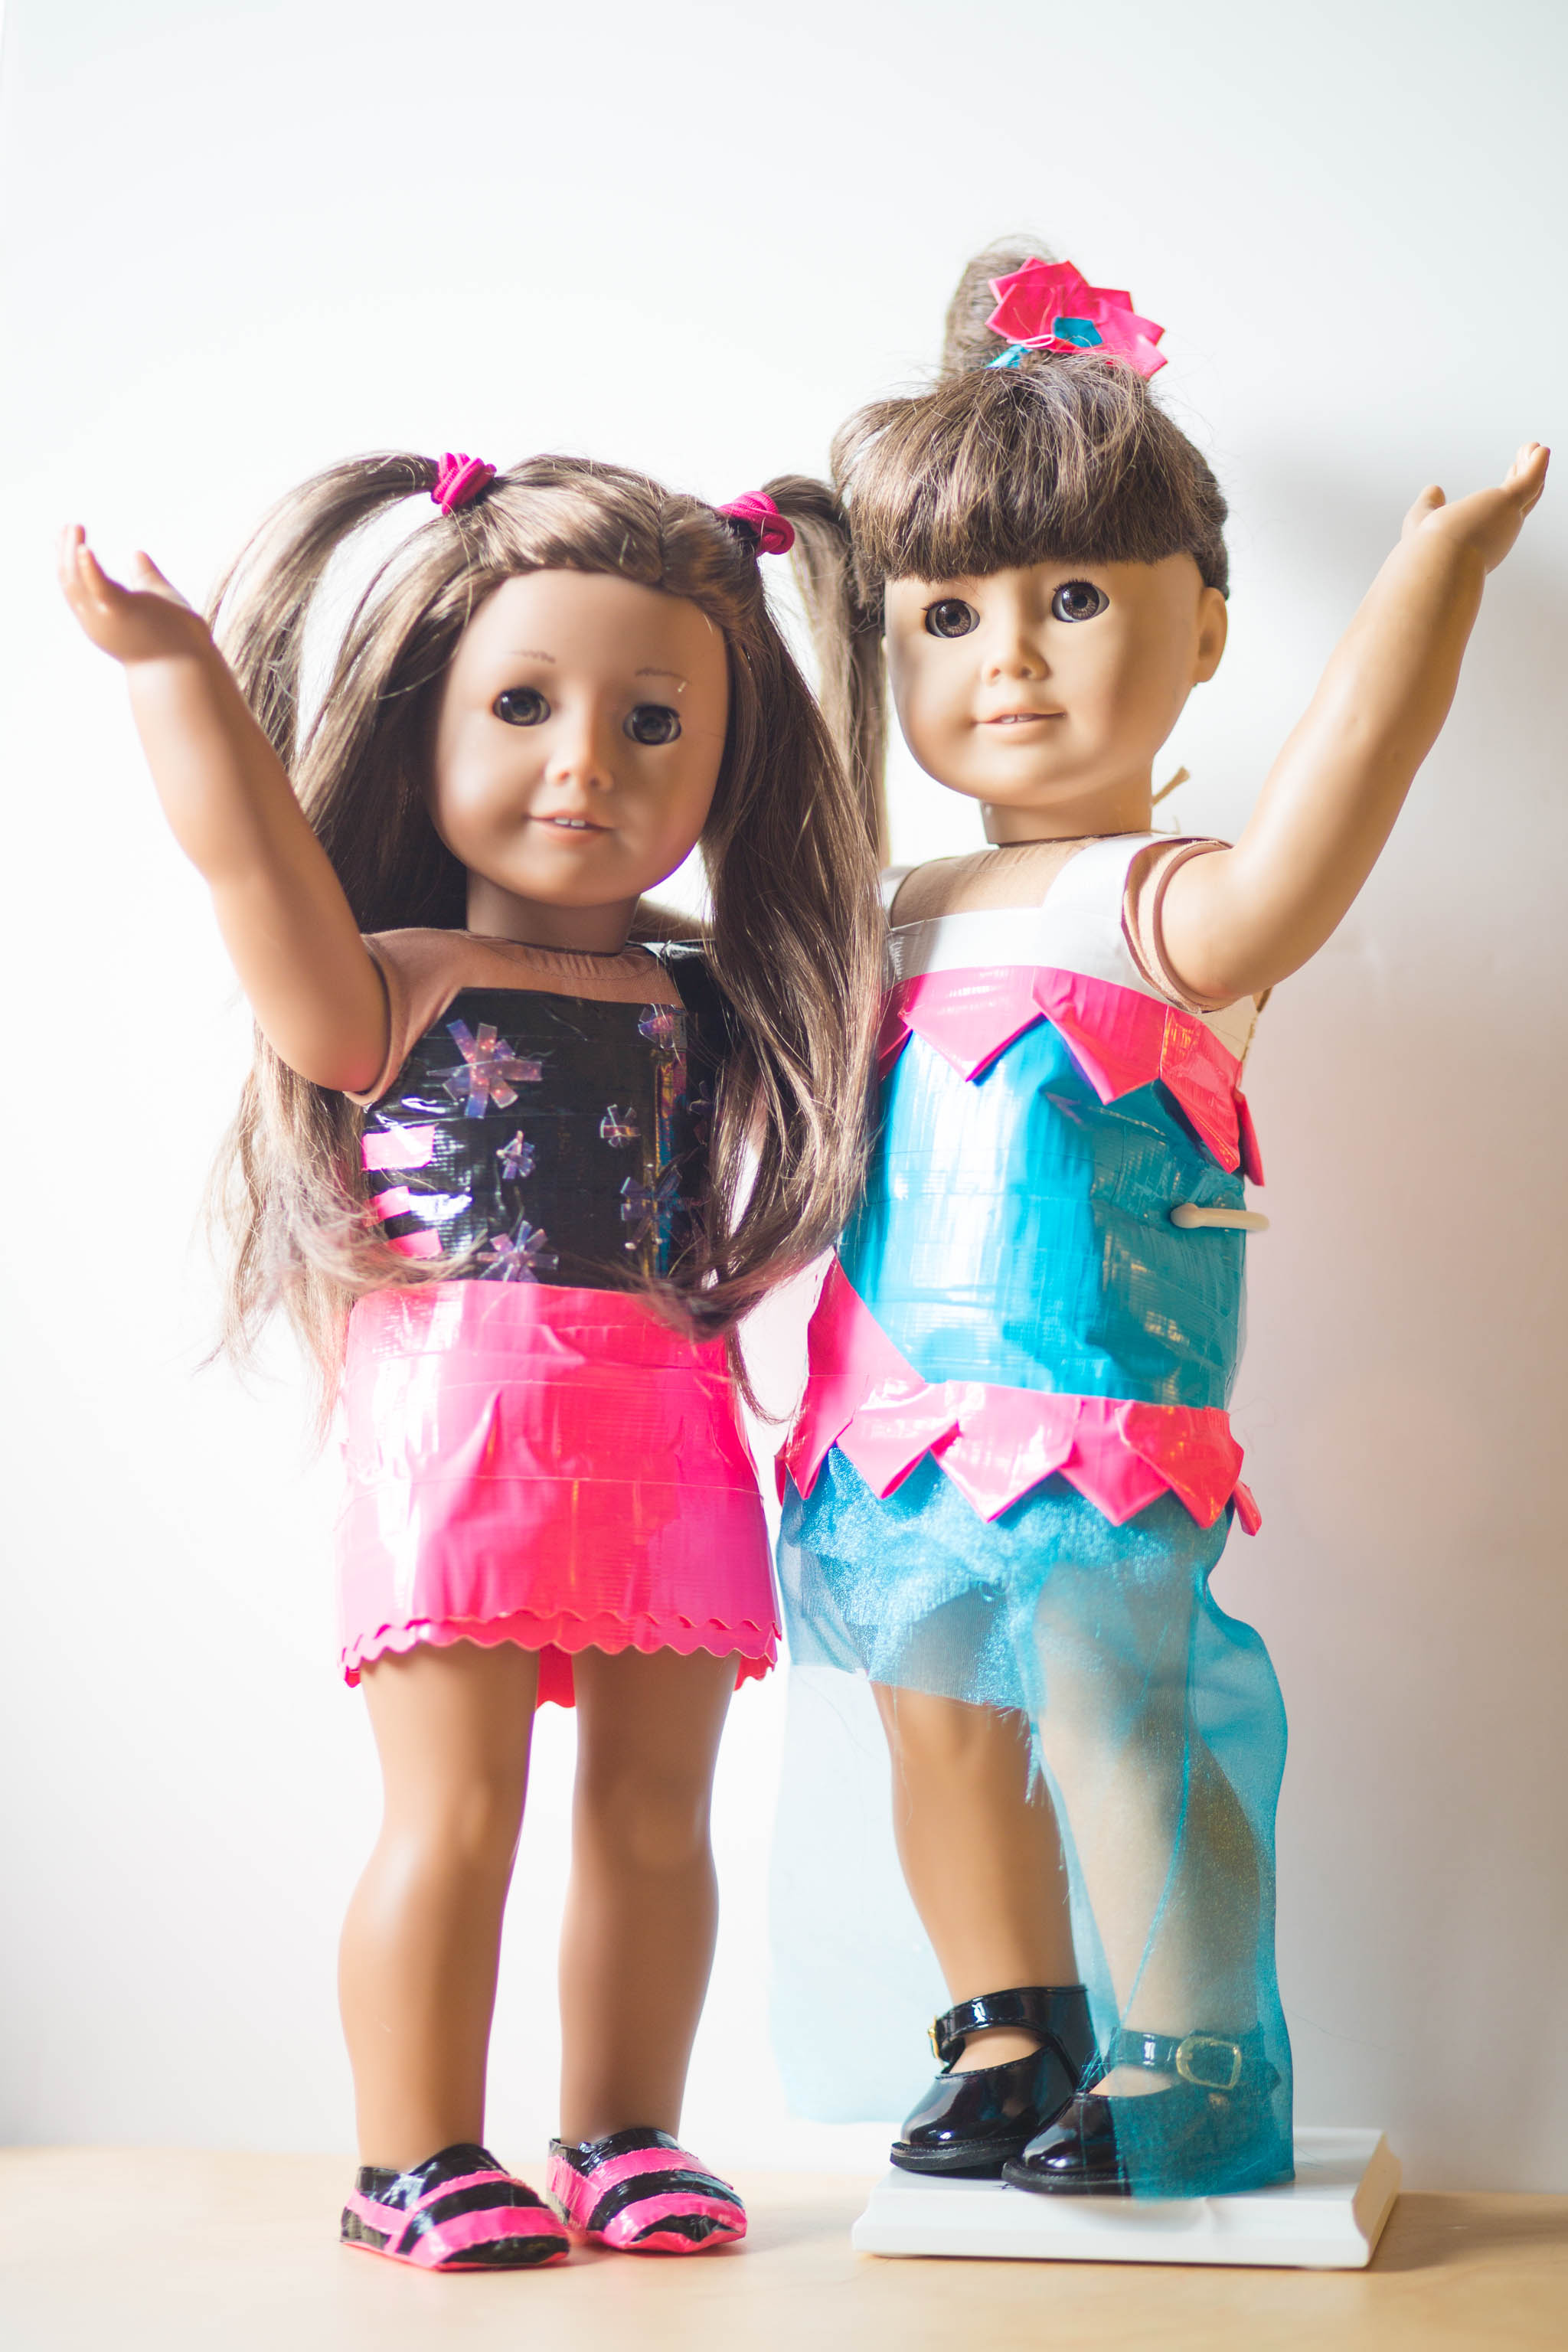
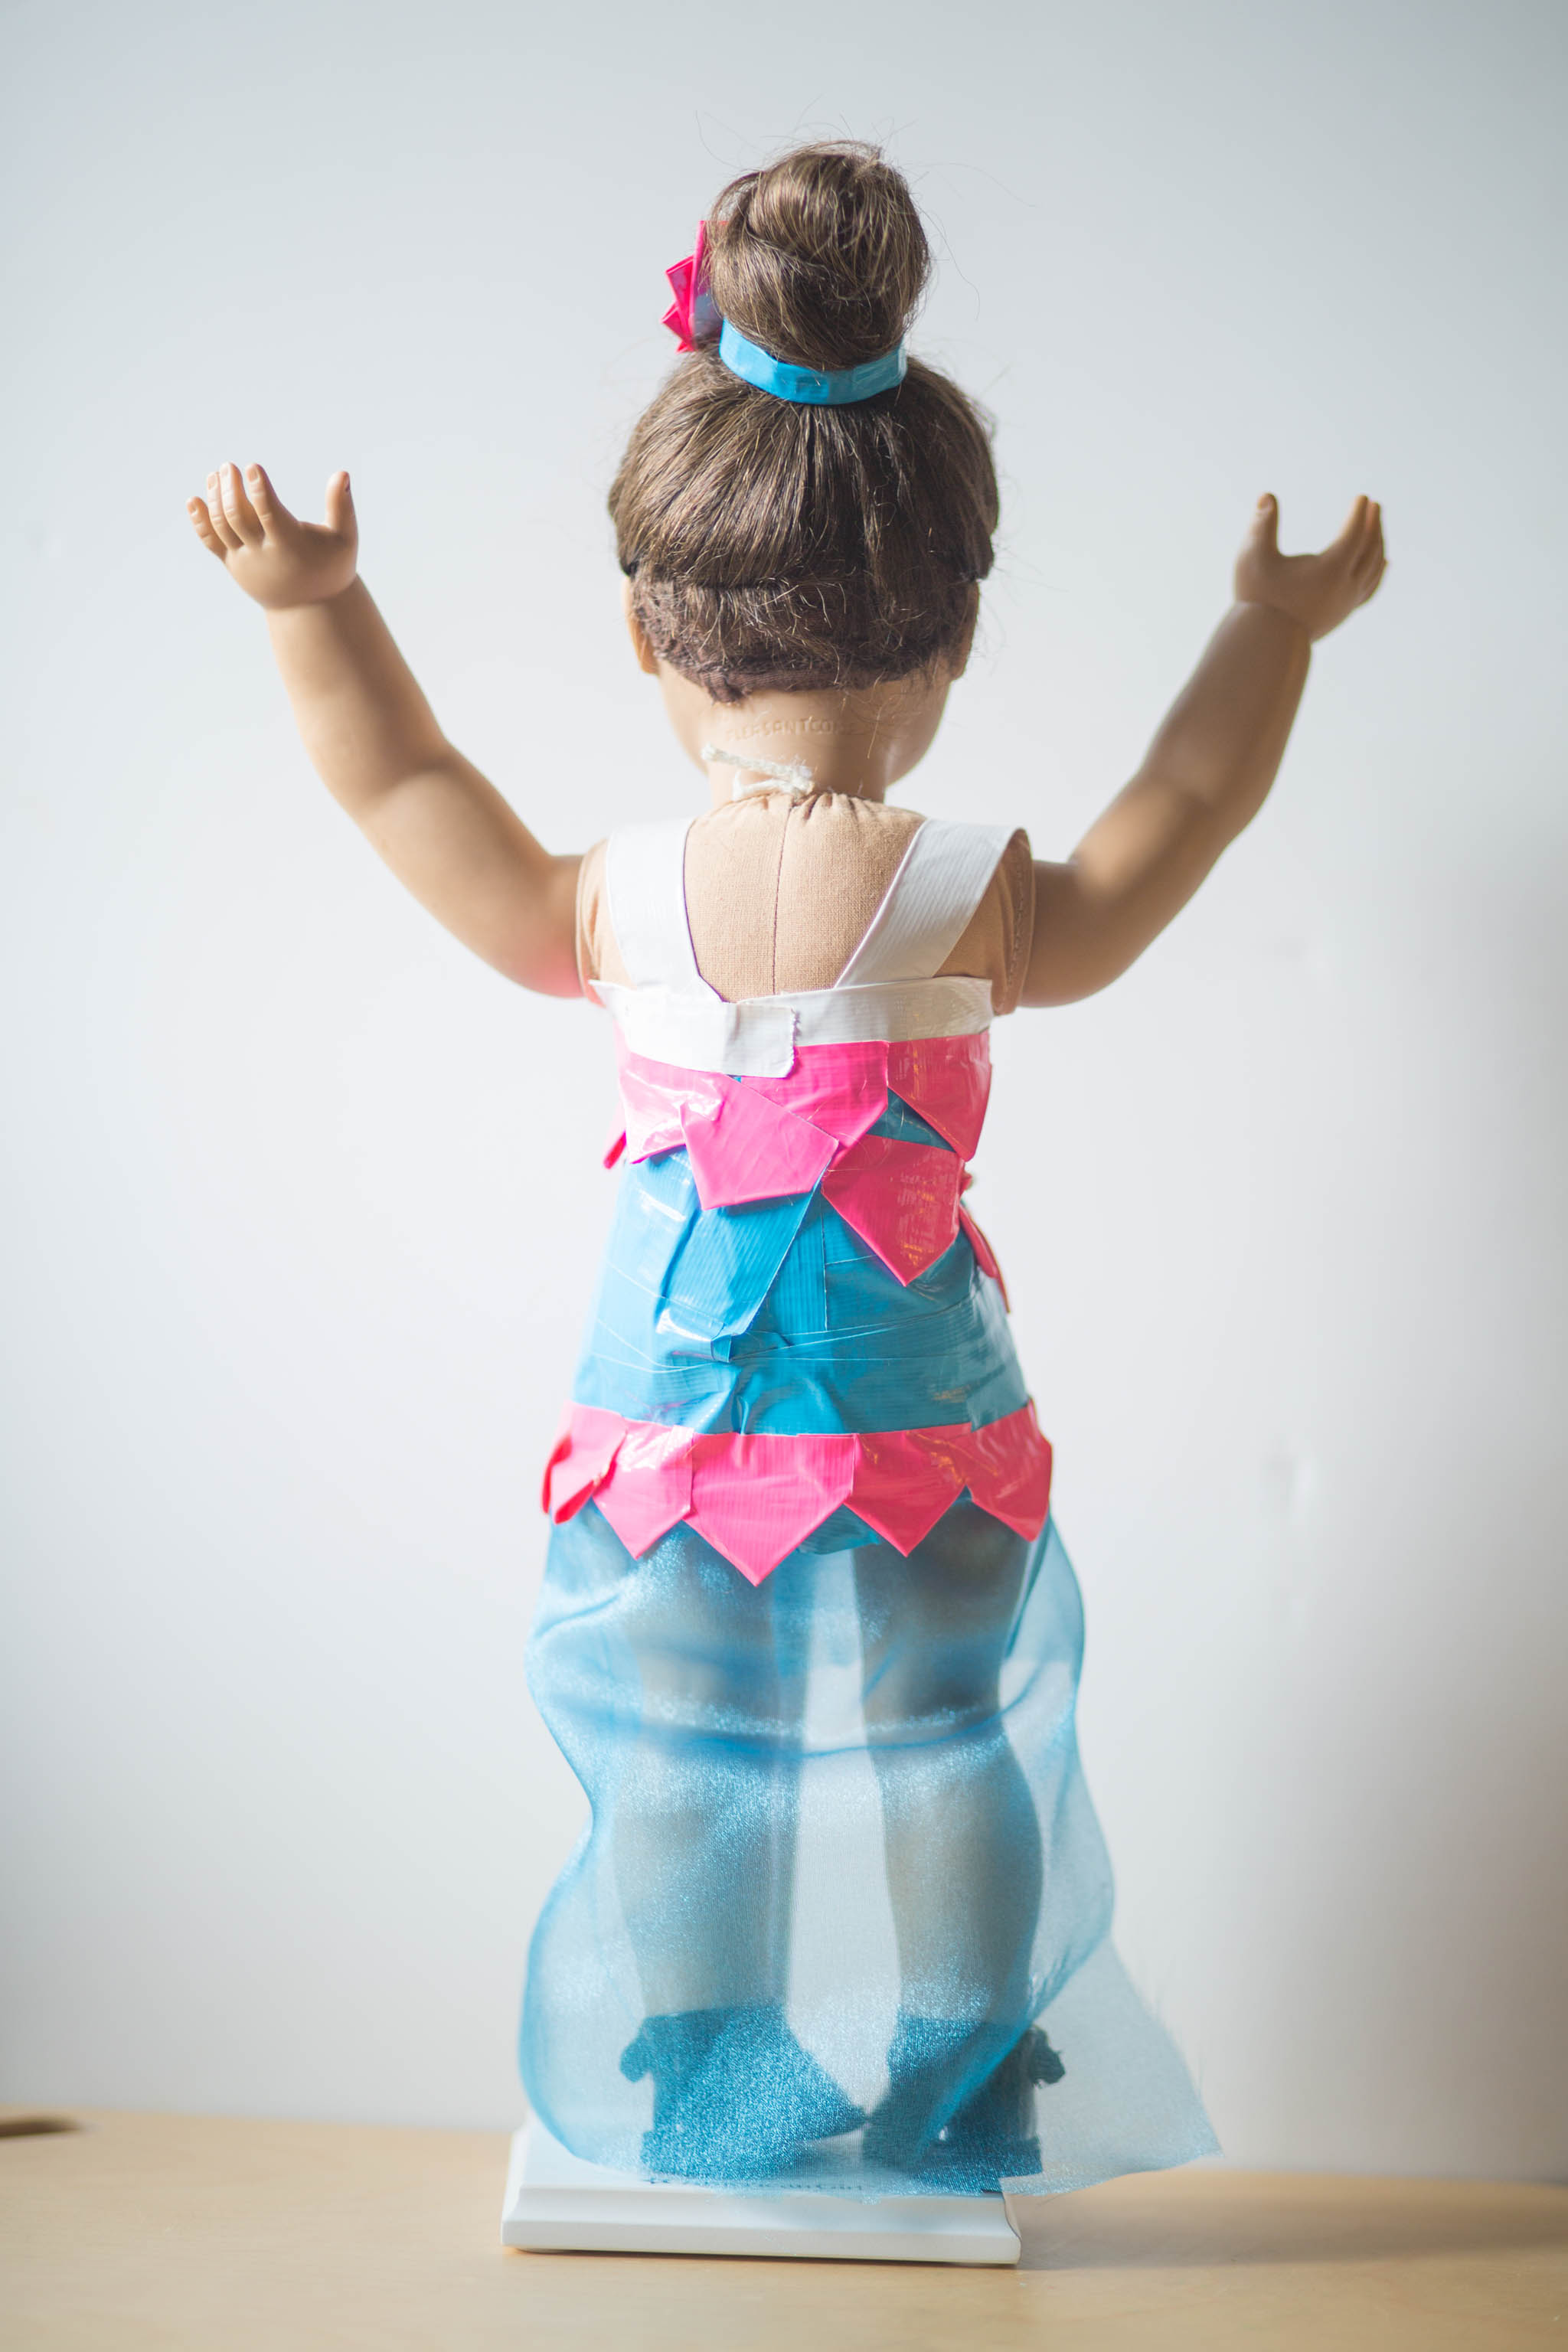
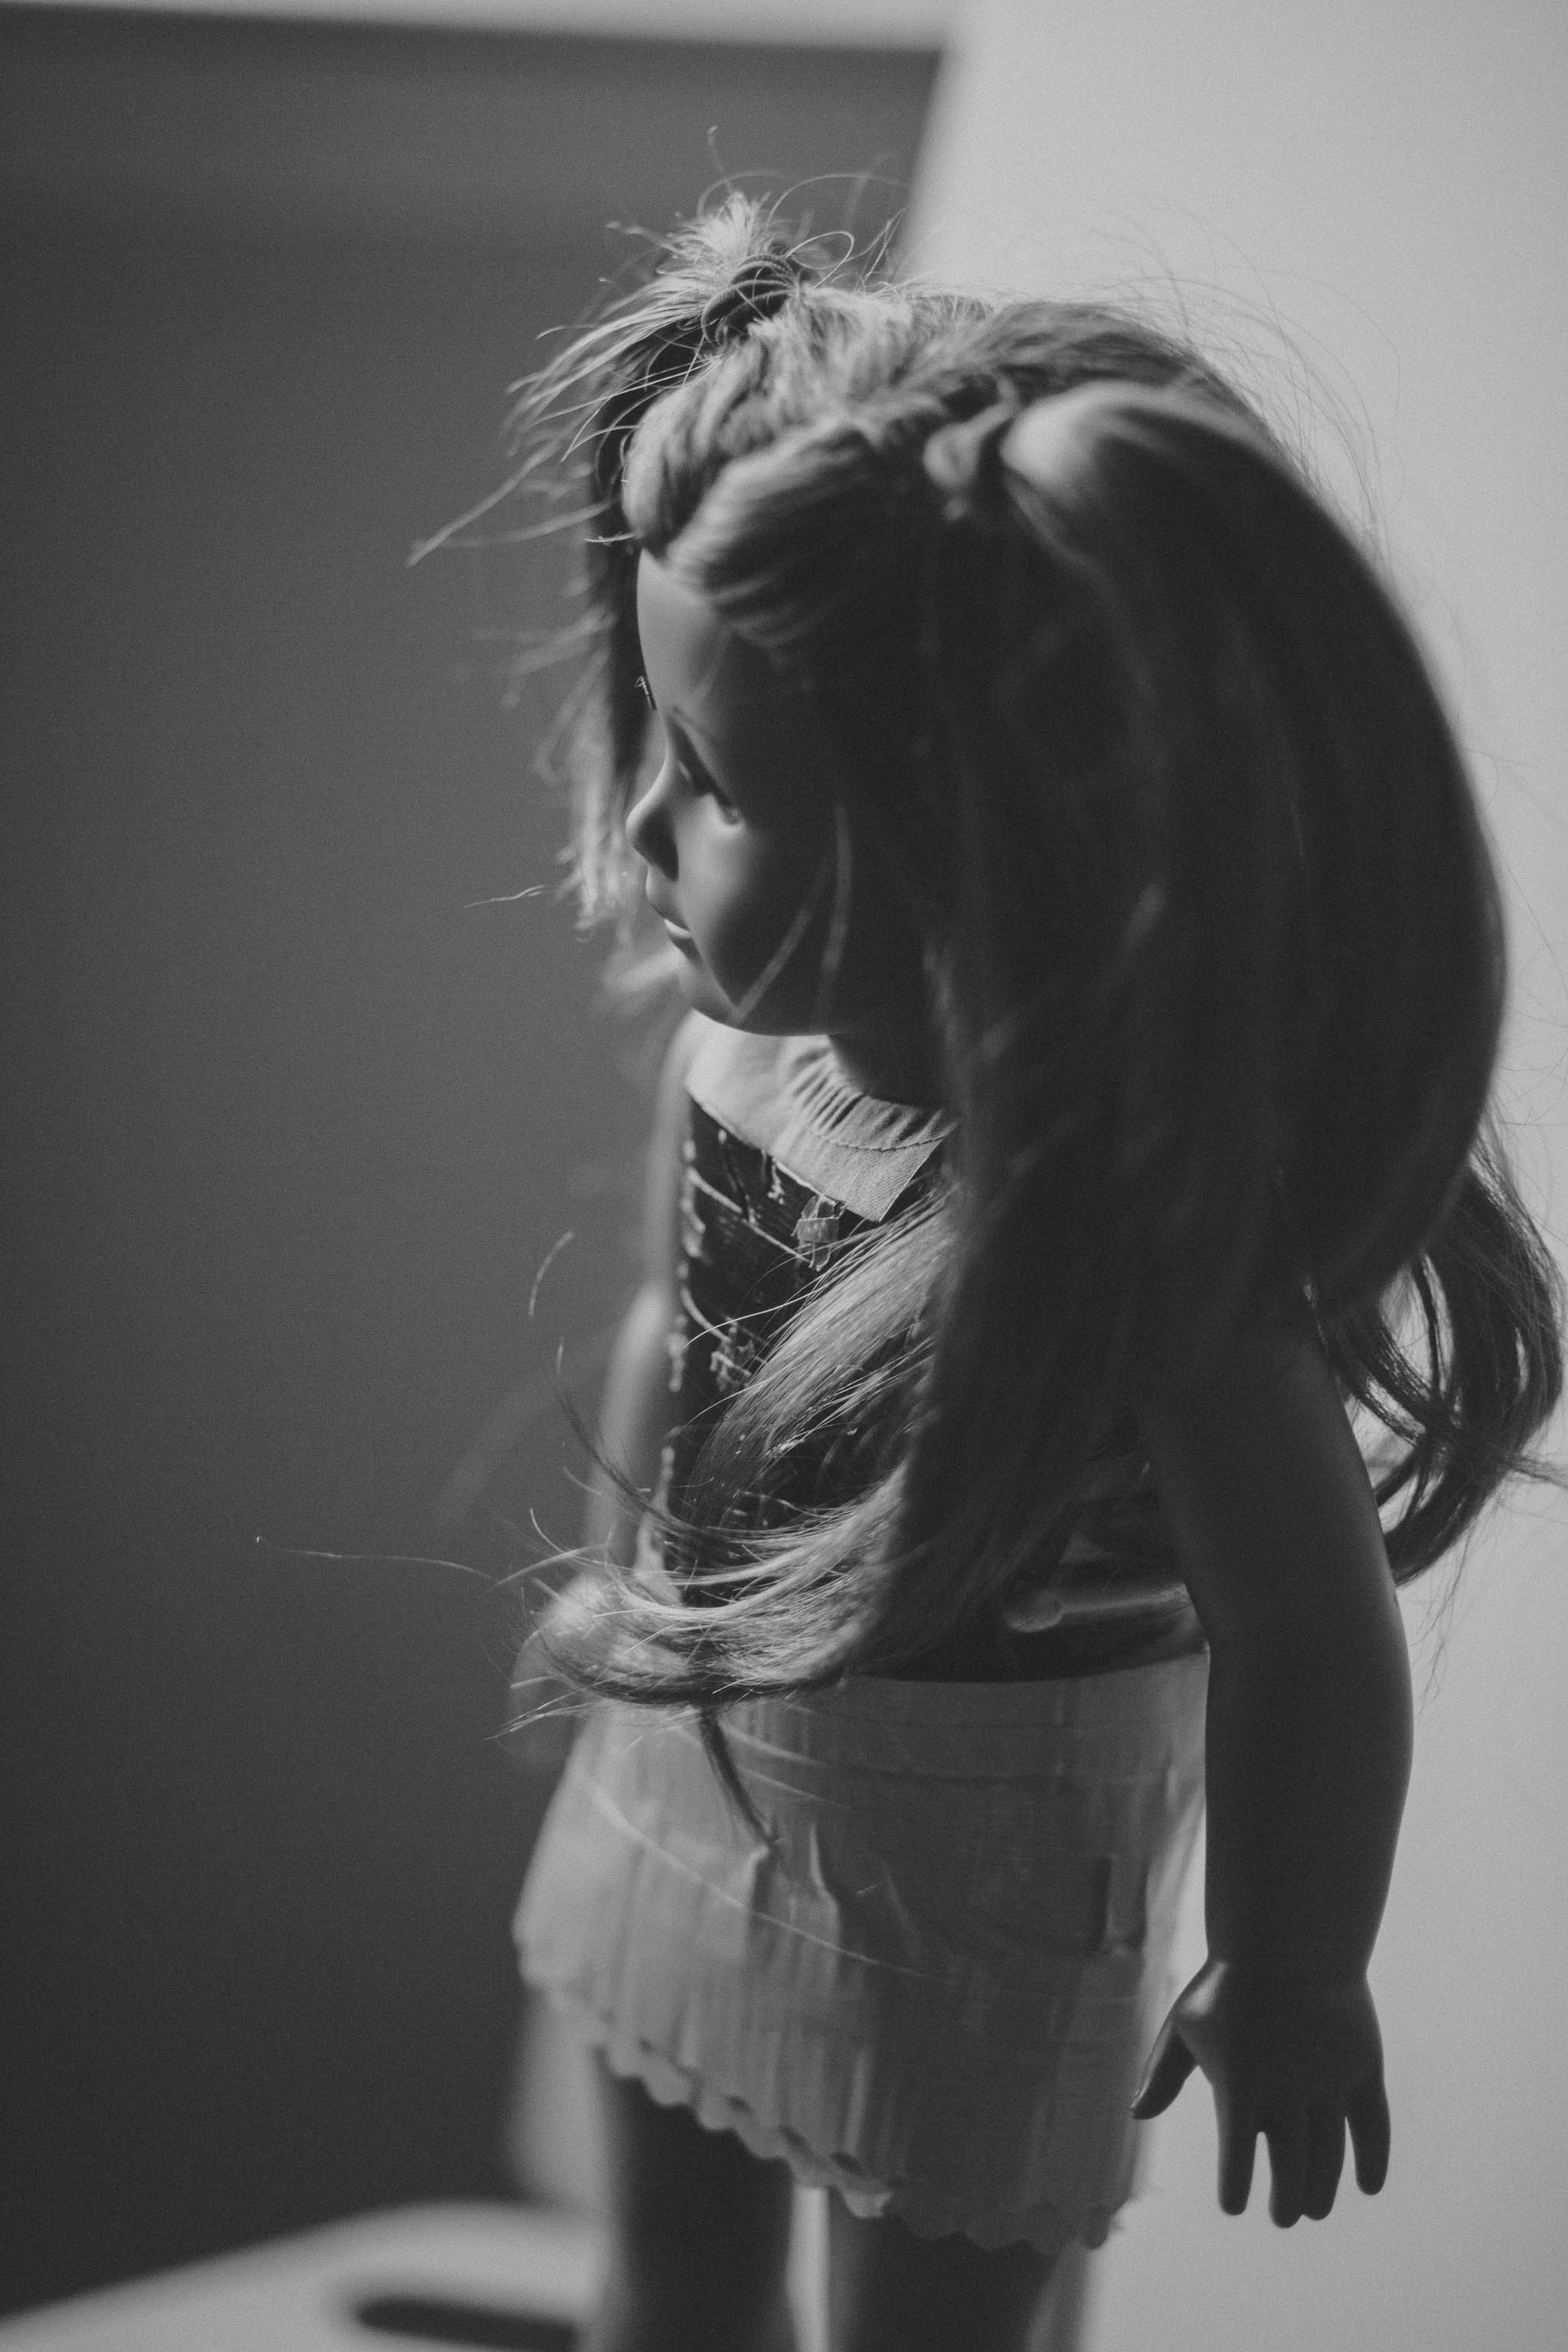
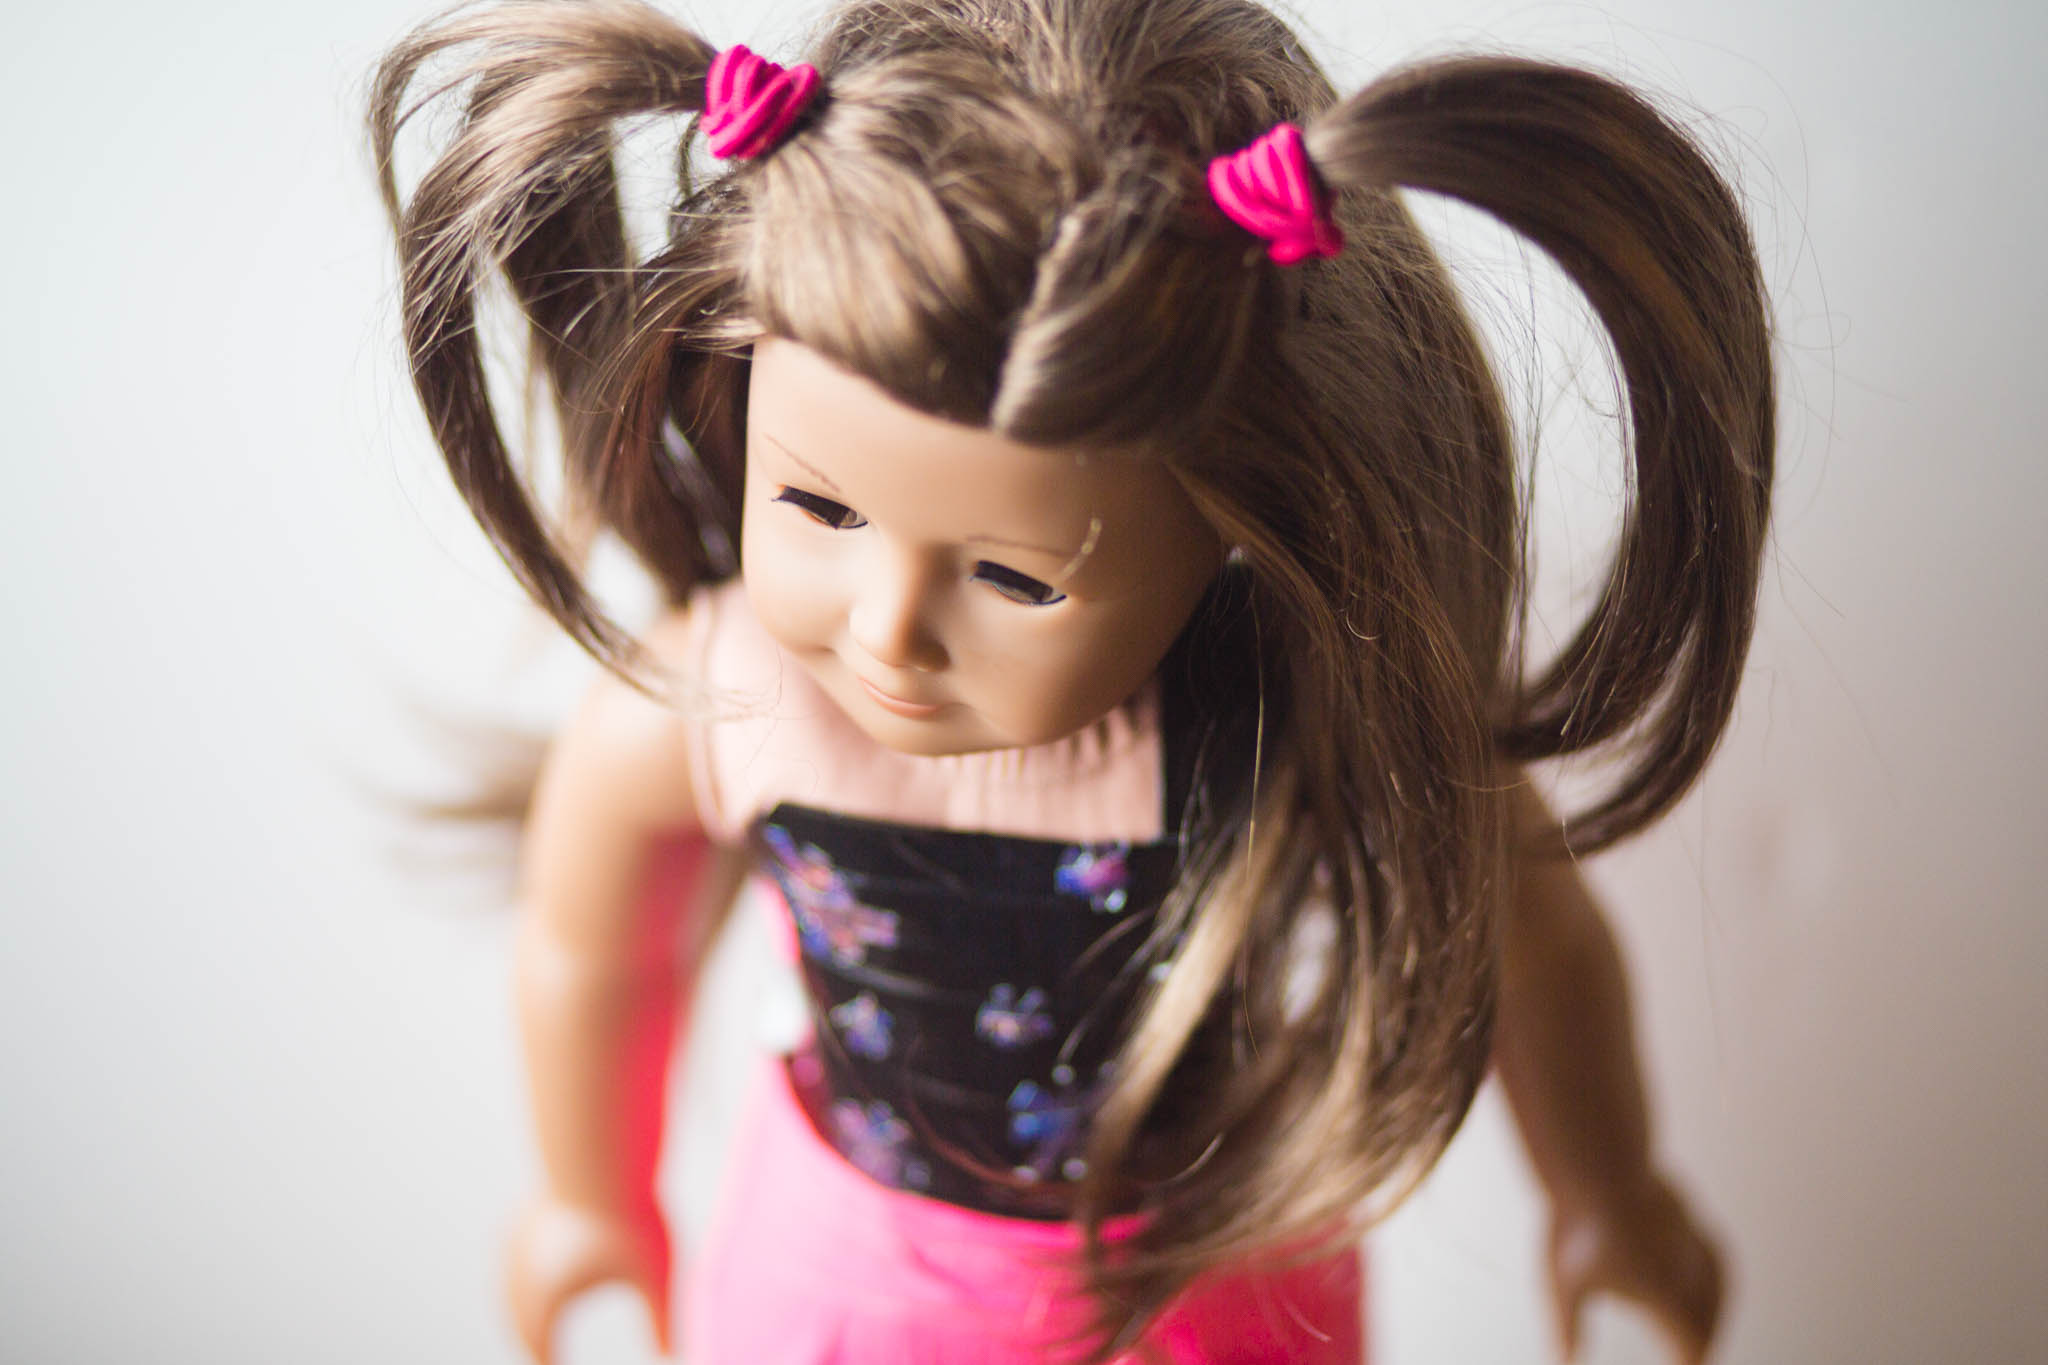
Duct Tape Clothes for American Girl Dolls
My twelve year old daughter challenged herself to create outfits for her dolls using duct tape.
These long rainy days become an opportunity for new creative projects. My daughter found me last week with a Big Idea. “I am going to make clothes for my dolls,” she announced.
“Oh, good,” I said. “You know where to find your fabric?”
She has her a shoebox size collection of her own fabric, which she can use for any project that strikes her fancy. “I don’t need fabric,” she said. “I’m using duct tape.”

“Really?"
It wasn’t such an unusual proclamation. She received new rolls of duct tape for the holidays after she made wallets and complex flowers. Still, I wasn’t quite sure how duct tape doll clothing would happen.
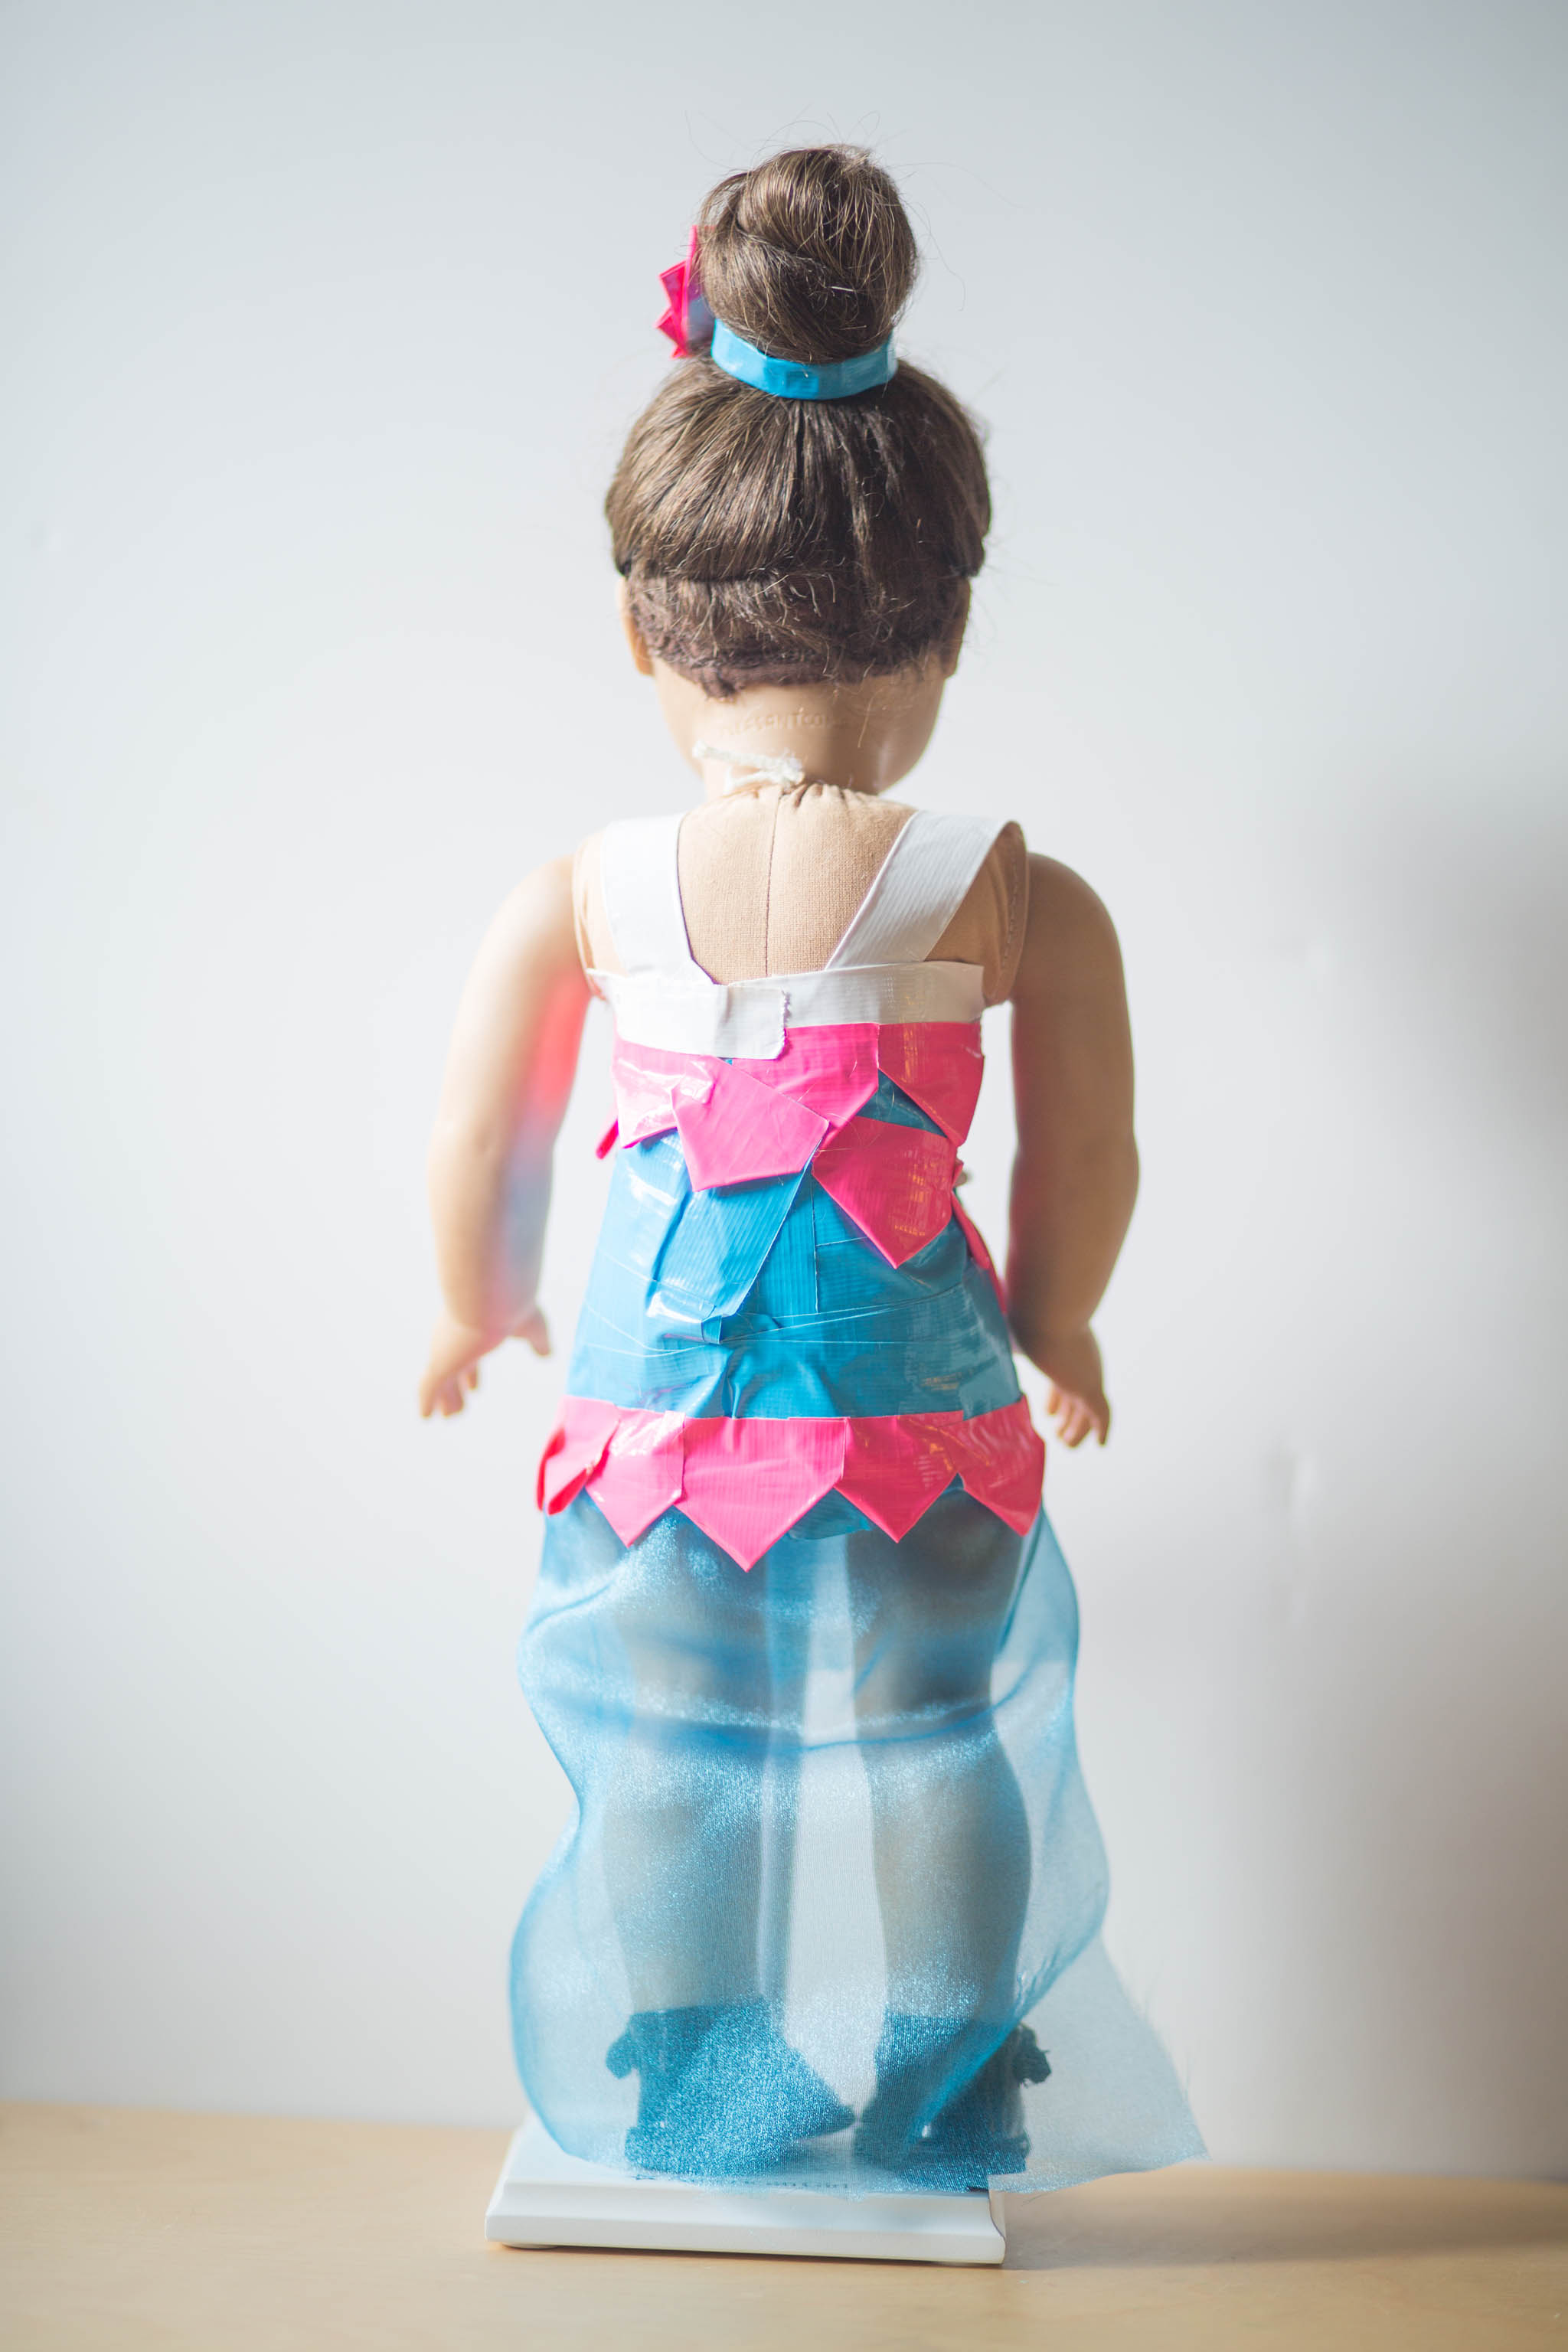
So began her adventure. She loved that she could create without worrying about frayed edges. She used her flower petal technique to make the triangles for her dress. She really enjoyed the duct tape because she didn’t have to worry about fraying fabric.

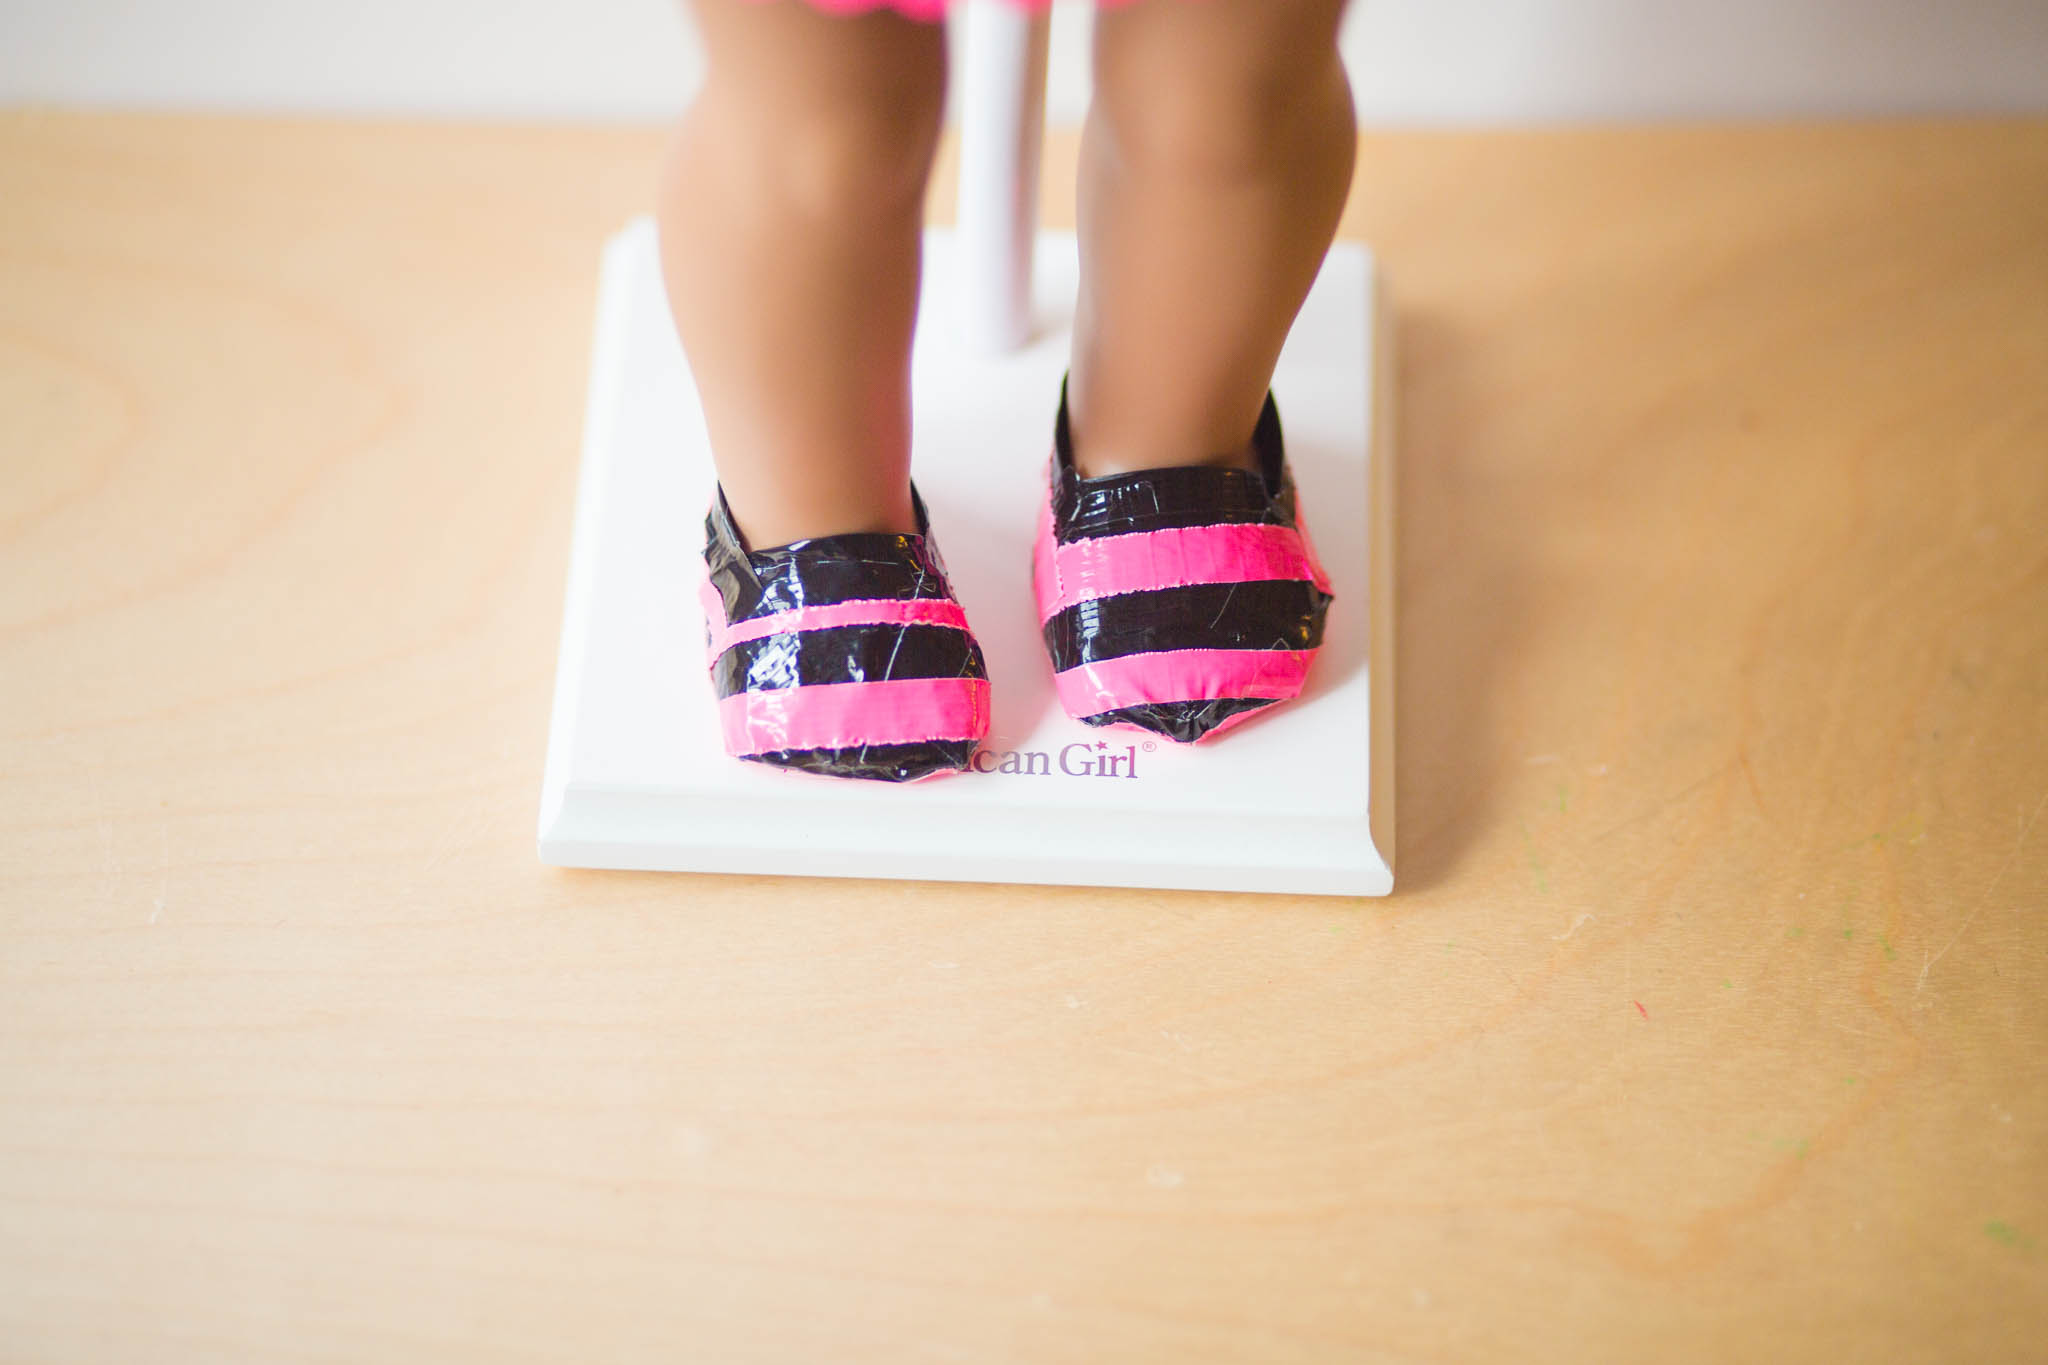
She tried a few different ideas, especially with how to put the clothes on and off the dolls. Even though they look form fitting, they can be changed. She tested ideas. Learned new pointers by browsing Pinterest. And one idea led to another. She could make shoes. And add fabric (tulle). Now she’s working on a backpack.
Inspiration!

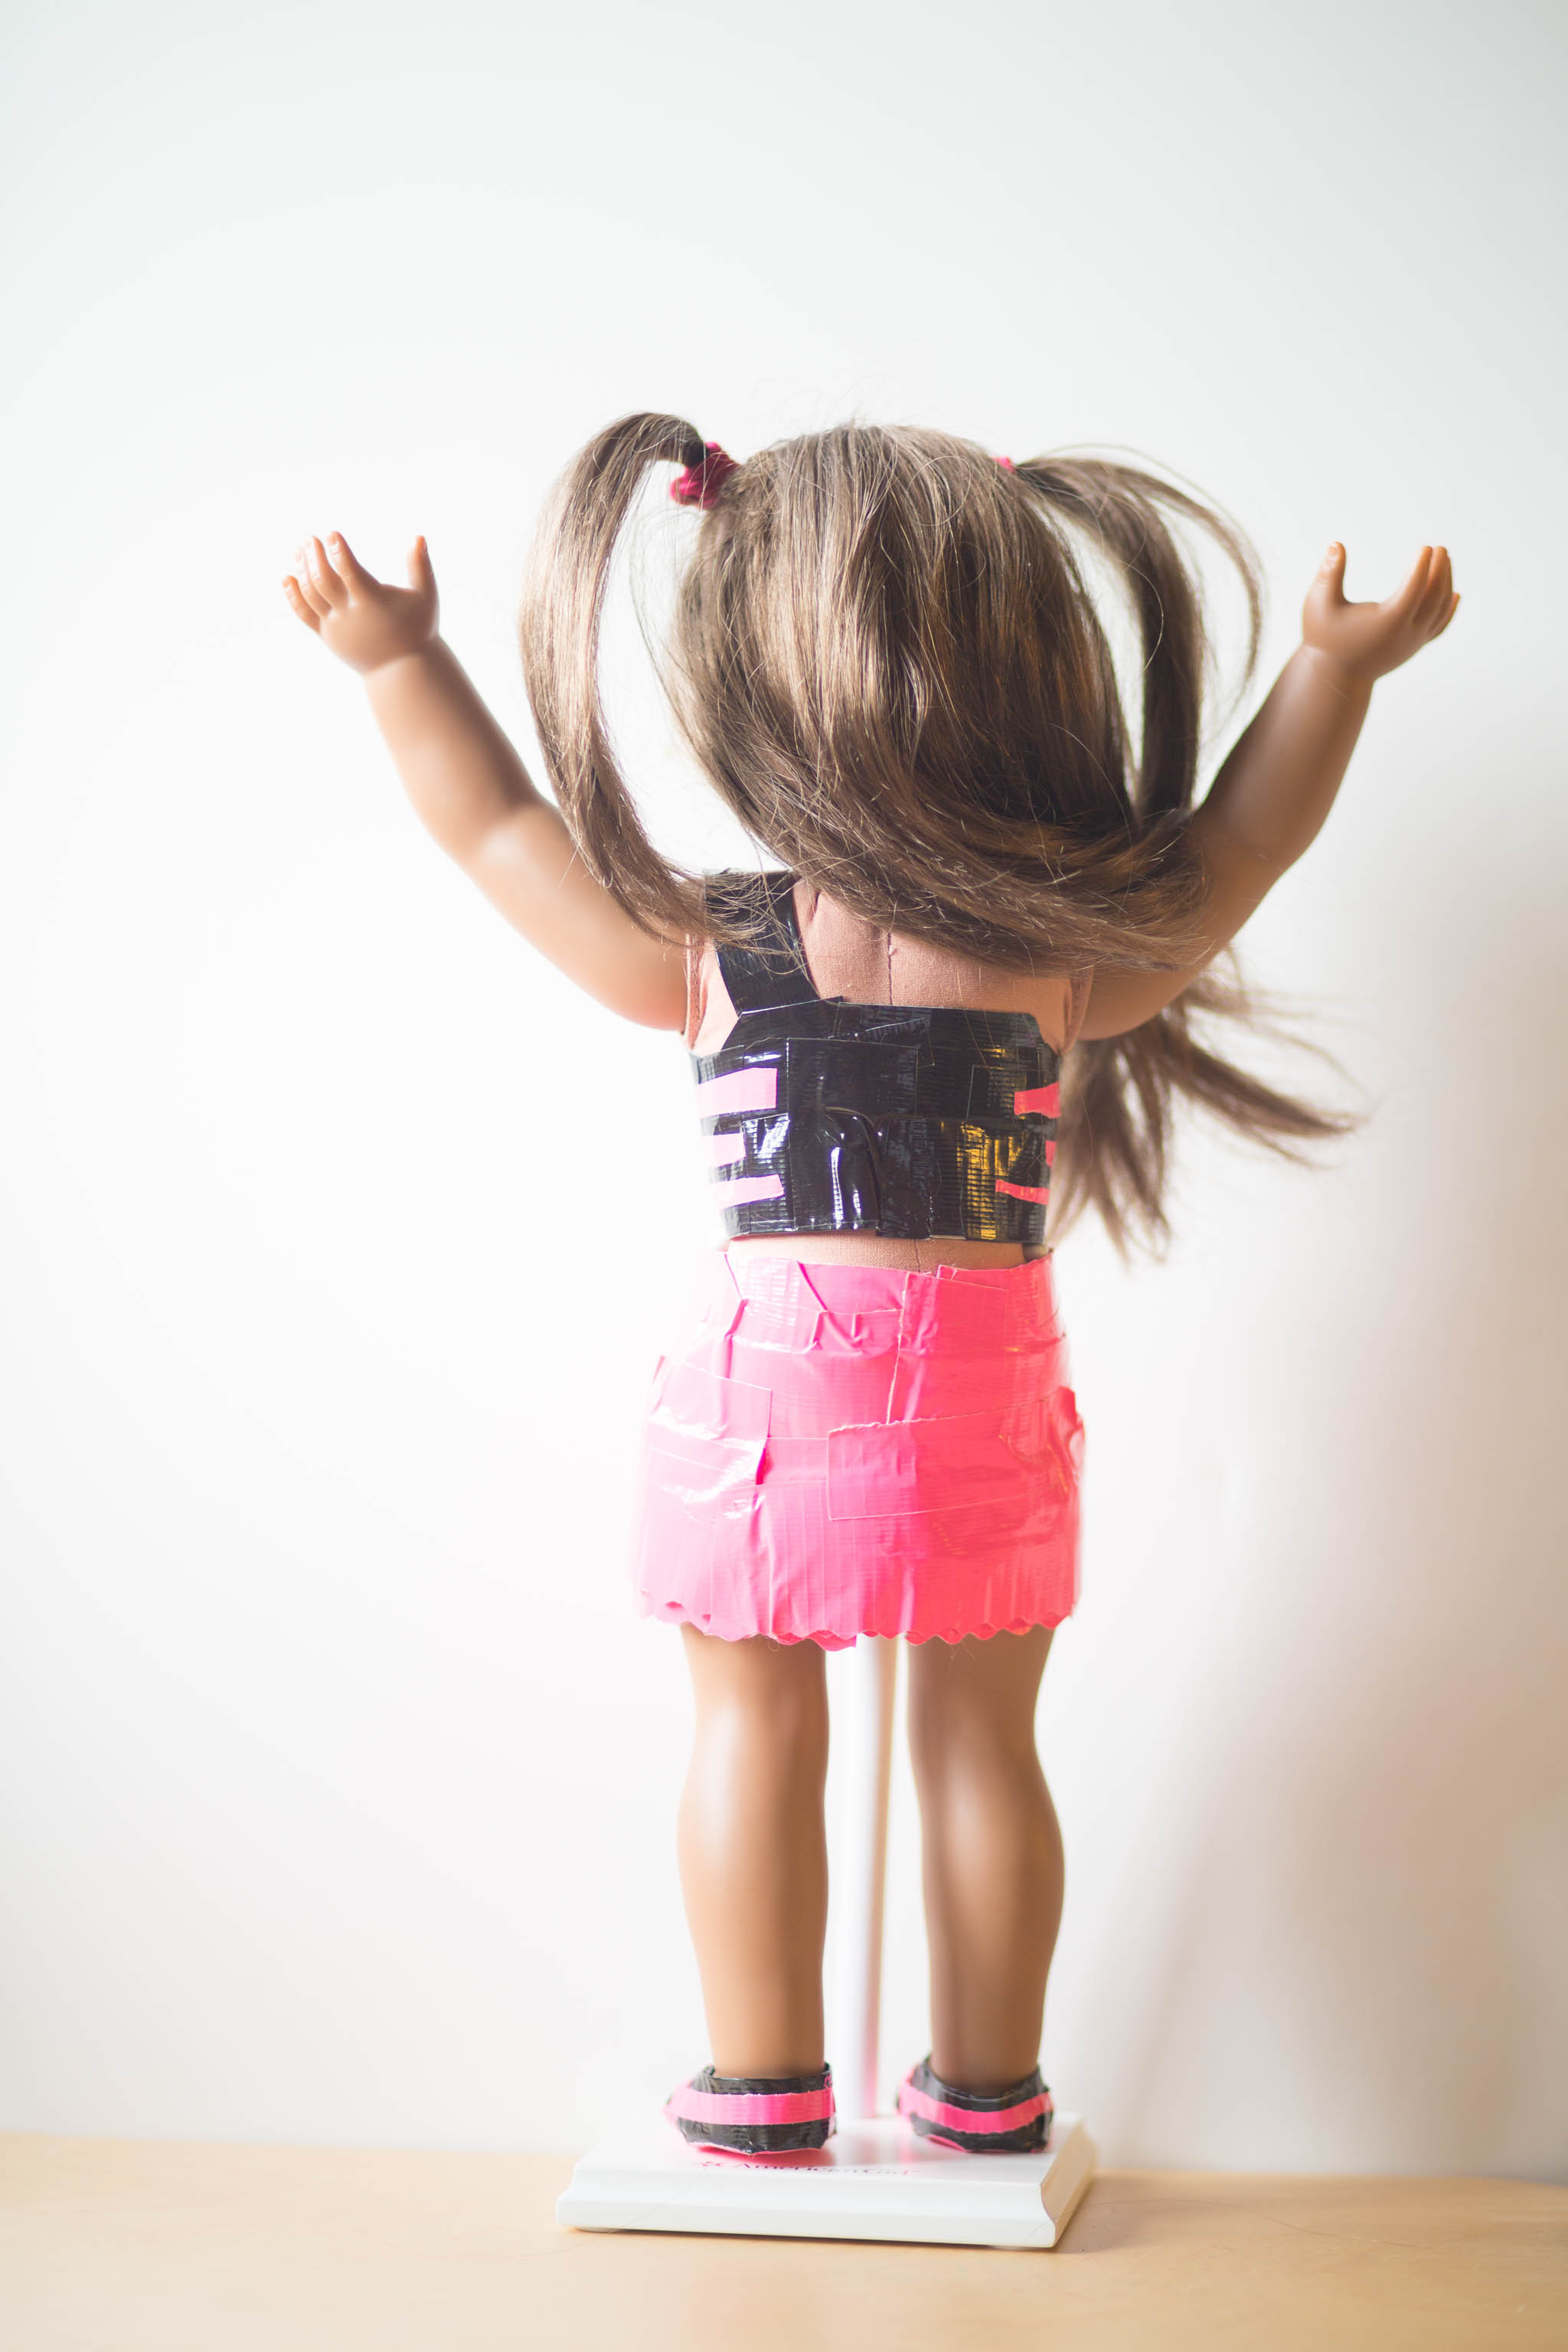
She made the fireworks pattern on the tank top by cutting thin strips of tape. She needed her own textile. Fancy that.
Her favorite things that she learned were using tinfoil to help shape the shoes, and it’s harder to make skirts than dresses, because the dolls are tougher to fit for skirts. And that clothes designing with duct tape is fun!
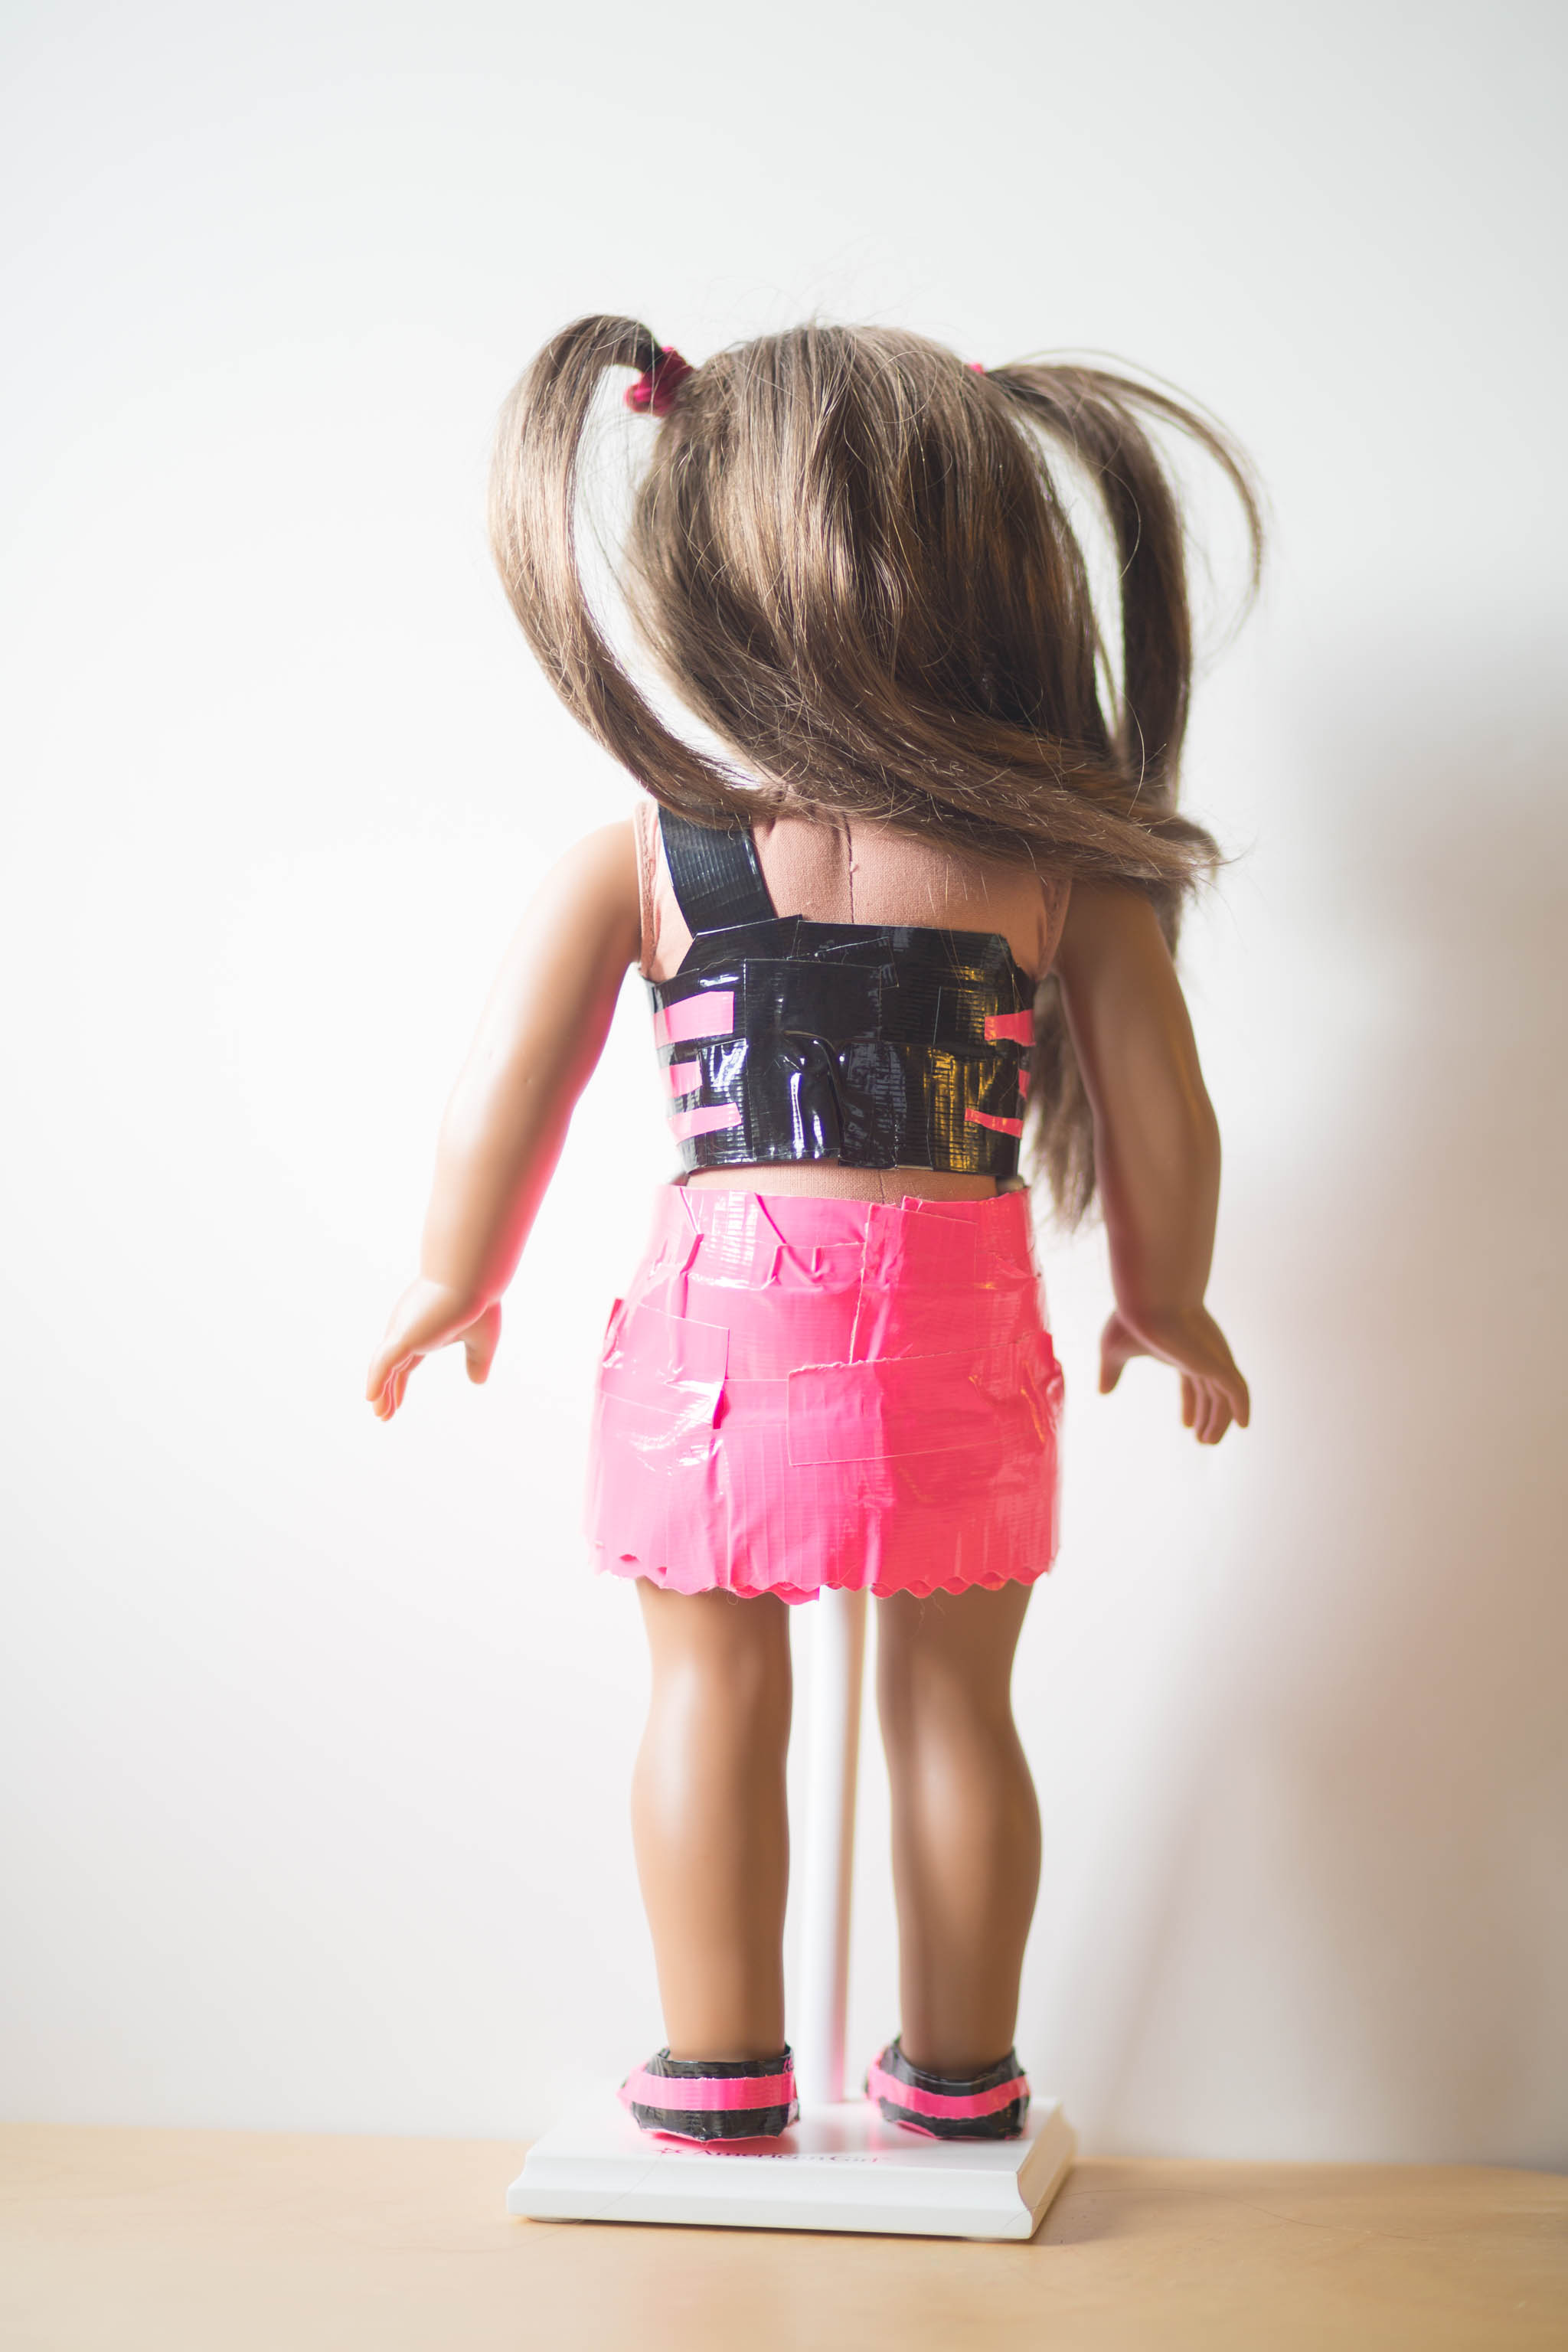
PS- All of her clothes are lined so tape isn’t touching the dolls. She used a rotary cutter with a scallop blade for the wavy effect on the skirt. I hope she inspires you or inspires kids in your world! And, just for the future, Anika is 12 years old. She loves creating!
If you are interested in more detailed instructions for her clothing, let me know. I may be able to inspire Anika to create a tutorial!
So Thankful
We appreciate all the magic. The creativity. The support. The sharing. The love. The wonder. The delight. The laughter. The surprises. The adventure. The ideas. The colors. The surprises. The gifts. The joy.
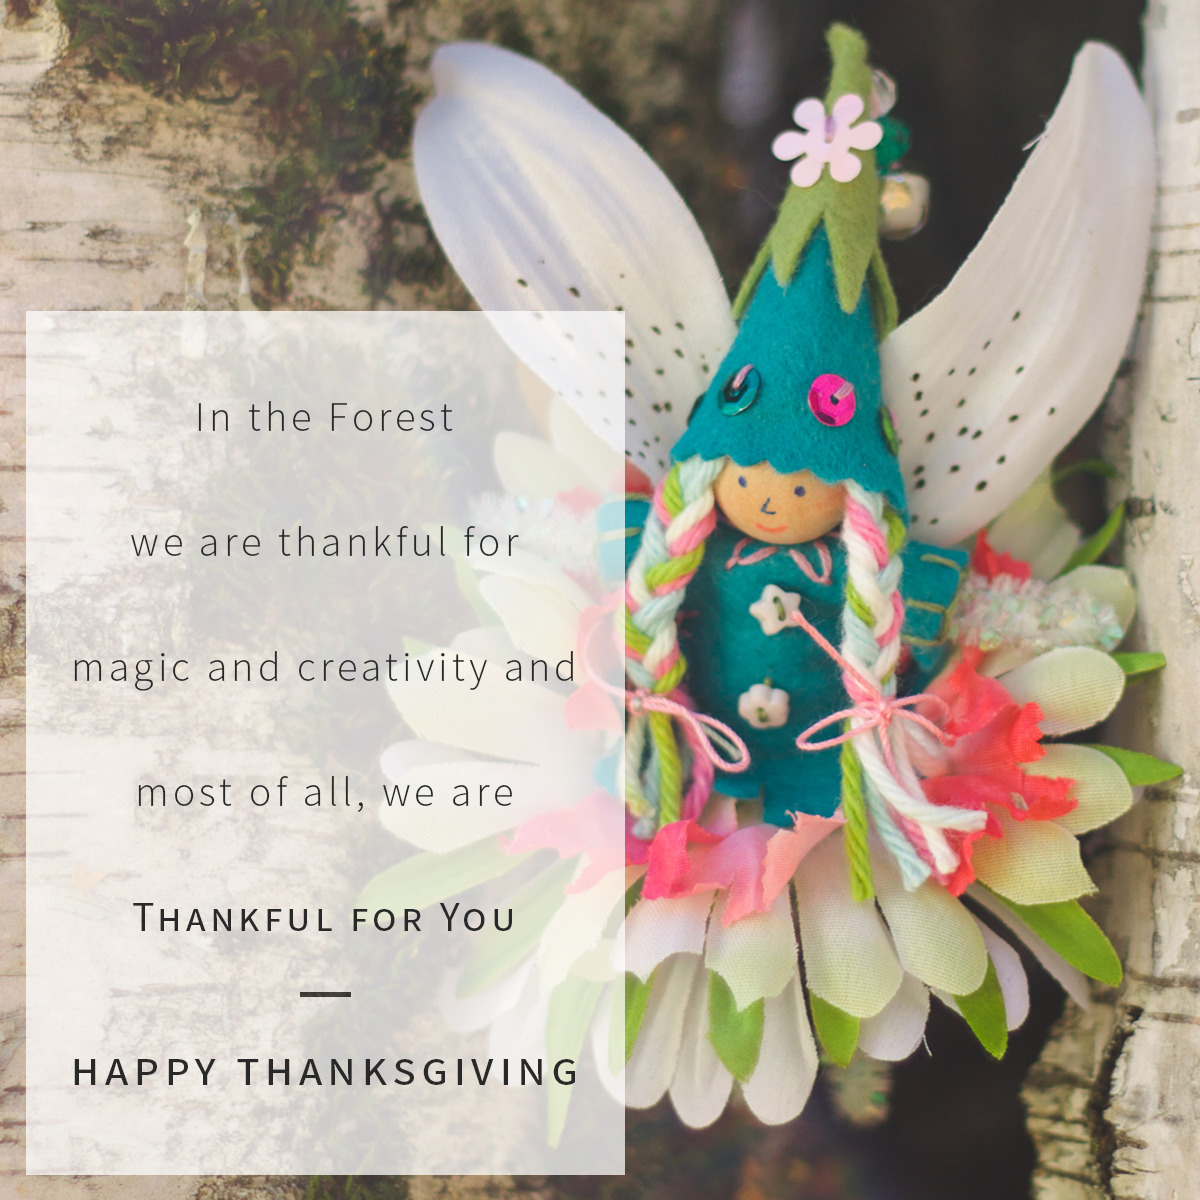
So much gratitude. We hope you get to spend the day with family and friends, enjoying lots of treats and laughter. Happy happy!
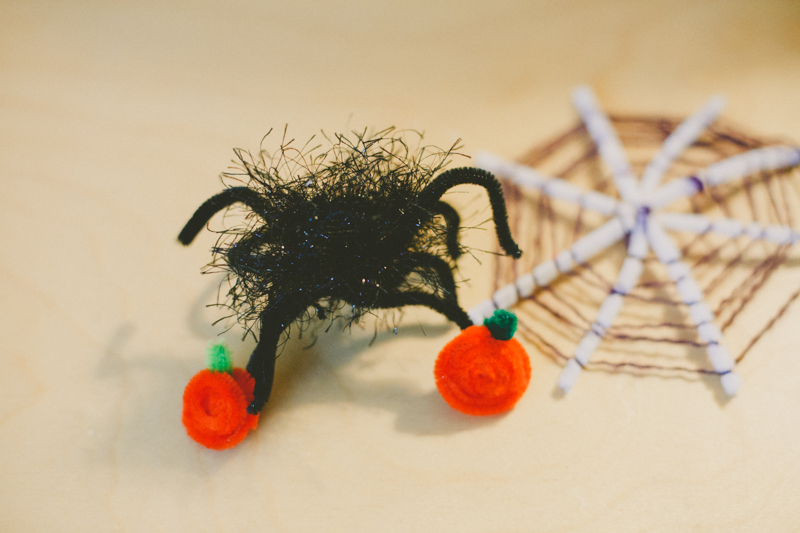
Spiderwebs and Spider Craft
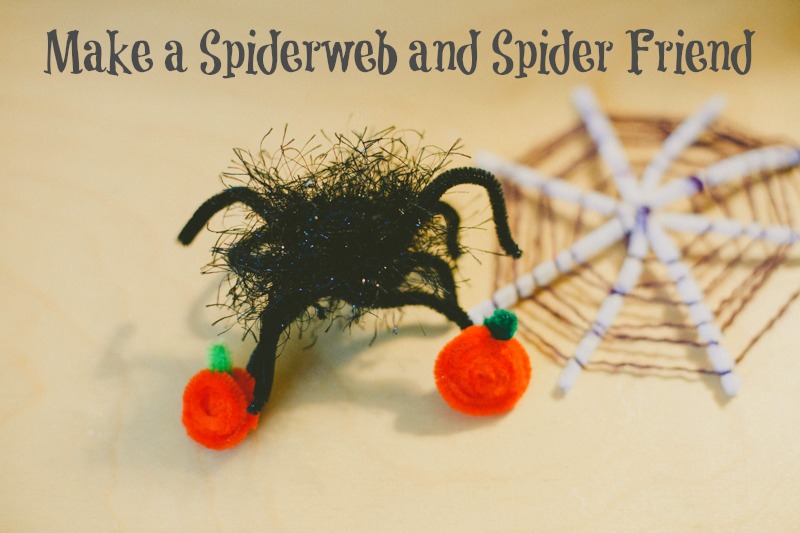
My girl and I love Halloween! As we brought out this year's decorations, she really really wanted to decorate her room. In our family, that means creating new goodies!
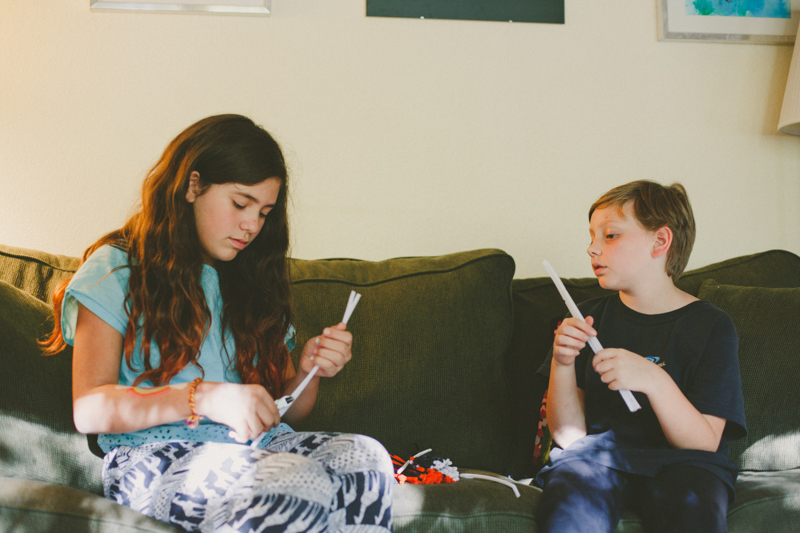
She wanted to create cute spiderwebs and spiders. They're fun, easy, and quick. My niece visited and she had just finished reading Charlotte's Web so this craft especially inspired her. That gave my girl the chance to be Teacher, which is always fun.
Along the way, we learned more techniques for different looks. We hope you enjoy!
Supplies:
- Pipe Cleaners
- Wire Clippers (or scissors if you don't mind possible nicks in the metal when cutting wire)
- Yarn
- Fuzzy Yarn (we used Festive Fur)
The Making:
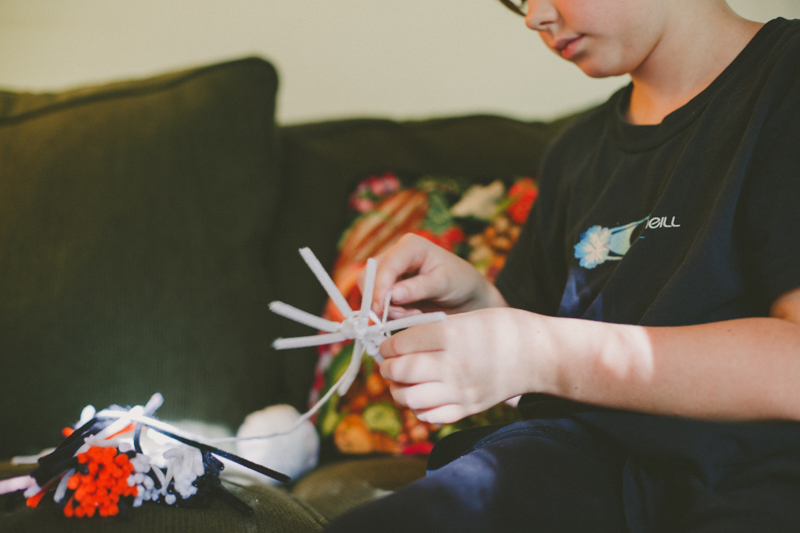
Clip three pipe cleaners in half so you have six in all. If you don't clip the pipe cleaners, they get weak towards the outer edges of the circle. I've also seen this project made with dowels which lets you make larger spiderwebs. The fuzzy pipe cleaners are easier for the yarn to stick in a spread out design.
Lay them them down and tie a piece of yarn around the middle. Spread them out and start winding the yarn around the center to hold them together.

The yarn can be white or black or purple (or any color). You can tie the pipe cleaners together while they are straight and then fan them out. My daughter insisted on tying them while they were all spread apart, which is trickier but still doable.

Start wrapping the yarn around the pipe cleaners, going around one, then the next one and the next one. Give yourself a little space between each layer as you go around and around the spiderweb. It may take a few passes to get the hang of it, but even spiders must practice making their webs (don't they?).

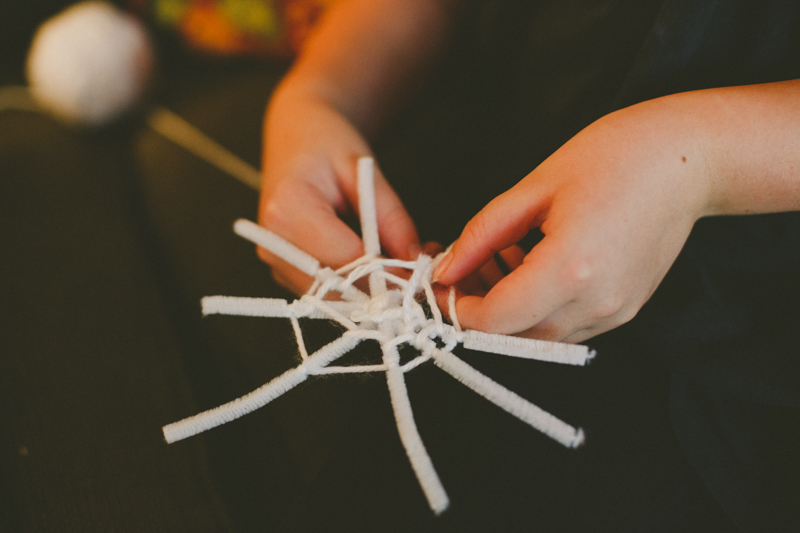
Continue to the outer edge of your spiderweb. Clip the yarn and tie around a pipe cleaner. Leave a little extra that you can use to hang the web.
For the spider, clip three pipe cleaners again to make six. The fuzzy yarn is a little tricky for little hands, so I helped with making the first spiders. We tried two ways that both worked.
First, we wrapped the fuzzy yarn around three fingers a few times. We clipped a length of plain purple yarn and tied around the middle. After our little fuzzy ball was secure, we tied it again around the middle of the three pipe cleaners to give our spider six legs.

Spread out the legs and bend to give your spider personality.
This version of the spider was a little flopsy (which was totally fine) except it inspired us to try again.
This time, we wrapped the fuzzy yarn into a ball. To learn how make a yarn ball, you can visit here. Basically, wrap the yarn around a few fingers, take off your fingers, wrap a few times in another direction, and again, and again. Once you get the hang of it, yarn balls are simple and fun.
Once the ball was about the size of a grape, we laid the three pipe cleaner legs across and wound around them too. Now we had six legs. We could fan them out and wrap the yarn between the legs. This technique made the spider more durable.

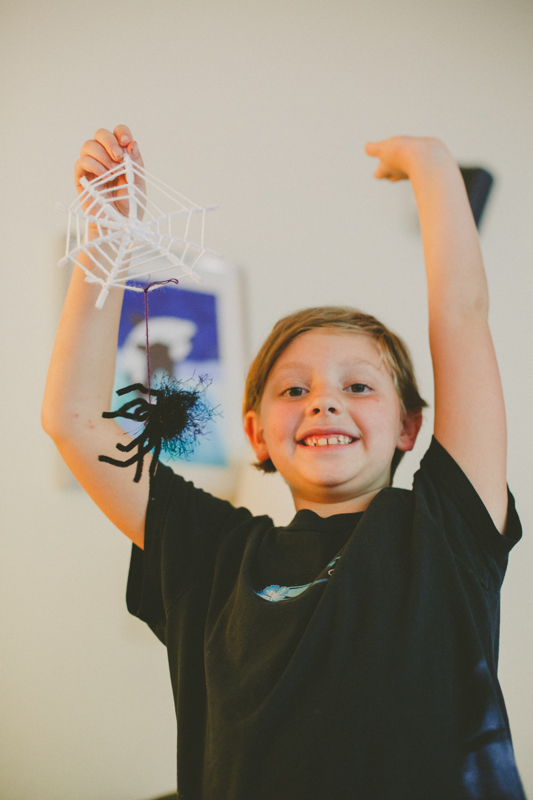
Isn't she cute?
Once our spider was nice size, we tied the yarn around the middle to secure it. The nice thing about fuzzy yarn is that it hides all the knots and loose ends. We tied a strand of plain yarn around it to give a thread/web for hanging.
Hurrah! The excitement kids show when they love their creating gets me every time!
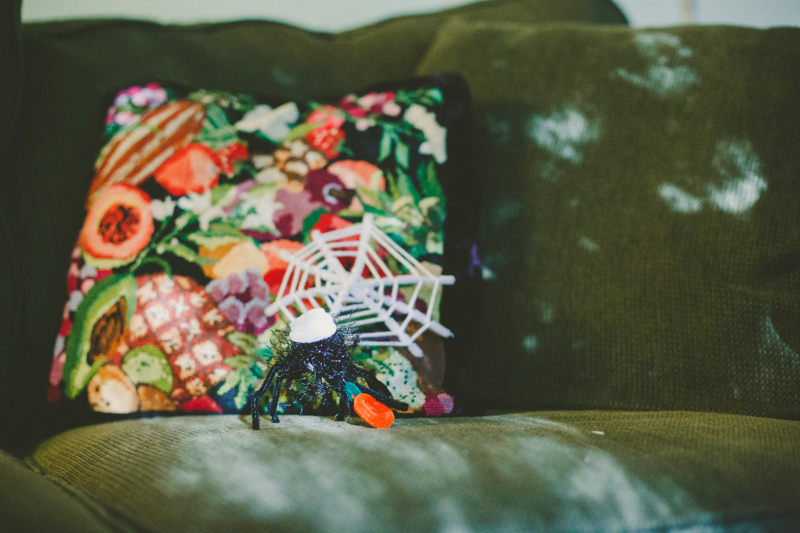
Meanwhile, the girls realized they could spin a piece of orange pipe cleaner in a spiral to make pumpkins! So many pumpkins! A tiny pice of green tucked into the spiral became perfect stems.

What lucky spiders getting decorations of their own!
Then, my favorite part of creating! The kids took off with their own ideas. My niece spiraled a white piece of pipe cleaner into a hat.
And my girl realized white pipe cleaners and white yarn can make an awesome ghost. Little pieces of orange pipe cleaner tucked into the yarn made perfect eyes.

Sometimes, all we need to do is give children the opportunity (and supplies). I am constantly amazed!
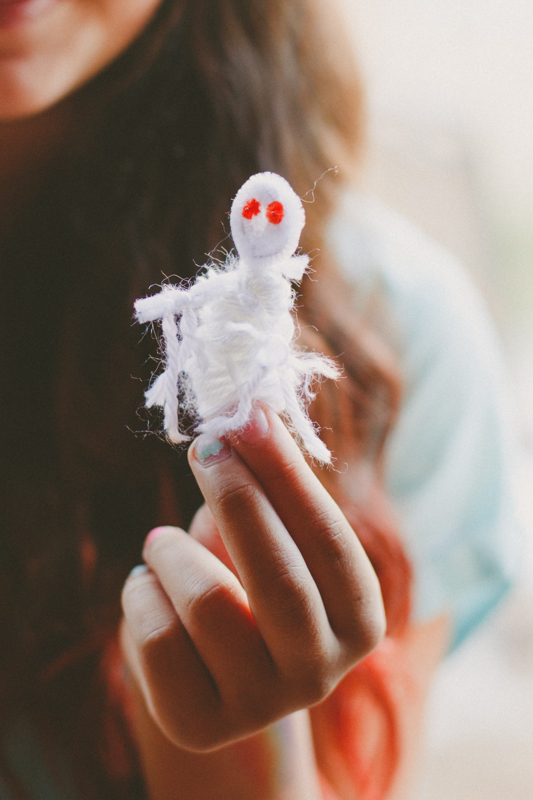
What a darling little ghost!
*I might need to write a tutorial for her ghost because I'm so curious how she made it :)
I hope these inspire your own decorations. A few pipe cleaners and yarn sure gave us a fun afternoon. And now our house is pleasantly spooky!

Zombie Bride and Groom
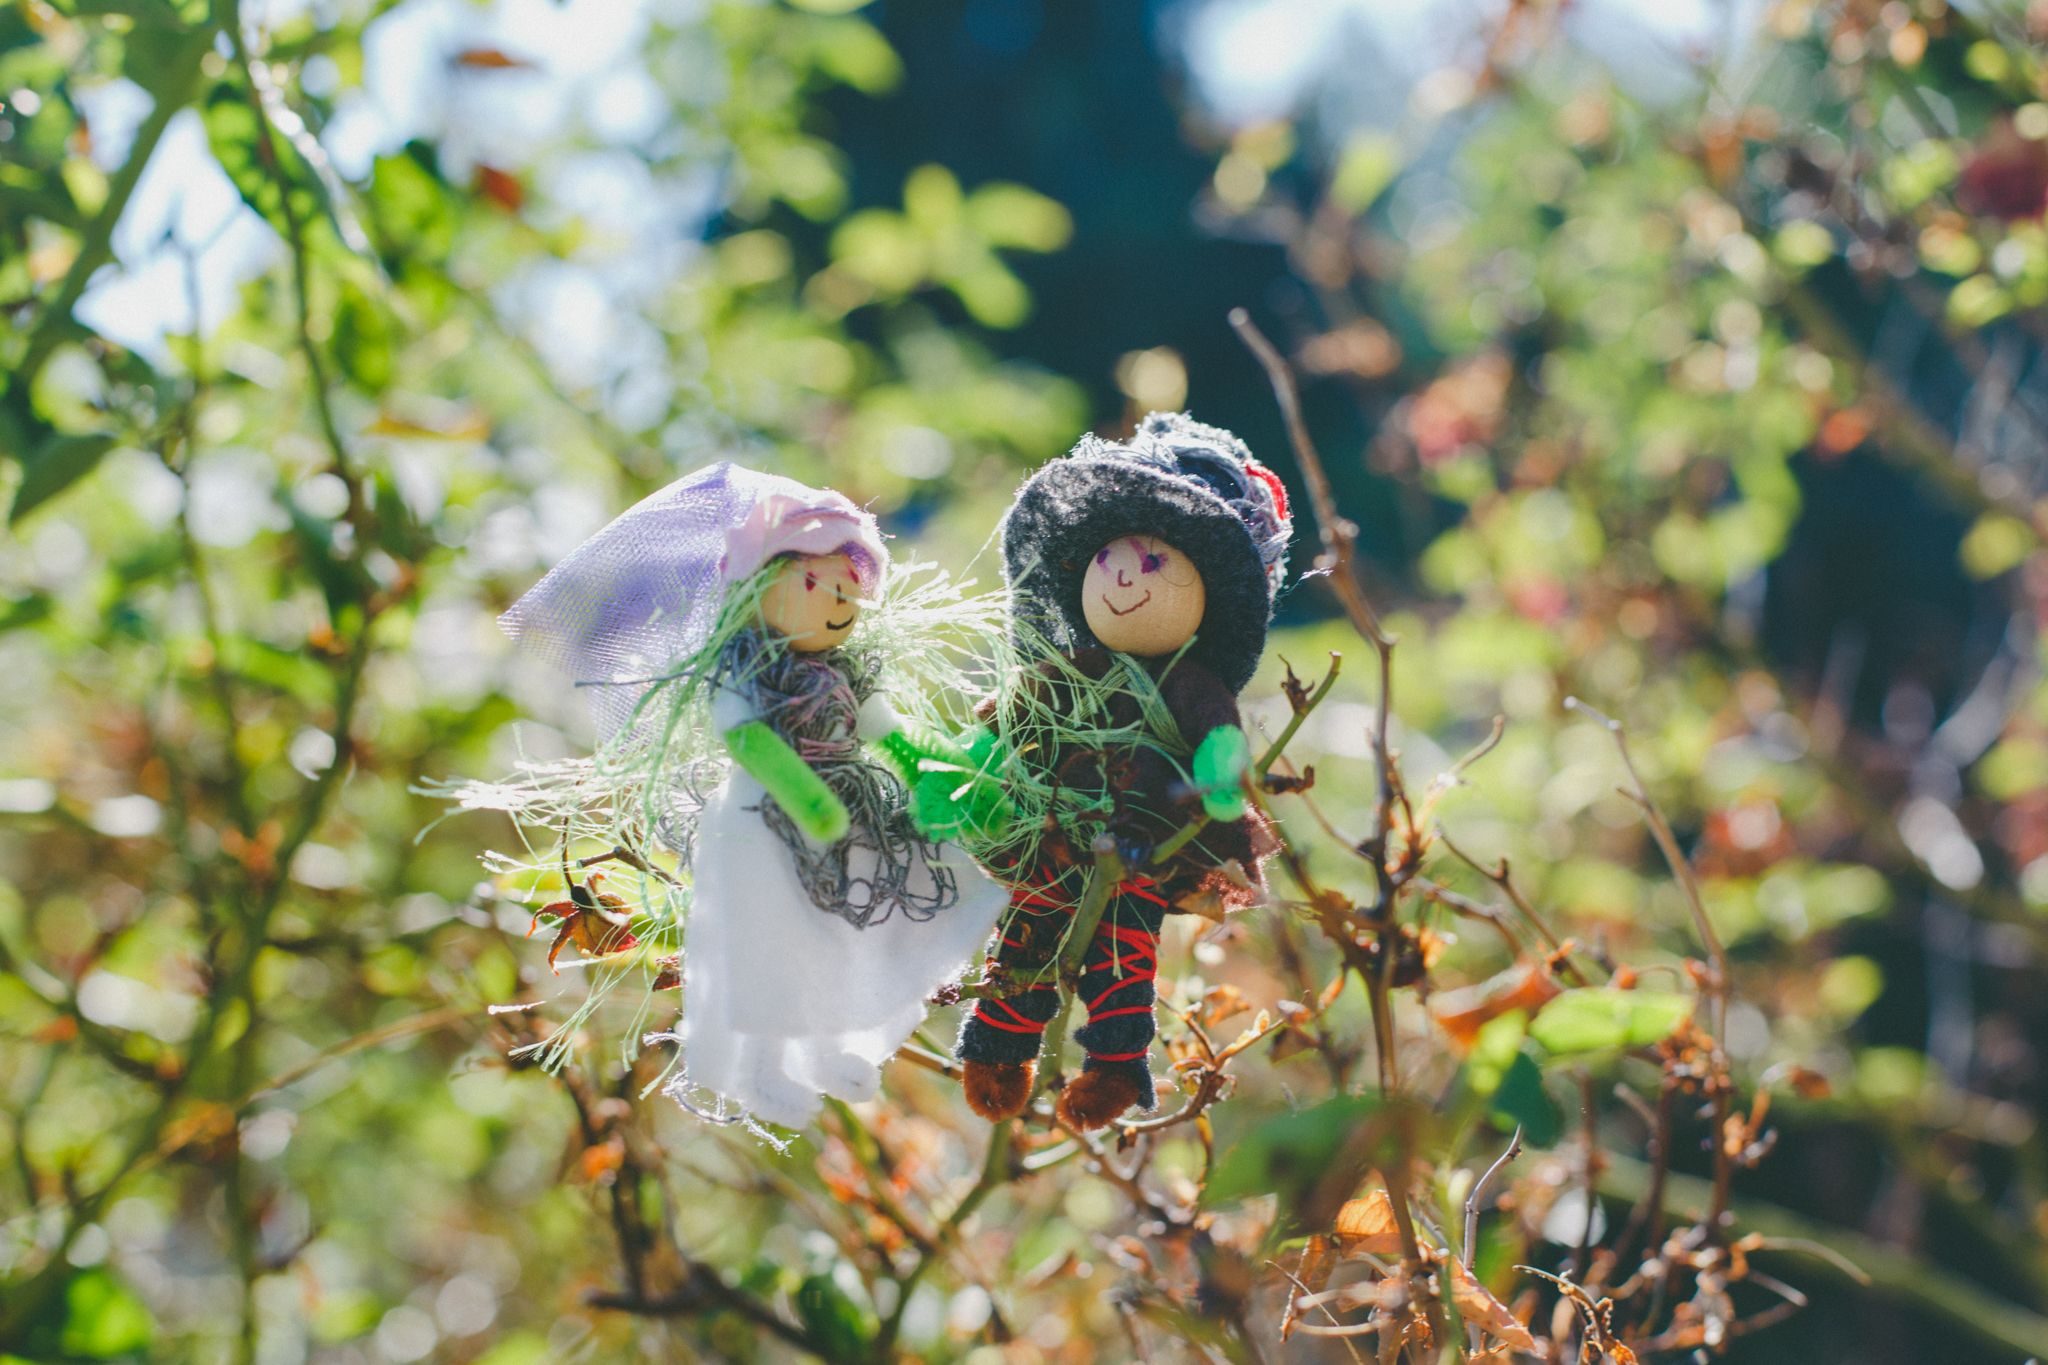
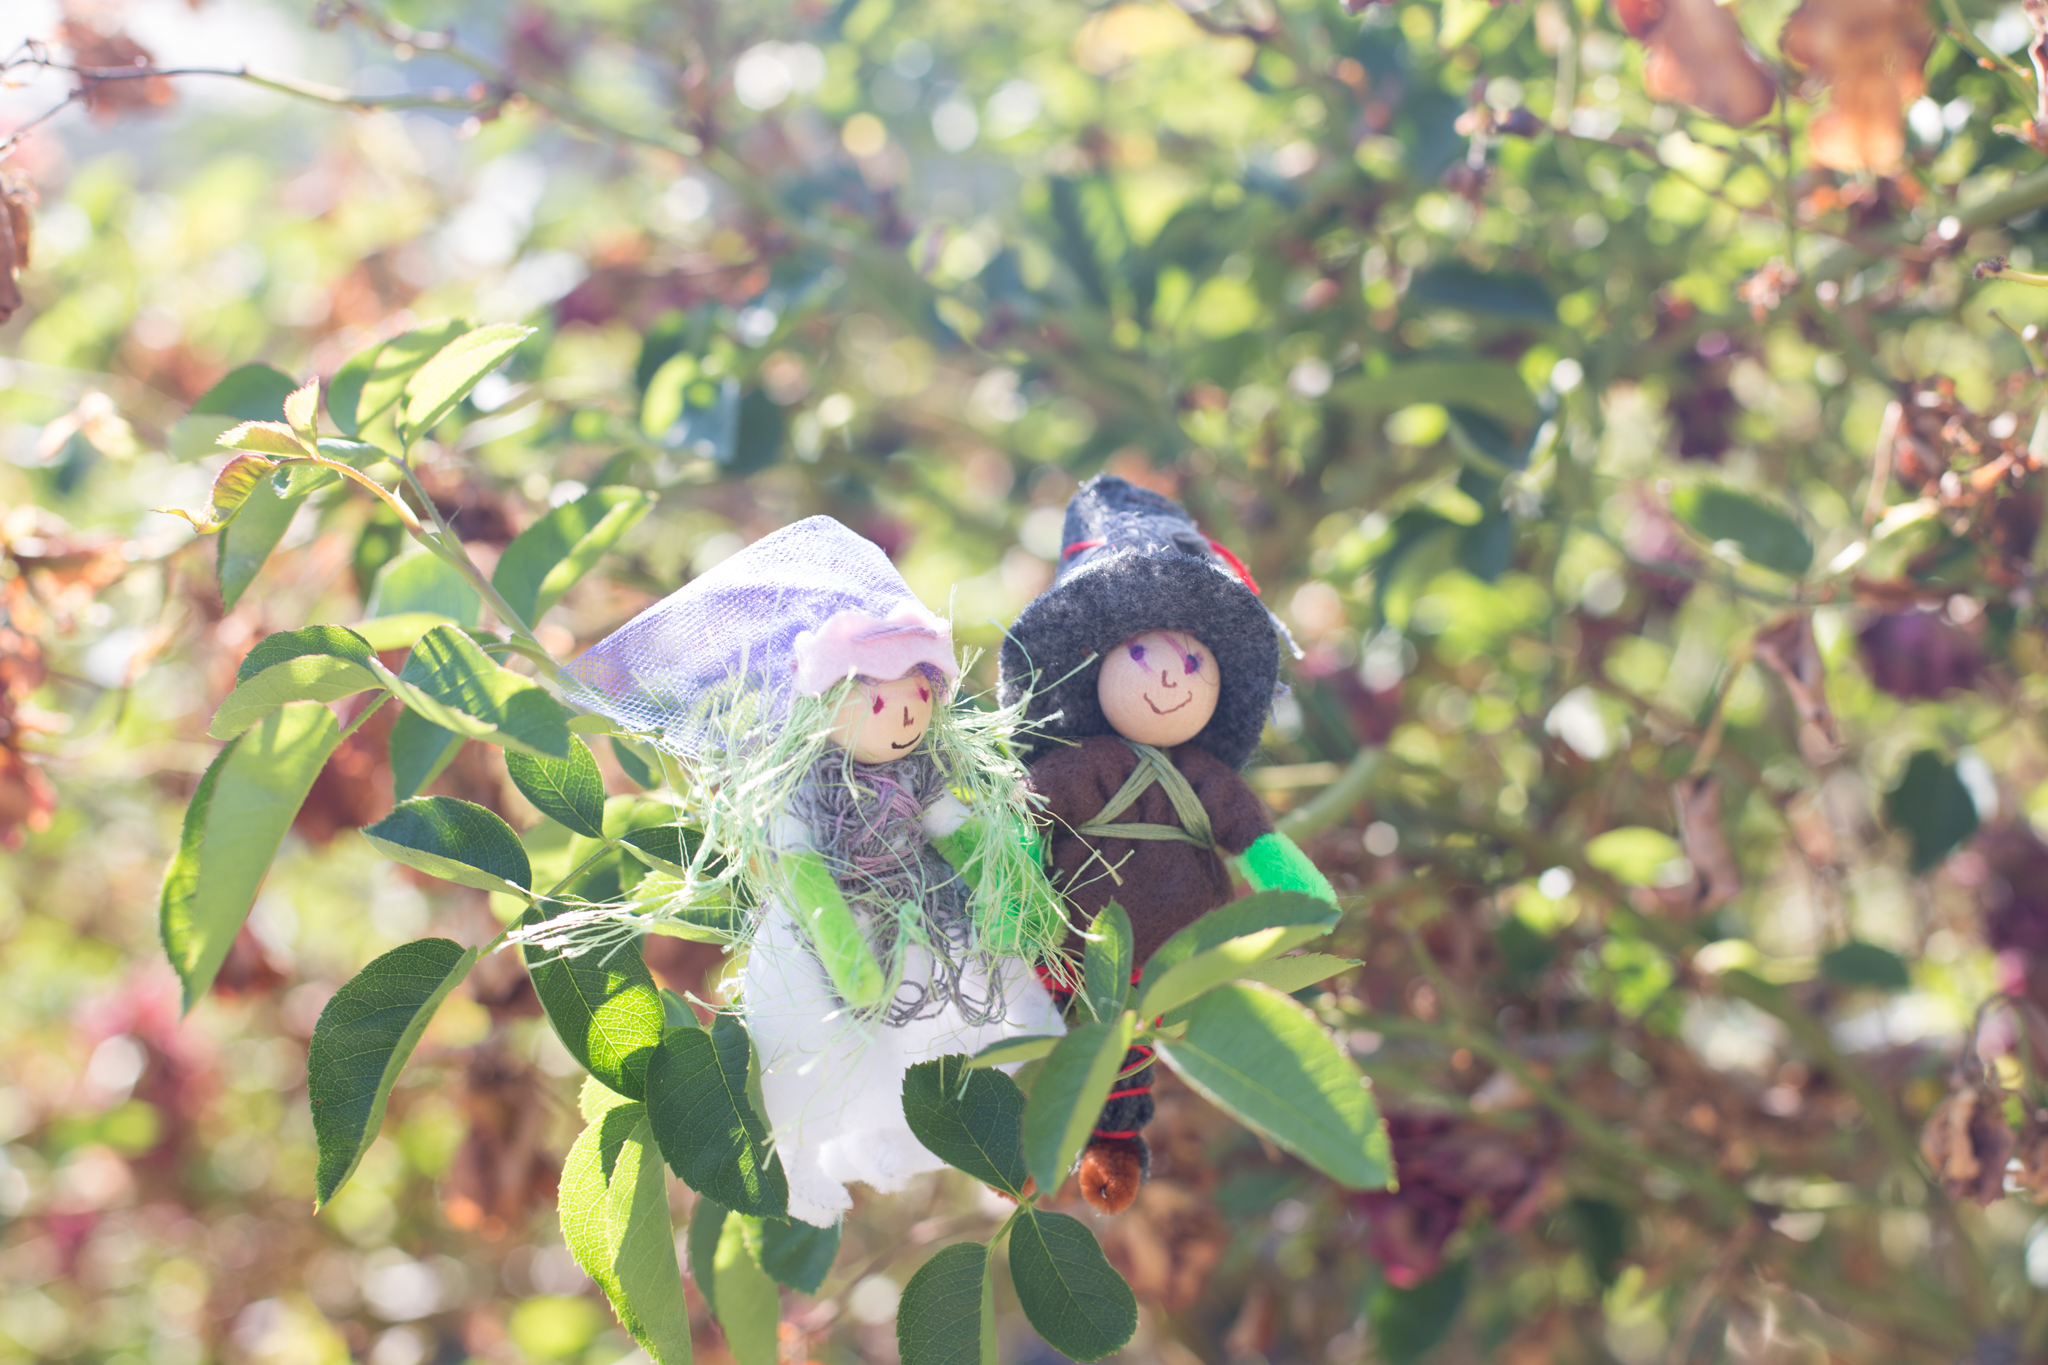
My daughter created this charming couple. We love zombies! In the Fairy Forest, the zombies are the wild children. They embrace mess. Tangles. Layers of rough-cut felt.
These two are cake toppers for a contest she entered featuring Ugly Cakes (yep, it's a real thing) at the Nevada County Fair. She was inspired to make a zombie wedding cake. She could make layers, and drizzle raspberry sauce, and add black icing (yuck)! We knew that a bride and groom cake topper would bring the entire cake together.
We used the zombie patterns from Forest Fairy Crafts. The layer of creepy cloth is easy to find in the Halloween season. I bought a mantle decoration years ago and use it for all of our zombies.
Our biggest challenge was their fancy hats. For the bride, we cut a strip of felt to hold her veil. We sewed the tulle onto felt with a few stitches and ended up securing the back with a stitch as well. Otherwise the tulle stood straight up!
For the groom, we used the same pattern as the witch and pirate hat. Except we created a tube instead of a triangle. I sewed a black rectangle to the top, then clipped around the edges to make it circular. I ended up doing these tricky parts because my daughter was distracted with lots of gooey decorating on the cake.

We wrapped a little creepy cloth around the hat as well. The nice thing is that we didn't have to worry about messy stitching or uneven edges. He is a zombie, after all.
For their faces, we used sharpie and smeared the ink before it dried. Again, we love the freedom of imperfections!
I hope these might inspire you to make happy zombie couples of your own! I ended up going to great lengths to keep them after the cake won a Blue Ribbon. Yes, she won first place!
And here's where they belong. On a zombie wedding cake!

Aren't they wonderful? The little dish at the top protected them from all of that icing.
And, don't worry, no one ate this cake :)
Remember, you have time to come to Circle of Hands Toys and Gifts on Saturday, October 17 to meet me and Margaret Bloom of We Bloom Here. Visit our Events for more information.
*this post does contain an affiliate link to our book. Should you choose to purchase, a small amount returns to the forest while your price remains the same. Thank you!

Favorite Fall Fairy Crafts

A few of our favorite Spooky Fairy Crafts
Spooky in the Forest is all about the fun of October. We love the darker paths, the gnarled trees and long shadows of evening. In the forest, our zombies have a sweet tooth. They enjoy tea parties. Our witches are candy-makers. Their cottages are sweetness and celebrations.
We have collected a few of our favorites through the years in this post. We have the link for a Free Moody Pumpkin Tutorial here! Moody Pumpkins can change their mouth to show happy, sad, angry, or confused. Kids love sewing them all over the world. Thank you for sharing photos of your moody pumpkins with us!
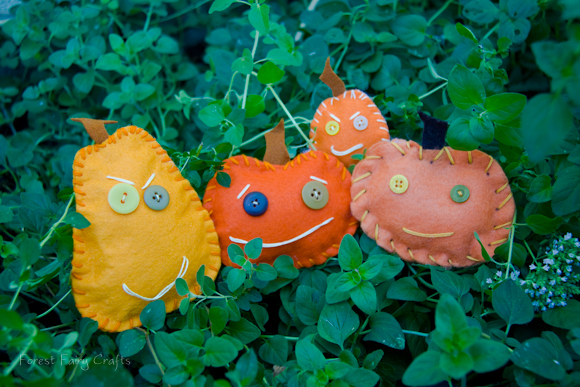
Moody Pumpkins in the Forest
We also have hints for sewing pumpkins with groups of children here.
A subtle change in an afternoon breeze signals a wonderful new season. Hints of falling leaves and a slight golden shimmer to sunshine whispers "autumn is here".
We love autumn in the Forest. The fairies adore a summer ball and a winter holiday, but they also love autumn. They love the way trees become a riot of color. How wind rattles leaves along the ground. They love the crisp air. They love pumpkin spice everything (don't we all?) They love to decorate!
A few of our October favorites are here. We have a few new ideas to share over the next couple of weeks too. Fairies love to dress up for the season!
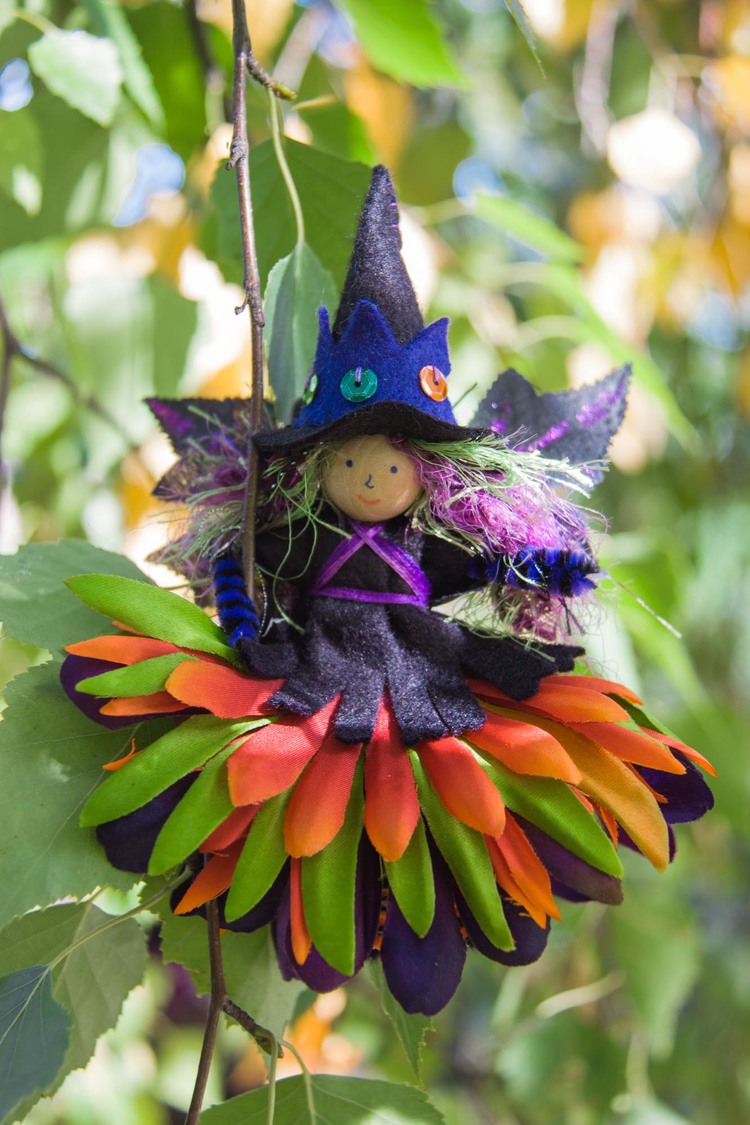
Fairy Witch by Lenka
I love to make witches and warlocks. The tutorials for step-by-step instructions are in our book.
I also love zombies. The fun about fairy zombies is that these fairies really, really don't care about being tidy. Smear the ink on their faces. Wind the thread in wackadoodle directions, layer torn fabrics... Zombie fairies love it all.
One hint for zombies is to look in local Halloween displays for 'creepy cloth' or other table decorations that can become clothing. I bought a mantle cover of gray creepy cloth about three years ago. I still have tons of it left!
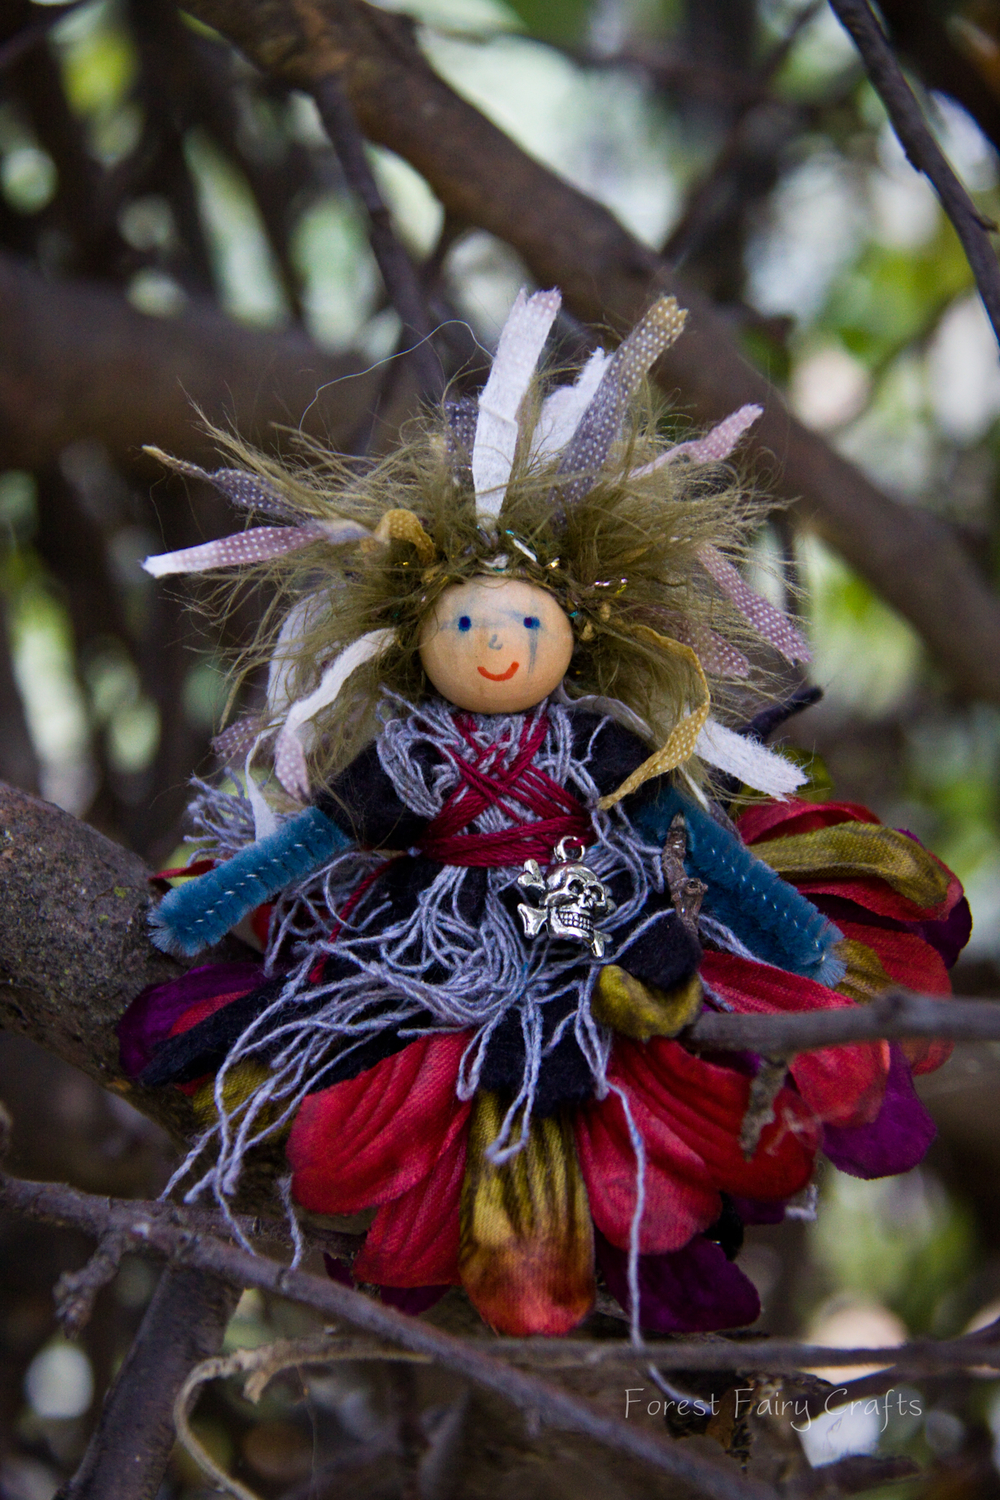
Fairy Zombie by Lenka
Instructions for the zombie and Pumpkin Fairy are in our book as well.
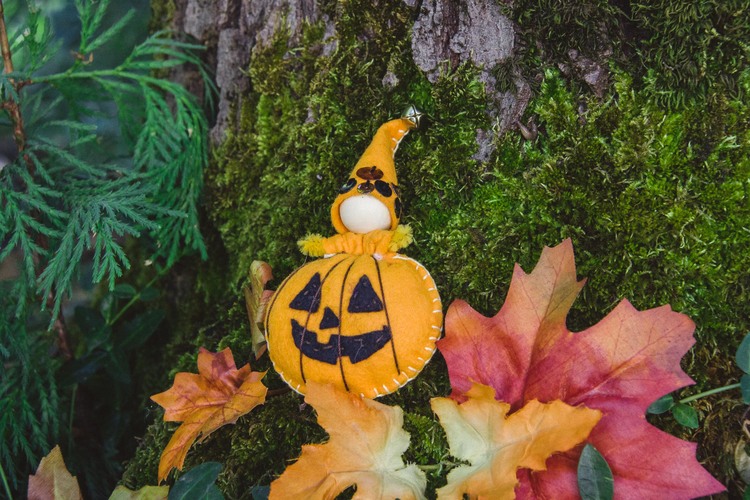
Pumpkin Fairy by Asia
This pumpkin fairy is such a sweet Halloween friend and decoration. The stuffed pumpkin is attached to the fairy. Though I imagine you could make the pumpkin-styled sleeping bag that the fairy sleeps inside... ooh, ideas!
Anyway, this playful fairy is so fun for the season.
Of course, if you want an easy way to create a few spooky fairies and crafts of your own, you can visit our Etsy Shop. We have one Pumpkin Fairy Craft Kit. We also have a Spooky Toy Maker Kit that has lots of supplies, including creepy cloth!
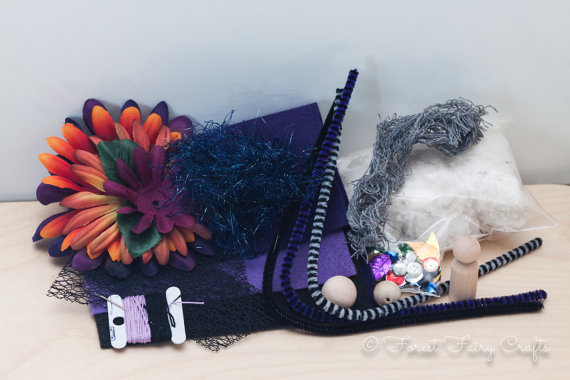
Spooky Toy Maker Kit
And if you would like to have a witch of your own made by Lenka, we have one left. She's a bit sassy :)
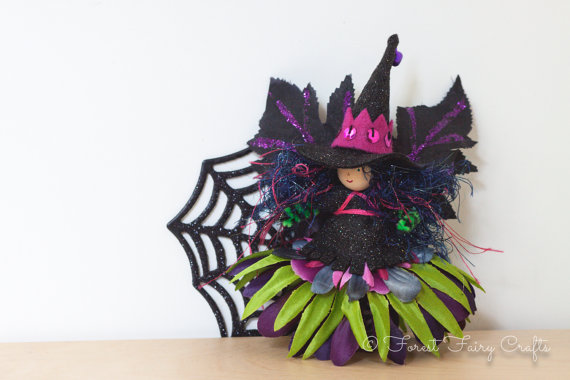
Fairy Witch by Lenka
You can find her here.
Enjoy all the fun of the season!
*this post does contain affiliate links to our book. If you choose to purchase, we receive a small commission while your price remains the same. Thank you for supporting the Forest.
Fairies will be in Sebastopol
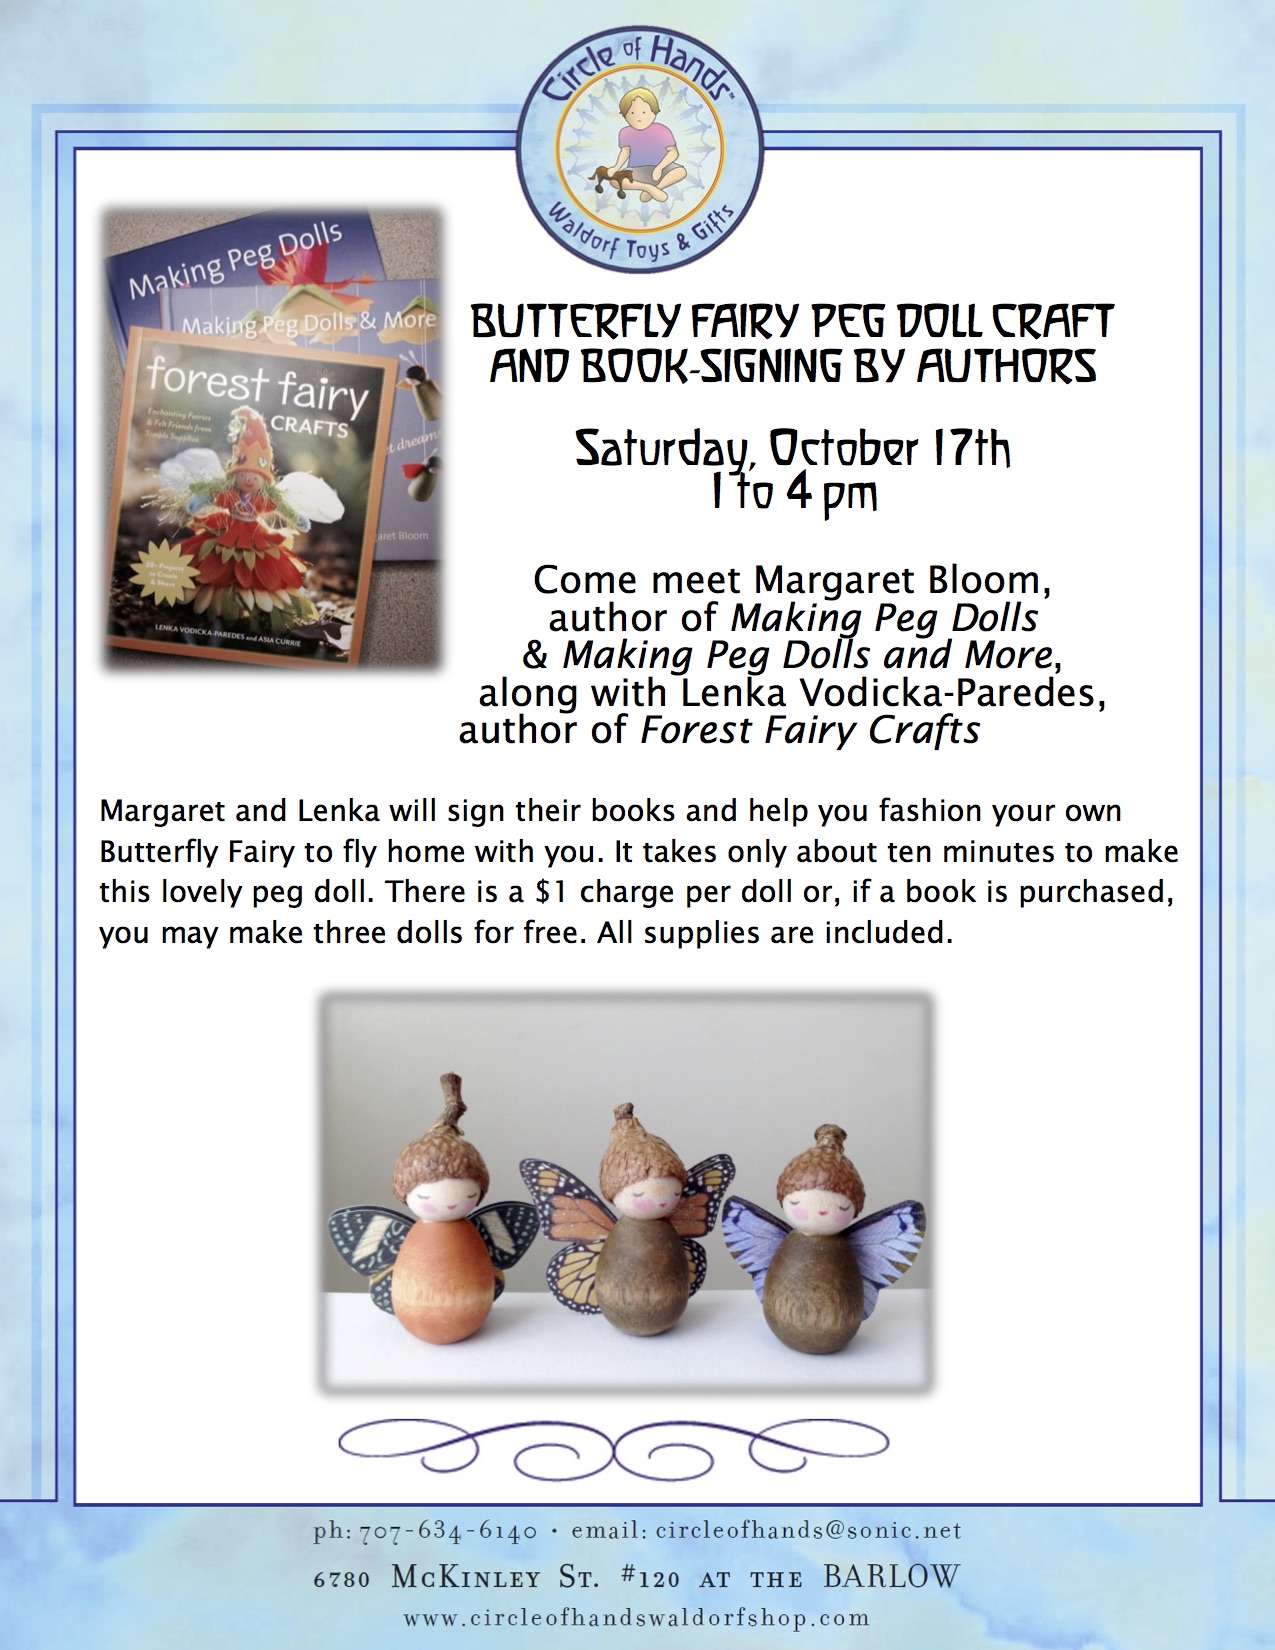
What a lovely flyer that Circle of Hands created for our event next month. These little pegs will be so sweet to create with visitors.
I am so excited to be visiting Circle of Hands Waldorf Shop with Margaret Bloom! We will be making little butterfly peg dolls and signing books.
It's such a treat to visit with Margaret Bloom of We Bloom Here. Her books are Making Peg Dolls and Making Peg Dolls and More. All of her projects are lovely and inspiring. I look forward to what we create together :)
Meanwhile, this change of seasons inspires me to choose new colors, imagine new ideas. Wishing you plenty of inspiration today!

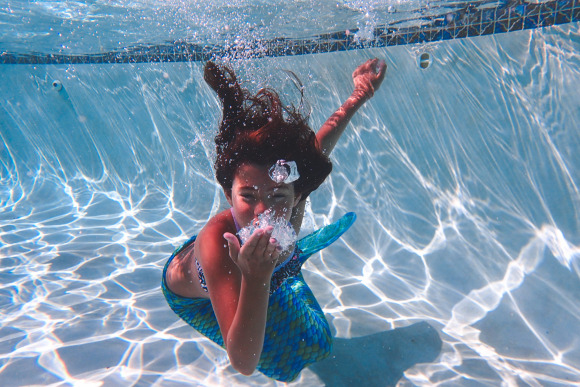
Summer Mermaid
Ah, summer. Your long days that go so quickly! With kids home from school and temps soaring, we spend more time in the water than on land :)
Summer is for mermaids.

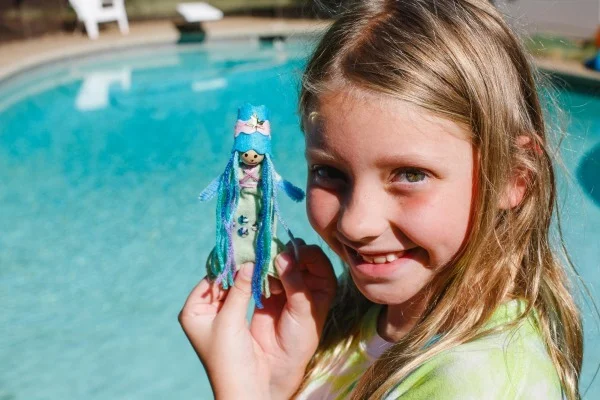
We are slightly obsessed with Fin Fun Mermaid Tails over here :) as anyone who follows my Instagram knows well. My daughter and niece adore becoming mermaids.
The next best thing to being a little mermaid is making a little mermaid. I am super-lucky that my niece spends a few days a week with us in the summertime. We play outisde, go to the river, and craft together. We call it Camp Lenkaland :)
My daughter needed Forest Fairies for an entry in the county fair (more on that later). While my daughter sewed her fairies, my niece made a mermaid.
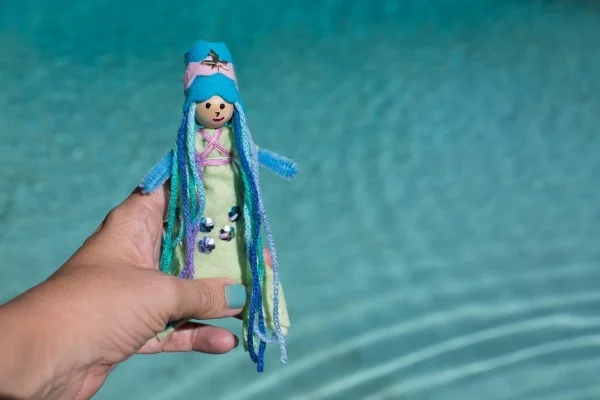
So sweet :). These mermaids aren't for swimming in real water, of course, but she's already joined my niece's collection of Very Special Things. We can create magic :)
Yes, summer is fleeting. Yet the memories last forever :)


Magic Wands with Yarn

So simple and so fun for the class today. I collected fallen branches about a foot in length. I brought sandpaper, yarn, and a few beads to class. Students chose the branch that "spoke" to them. They could use sandpaper to smooth rough patches. A few spent ages making their sticks all smooth.
I showed them how to tie a knot around the branch- the short end dives through the loop, wrapping around the long end. I showed them how to hide the short tail by wrapping around it. We discussed layering colors and adding beads. I said they could fingerknit then wrap the knitted chain. They wanted to engage quickly so no one tried that. Another day :)
Their wands went home with them today, all unique and beautiful! Just like the children :)
Fairies for Good Causes

An invitation. Over the years, we have made fairies for donations. We hear stories about generous people who make fairies and treasure keepers for childrens' hospitals and school auctions. I forgot how much fun I have creating to give. Crafts help children in many ways. Crafts carry love. I made these for my son's class basket. It went to an auction benefiting his school (and arts in schools, including handwork, yay).

Along the way, I found myself enchanted. Giving gives to the giver :)


Don't they look cute on the basket?

Fairies given away have a certain special magic :)
Have you given fairies to a good cause? Where did you give?
I am sure inspired to keep a supply of sweet little fairies just for donating. They are magical :)
Hope you get to enjoy giving :)
Making Peg Dolls and More in the Forest
We love peg dolls in the forest. We love being inspired.
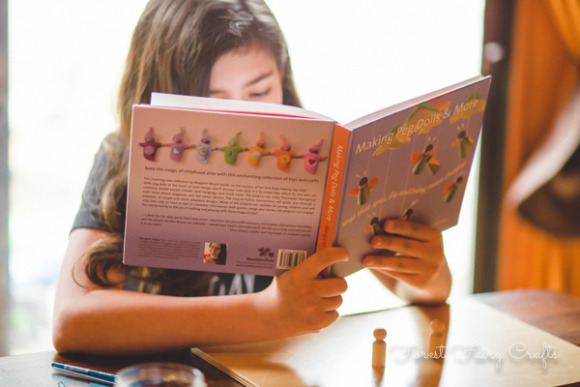
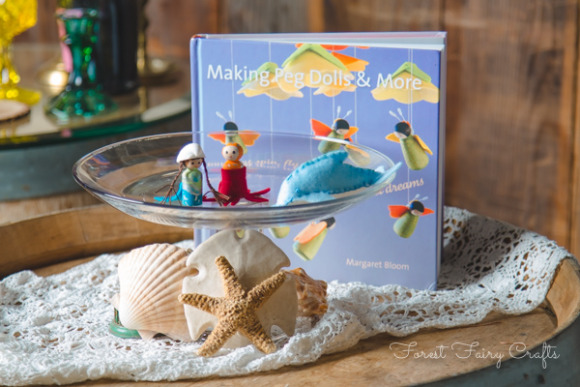
Margaret Bloom sure knows how to inspire us! Her first book, Making Peg Dolls, showed us how to create lovely little pegs for our collection. Her new book, Making Peg Dolls and More, shares new fantastic ideas! We couldn't wait to dive into the pages.
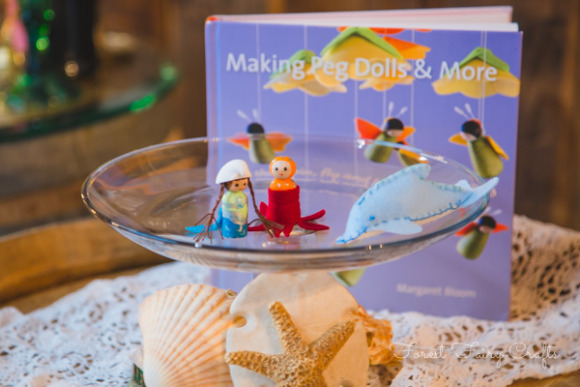
My daughter is a mermaid :)
So of course she chose the mermaid project. My son is all into ocean creatures these days. The octopus was just perfect! To complete our ocean adventures, we sewed the dolphin too. I haven't made many felt animals so I was a little nervous. The directions worked fantastic!
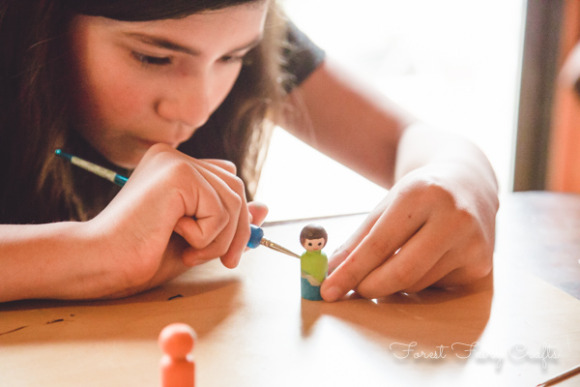

The painted pegs were so cute just by themselves! Even cuter with the felt pieces :)

We love how each step of the craft is shown with easy-to-follow illustrations and beautiful photographs. As a mom, I enjoy invitations to create your own vision. My son loves, loves, loves orange. So we made an orange octopus for him.
My daughter decided that her mermaid needed a seashell for a hat. Is that okay, Mom? Of course! The beauty of creating is that you get to make your visions. Take inspiration and grow. Learn. Discover.
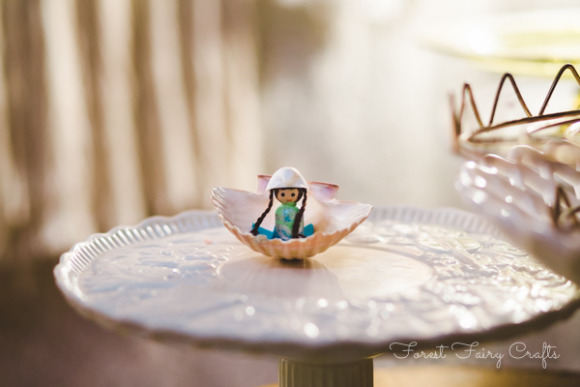
Find magic.
Be delighted :)
The fun is just beginning for the little ocean pegs. They are already finding adventures.
Joining Margaret's Bloom celebration for her new book delighted us! We know that lots of wonderful things are going to made from this book. Our fun is just beginning :) Our mermaid, octopus, and dolphin need more friends.

As a gift for all of us, A Child's Dream Come True (which carries our favorite felt) has gifts for anyone ordering Making Peg People and More. This week (until February 14, 2015) you receive a special free mini-bundle of wool felt and 2 Large Wood Peg Dolls! You can also enjoy 10% off Holland Wool Felt Yards + Cuts and 10% off Wood Peg Dolls. Simply enter code: DOLLCRAFTS in your shopping cart to apply and see the discount. They also carry Forest Fairy Crafts :)
Follow the Entire Peg Doll Blog Tour!
Enjoy!
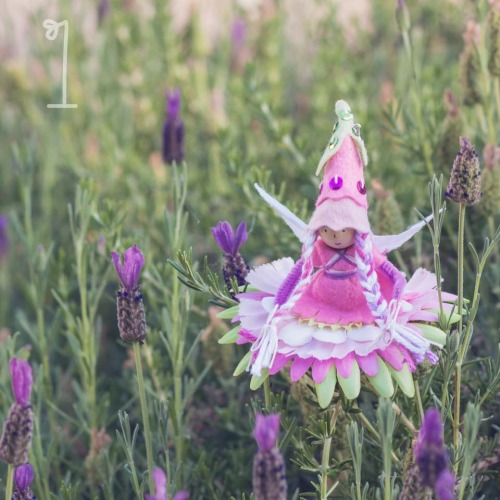
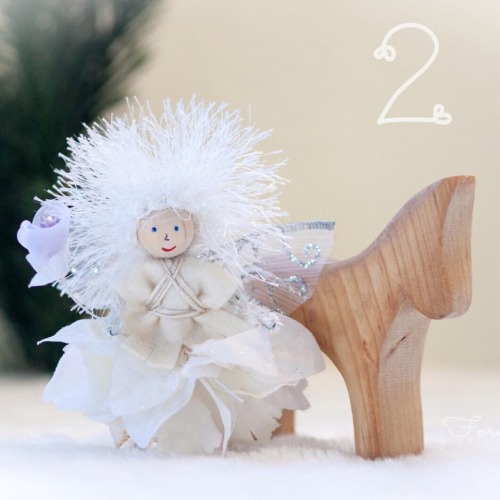
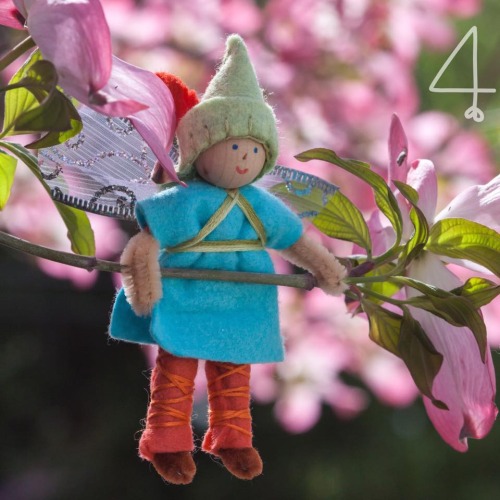
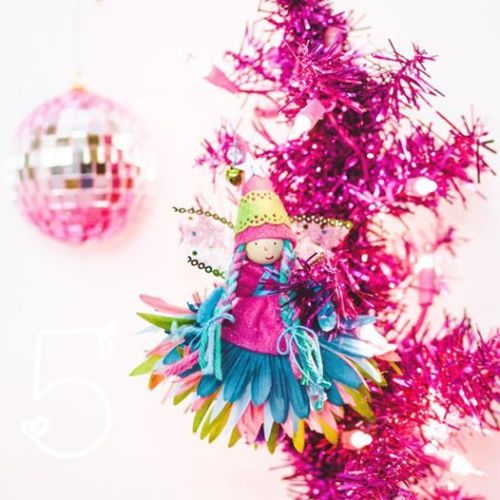
Christmas in the Forest
This year, all the fairies are celebrating the season! I started a Christmas Advent (mini-version, because honestly I had the idea on December 4). We are already on day 7 of 12. And I love looking back at fairies I made over the years! Here they are so far :)

Wishing you a happy holiday season!
Acorn Gnomes

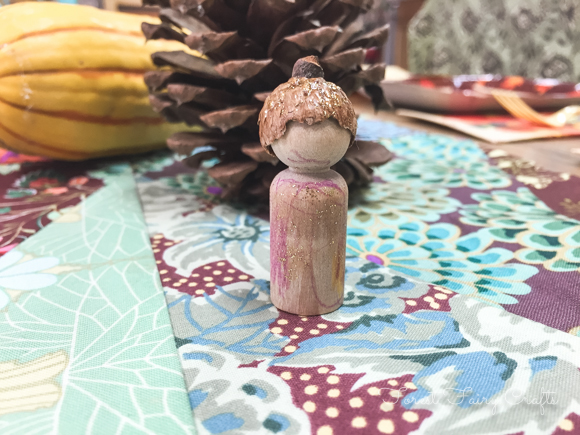
About an hour before class with my youngest kindergarten students, I was inspired. They had a feast later in the day. They would be excited, yet needing to keep busy. They needed an activitiy that would be fun, successful, and simple. Enter the Acorn Gnome.
Easily the easiest gnome ever. And, yes, that's two 'easies' in one sentence :). For this gnome, I gave each student a gnome and colored pencils. We talked about gratitude, and guests at the table, and whether gnomes are real (very heated discussion there). Then they decorate their gnome. They chose their acorn cap. I added glue. Let the gnomes dry a bit. Then I dusted them with a thin coat of gold-glitter paint. Just because everyone loves a little sparkle.

One student opted out of the acorn hat. He didn't want to hide his art under an acorn. Another made Darth Vader. We discussed using our imagination for faces (not needing to draw a face).
The gnomes became guests at their feast. Super sweet.
Oh, I did bring a little sharpie to write initials on the bottom of gnomes. I changed it quickly to teeny-tiny names because intials were a strange idea (these adults with their strange ideas!).
Supplies
- Peg dolls
- Acorns (would be fun to collect with children, but I didn't have the time, I always collect them when I find them (again, adults and their strange ideas)
- Colored pencils
- Craft Glue
- Sharpie for names
- Optional glittler paint
Create
Write names when handing out gnomes. Children decorate pegs however they like. Call up children to choose an acorn. Glue acorn caps. Allow to dry during recess. Paint light layer of glitter. Let children enjoy and bring home!

Big thanks to Teacher Holly at the Nevada City School of the Arts for making this class possible :)

Wishing everyone a very happy day. Hoping these gnomes find you with family and plenty to be thankful for!
 Photo Credit: Sara Serrata of North Fork Photography
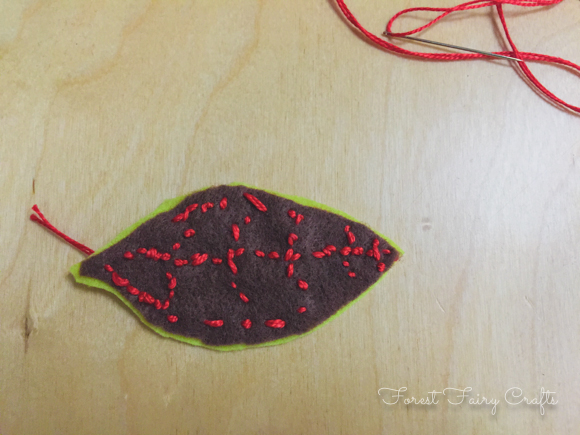
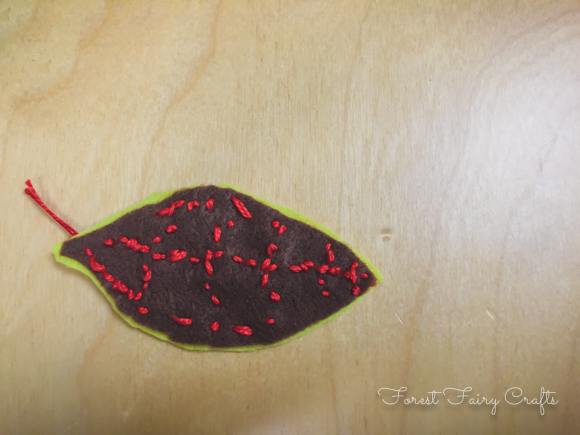
"Leaf" Gratitude
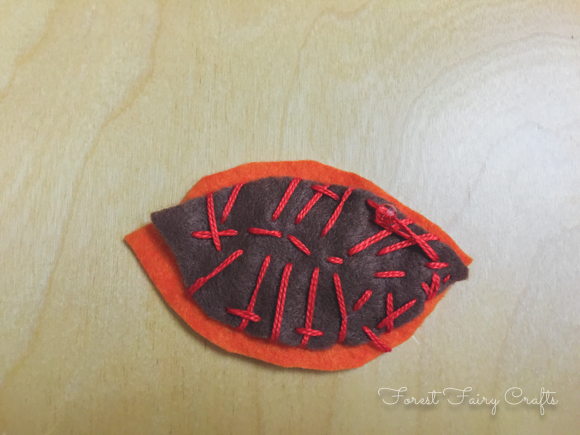
A student named this project. I wanted a way to treasure all the amazing things in our world. We were inspired by the many leaves turning colors and falling this time of year. What if we could sew a leaf where students could collect gratitude inside on slips of paper?
The leaf can become a decoration with a surprise. Students decided they might add gratitudes before Thanksgiving to share on the day. Or they might go around on Thanksgiving and ask everyone to add a gratitude on a little piece of paper to keep inside the leaf. Either way, they discovered these are the perfect way to 'Leaf' a gratitude!
Supplies:
- Two colors of felt
- Scissors, needle, and thread
- Decorations (beads and sequins)
I cut paper with this second/third grade class a lot. I hoped we could make the leap into felt (saving me a ton of prep time). So I brought in rectangles of brown felt. We talked about shapes of leaves and "cutting out" triangles or curves to create a leaf. Students often want to "cut around", twisting the felt and cutting things in half accidentally. We had mixed success. A few needed a second piece of felt, or the leaf was super-small, or not what they expected. We worked through the hiccups.
We talked about decorating one side of the felt. I did show them how to stitch so they could to embroider the veins of the leaves if they wanted. They all looked beautiful in their own way. Students chose the color for the back of the leaf.
At home, I cut the chosen felt bigger than the leaf. I made it roughly similar, but did not meticulously cut the felt to match. This way, if it wiggled, they had room to keep sewing.
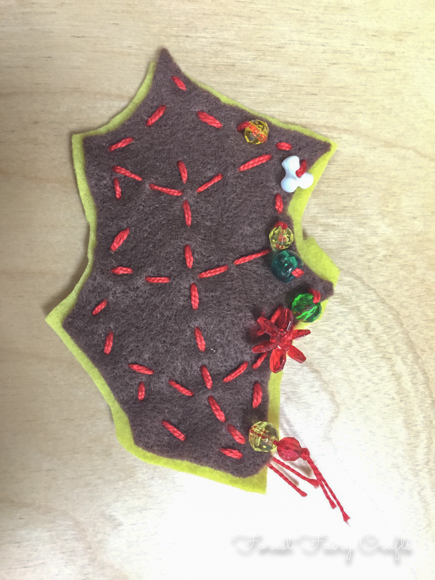
For the next class, we talked about sewing up and down (running stitch) and traveling around the edge of the brown leaf like a little caterpillar. "Leave a gap," I said, "So your leaf has a secret compartment for gratitudes." They could add beads and sequins as they travelled around. Each leaf became lovely. We tied loose ends and children promptly planned how they would surprise their family with gratutides in the pocket. A few plan to add it to the Thanksgiving table. A few want to add a loop to hang their leaf. Lots of ideas.
Which is my favorite kind of project. A craft that inspires!
You can see the little gap on this leaf- a space without stiching so you can get inside the leaf.
Hurrah! Wishing you and yours a very thankful season :)

Batty in the Forest
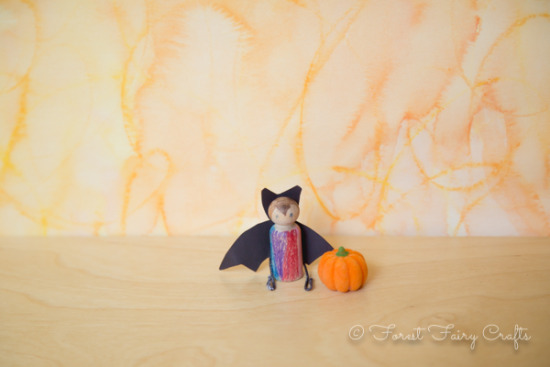
We adore bats!
The bats on We Bloom Here inspired us! We had to bring them to Handwork class. But how? Each week I am challenged to bring an adorable and sweet idea to forty students in first or second grade. Margaret Bloom, the lovely author of Making Peg Dolls and Making Peg Dolls and More
(new! yay!) helped me adapt her tutorial for lots and lots of bats.


I thought of using sharpies instead of paint. Which meant a layer of sealant so the sharpie wouldn't 'bleed' into the wood.
"Why not use colored pencils?" she said.
Why not?
So we used colored pencils and black paper instead of felt. I played with the shapes until I made a template that I liked. I traced that shape forty times onto black paper. The kids cut their own wings and ears. They decorated their pegs with rainbows or fangs or both. These are magical bats after all :)
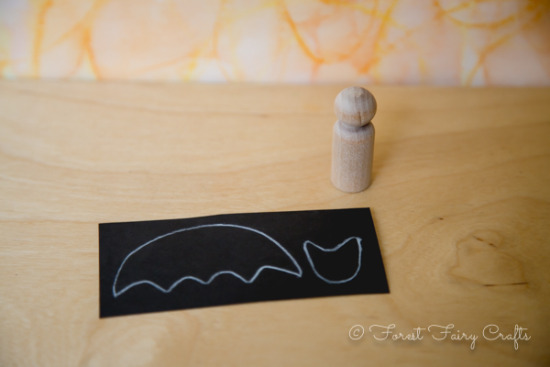
Each student had an envelope where I collected the decorated peg, wings, and head to glue at home. I used tacky glue because I added wire feet. Every bat needs to hang out!
Here was a little mistake, though, for me. I had white floral wire and thought, "this won't be so difficult to color black." Ack! I should have gone to the store and bought black wire to save myself a lot of time. If you are making one or two, coloring the wire was fun. For forty bats, not so much.
At home, I layered out the wings, head, and wire. I added glue and the peg. I let them all dry on the envelopes to return the next day.

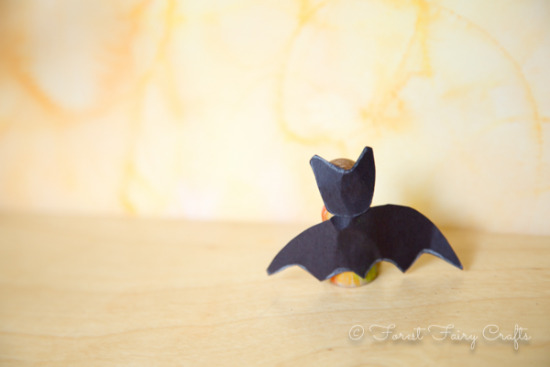
Back of the Bat
Thank you so much for the wonderful idea and tutorial, Margaret! Children loved their bats :)
Even a grumpy tree needs a little bat friend hanging about :)
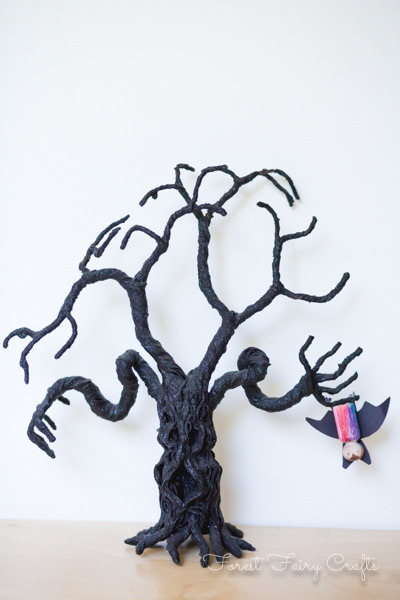
Enjoy :)
*please note: this post contains affiliate links. Should you decide to purchase a book using these links, a small amount returns to the Forest. Your price remains the same. Thank you!
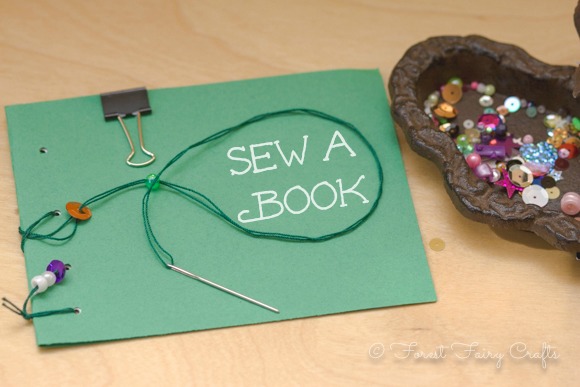
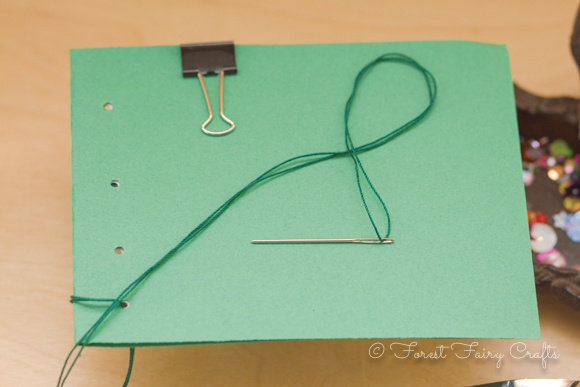
Sew a Book
Once upon a time, books were treasures. They were kept in castles. They were guarded. And only a few very chosen people were allowed to read them. They were valued like gold and jewels. Because each and every book was made by hand. People worked hard to create paper. They lettered each word with ink and a feather. And then they had all these pages. How did they hold the pages together?
They sewed them.
Children found this idea fascinating. We looked in books to see the bindings. Most have modern glues. We did find a few with stitching.
I shared a few ideas for stitching their own books. They loved becoming authors and illustrators after sewing. I invited them to write about anything they wanted. What freedom! It could be fiction or non-fiction. A field guide to flowers in your yard or to dragons. We saw books about kittens. Books about the seasons. Books about unicorns. And books about flowers. I plan to revisit the idea and make more complex designs throughout the year. A wonderful first sewing project for all ages.
Ages
- All ages (these were with 5-8 year olds). Older children got into the history of bookmaking. They also dove into the writing and illustrating of their own stories. Younger children enjoyed threading beads and sequins.
Supplies
- Paper
- Construction Paper (or watercolor, anything for a cover)
- Needle and Thread
- Hole Punch
- Binder clip
- Sequins and beads
Preparation
- I cut the paper (any size works). I cut the construction paper so it could fold around the white paper (double the length of the white paper)
- I folded the construction paper around the white paper and secured with a binder clip
- I punched four holes along the folded binding edge. All the papers were now held together with the binderclip, keeping the holes aligned. Aha! moment :)
- I doubled and knotted thread on the needles (tips about our needle and thread choices are in our book
)
- I tied the thead around the first hole- actually went through and then back up through the loop in the thread. Any knotting will do. The books were ready for sewing!
With Children
- We talked about history and sewing. We talked about taking our time. I showed how the needle can go back through a hole more than once to create a decorative binding.
- We talked a lot about not taking the binderclip off until after you sew through the holes. Pages will slip!
- Children threaded beads and sewed beads and sequins along the way.
- They discussed what they would write and draw. We talked about books with no pictures and books with no words. They really got to thinking about the process of creating a book.
I tied off threads and they drew and wrote. As long as the threads didn't wrap around the open side of the book, it was all good. They loved their books for many reasons. And wanted to make more! Which is always good. Love inspiration :)

Wishing you happy sewing today!
Please note: This post contains an affiliate link. Should you decide to purchase our book, a small percentage returns to the forest. Your price remains the same. Thank you!
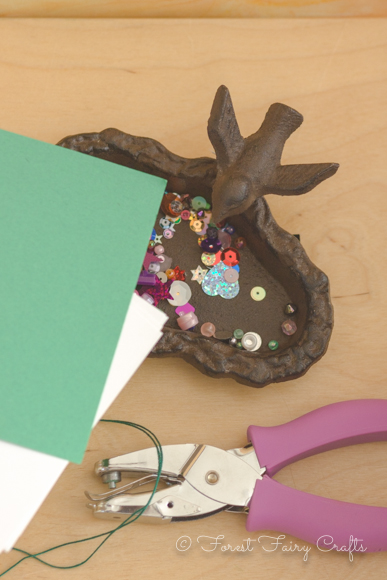
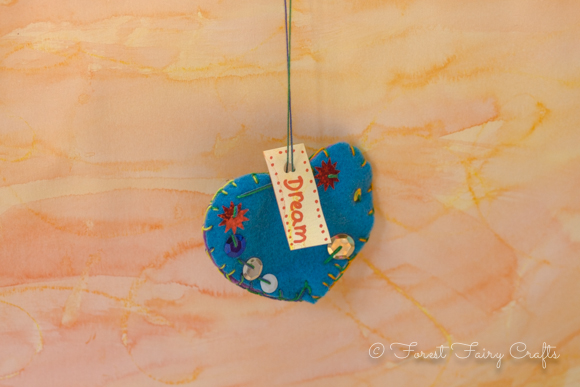
Wishing Heart
Let's begin with a wish. A hope. A dream. Let's made crafts to celebrate our wishes. Because the best wishes are from the heart.
This was my first sewing project of the year with second and third grade students (7-9 years old). Most had used needle and thread before. I wanted a project that would let them explore. A project that let everyone be successful. Whether they wanted one decoration. Or a hundred and one :)
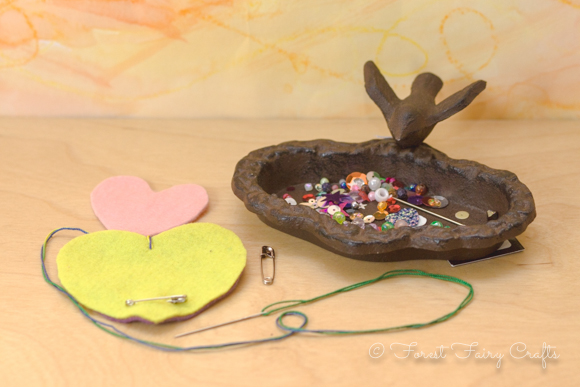
Supplies:
- Felt (two colors for each heart)
- Needle and thread (chenille needles and crochet thread)
- Safety pin
- Beads and sequins
- Slip of pretty paper for name and wish
- Optional: a third, smaller felt heart to decorate
Age: 6+
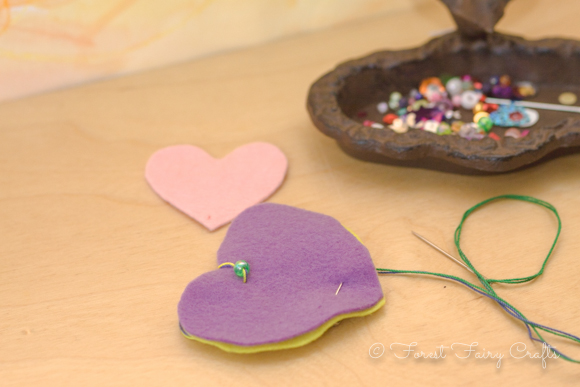
Prep: Cut hearts. Secure them together with a safety pin. Double and knot thread on the needle. Sew one stitch at the top hiding the knot between the two hearts. The stitch and the safety pin keep the felt together while children sew.
Children: These hearts are a lovely first sewing activity because almost everything is beautiful (expect for tangles). Children add a bead or sequin to one side of the heart. They push the needle through felt anywhere they like. Big stitches work just fine.
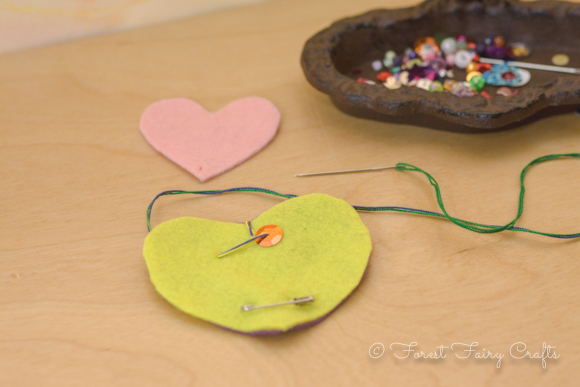
Now the needle and thread is on the other side. Add another sequin, bead, or both.
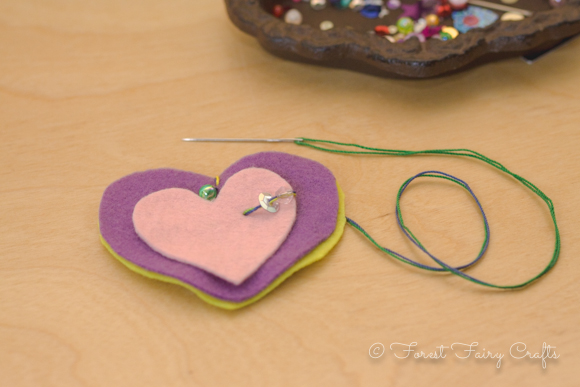
You can also add the little felt heart. Be careful when going through three layers of felt. It may take a little practice.
Add all of the sequins and beads that make your heart happy.
Helper: Just encourage. Sort out any tangles. Take off the safety pin once the two pieces of felt are secure.
Most design choices will be fine. Long strings of beads. Loops around the outside of the heart. Crisscross stitching. It's all okay. This allows children to experiment with sewing. And have fun! They can stitch around the outside if they like, but it's not needed.
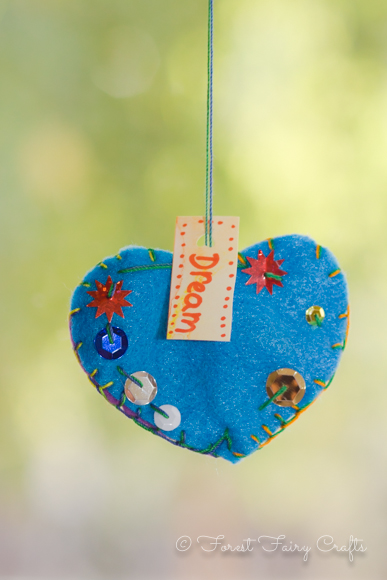
Tie a knot. Move the string to the center for hanging if there is enough string left. If not, add a string. Many children strung beads on their hanging thread to catch the light. If beads go on the hanging thread, be sure to tie a knot around the last bead so they don't slip off.
Children: Write your name and a wish on a pretty slip of paper.
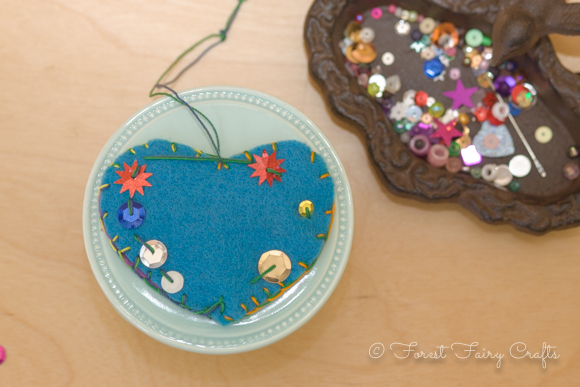

Each class hung their hearts in a special area of the room.
One is lovely. A collection is gorgeous.
Have fun sewing this week!
For more insights about sewing with children and teaching children how to sew, consider our Forest Fairy Crafts book. It shares our favorite needles and threads along with stitches, troubleshooting, and more. The link is an affiliate link. Should you decide to purchase, a small amount returns to the Forest. Enjoy :)
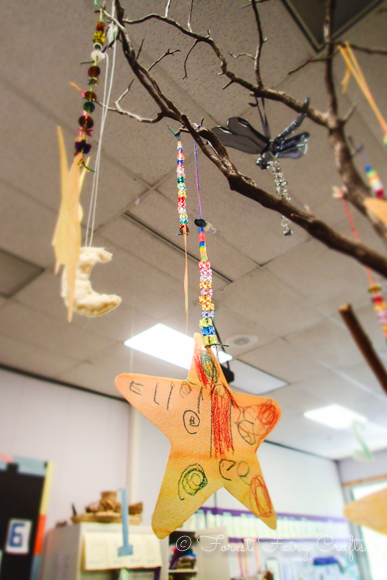
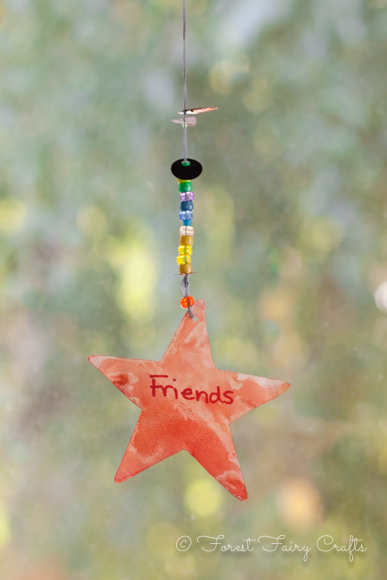
Wishing Stars
We start a journey with expectations. And children are often told "don't do this," or "don't do that," as they start an adventure (like a new school year). Think of all the rules, the rules, the rules :)
So I like to think of the things we do want for our adventure. What do we want to create? How do we want to feel? What should we bring to this journey?
Children often wish for things. Things like ponies or candy. I want to wish for things we cannot touch. Kindness. Friends. Creativity. Beauty. Hope. Love.
And, every once in awhile, a child cracks my heart wide open with a wish. Like this one.
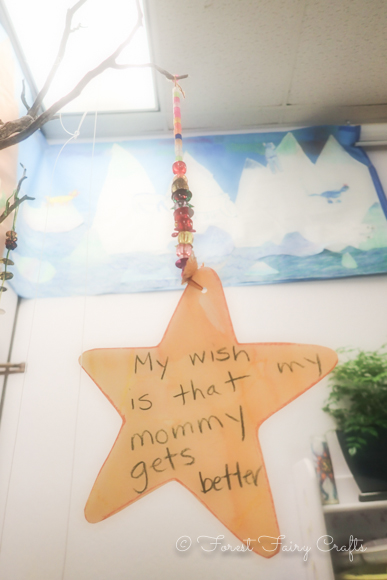
Something about crafting allows us to feel deeply. To share deeply. Creating a space where we can express ideas that are big and mighty. They connect us. As we sew or bead or knit, we create together. We create community.
The stars can be very simple or made fancier.
Optional: Children can watercolor or decorate their own paper. We have painted squares on both sides, then we cut into stars. For time's sake, I watercolored and cut these stars.
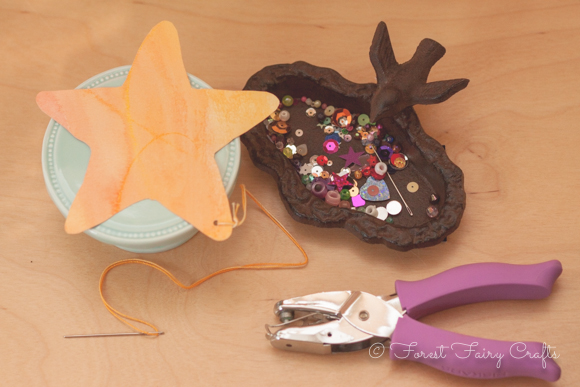
Supplies:
- Stiff paper
- Needle and thread (I used friendly blunt needles and crochet thread)
- Beads and sequins
- Hole punch
Prep:
Watercolor paper on both sides and punched a hole. Double the thread and tie a knot. Go through the hole, then back through the loop in the thread. The thread is now attached to the star and ready for decorating.
Ages: 5-7
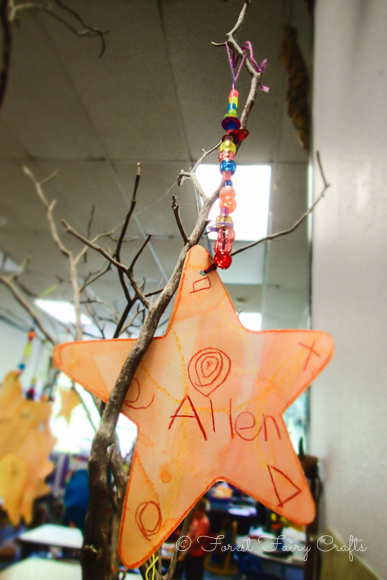
For children:
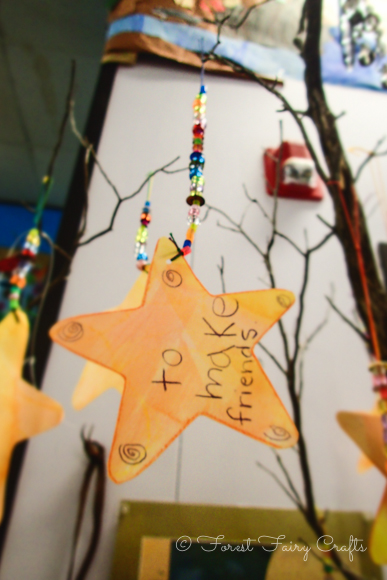
Write name on one side of the star and a wish on the other side. If a wish is hard to choose, add a few beads while thinking. Wishes can take time. Decorating the star is also lovely. Thread sequins and beads. Hang in a sunny place to see the sun shine on your wishing star.
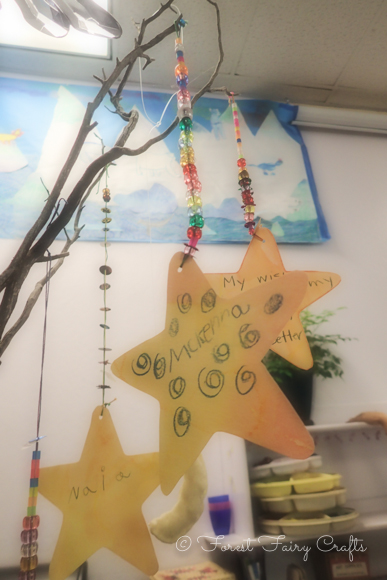
Helper: When tying off, be sure to tie around the last bead, or else they can all slide right off the thread. I loop the needle through the last bead a couple of times to secure all the other beads on the thread.
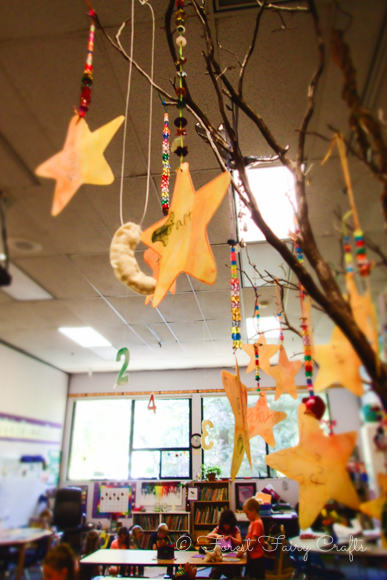
Enjoy! One class hung them on a branch. Another hung them from the ceiling over their gathering space. All those wishes watching over the children. Beautiful! These inspire a lot of discussion and create a lovely space where children celebrate wishes coming true :)
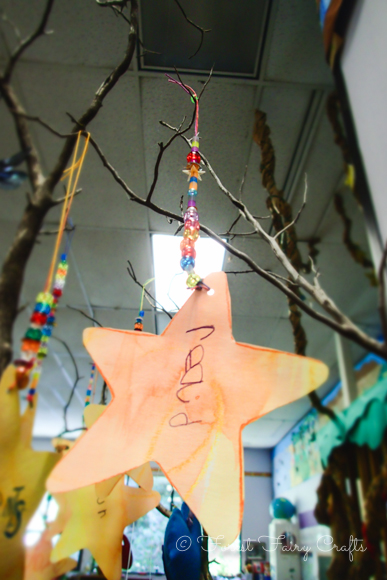
This wish? To read. May all your wishes come true :)