

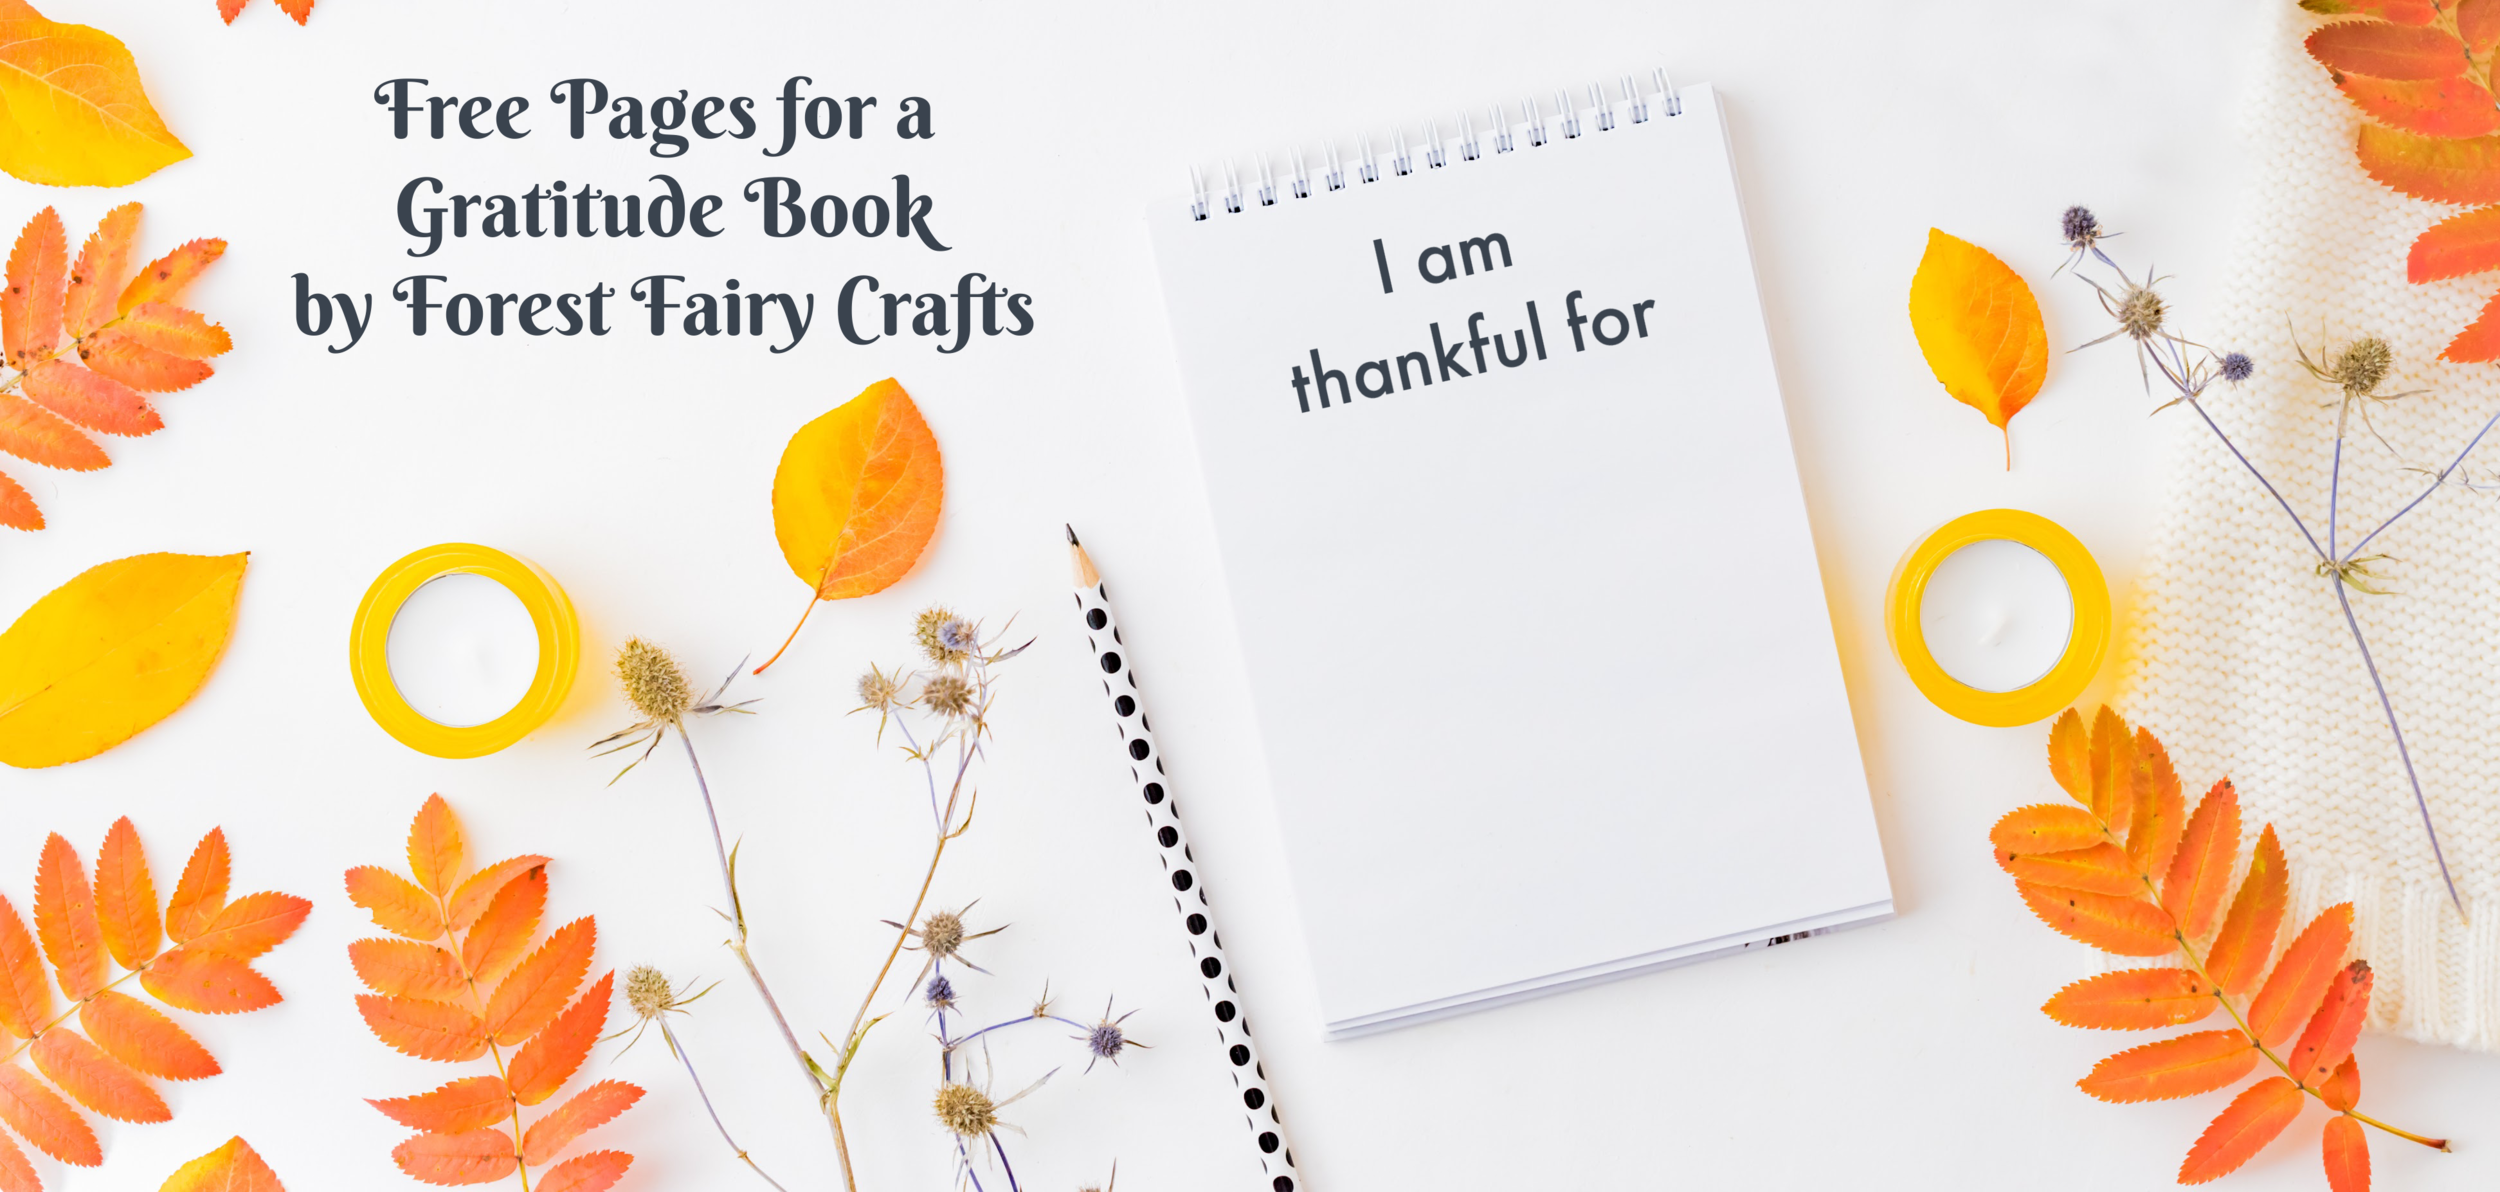
A Gratitude Book
The first day of November starts one of my favorite classroom projects- the gratitude books. The idea is simple enough. Each day, children wrote one page for a book that I put together for them to bring home before Thanksgiving. We created books for a number of years, which gave me additional ideas and perspectives on how to inspire and support students along the way. The good news for all of you this year is that I made printable PDF pages to jumpstart your child’s creativity.
You can start the book anytime (and any time of year). You can complete one page a day or a page a week or multiple pages a day. Whatever works best for your children or students.
All of our projects are invitations. Take the idea and make it your own. The templates are set up to be half pages that you can print, cut in half, then staple or punch holes to thread yarn for binding the book. Your book can be 5 pages or 50 pages. I recommend not binding the book until you reach the end of the project. That way you don’t find yourself either with blank unfinished pages or running out of pages. I kept them in a folder. This way, too, I could shuffle pages that a child had already completed, and they could read the pages to me before adding a new page (massive reading practice reinforcement). And students could plan the order of pages before we assembled the final book.
Creating pages itself is fun. The real magic, however, is what happens as children plan pages.
The idea is simple. Make a stack of pages- blank or use our template or make your own. Each day, the child adds another page. They write the sentence (or more if they want) and illustrate it. The only guidance is that each page needs to be different- choosing dogs, dogs, dogs, every day becomes repetitive. However, if they want to vary the dogs- thankful for black dogs and spotty dogs, that’s fine. Here’s why-
They start noticing things throughout the day.
In the beginning, I say that it’s fine to use obvious/easy answers. Some children go right to “air” and “food”. They eventually run out of easy answers. And that’s when they start paying attention to plan the next day’s page. If they get stuck, I’ll ask for details. What’s your favorite food? Or your favorite place to go? But mostly I try to stay quiet and let them simmer ideas and choose on their own time. They know that they need an idea for the next day, and eventually, they realize that paying attention can give them an idea before they sit at the table to write.
The original book project was a daily activity during group time. You could easily change the duration of the project for whatever is available for your family, classroom, or group. The pages can be made in an afternoon or over a number of weeks.
One way that I make it easier for younger children is to write the beginning of the sentence because the goal for me is thinking and writing unique ideas. The templates use a gray font because I would encourage children to trace the written letters if possible. Tracing takes less brain-power and reinforces the spelling for later. If students are tired or overwhelmed by that quest, skip tracing the letters.
A supportive idea for their own words is that they could tell you the end of the sentence and you write the letters lightly for them to trace, or they use a colored pencil over your letters to make it colorful. For very young children, you can write the words and they draw the pictures.

As with all my projects, I ask myself, “What is the goal?” If the book is going to be shared around at Thanksgiving, you may want to pay closer attention to correct spelling and neatness. If the goal is an immersive celebration of all the wonders of a child’s life, then don’t worry too much about neatness and correct spelling.
And I guarantee you, they love reading this book. By having the first words exactly the same on every page, it builds confidence for early readers.
With older children, I encouraged looking for details. Why say cats when you mean super fluffy cats? Why say food when you mean garlic mashed potatoes with gravy?
I encourage adults to create their own books as well. Show that appreciation continues through all of our years. This year, in particular, brings massive challenges. Yet the appreciations are so sweet. I appreciate my fluffy black and white dog that cuddles throughout the day.
Further ideas and notes: you can make the book resemble a scrapbook. Collect leaves or look through old magazines for images that inspire. Add them to pages. Use watercolors or paint or stickers. Give students room to imagine how each page can express their ideas. By assembling at the end, you won’t worry about paints smearing onto other pages. Feel free to let children express their creativity. I am so grateful for that!
Our template has a text box and another page with a line. You can add more lines, or a top line and dashed middle line if that matches your child’s learning process. It’s easier to add lines than remove them :)
If a child wants to write more than one page a day, that’s totally fine. Some students wanted to write many, many pages. When you assemble the book on a date instead of binding it in the beginning, making a page a work of art won’t damage other pages.
We hope that you enjoy the project! The Gratitude Book was a delight to create and read with students. And they were so proud of their books (as they should be).
As an added bonus, children went to Thanksgiving celebrations with plenty of answers to “What are you thankful for?”
We’ve included a “print” font version and a “handwriting” font for practicing cursive. Both can be printed on printers. Enjoy!


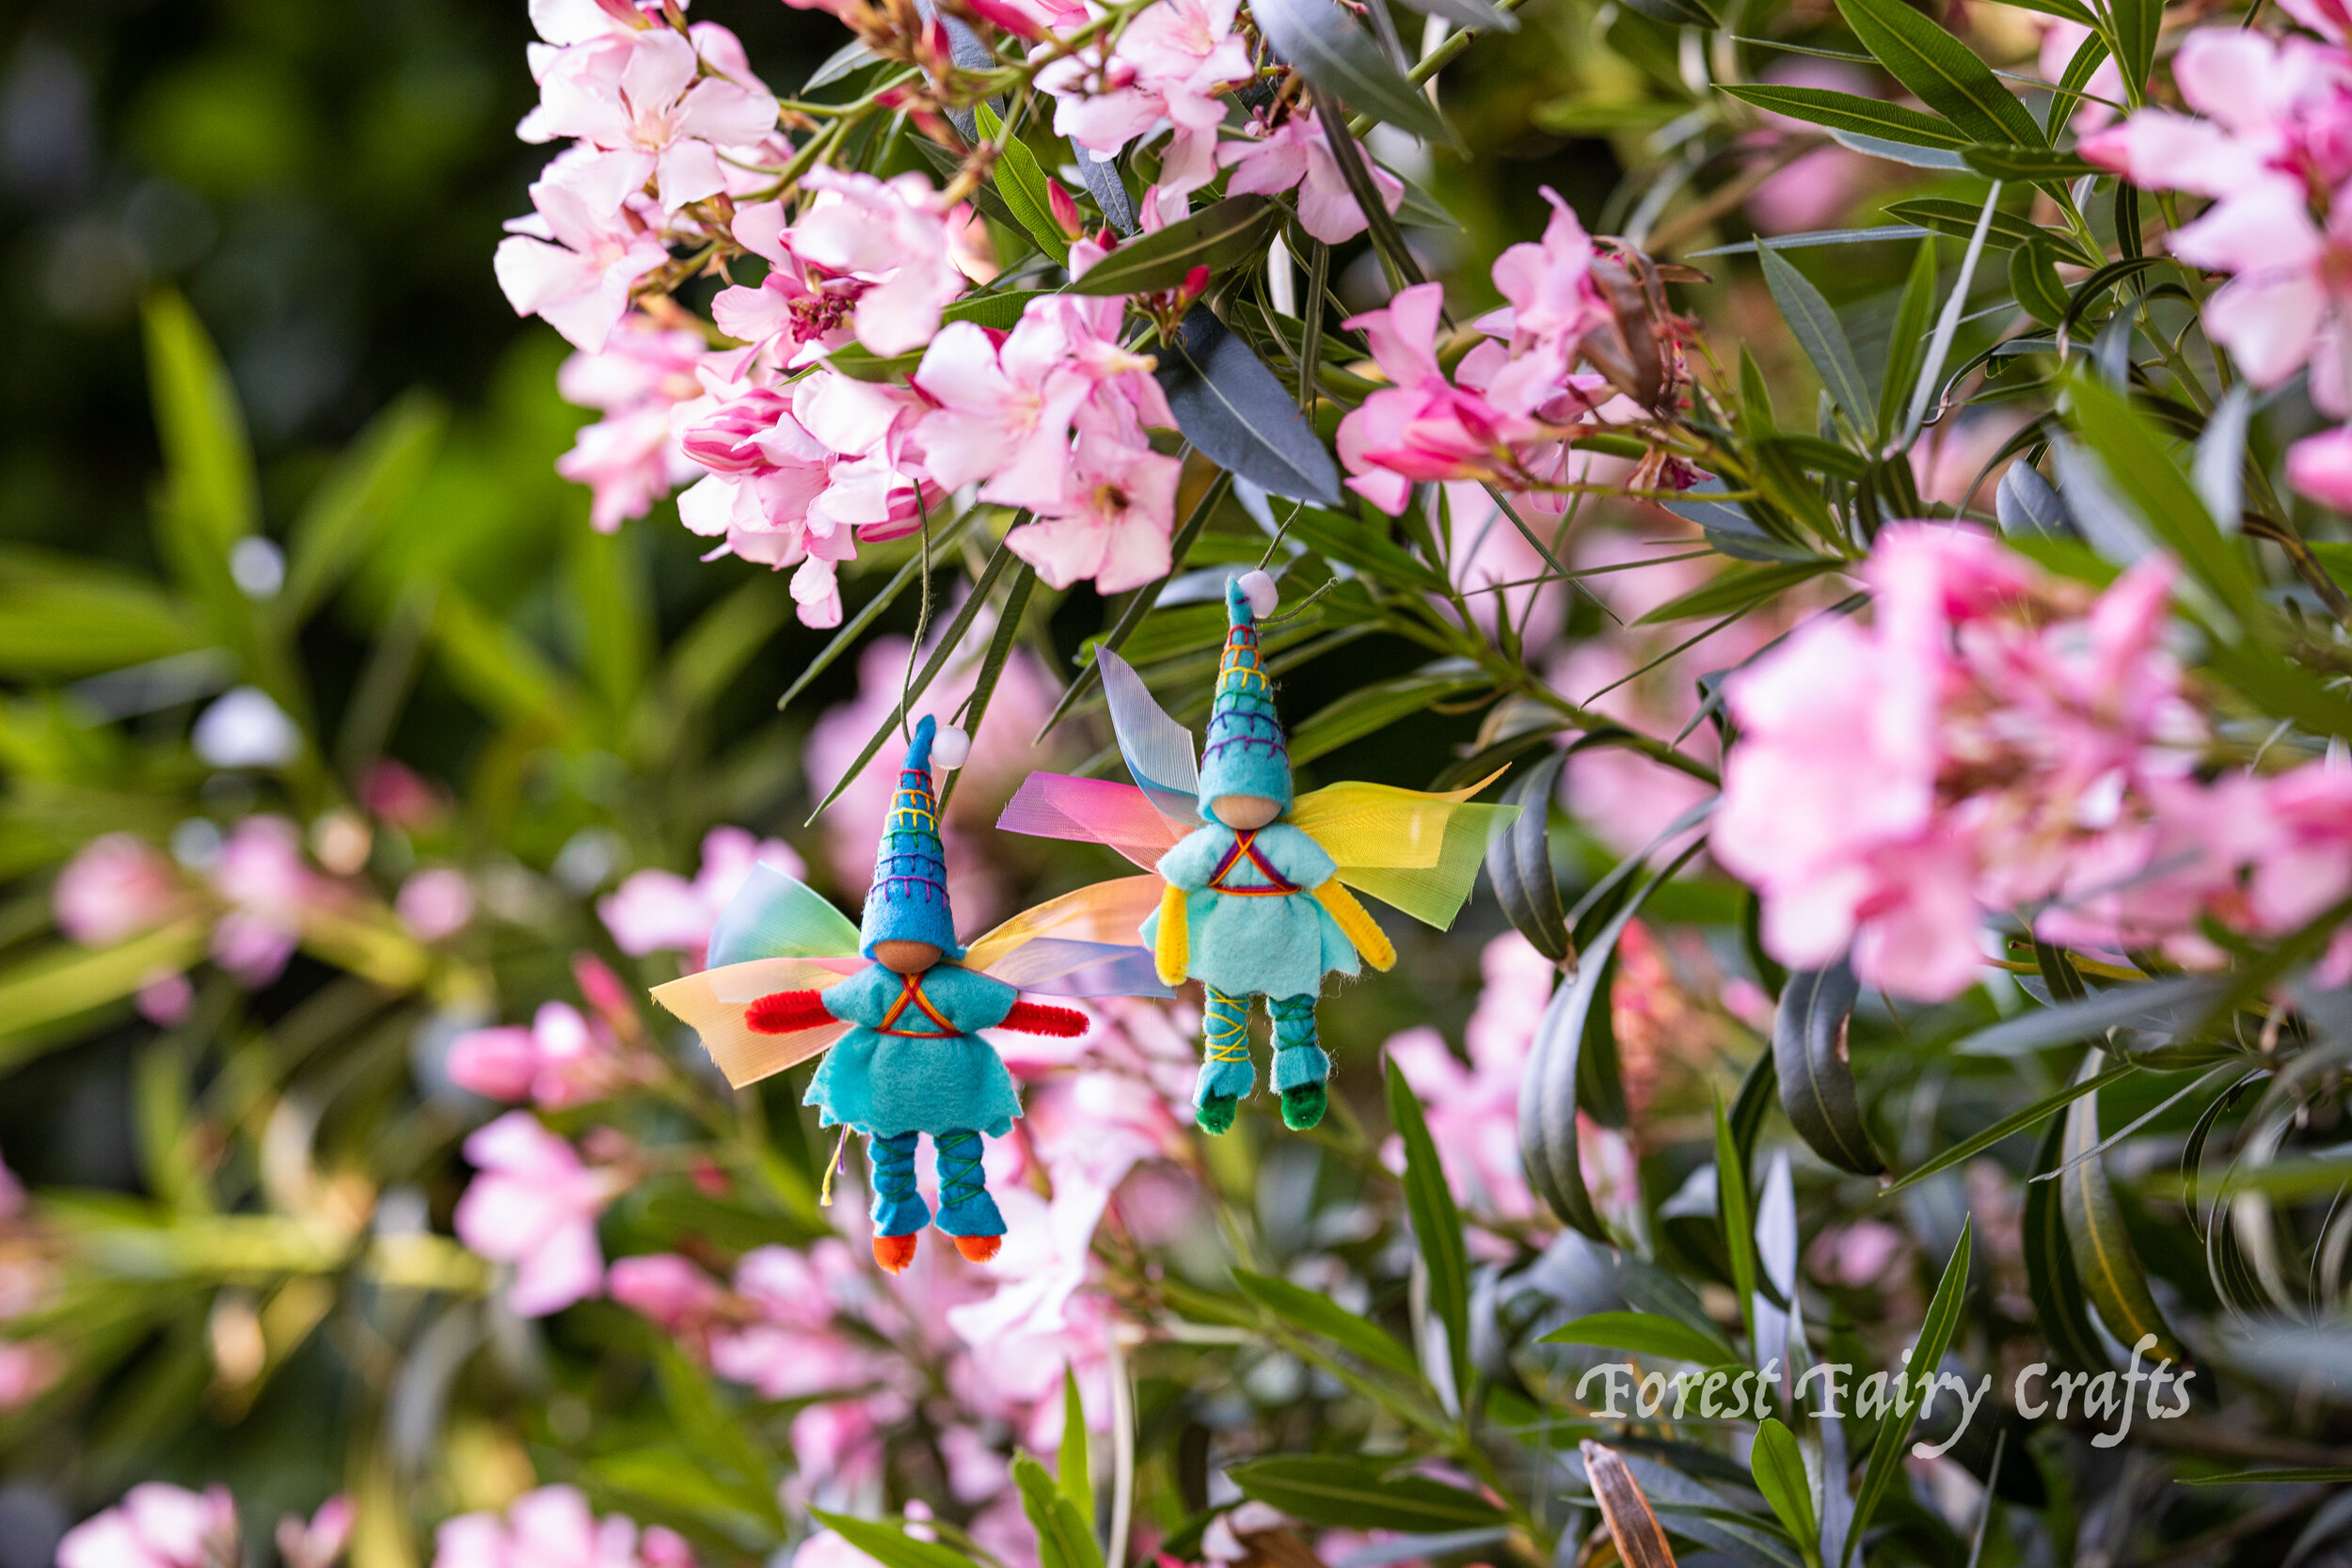
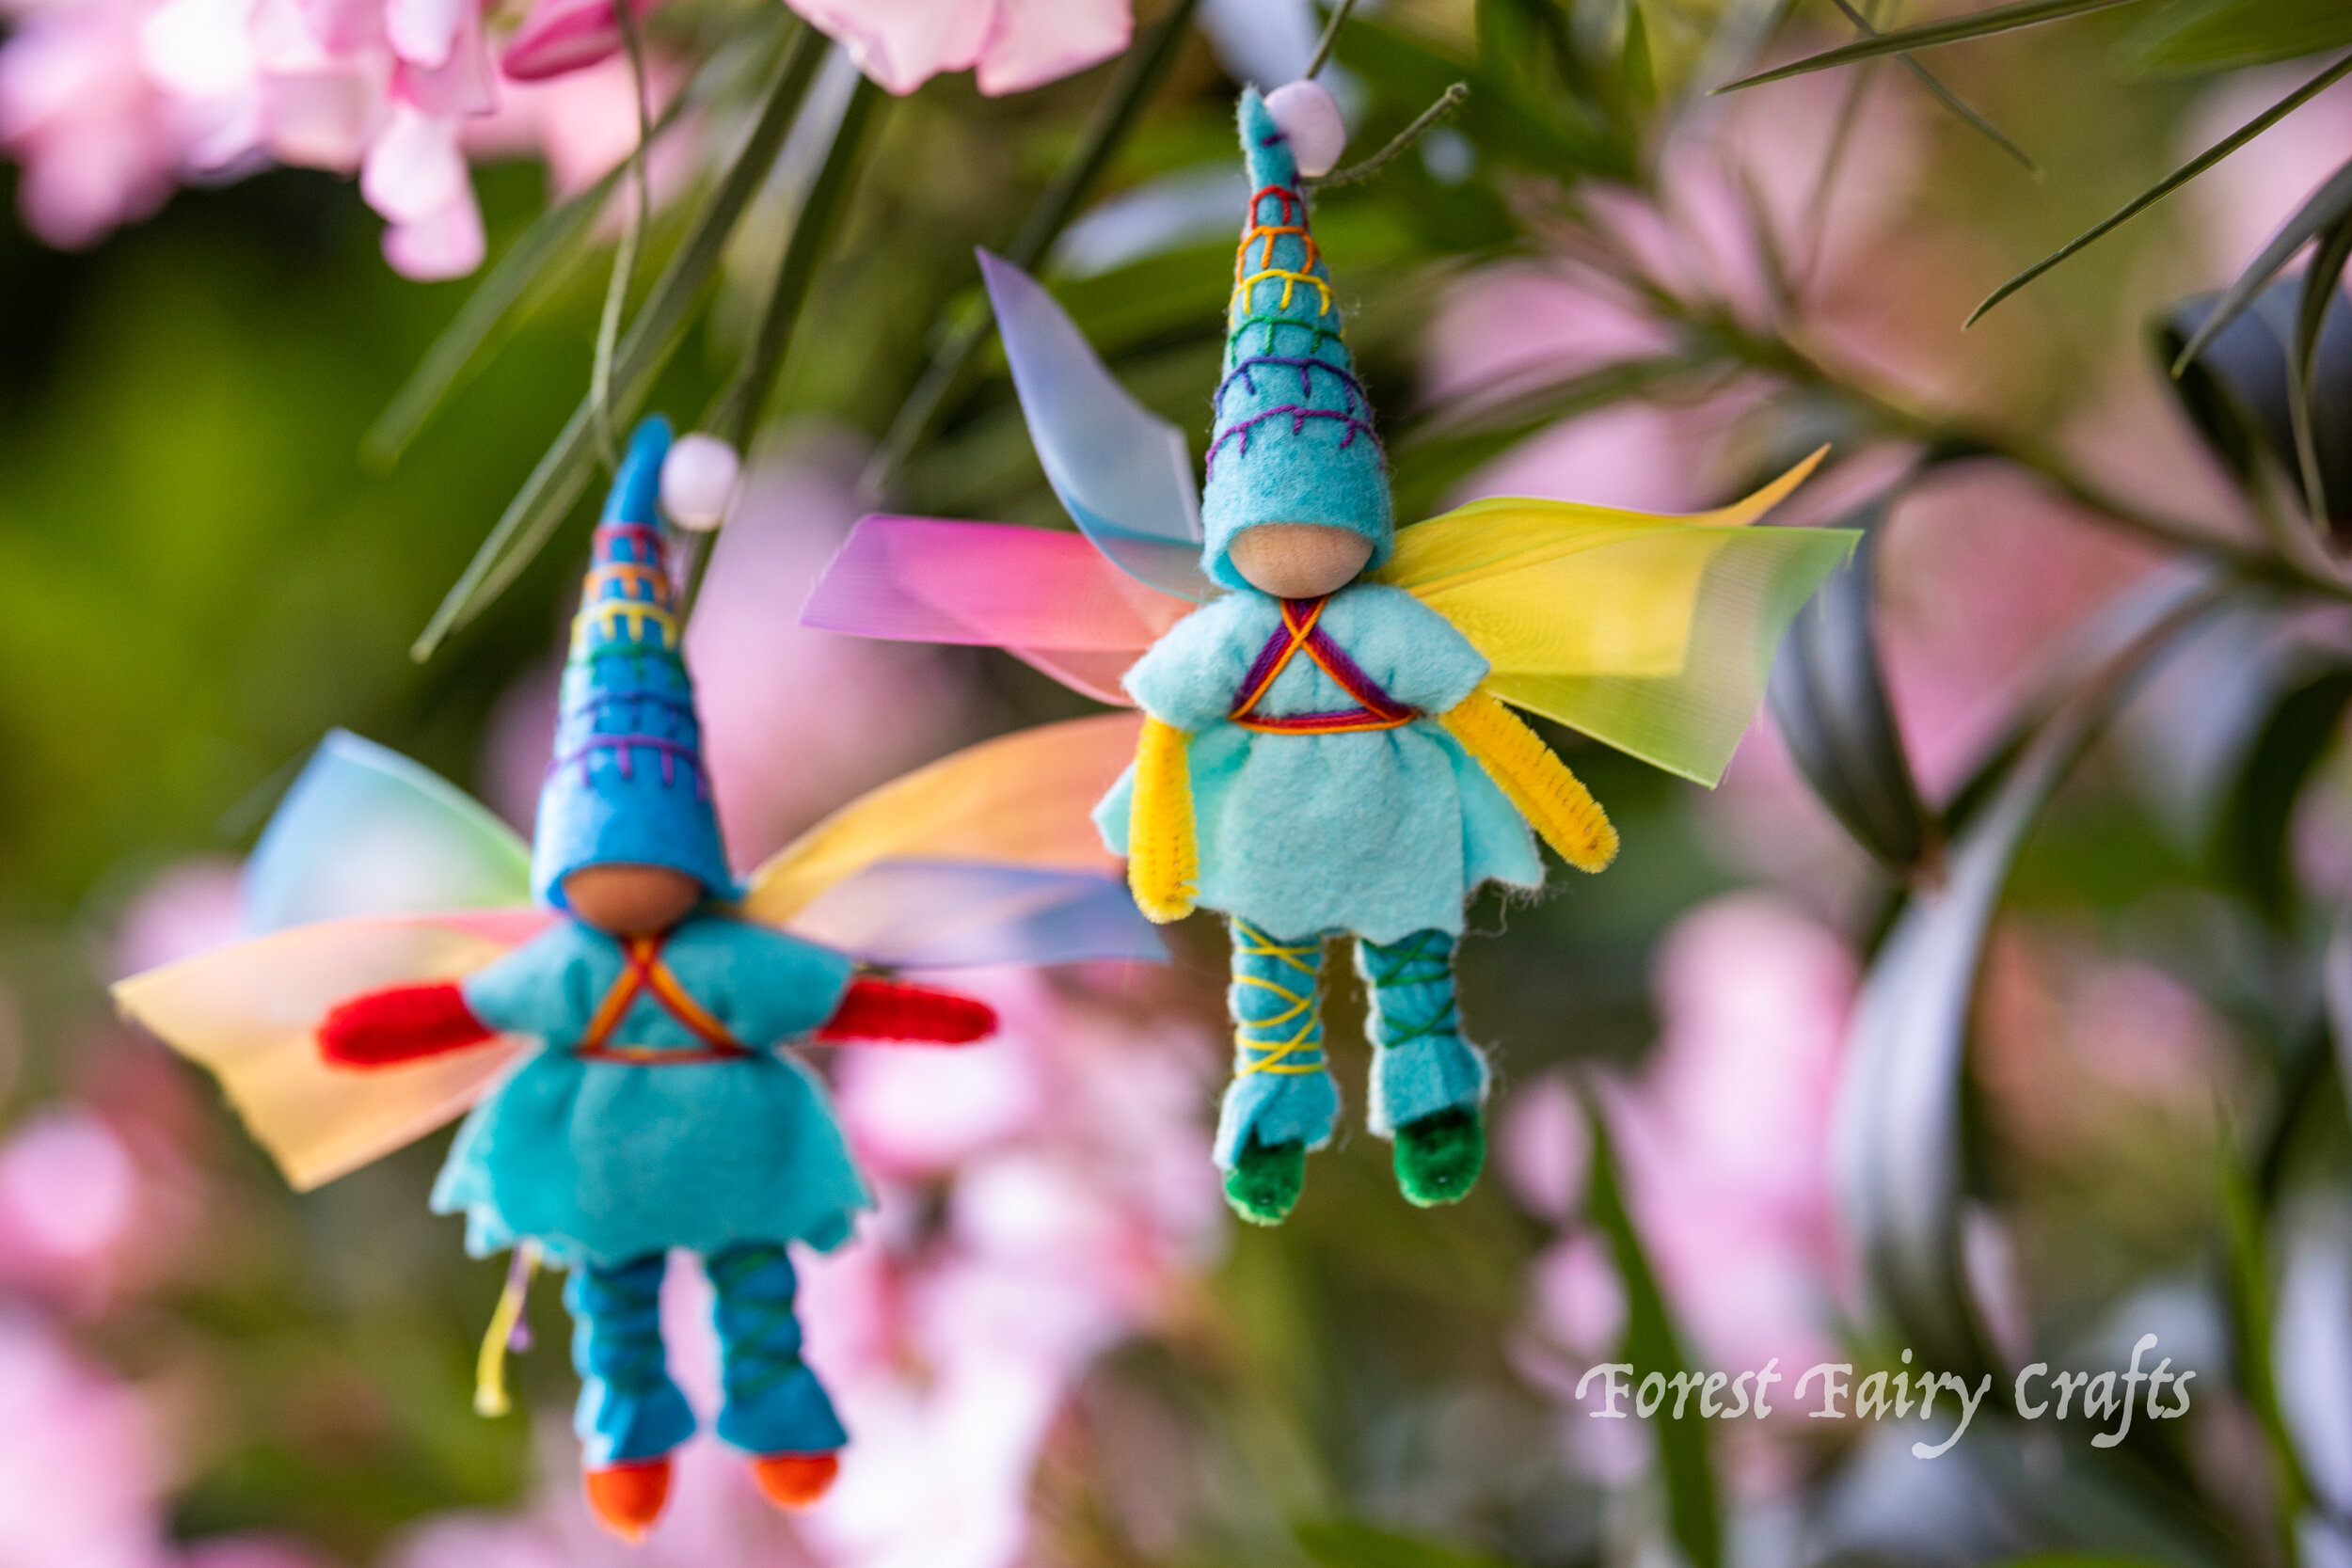
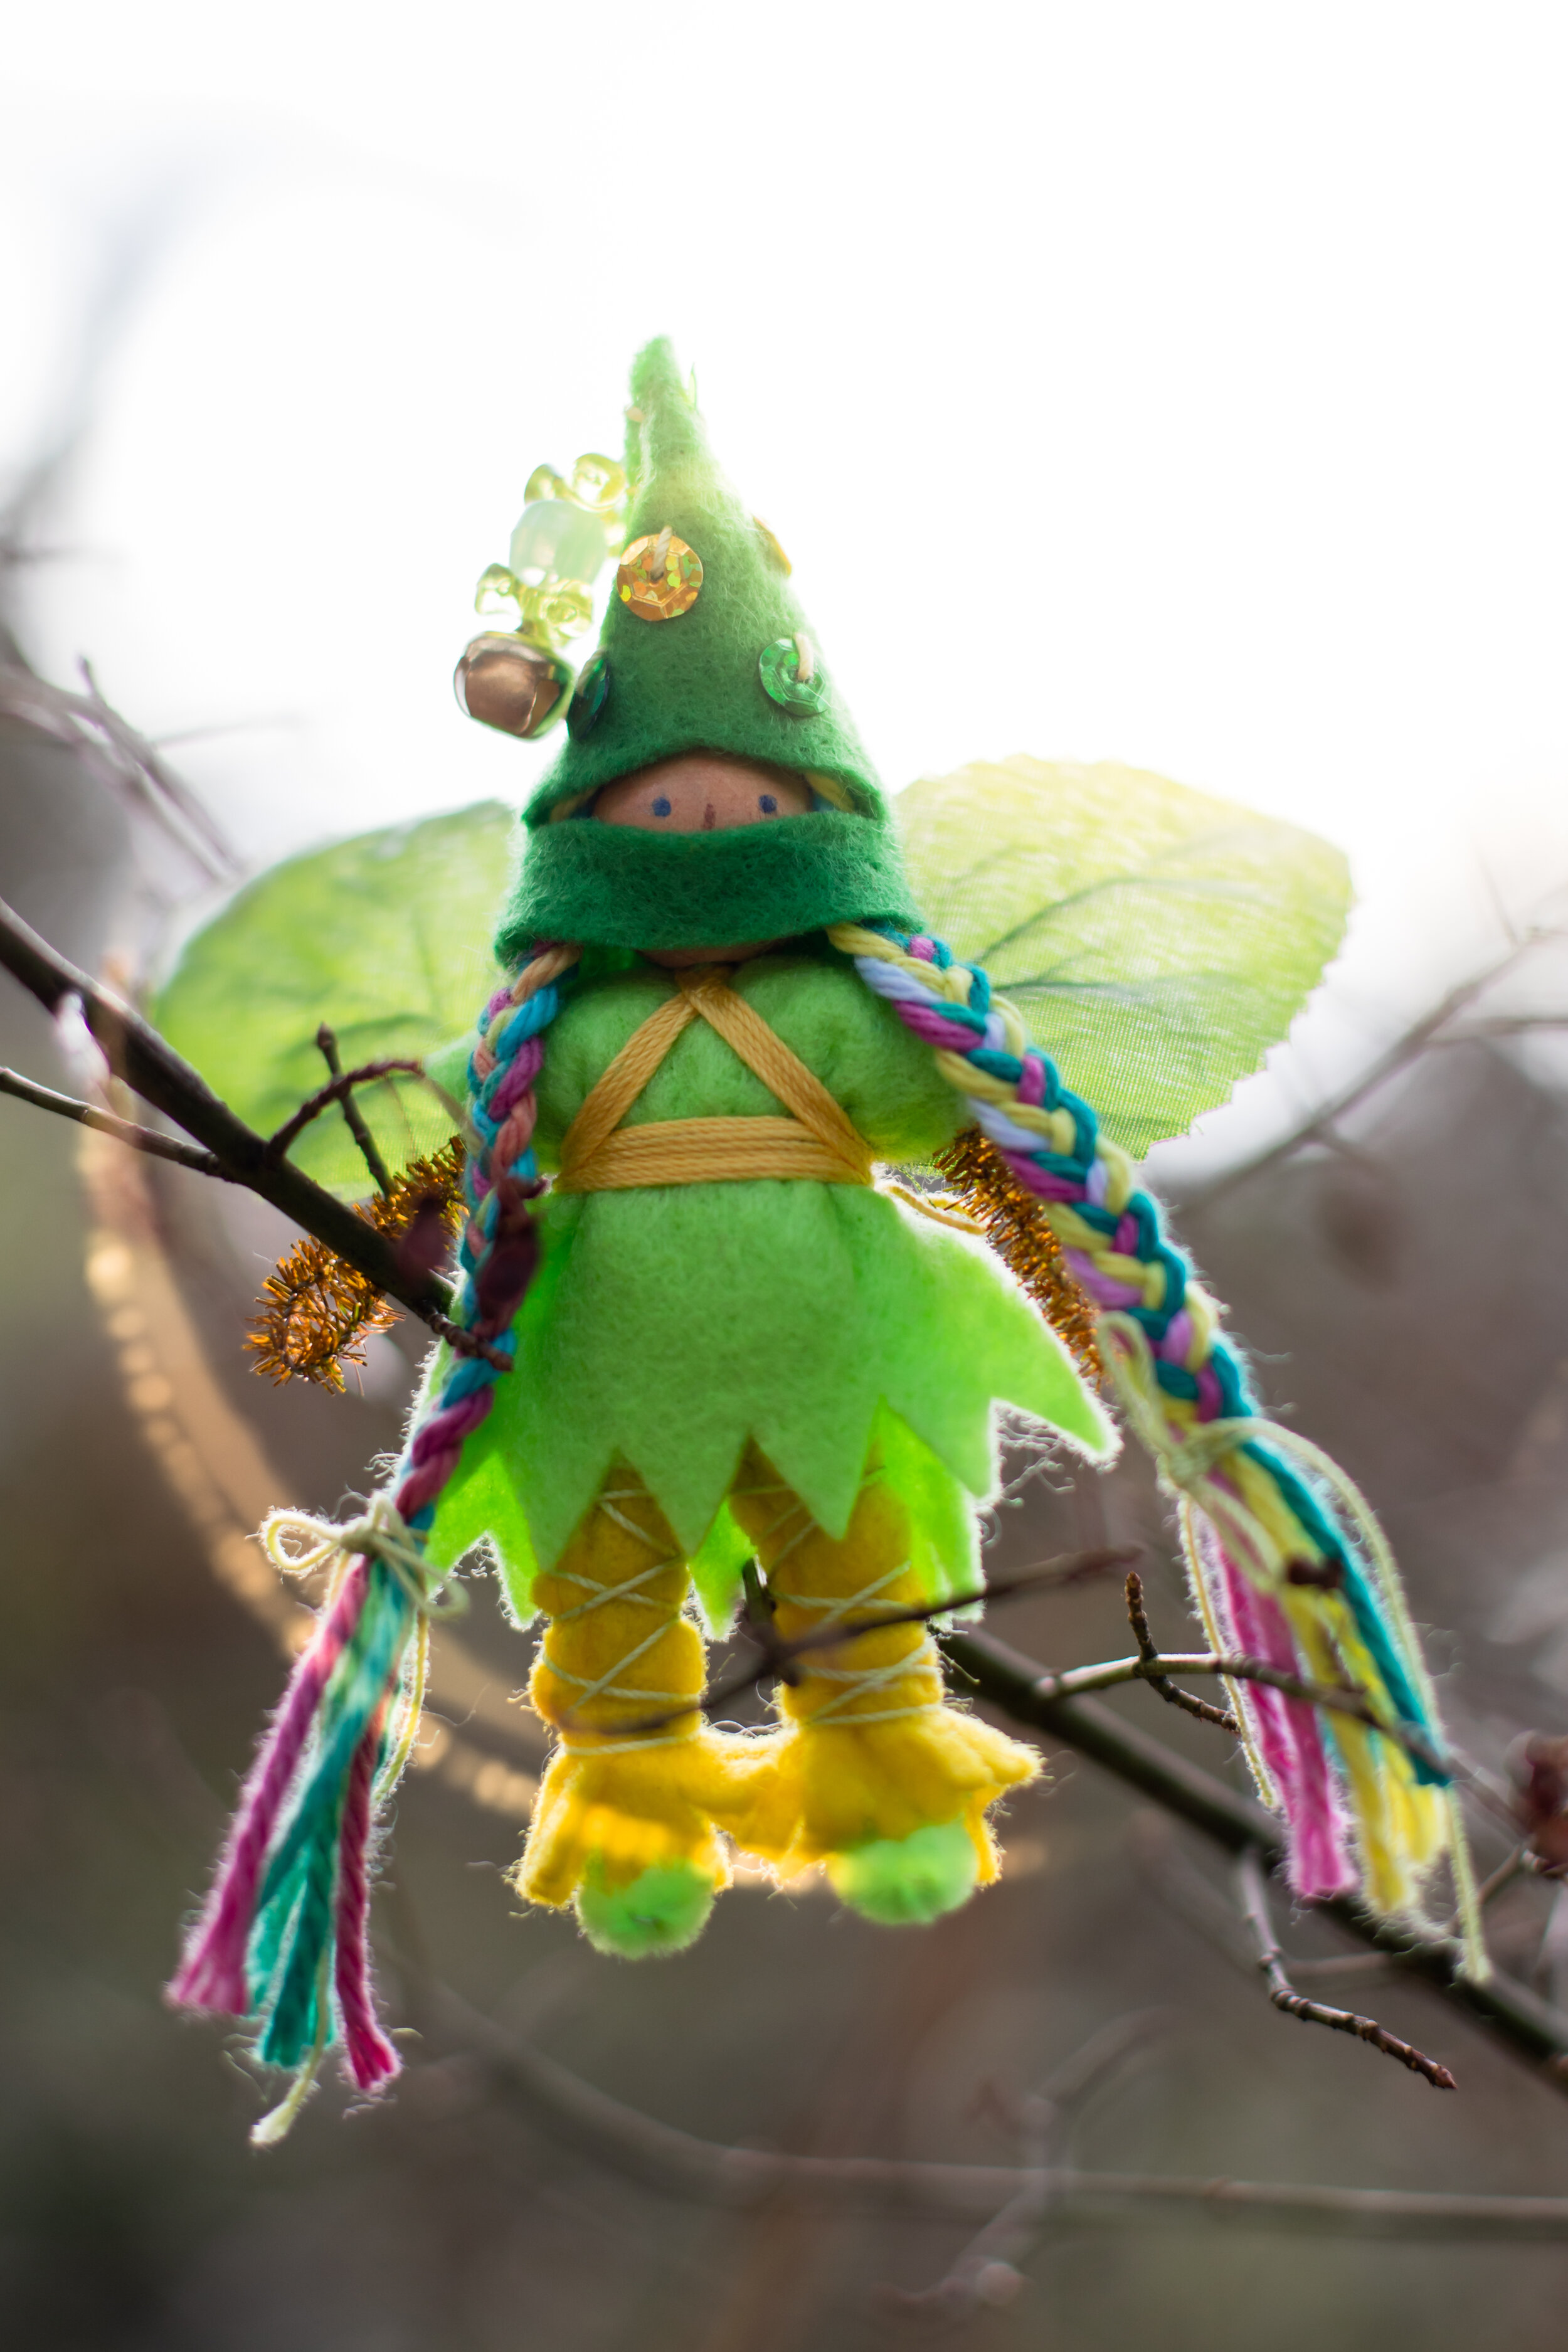
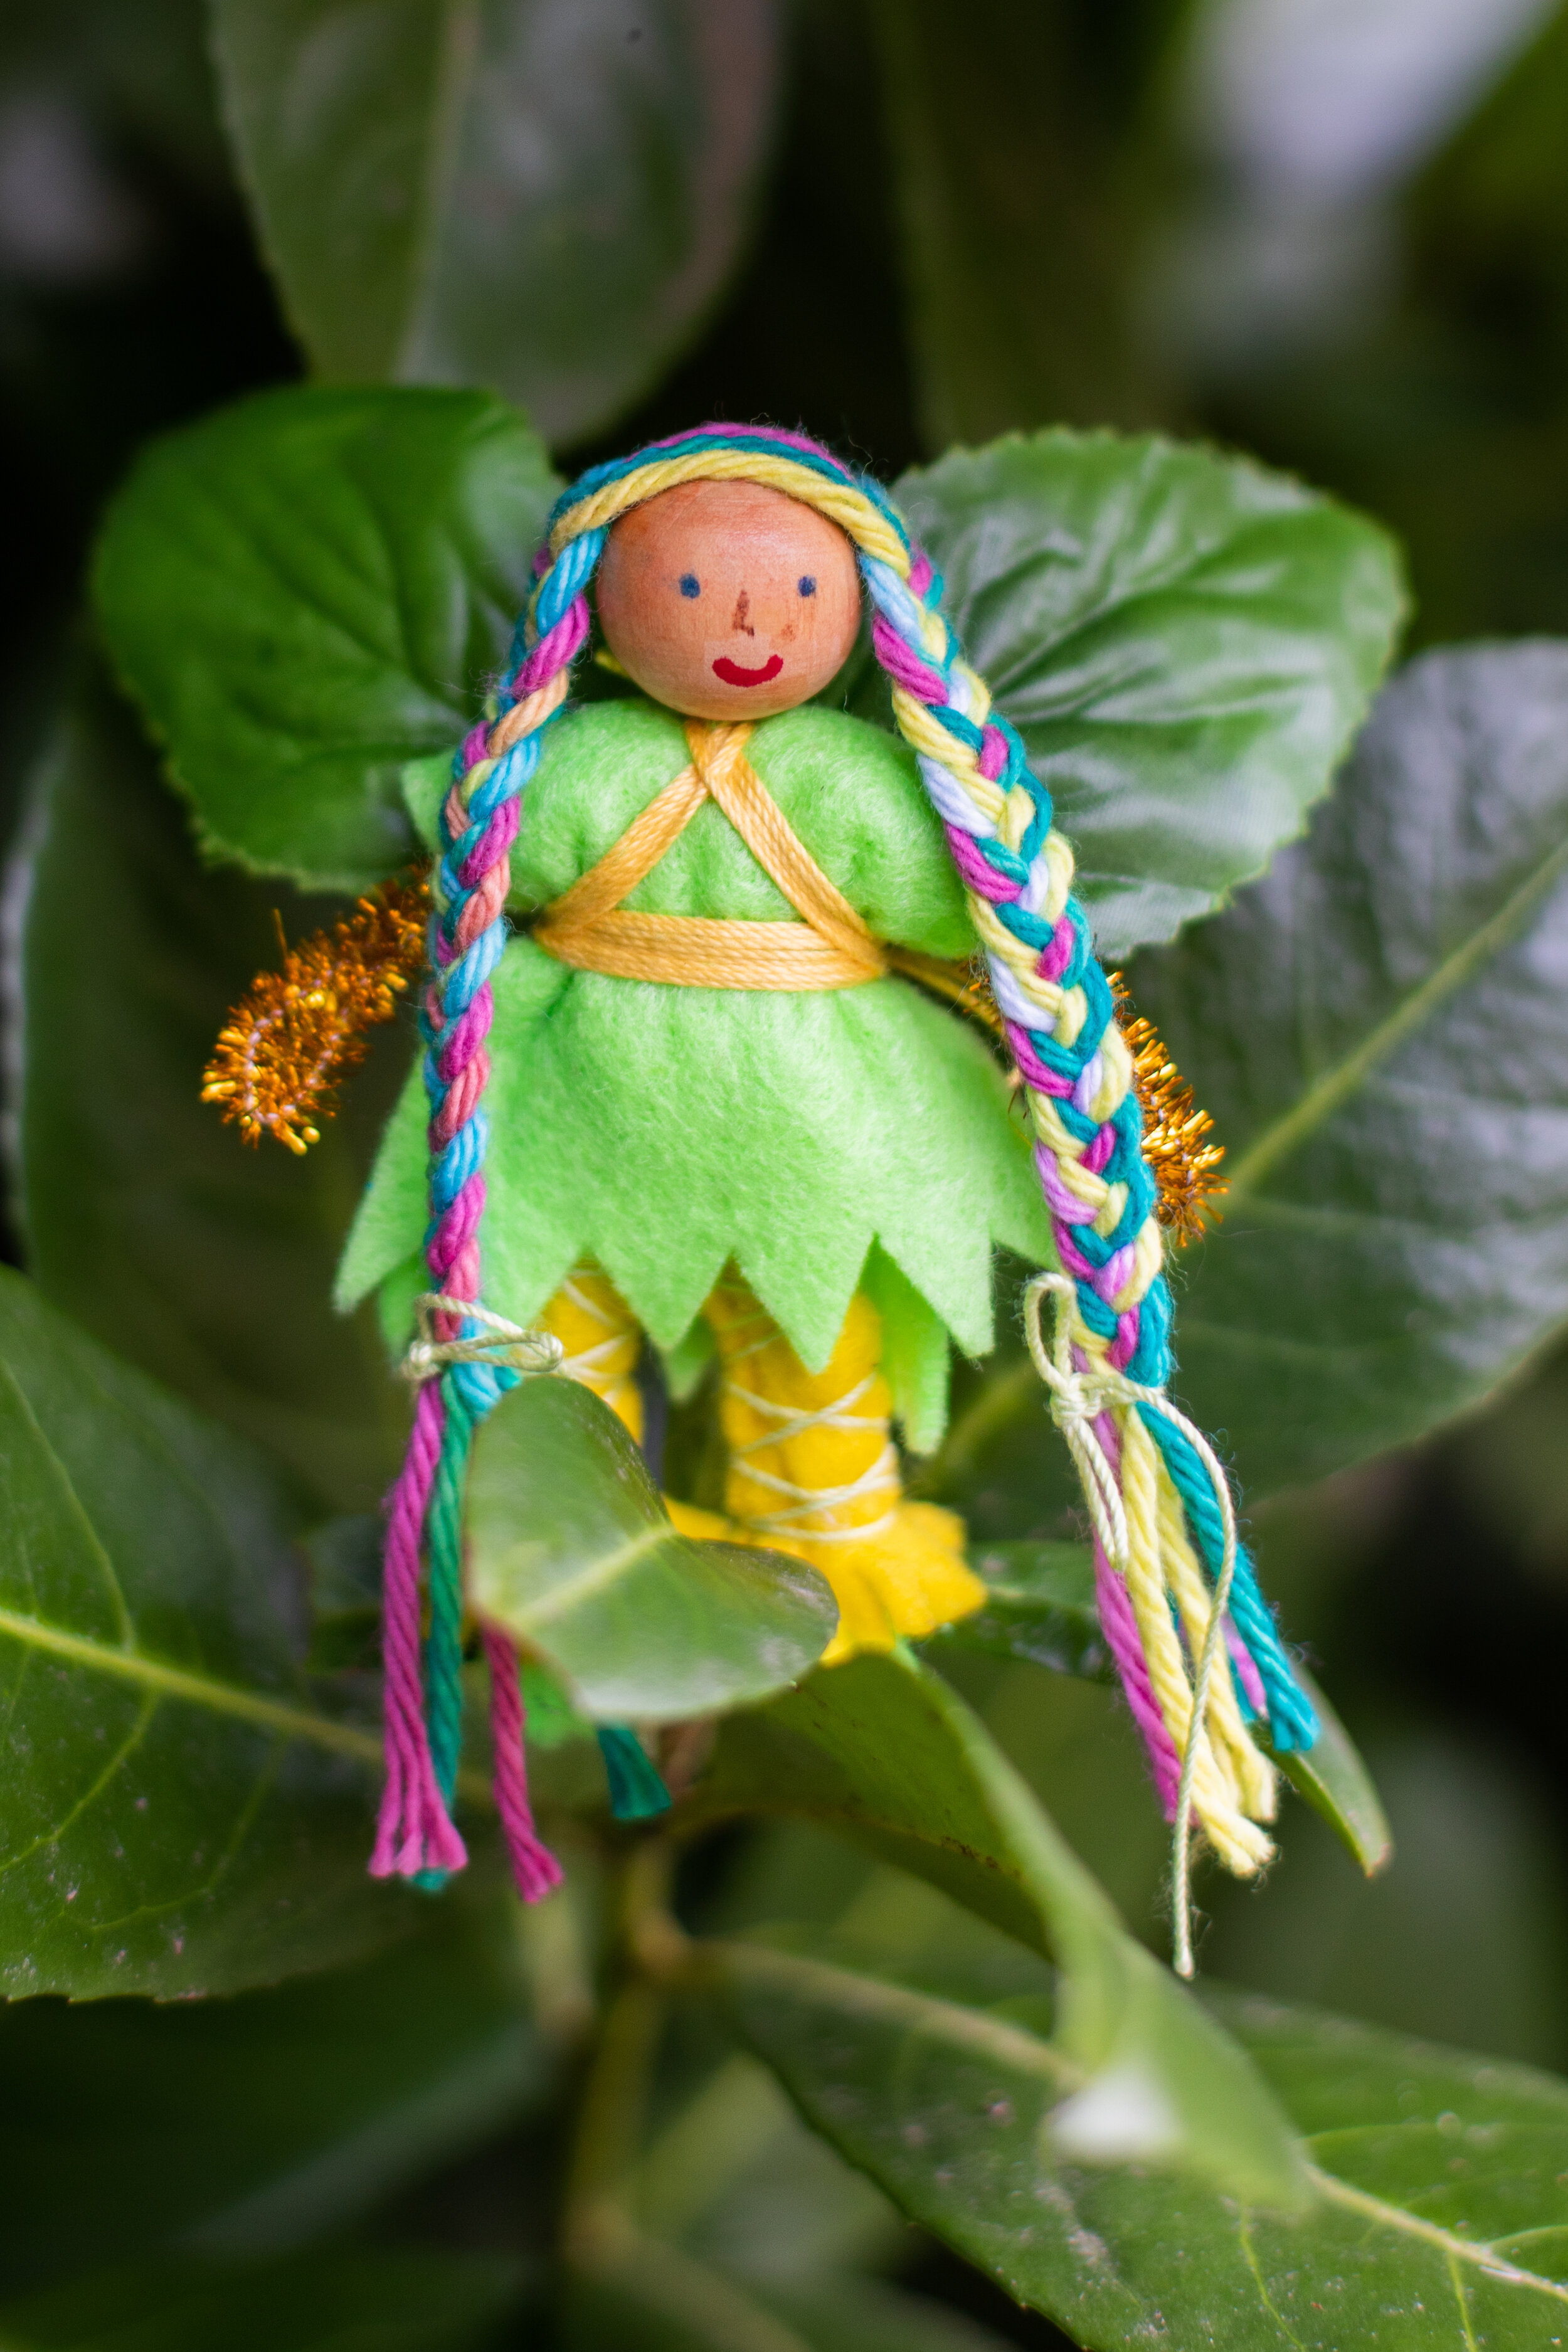
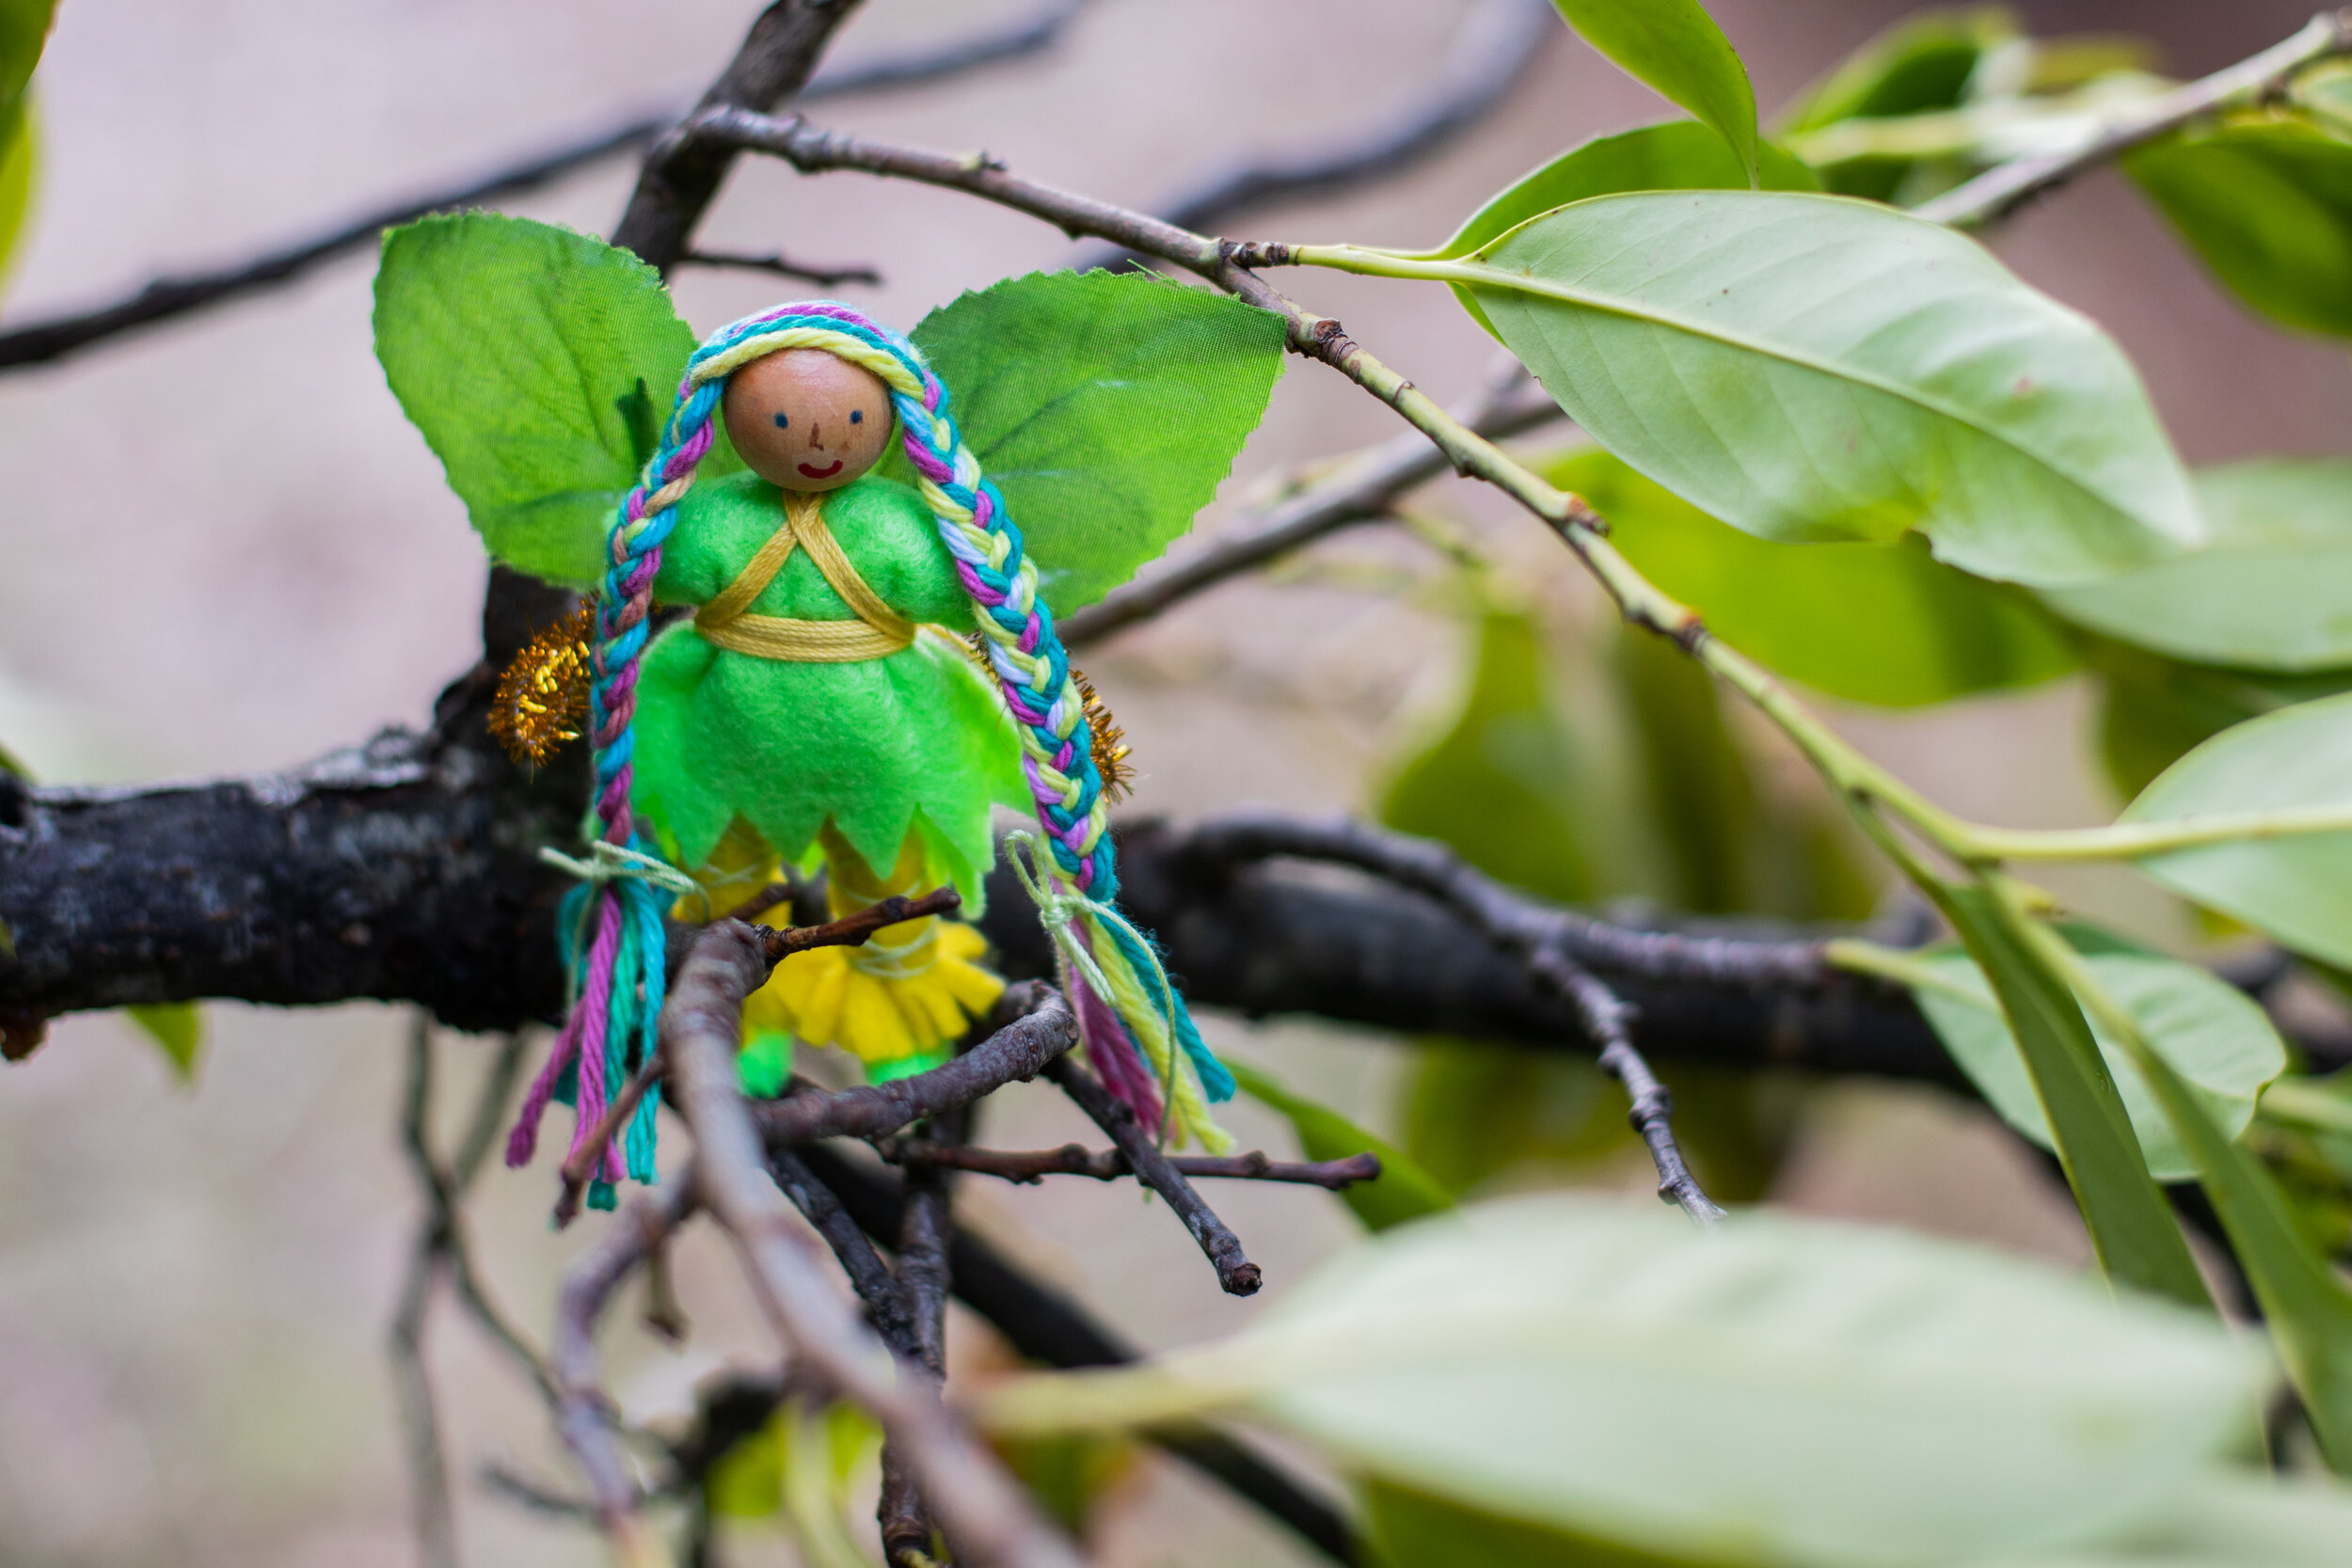
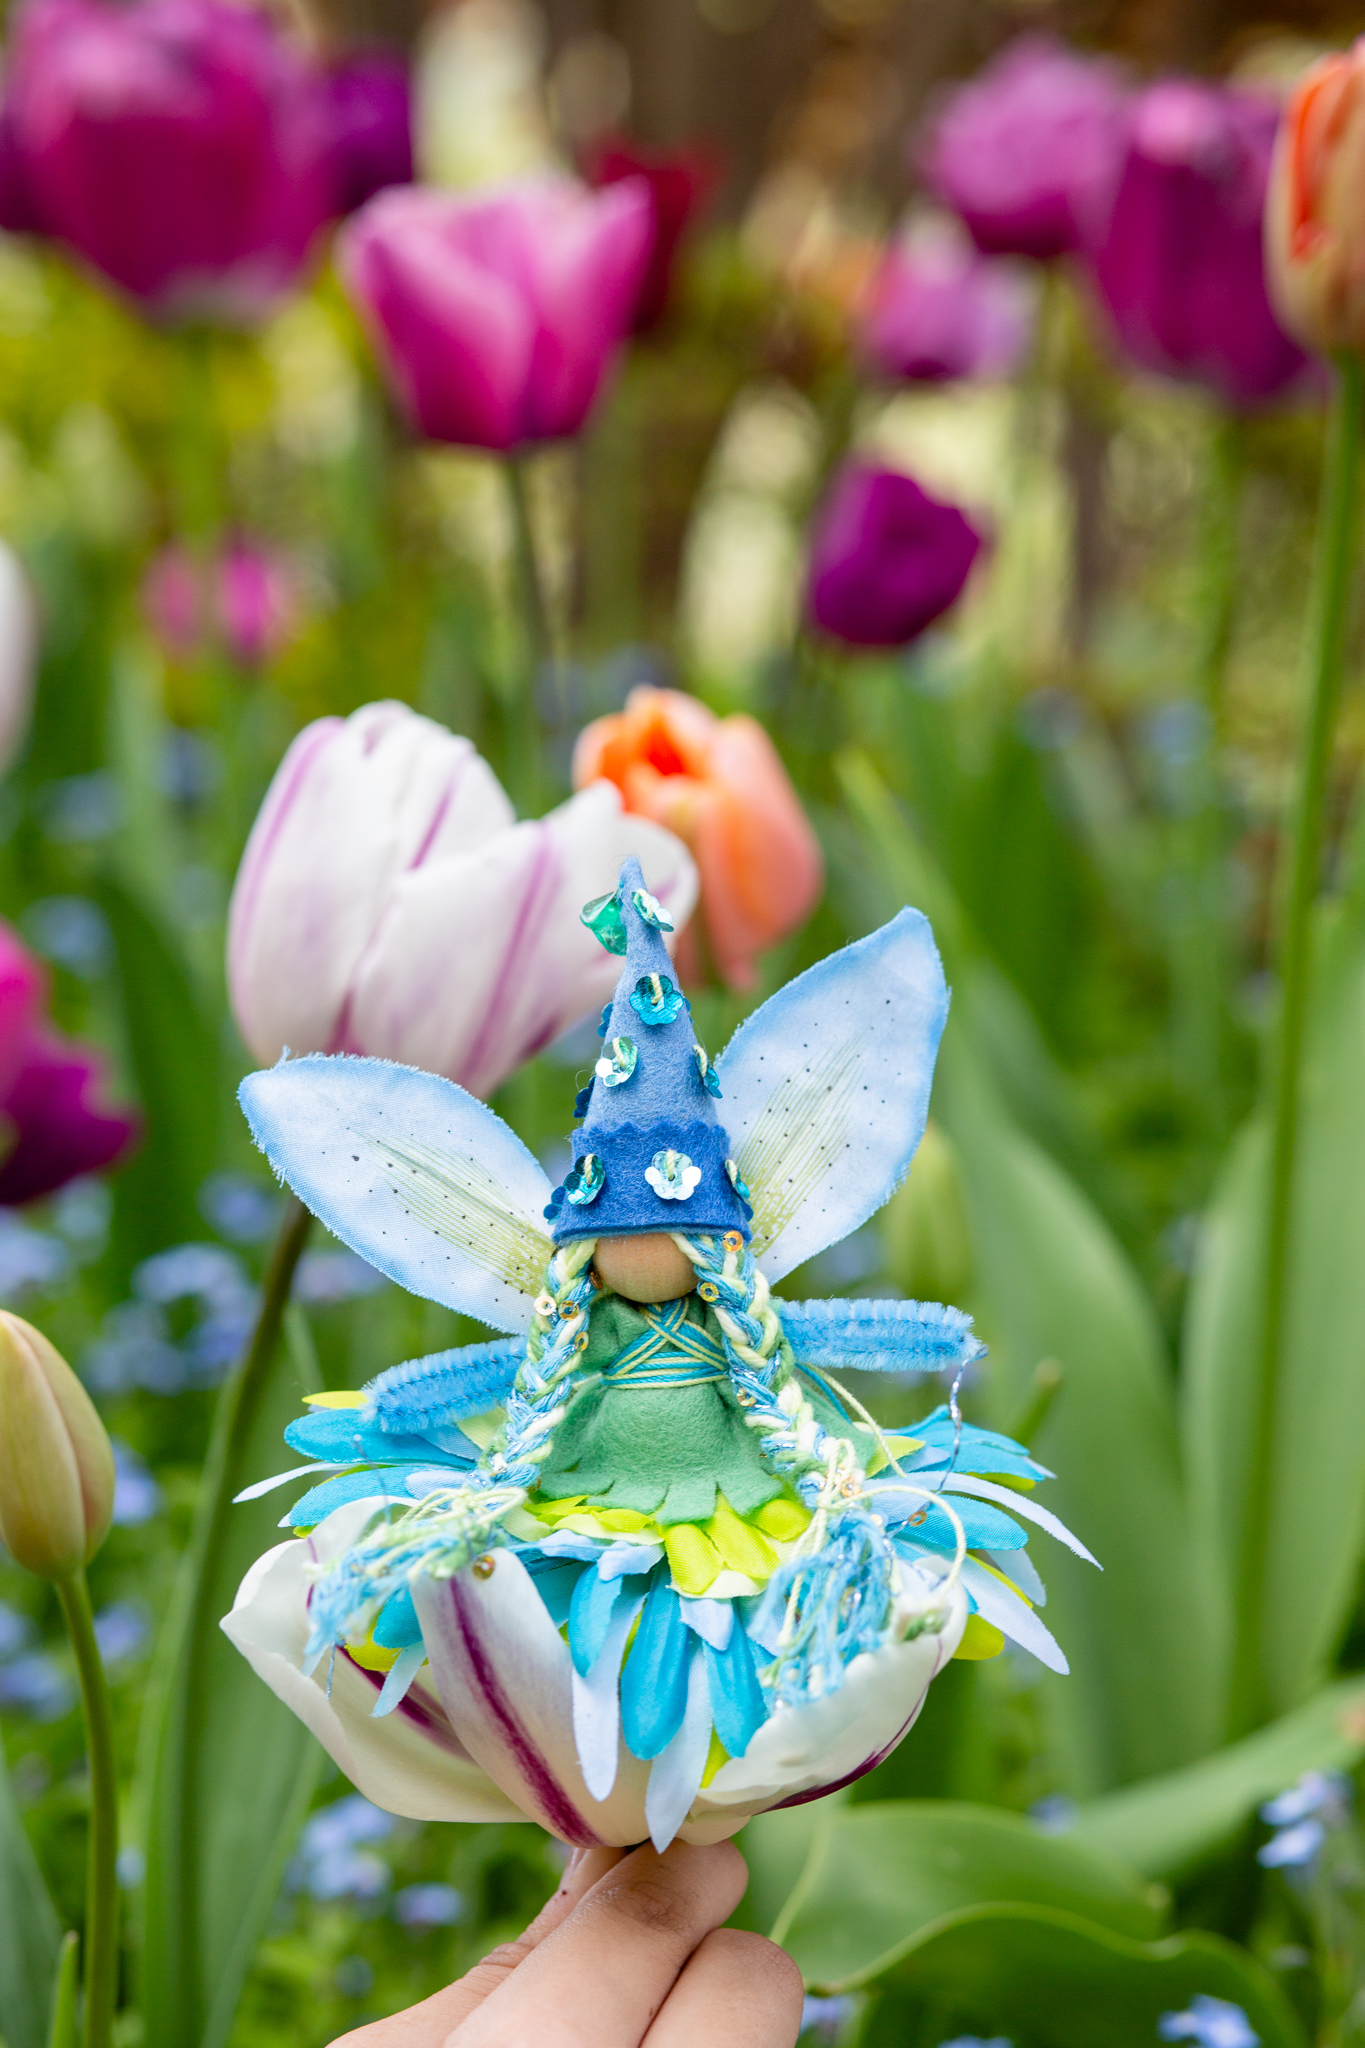
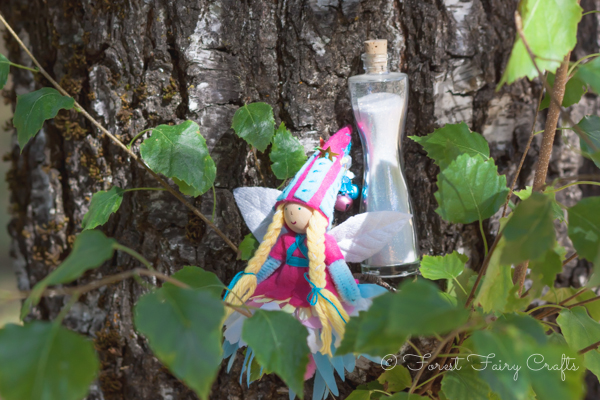
Rainbow Fairies
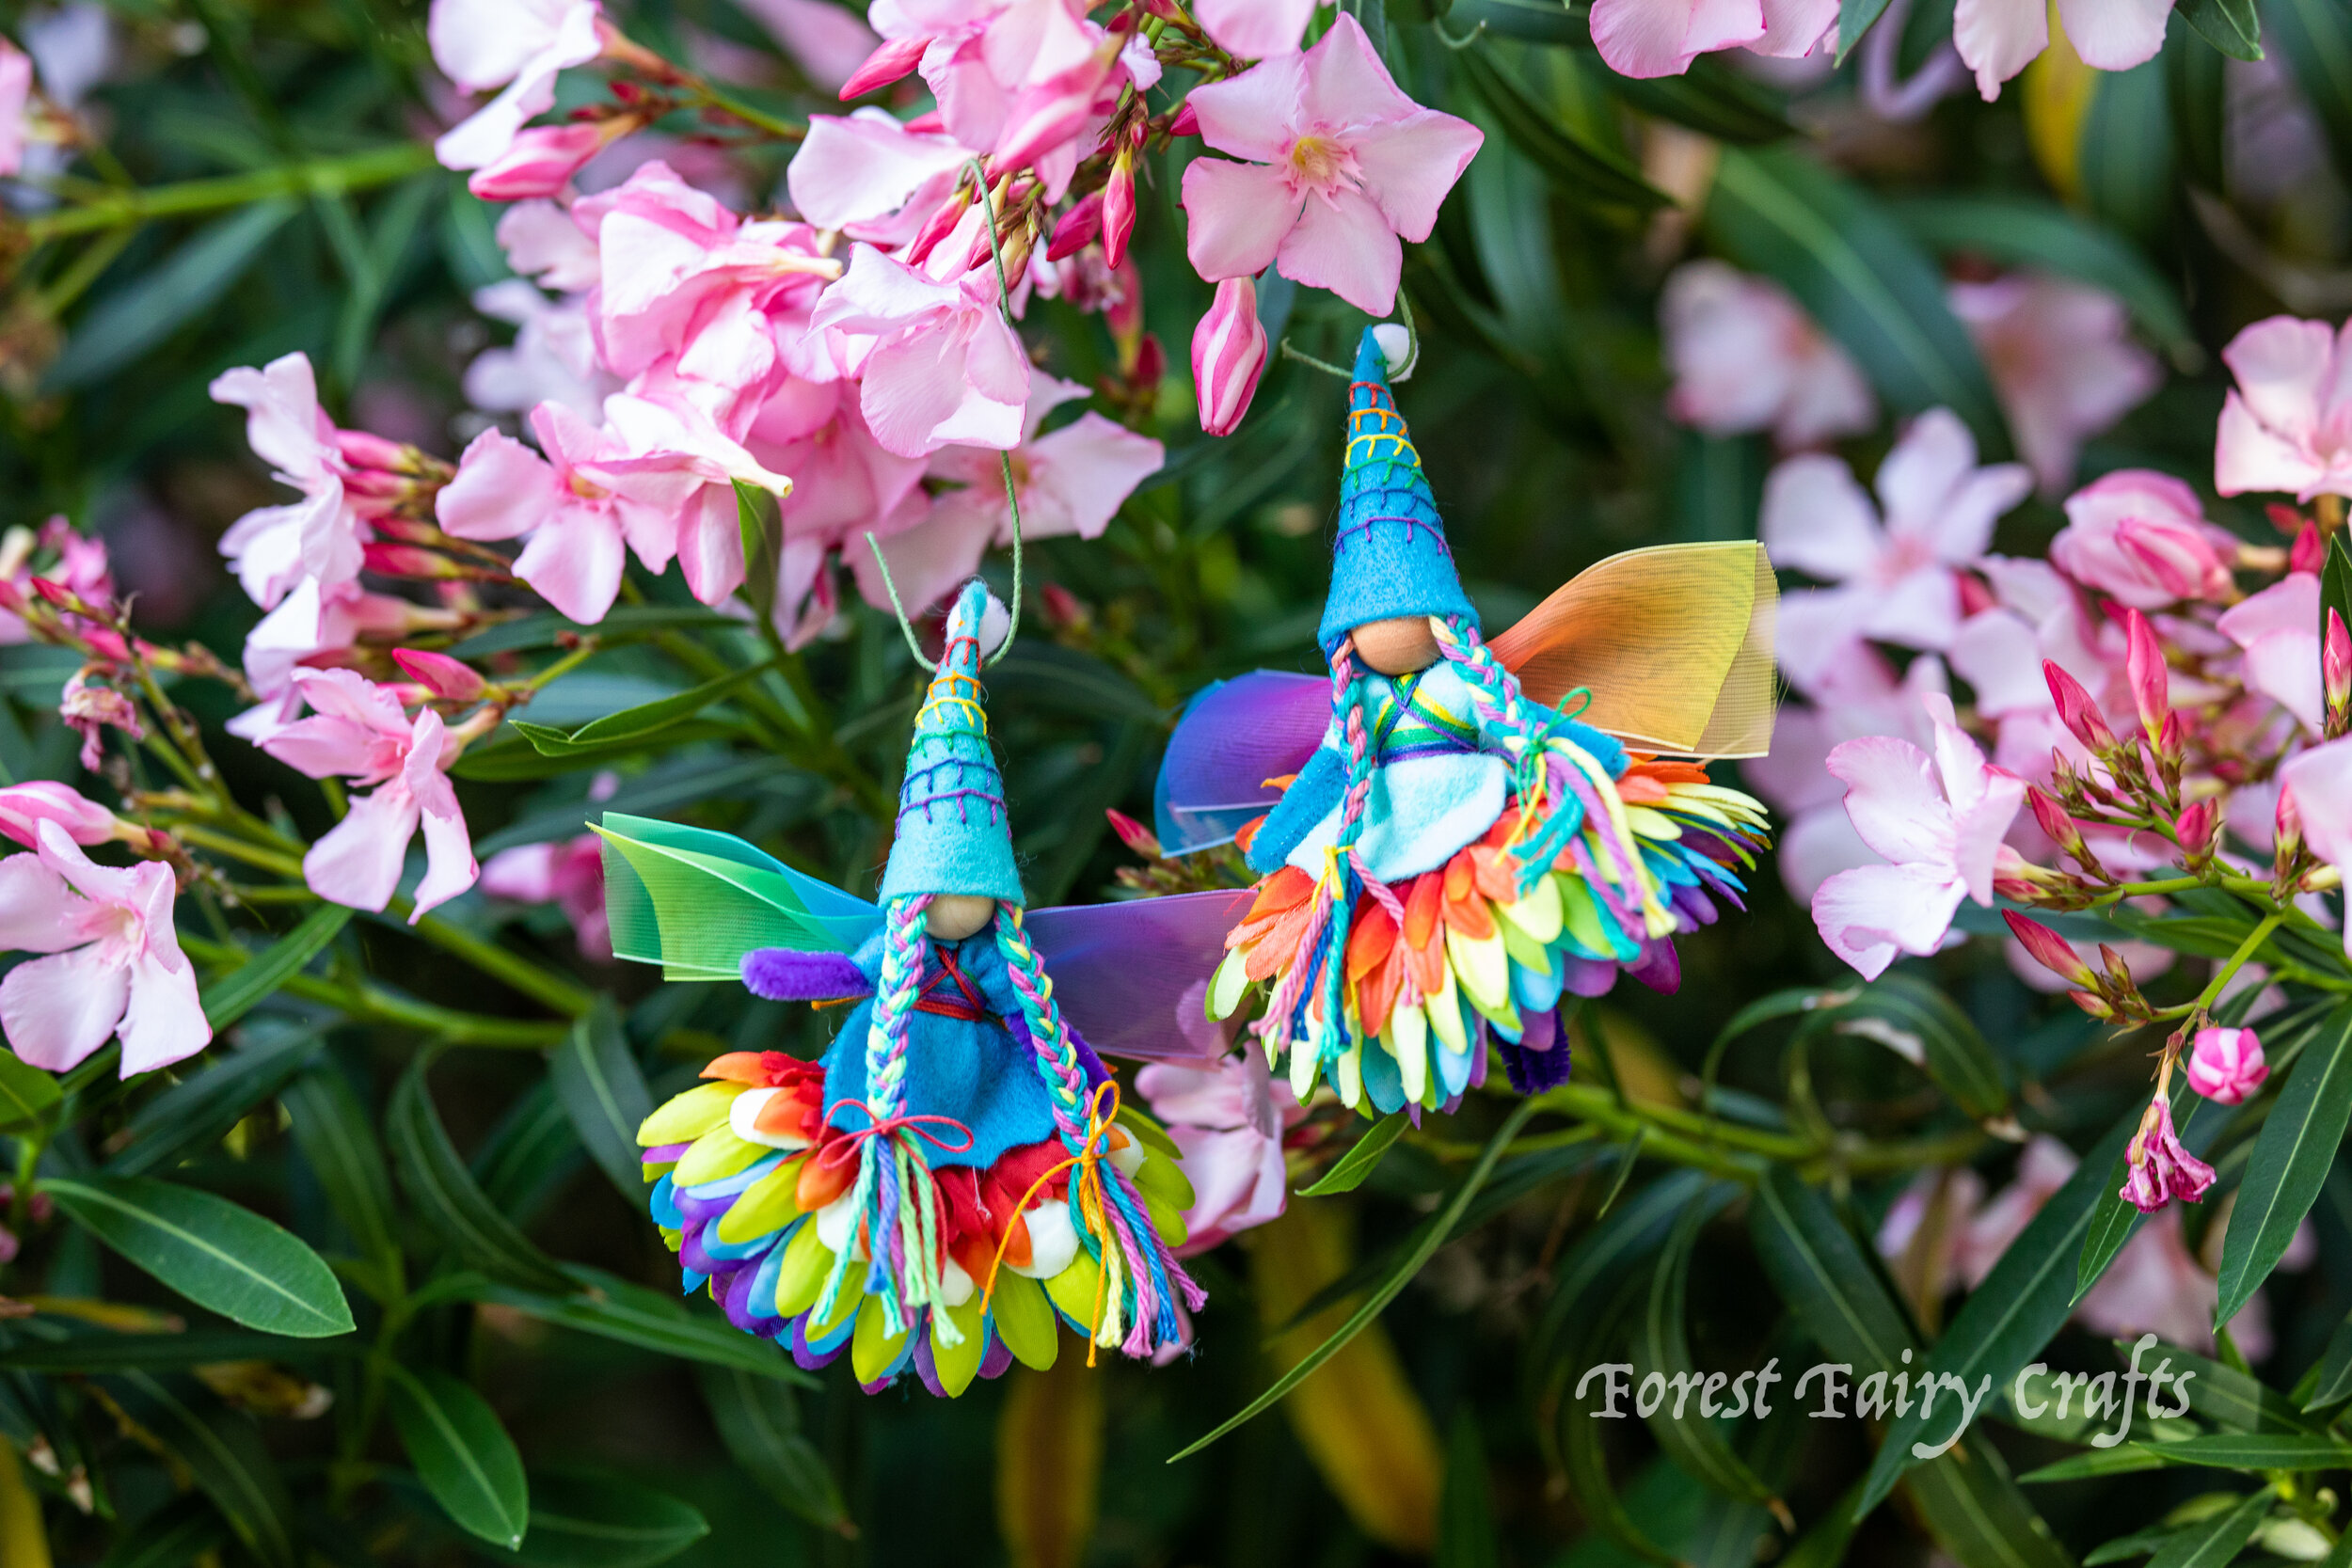
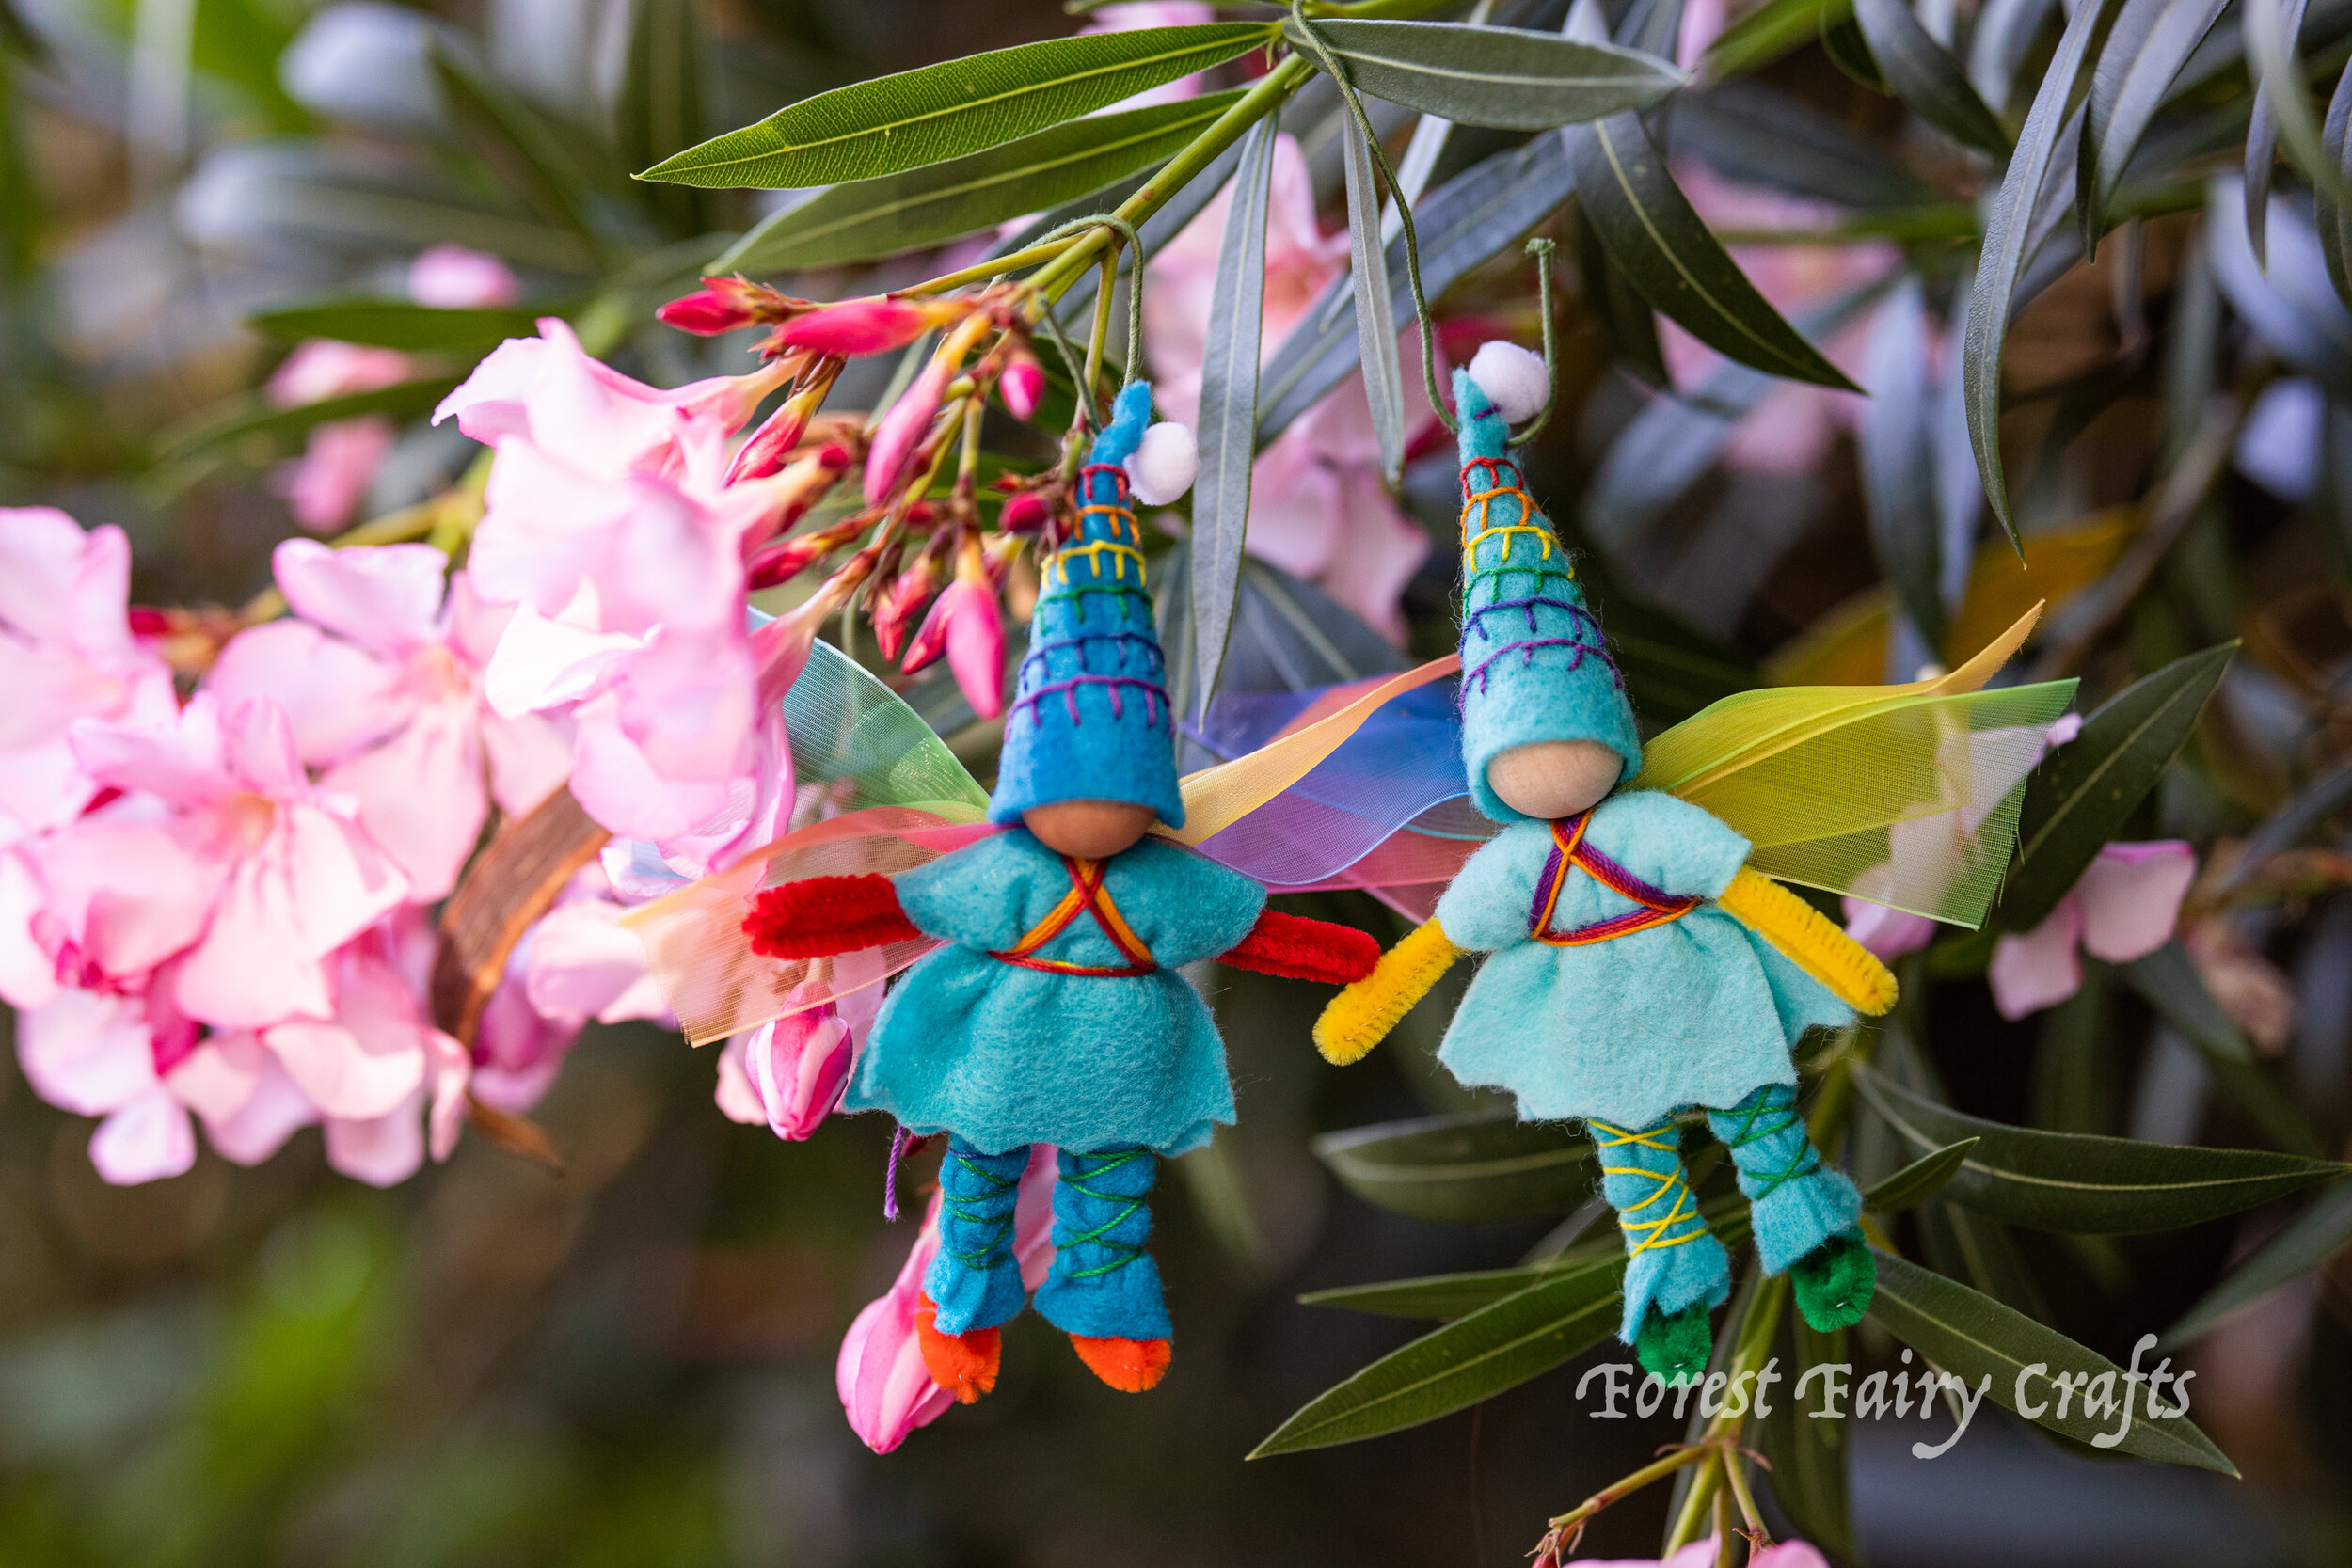
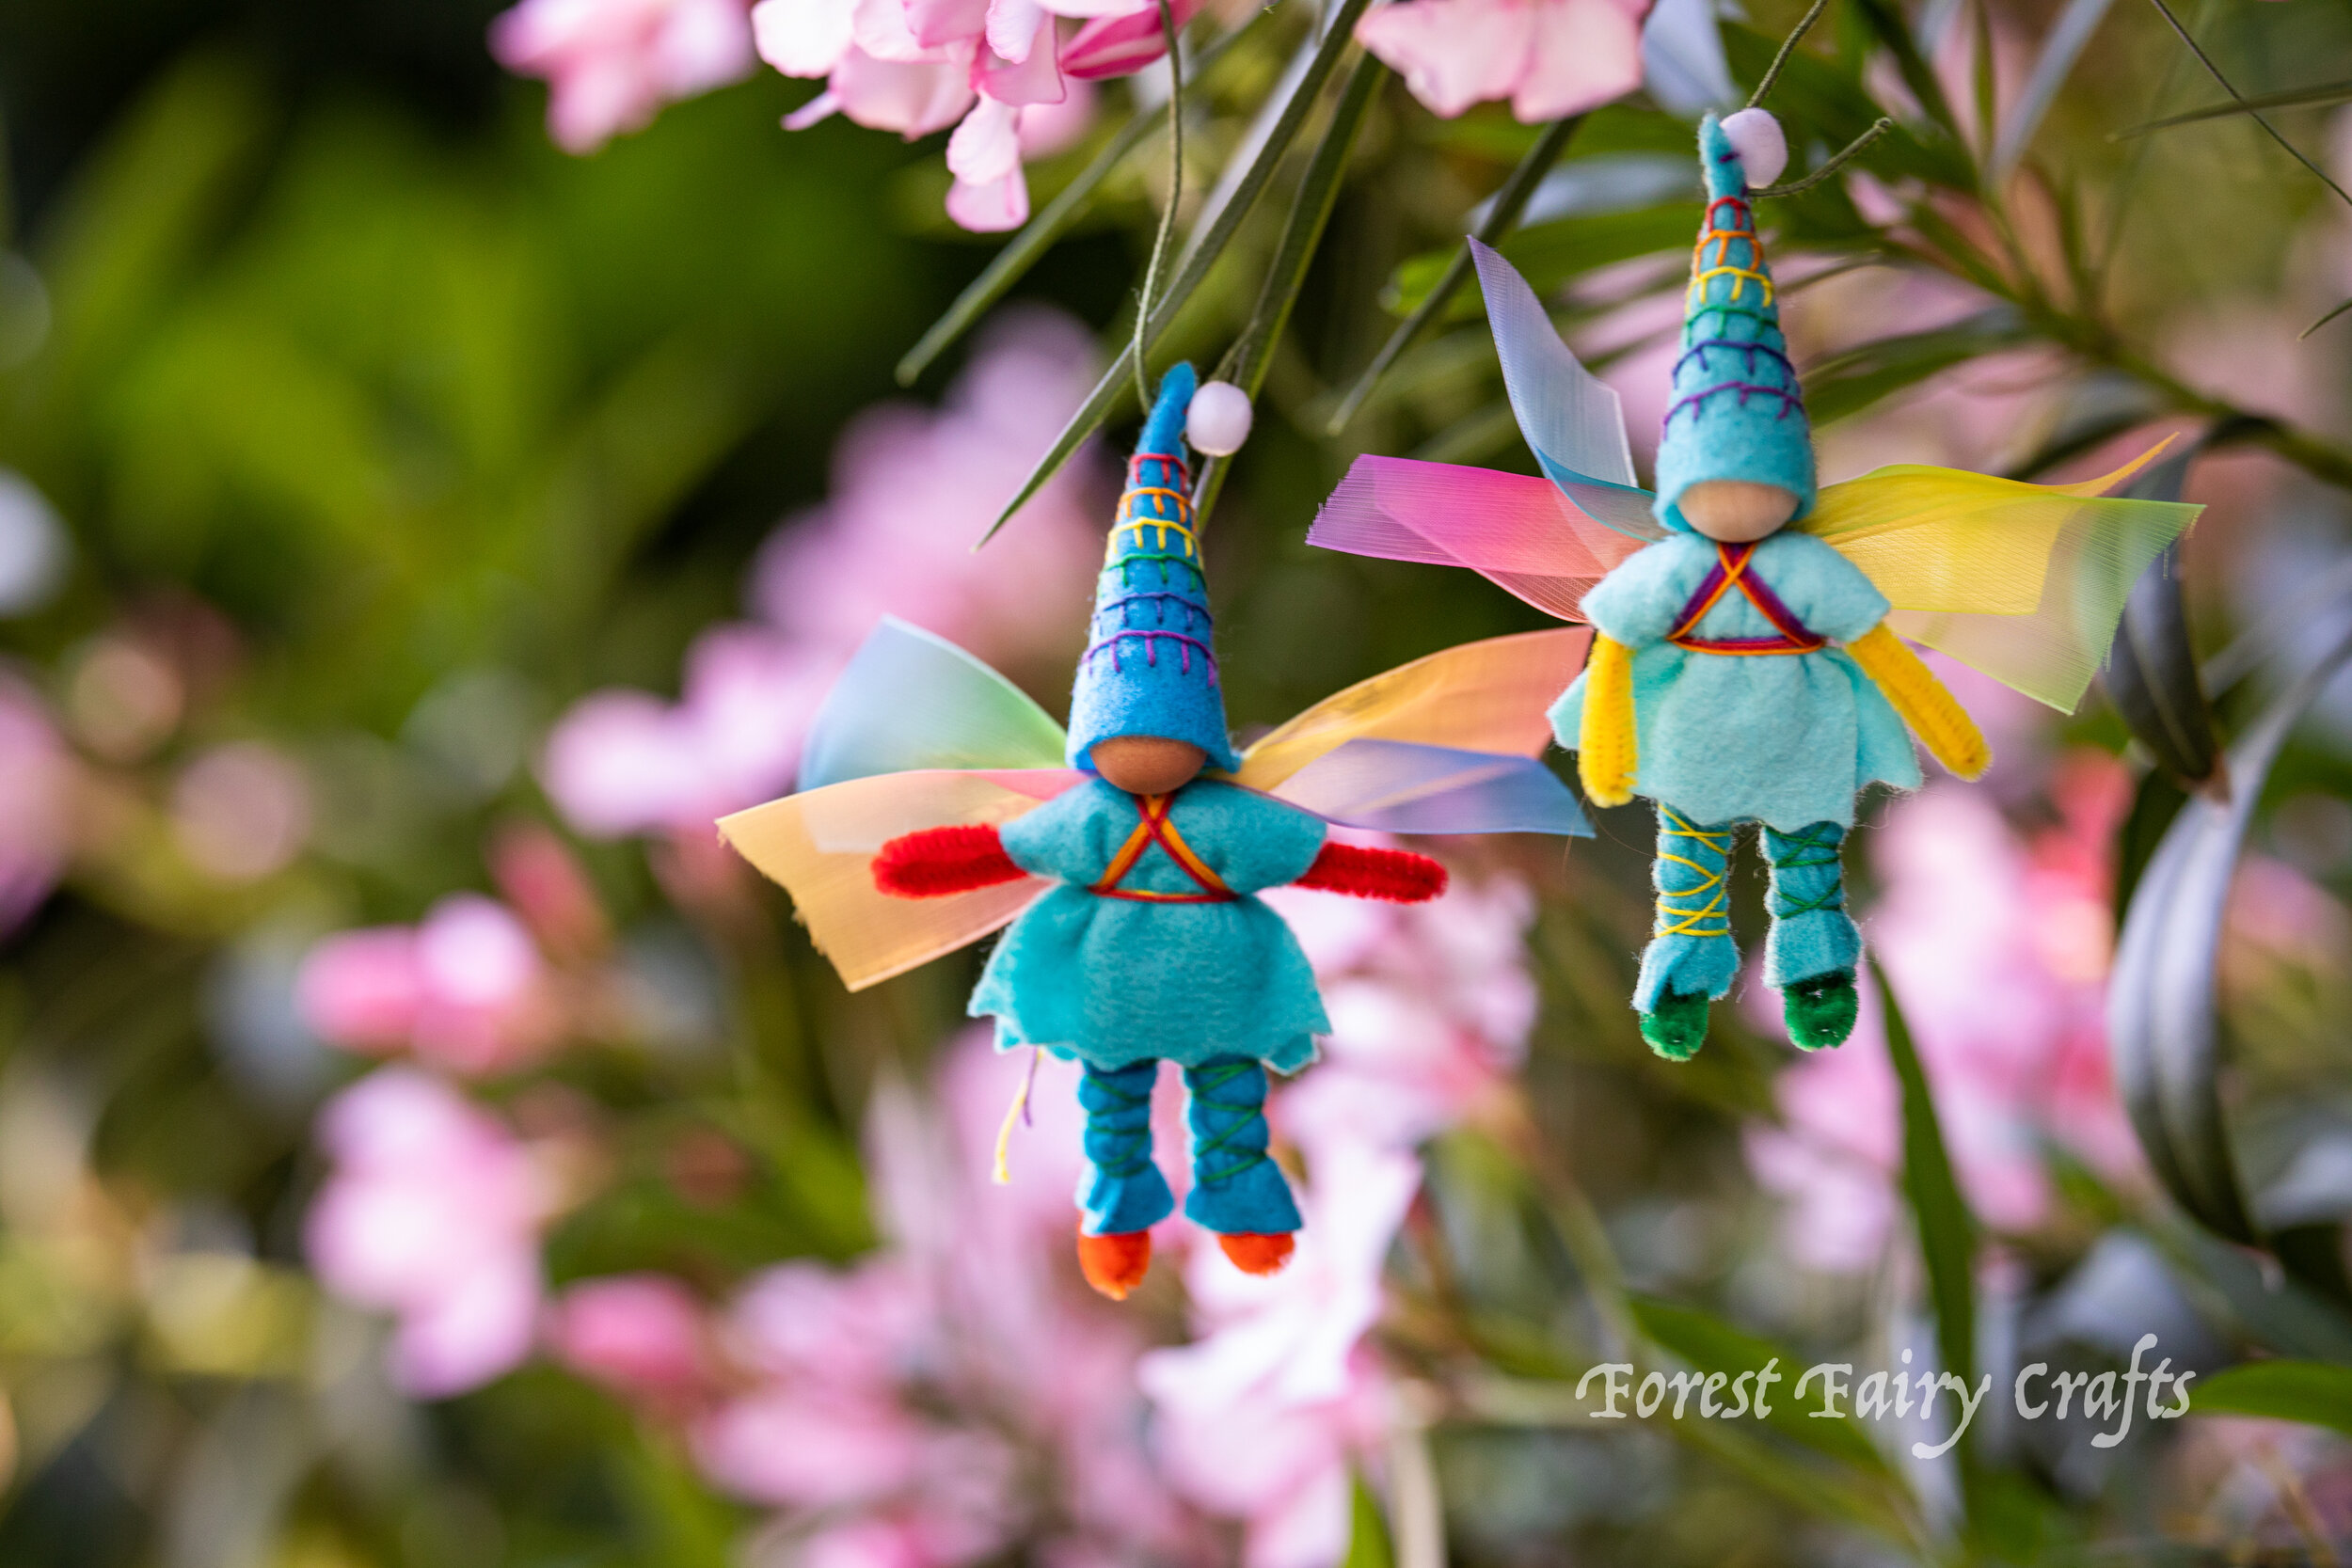
The early summer skies are exactly where fairies like to play. These rainbow fairies charmed me when I had the idea to create them.

My first challenge was creating the rainbows on their hats. I could have done a whipstich (line) or used sequins, but I thought about using a Rabbit Stitch (aka blanket stitch) which looks a few stitches to figure out. I practice on a scrap piece of felt before the cut triangle hat. I used rainbow crochet thread. And it meant that I had to clip a section of purple, tie that off, then clip blue, and tie that off, and so forth. Lots of tying and starting new threads. Which means this is a project for older, patient children or adults. I could try to show step-by-step photos if people are interested. I push the needle down through With younger children, I would offer rainbow color sequins and let them have fun sewing sparkles onto the hat.

I was going to add bells to the tops of the hats when I found the white puffs (from a Santa fairy project). They looked like perfect clouds!
The next puzzle was their clothing, which I could have chosen in rainbow colors. I felt blue evoked the sky and brought them together so I chose light and dark blue for clothing. Then I used rainbow thread for their shirts.
The next question for me was how to make their wings. I found the rainbow ribbon, but it didn’t have wires and seemed thin for my usual wings. So maybe I would create a bow? Or loop it around somehow? Finally, I realized that the two pieces of ribbon worked well. I ended up flipping pieces so they had similar colors overlapping because it made it more rainbow-like.
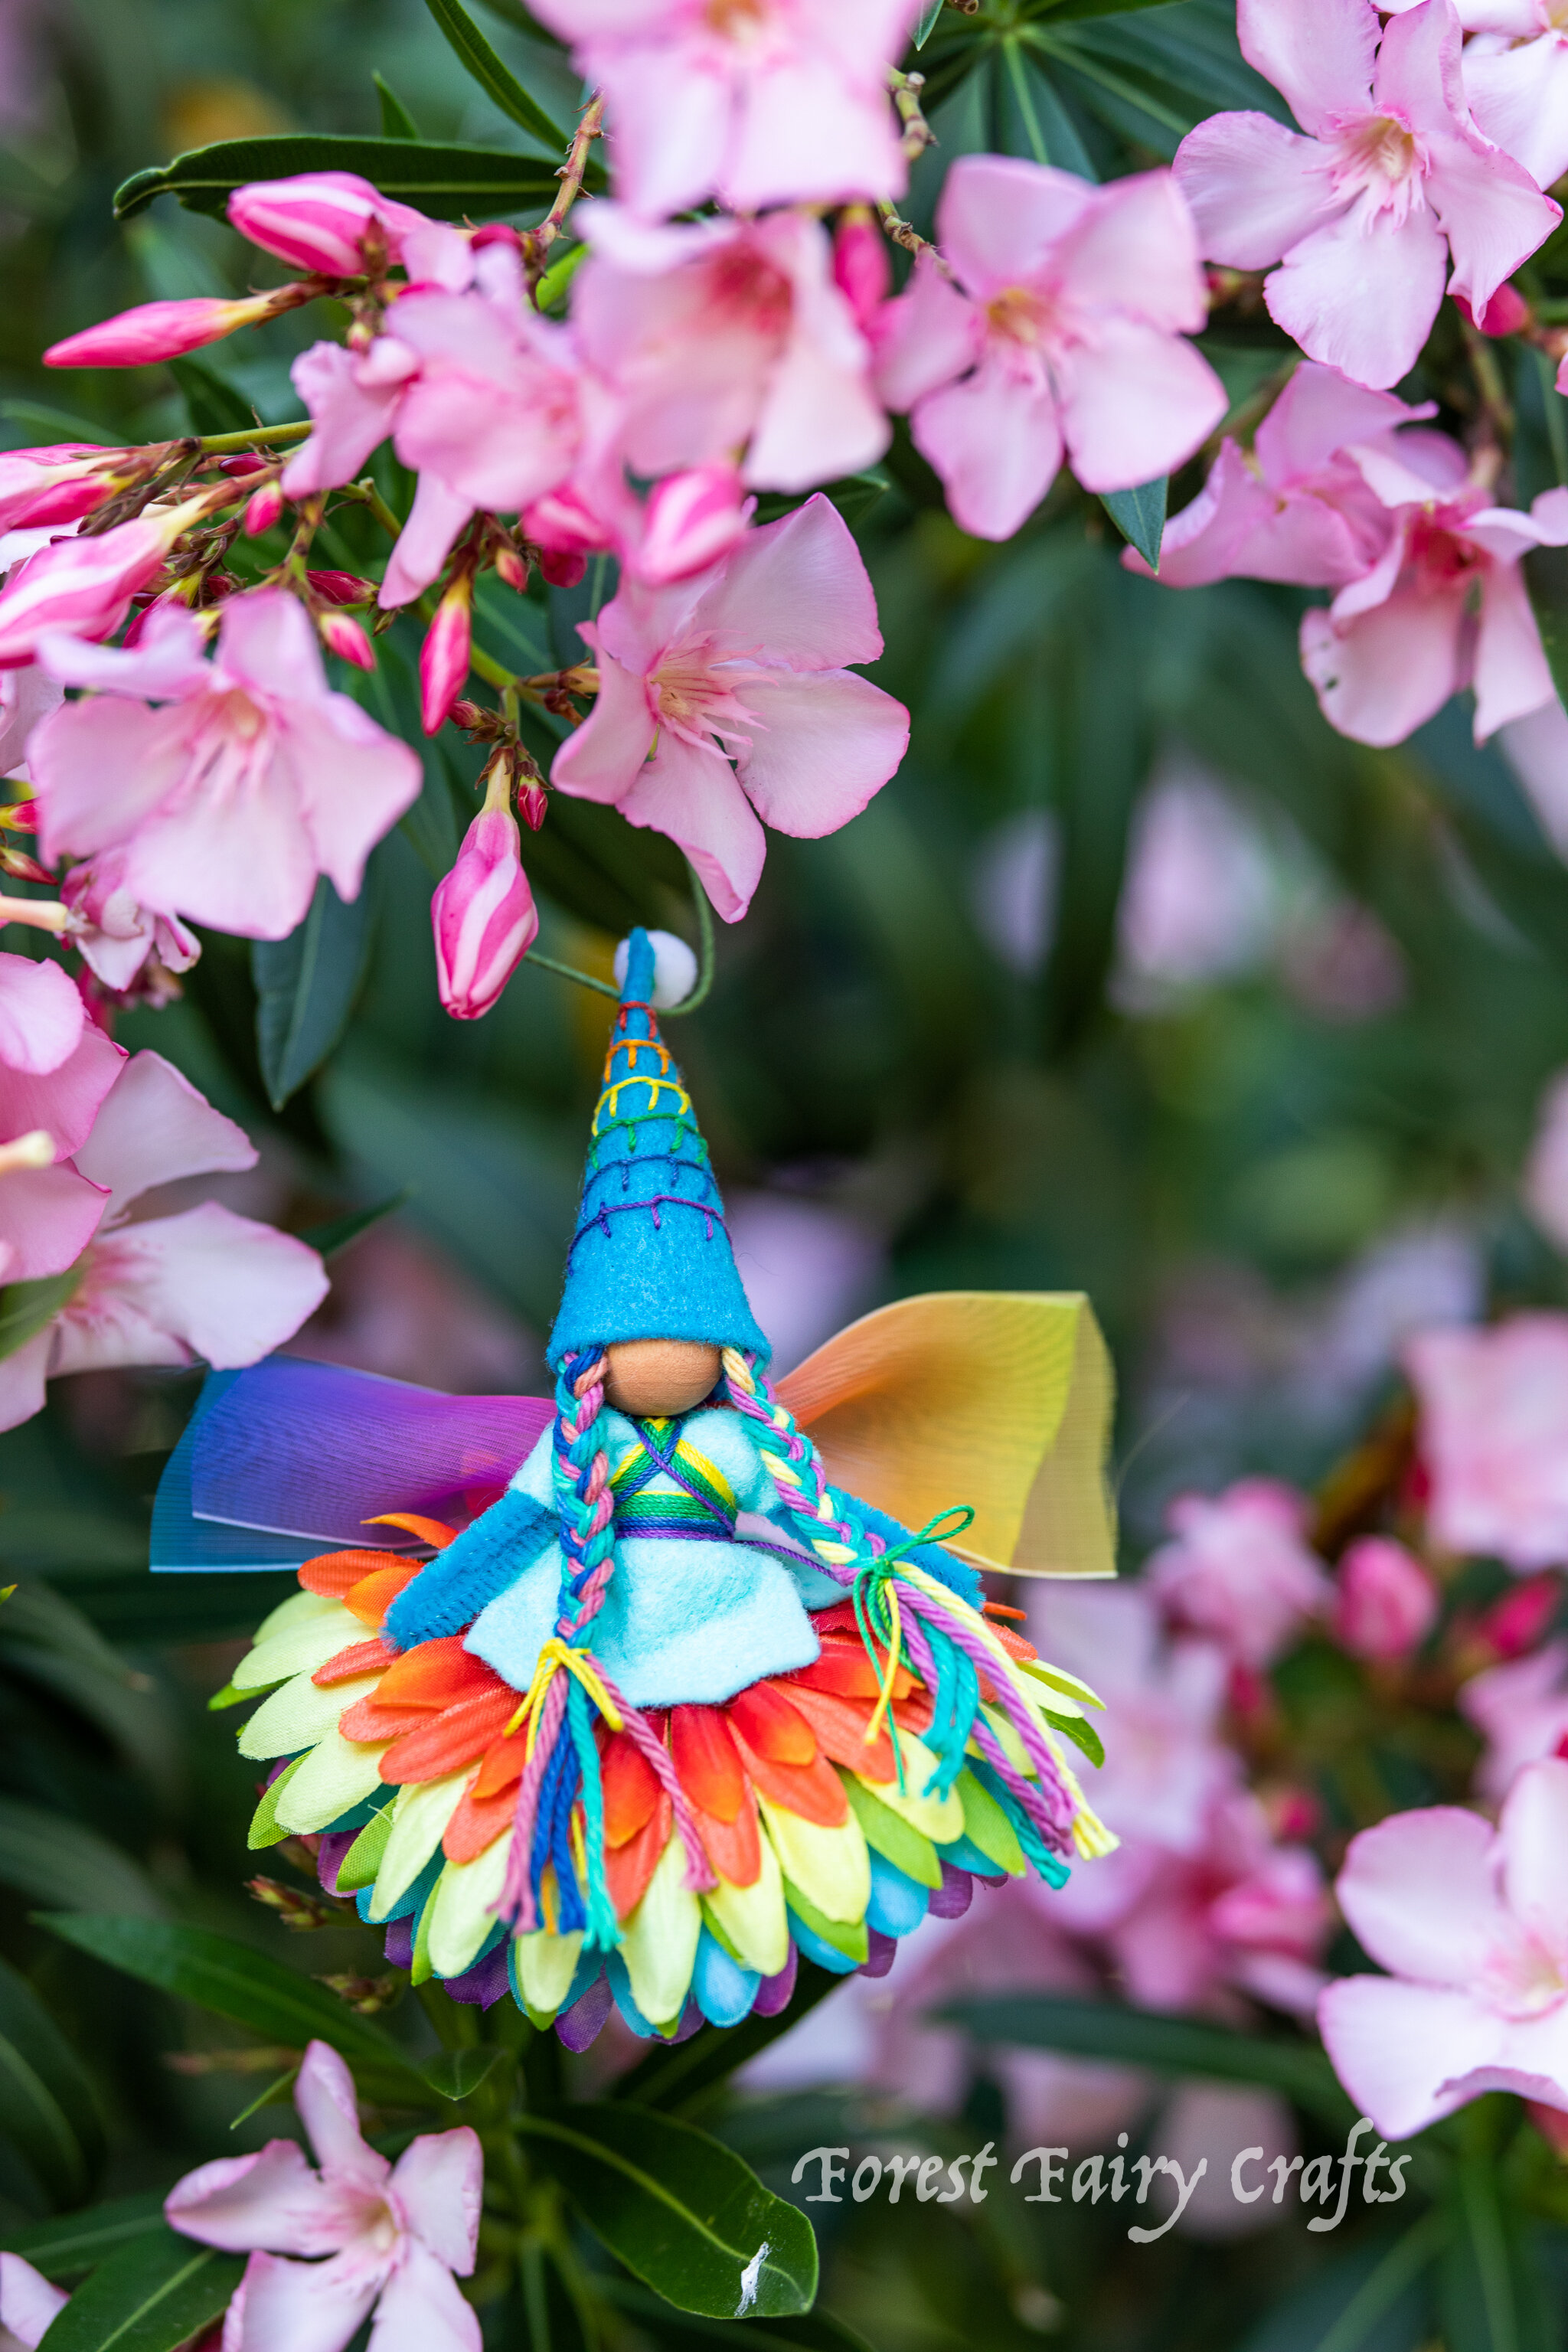
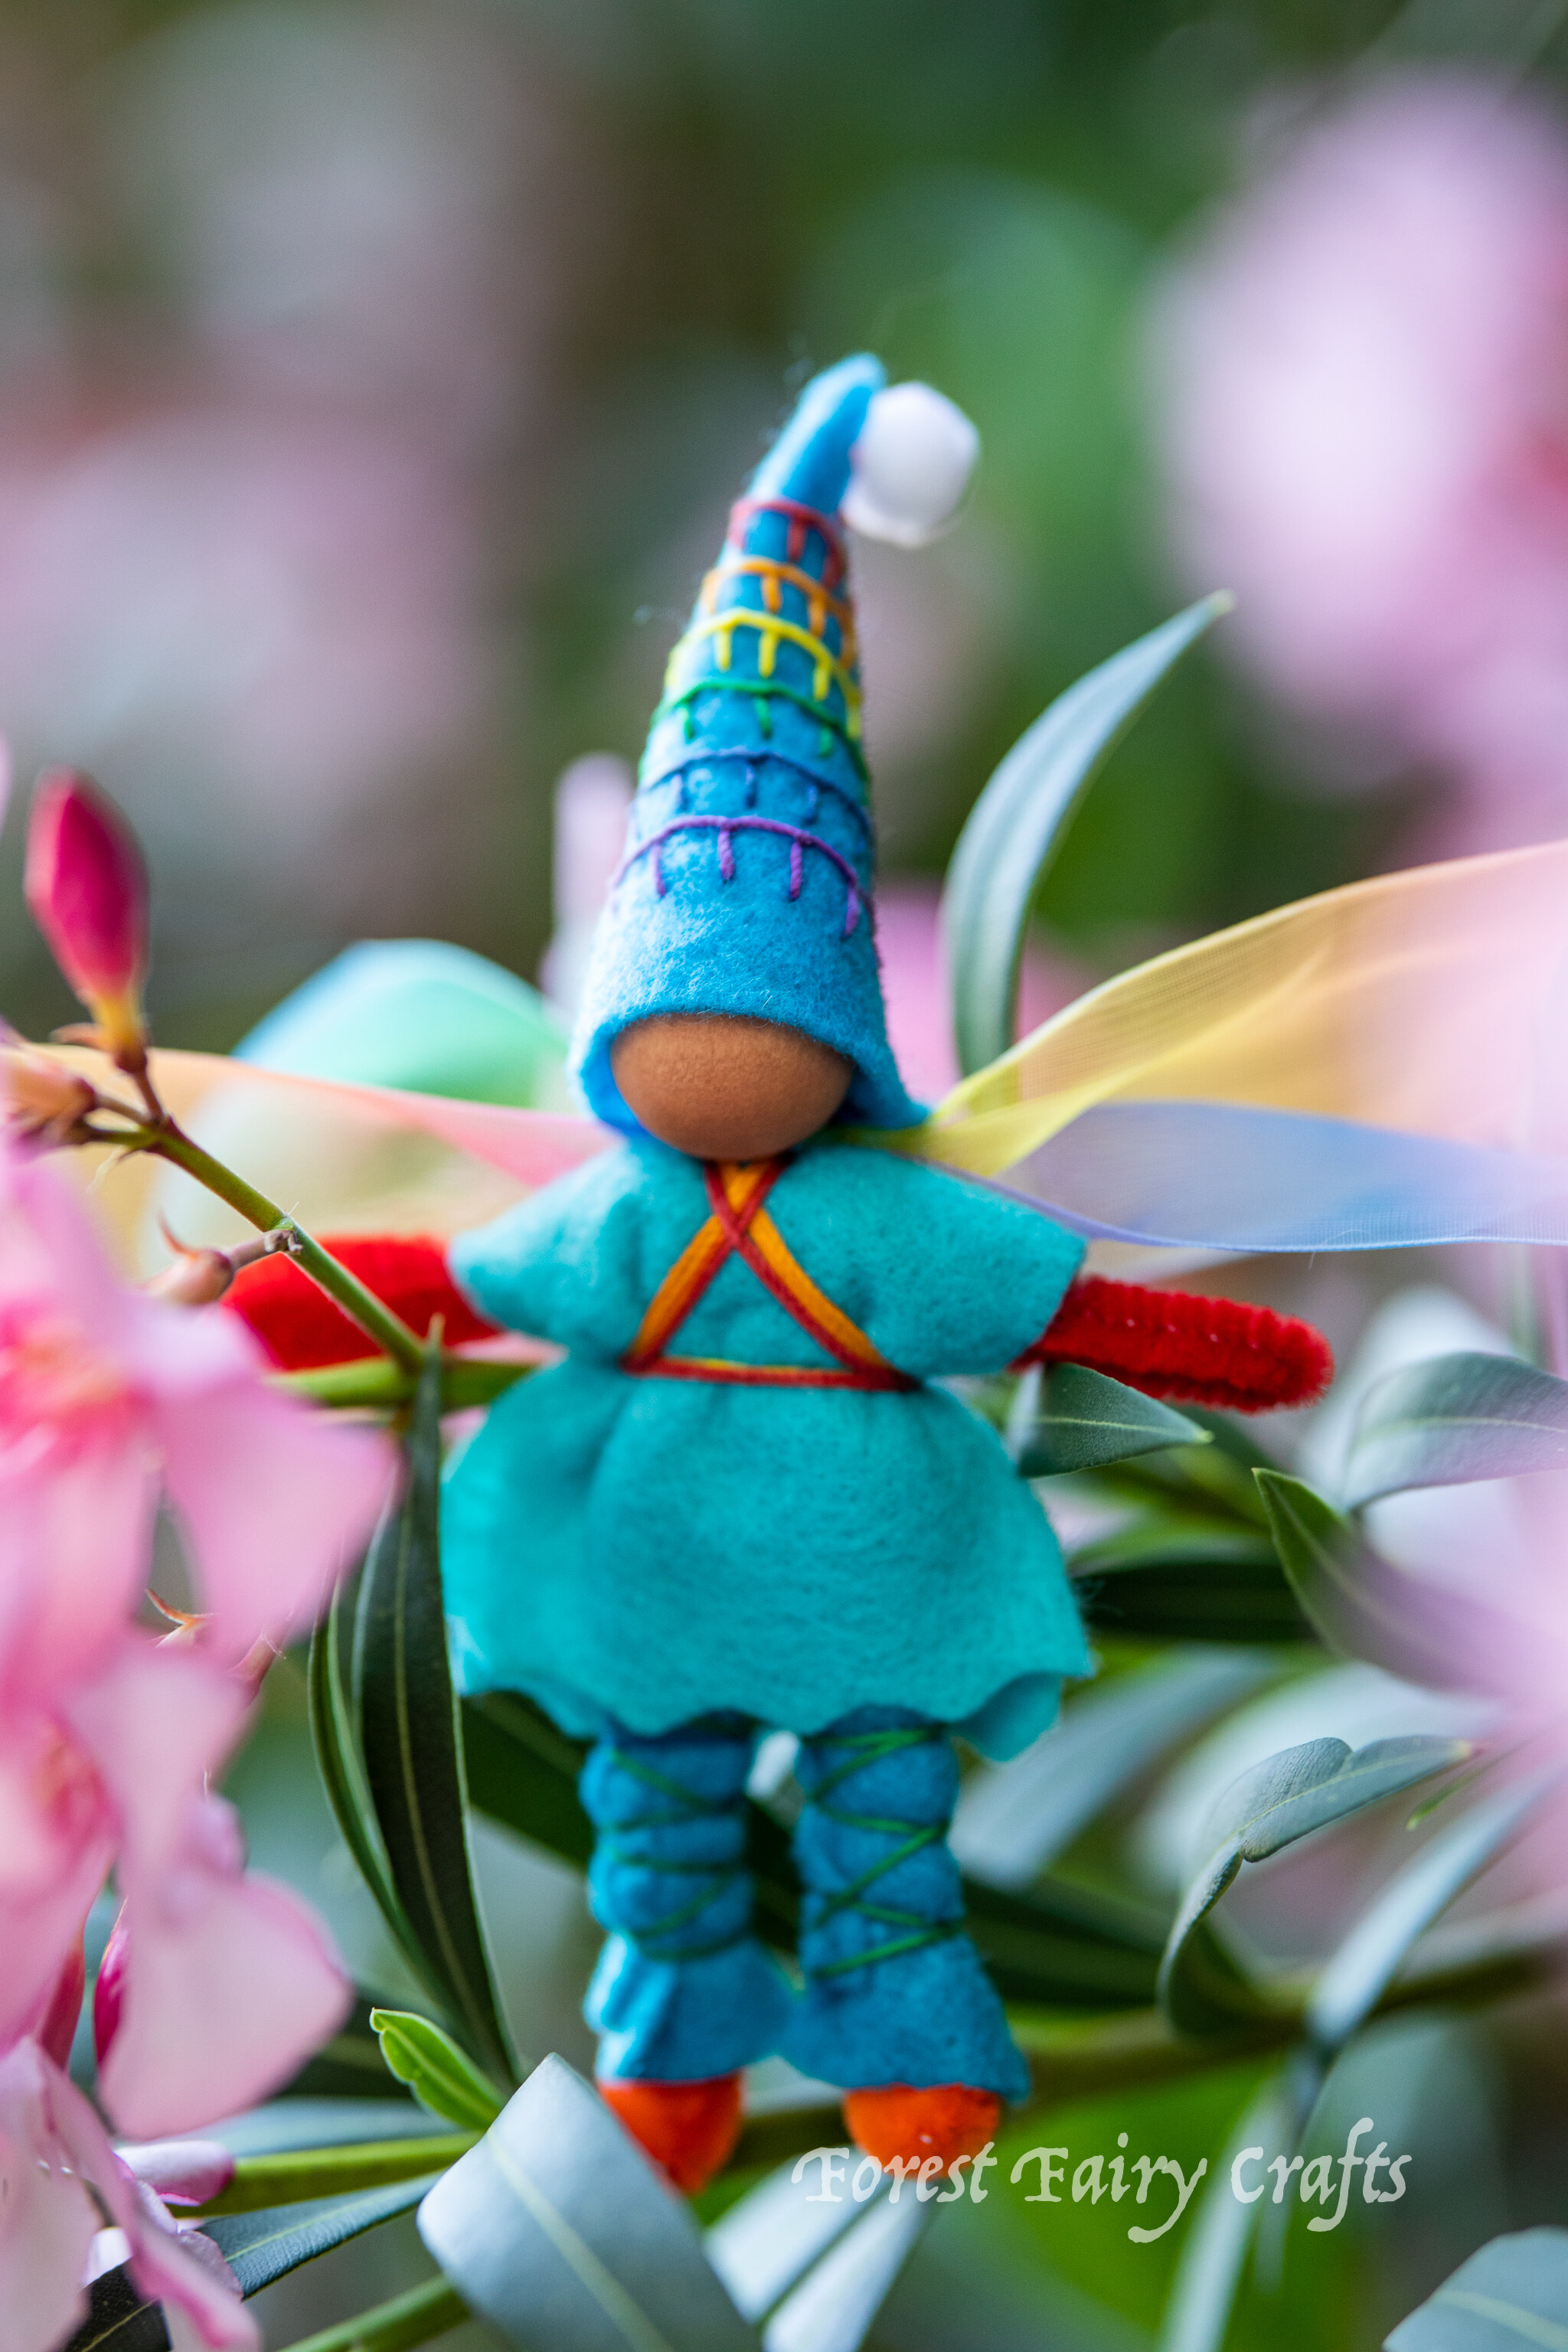
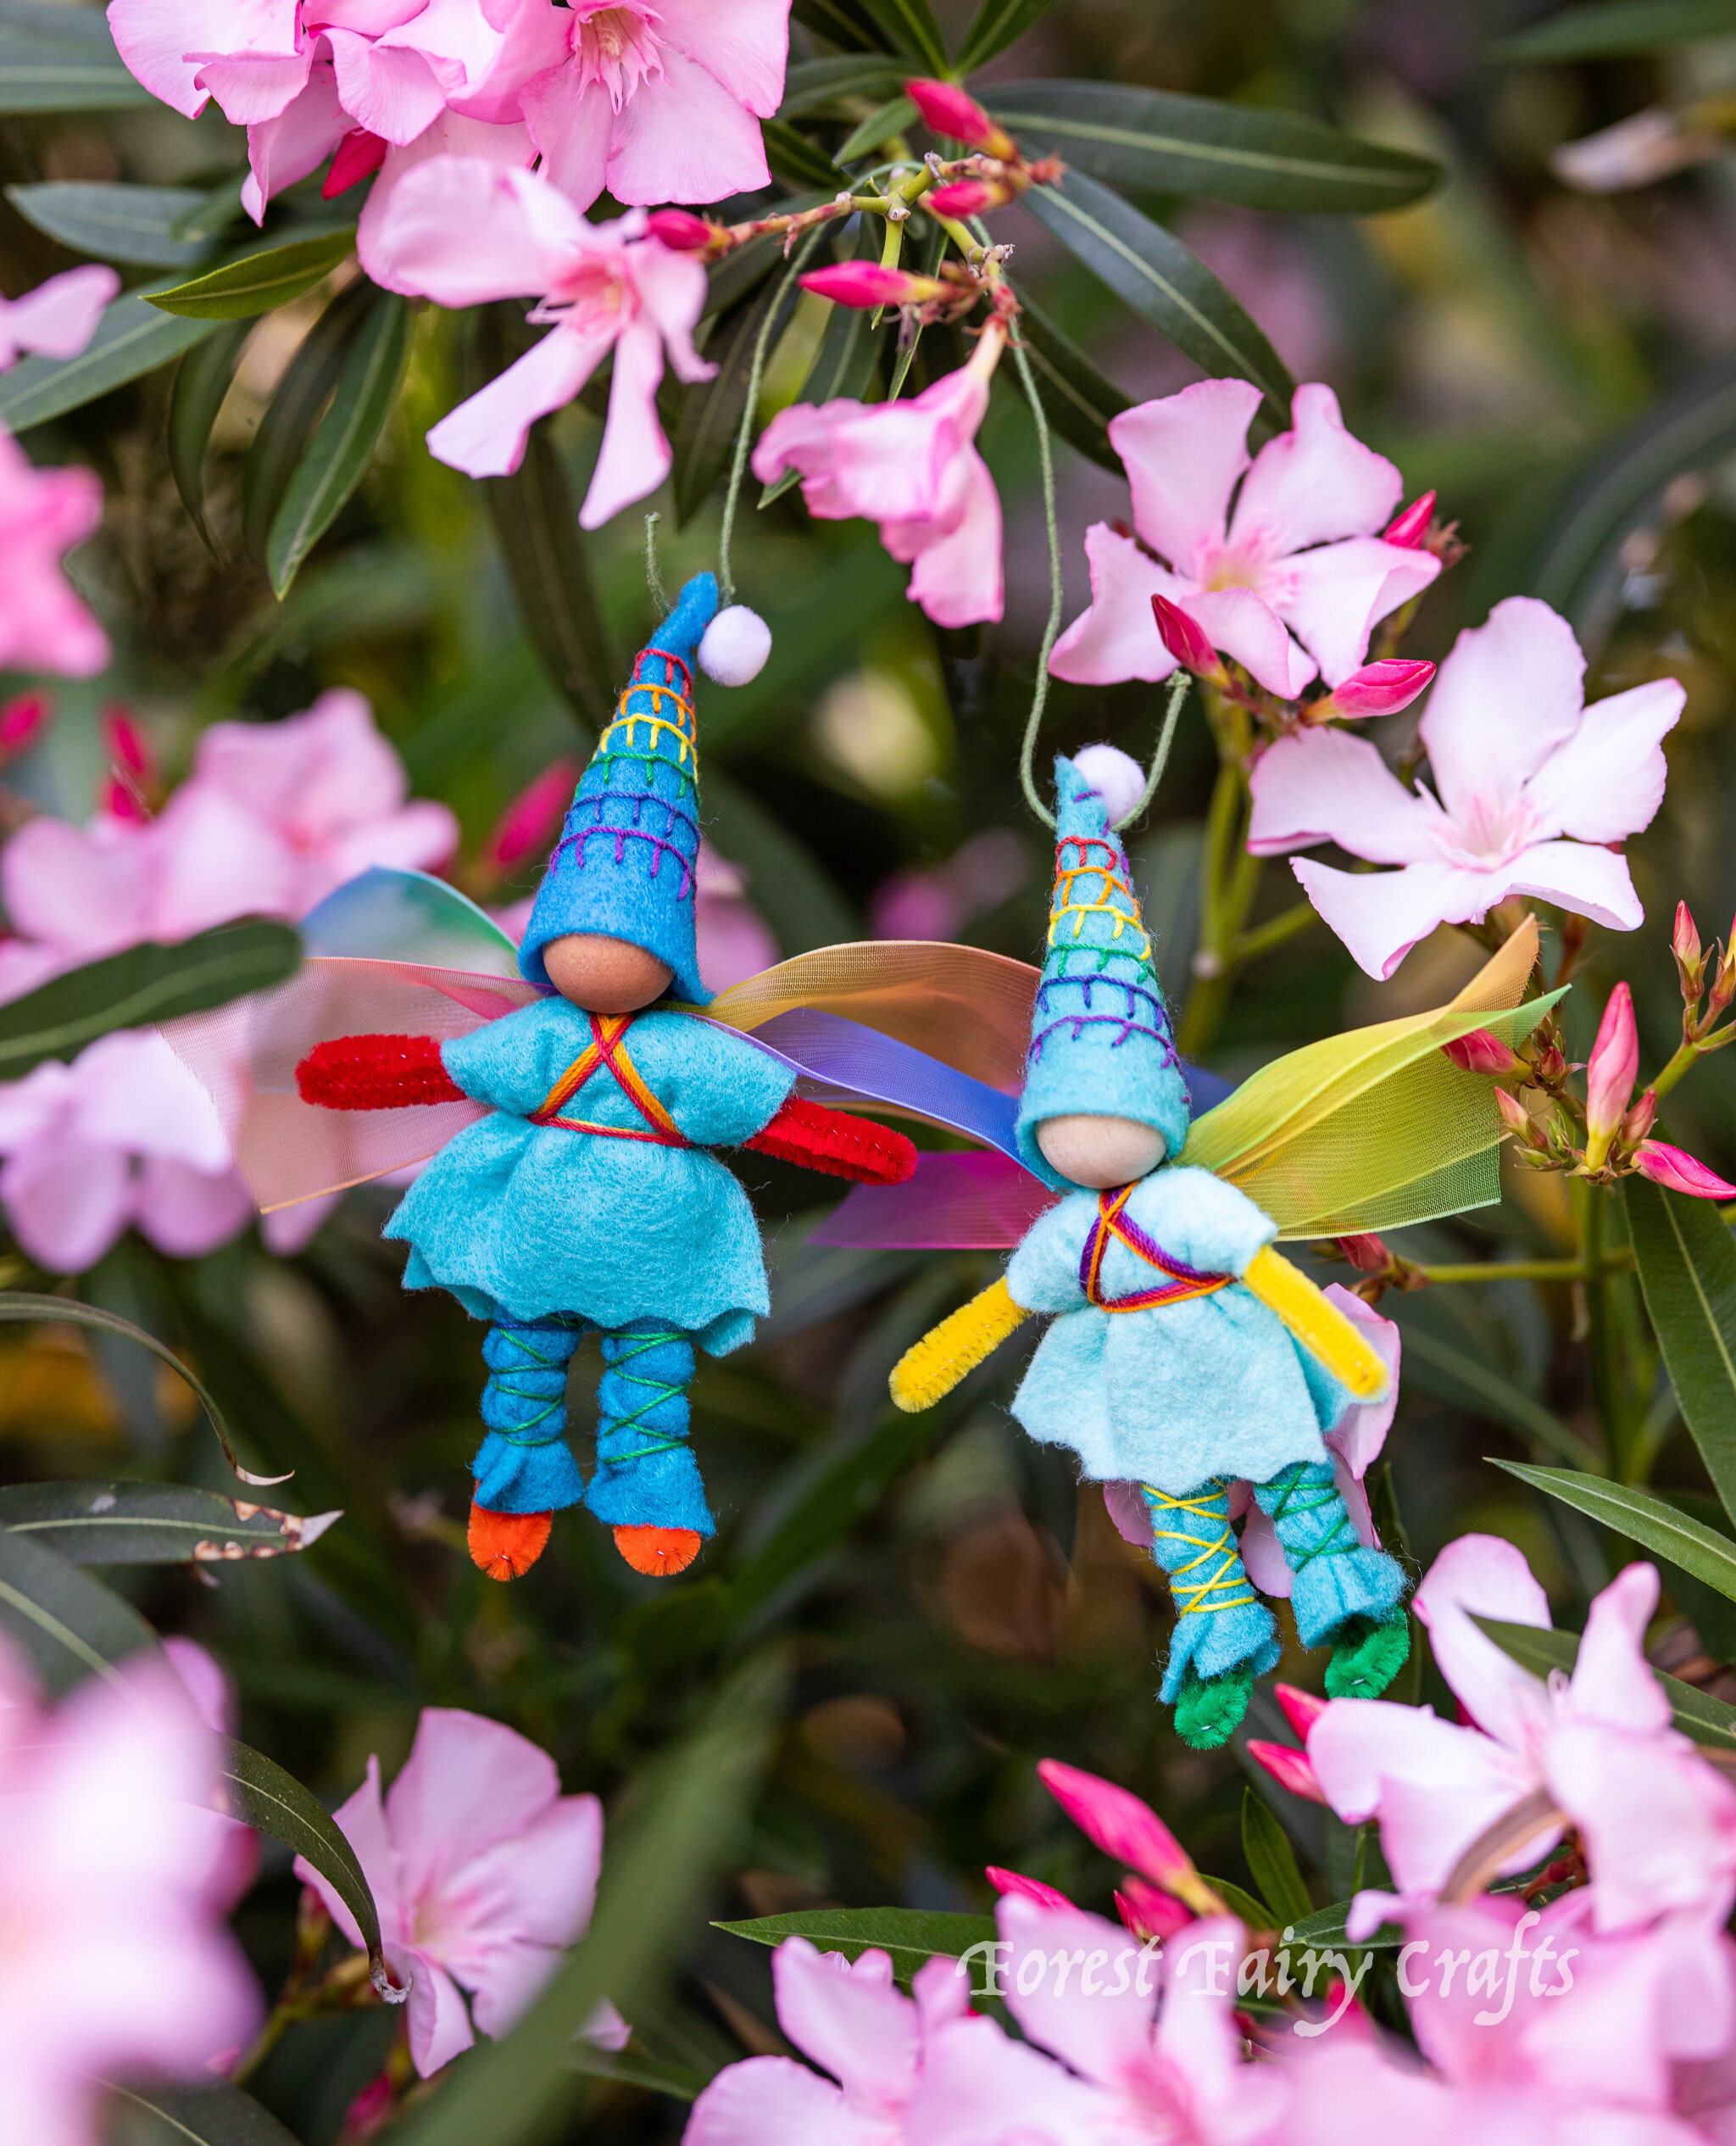


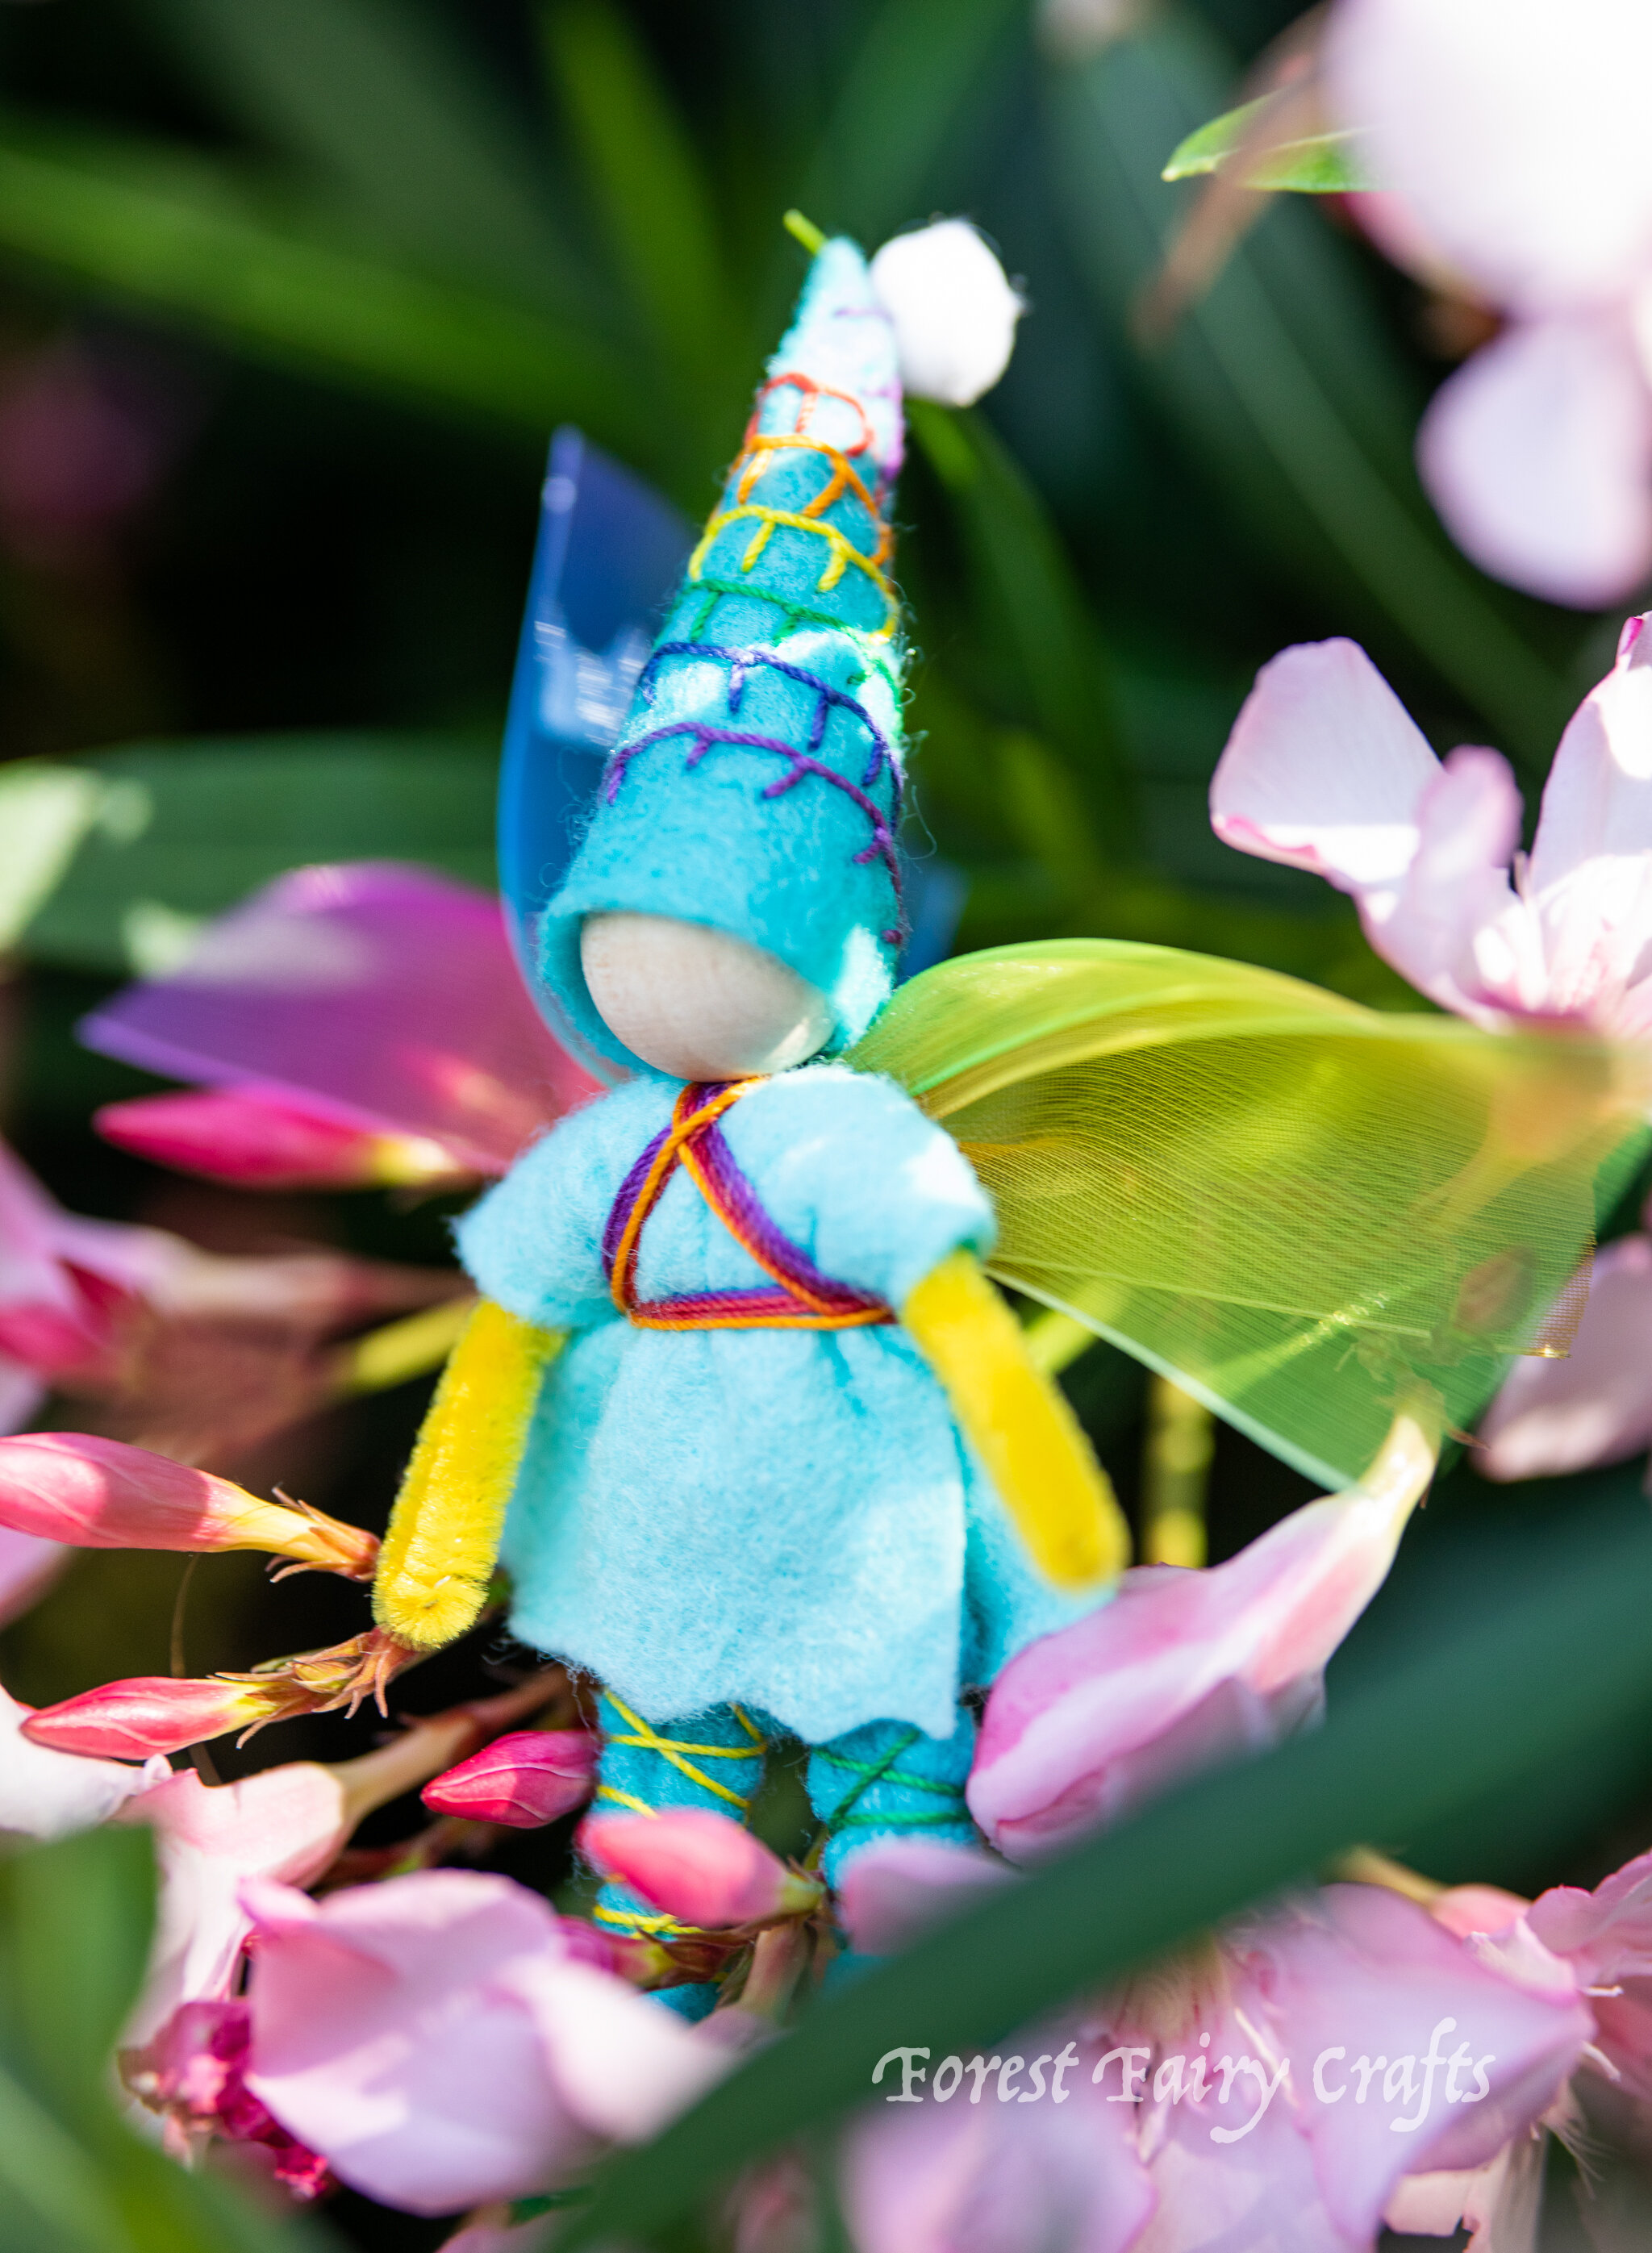
With rainbow cotton yarn braids and rainbow petal skirts (luckily I have lots of petals in my stash), the rainbow fairies came together and were so incredibly cute! The value in creating them is seeing them come together at the end. They charm me every time.
Everyone loves rainbows! 🌈
Supply Resources:
Holland Wool Felt
3/4 inch 20mm Wood Beads (darker tones painted with Lyra Watercolors)
Rainbow Thread*
Rainbow Cotton Yarn*
*Affiliate link. If you choose to purchase, a small amount is given to us while your pricing remains the same. Thank you!


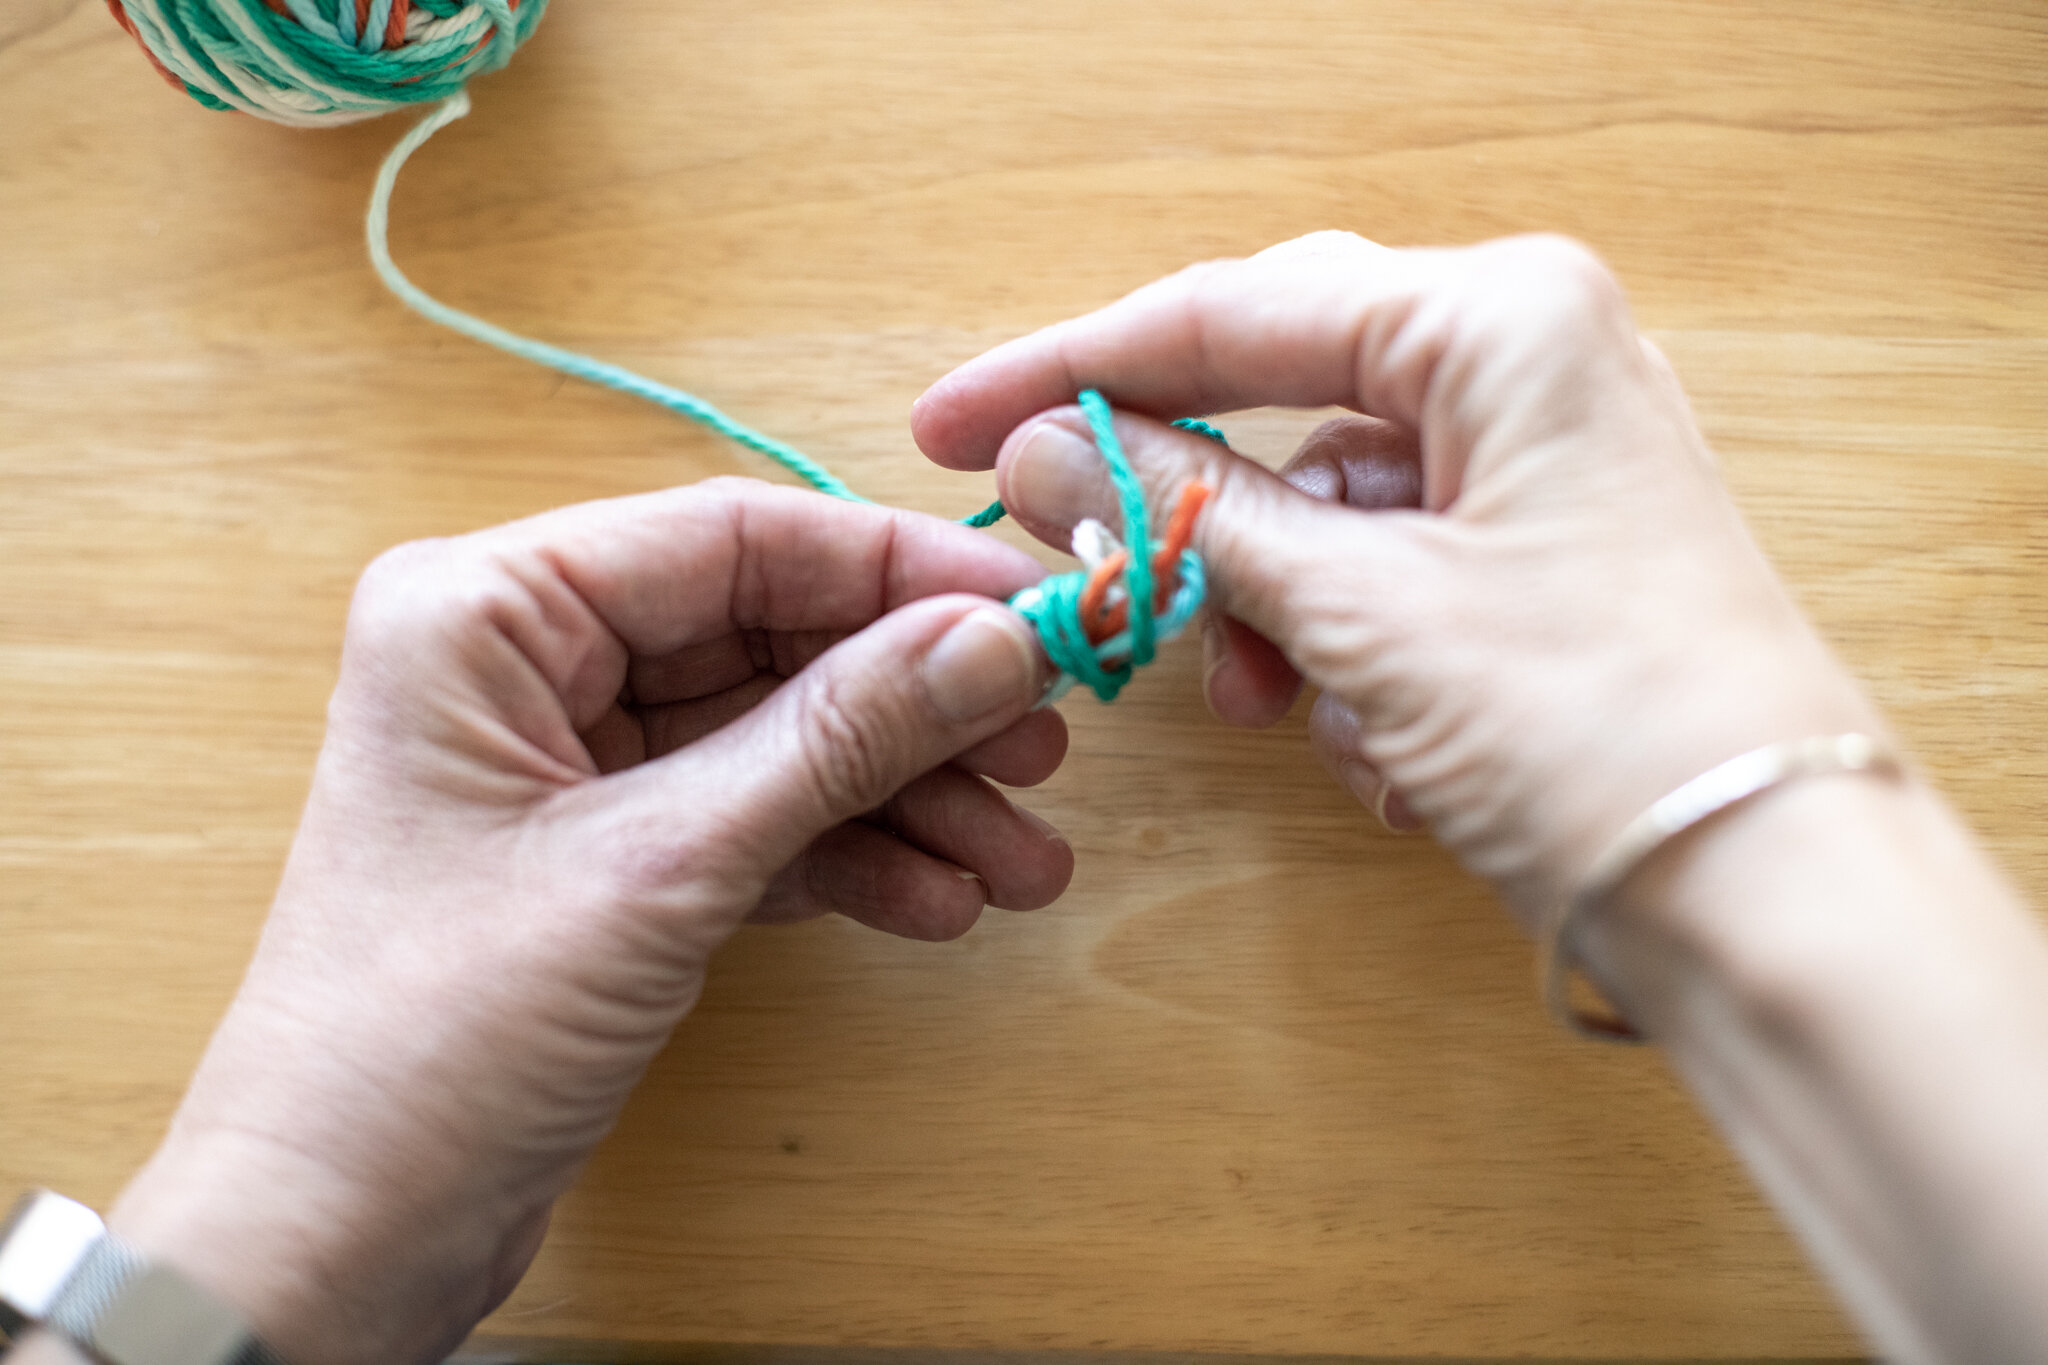
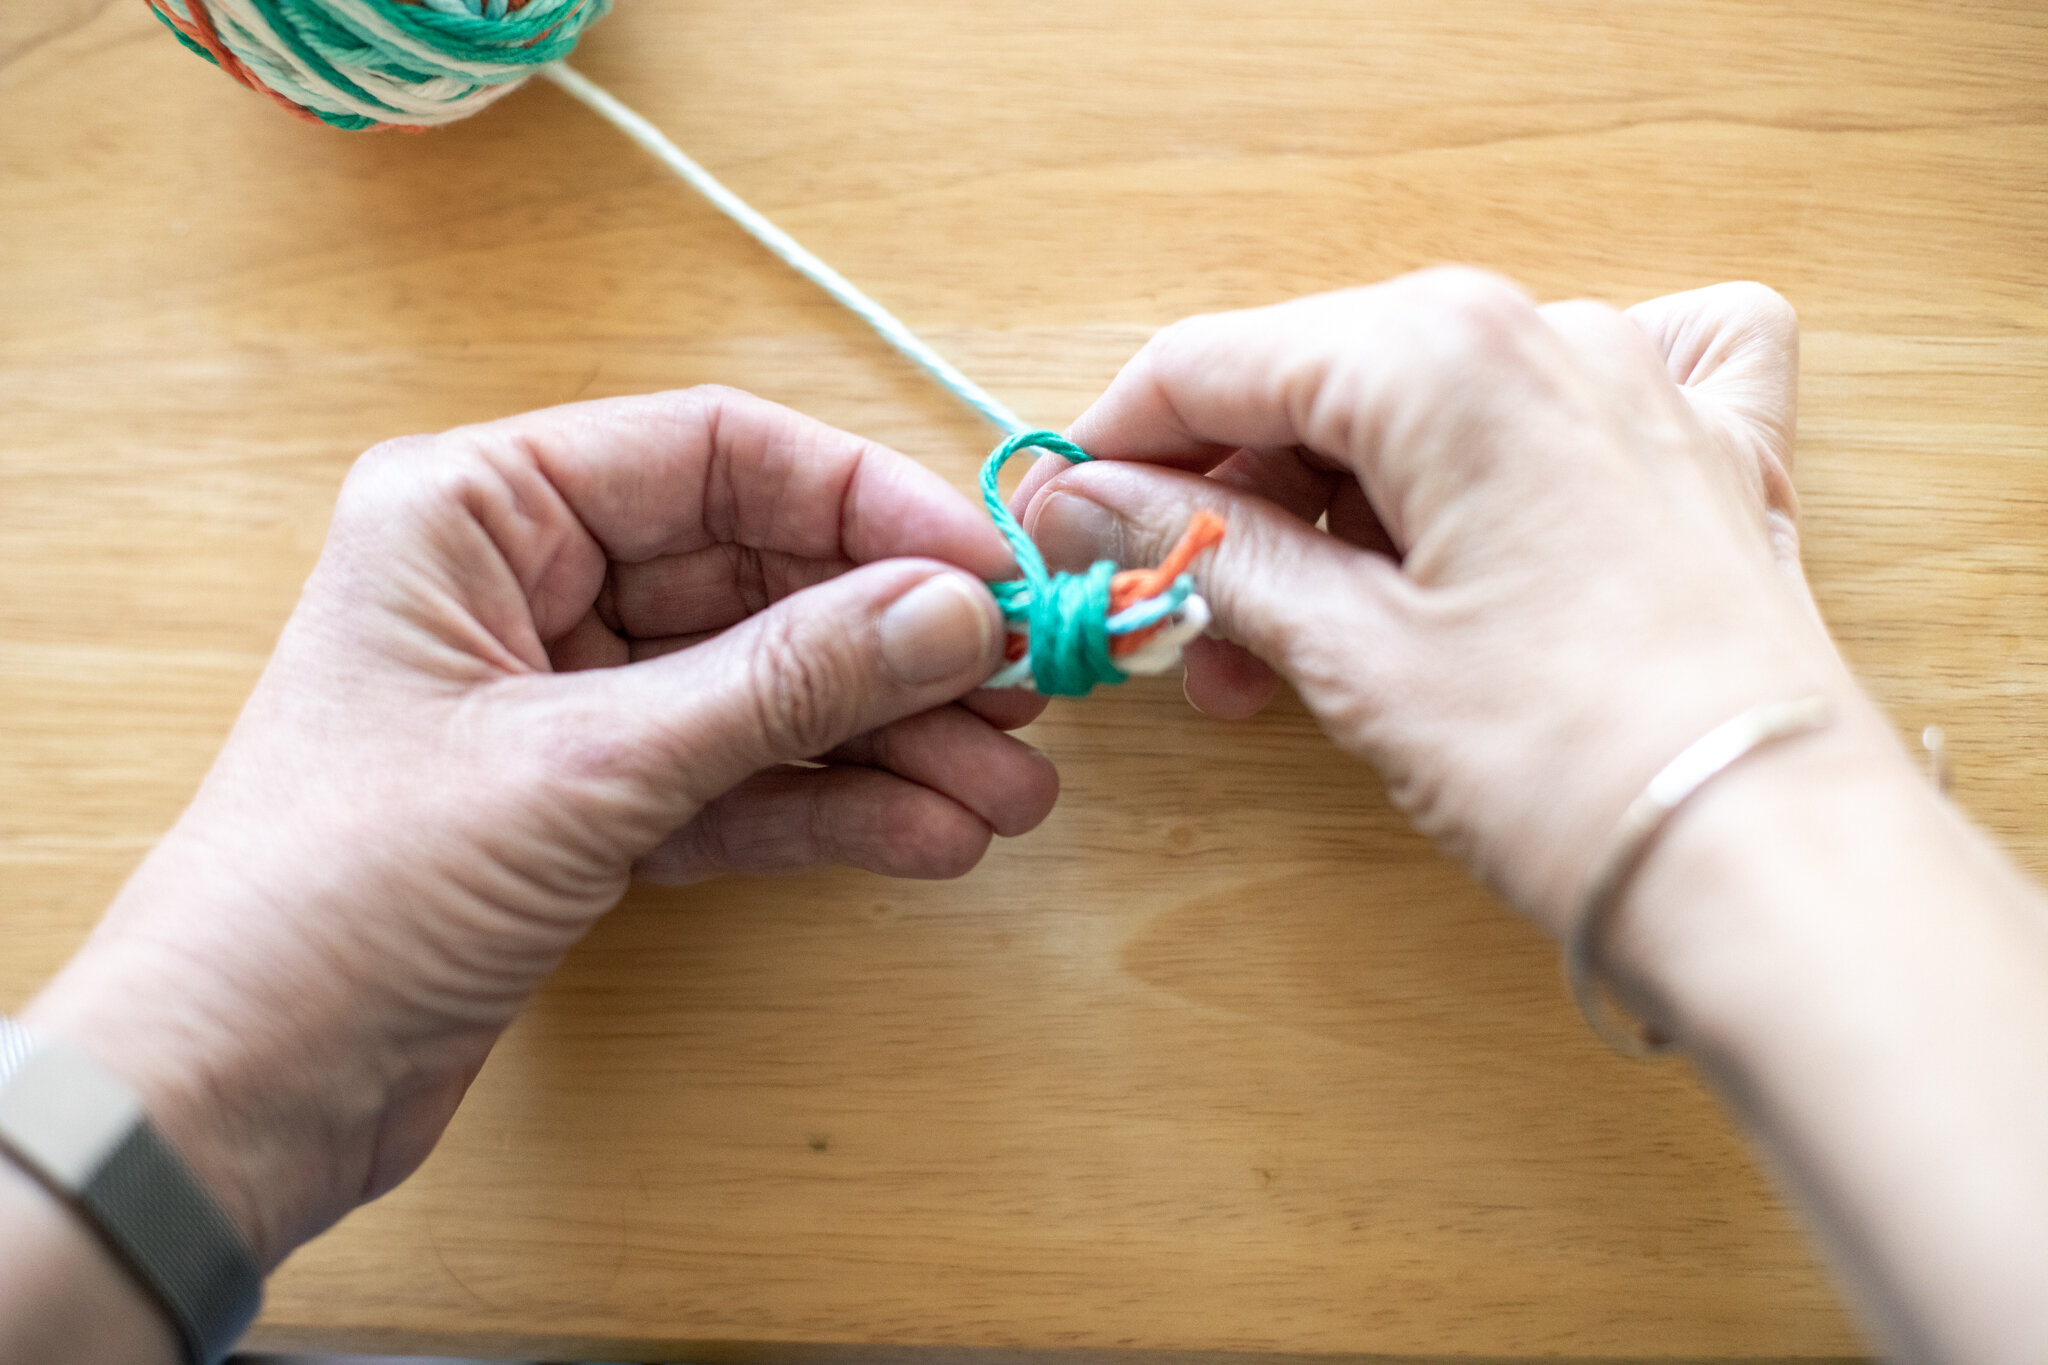
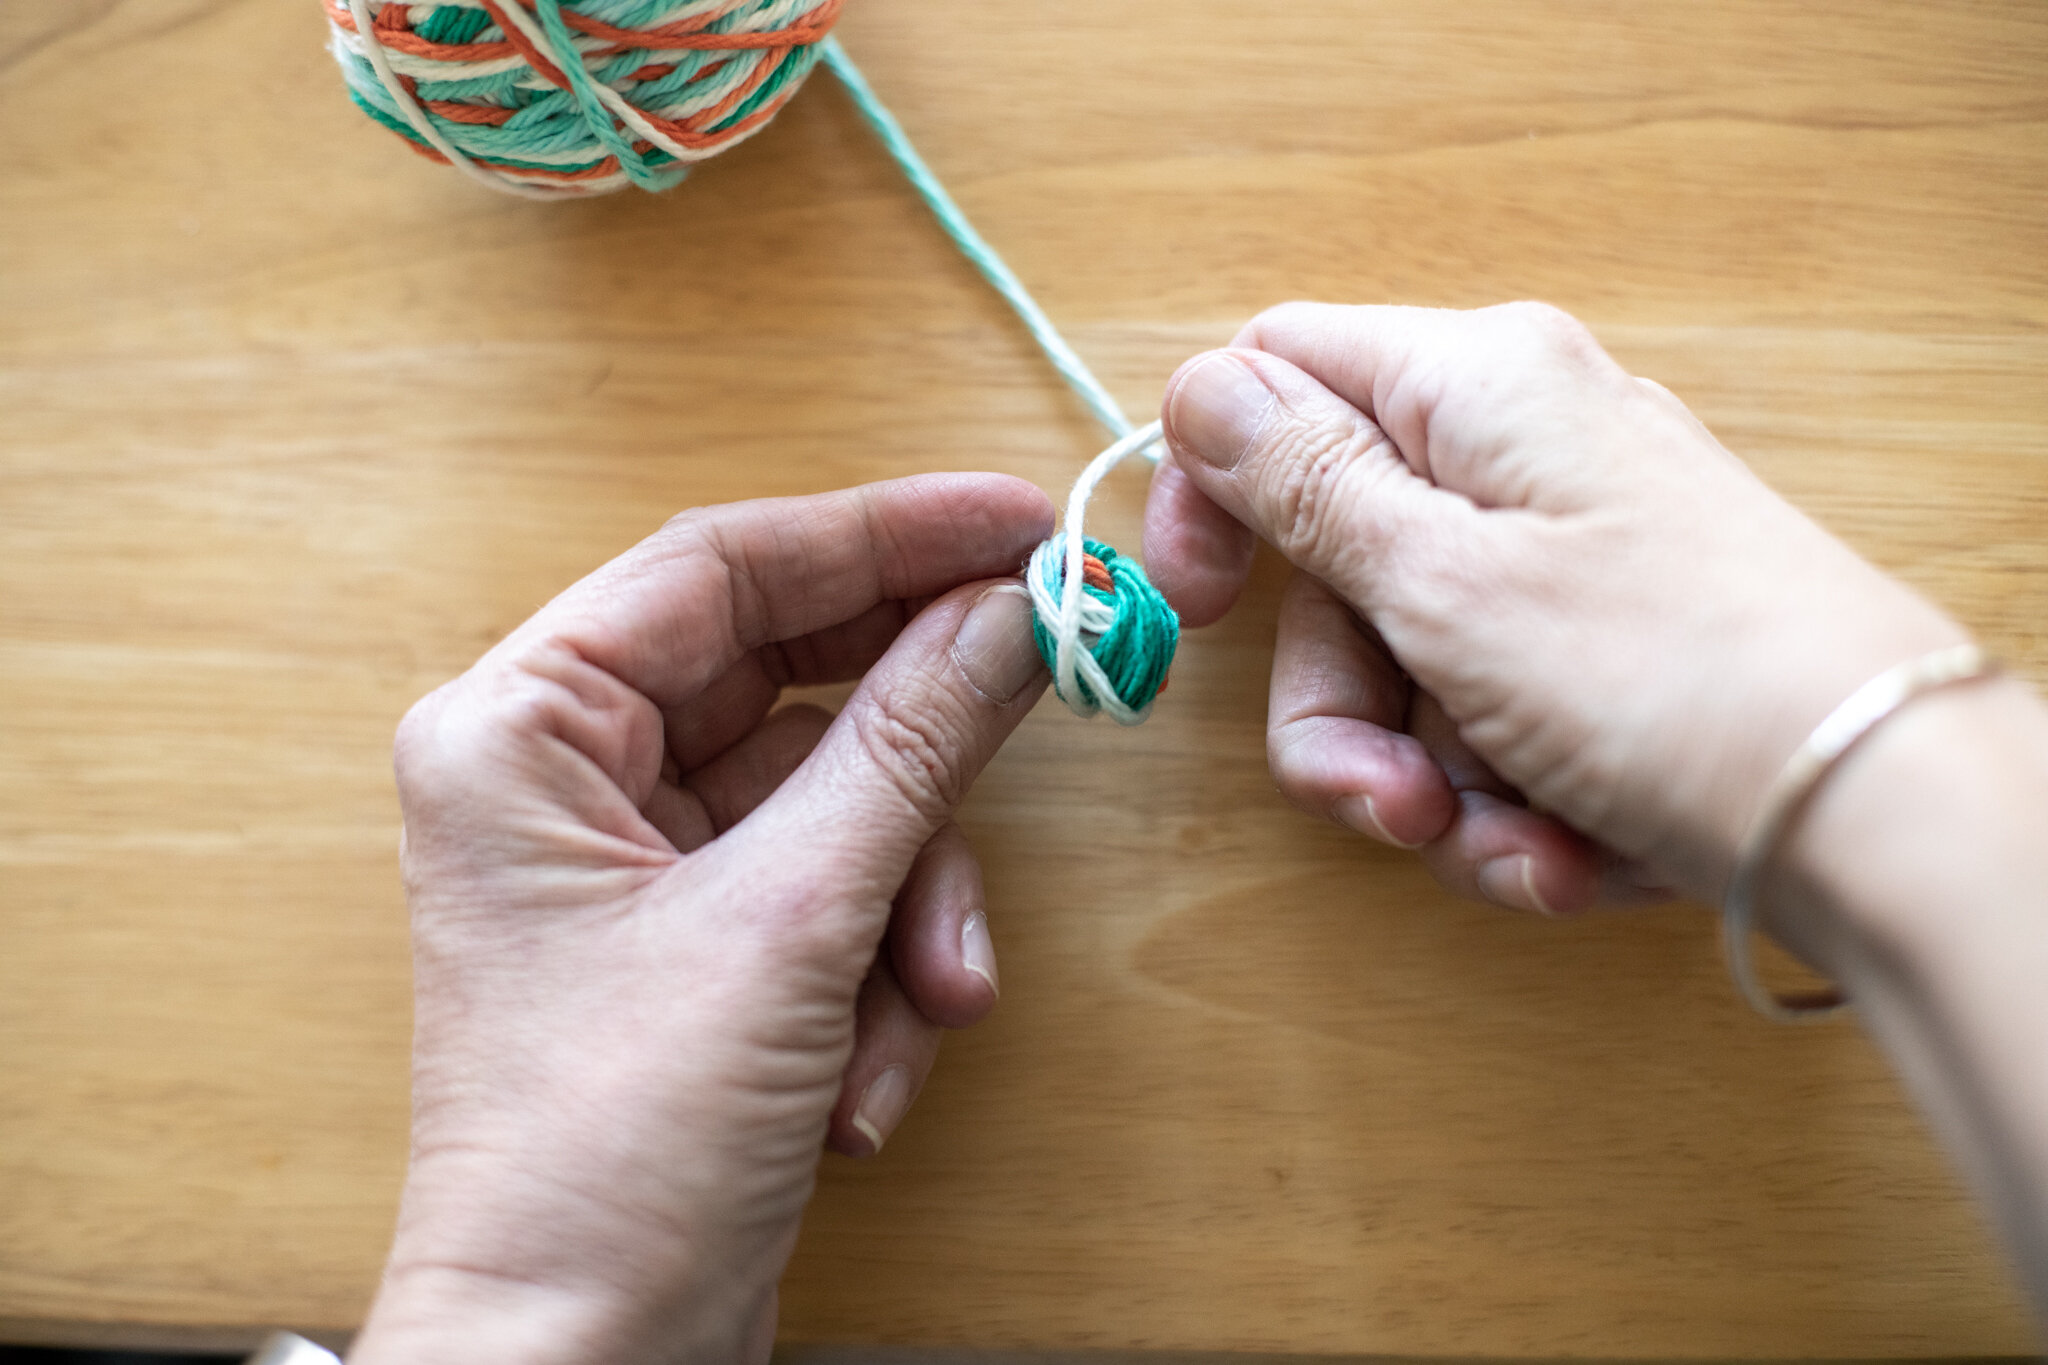
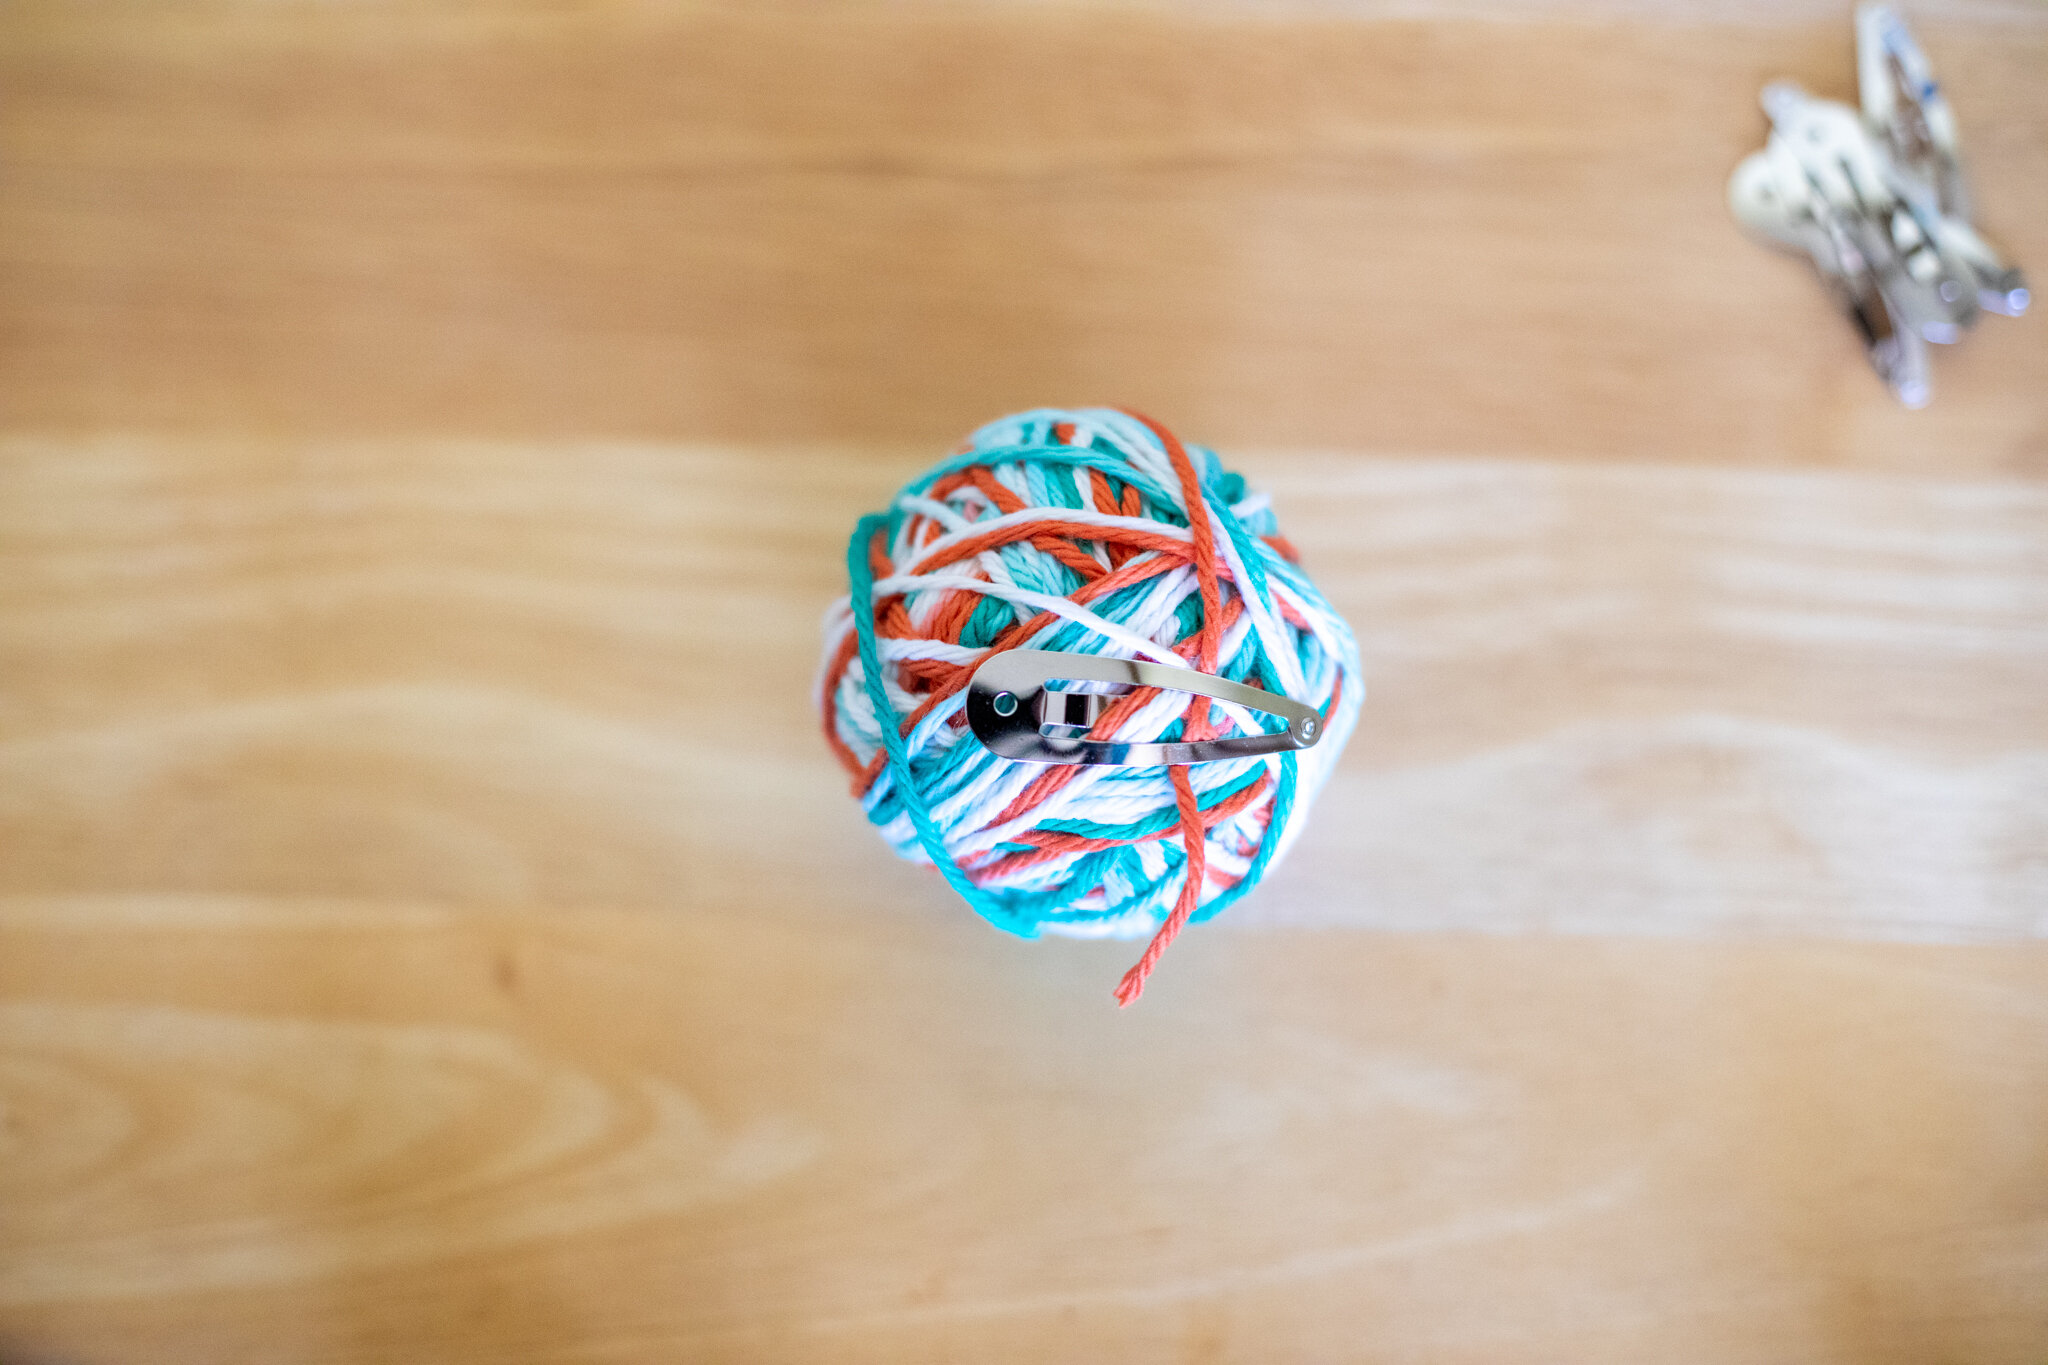
Another Way to Wind Yarn Balls
As promised, here’s another way to wind yarn balls. This way is quicker if you are making a pile of yarn balls, such as for a summer camp or basket of yarn for children to choose from. This technique doesn’t give the same level of fine motor skills, though, and it’s harder for little hands to control the yarn from slipping off of their fingers. So it’s a friendly version for adults or older children. But the other way gives children more winding practice around their fingers. Choose which one feels easier for you.
The beauty of handwork is that we all get to choose what works best for us. And I’m sure there’s even more ways to start winding yarn. It may be a worthy experiment to teach both methods to children and then ask them which way works better for them. The results may surprise you!
Onward to another way to wind yarn balls :)
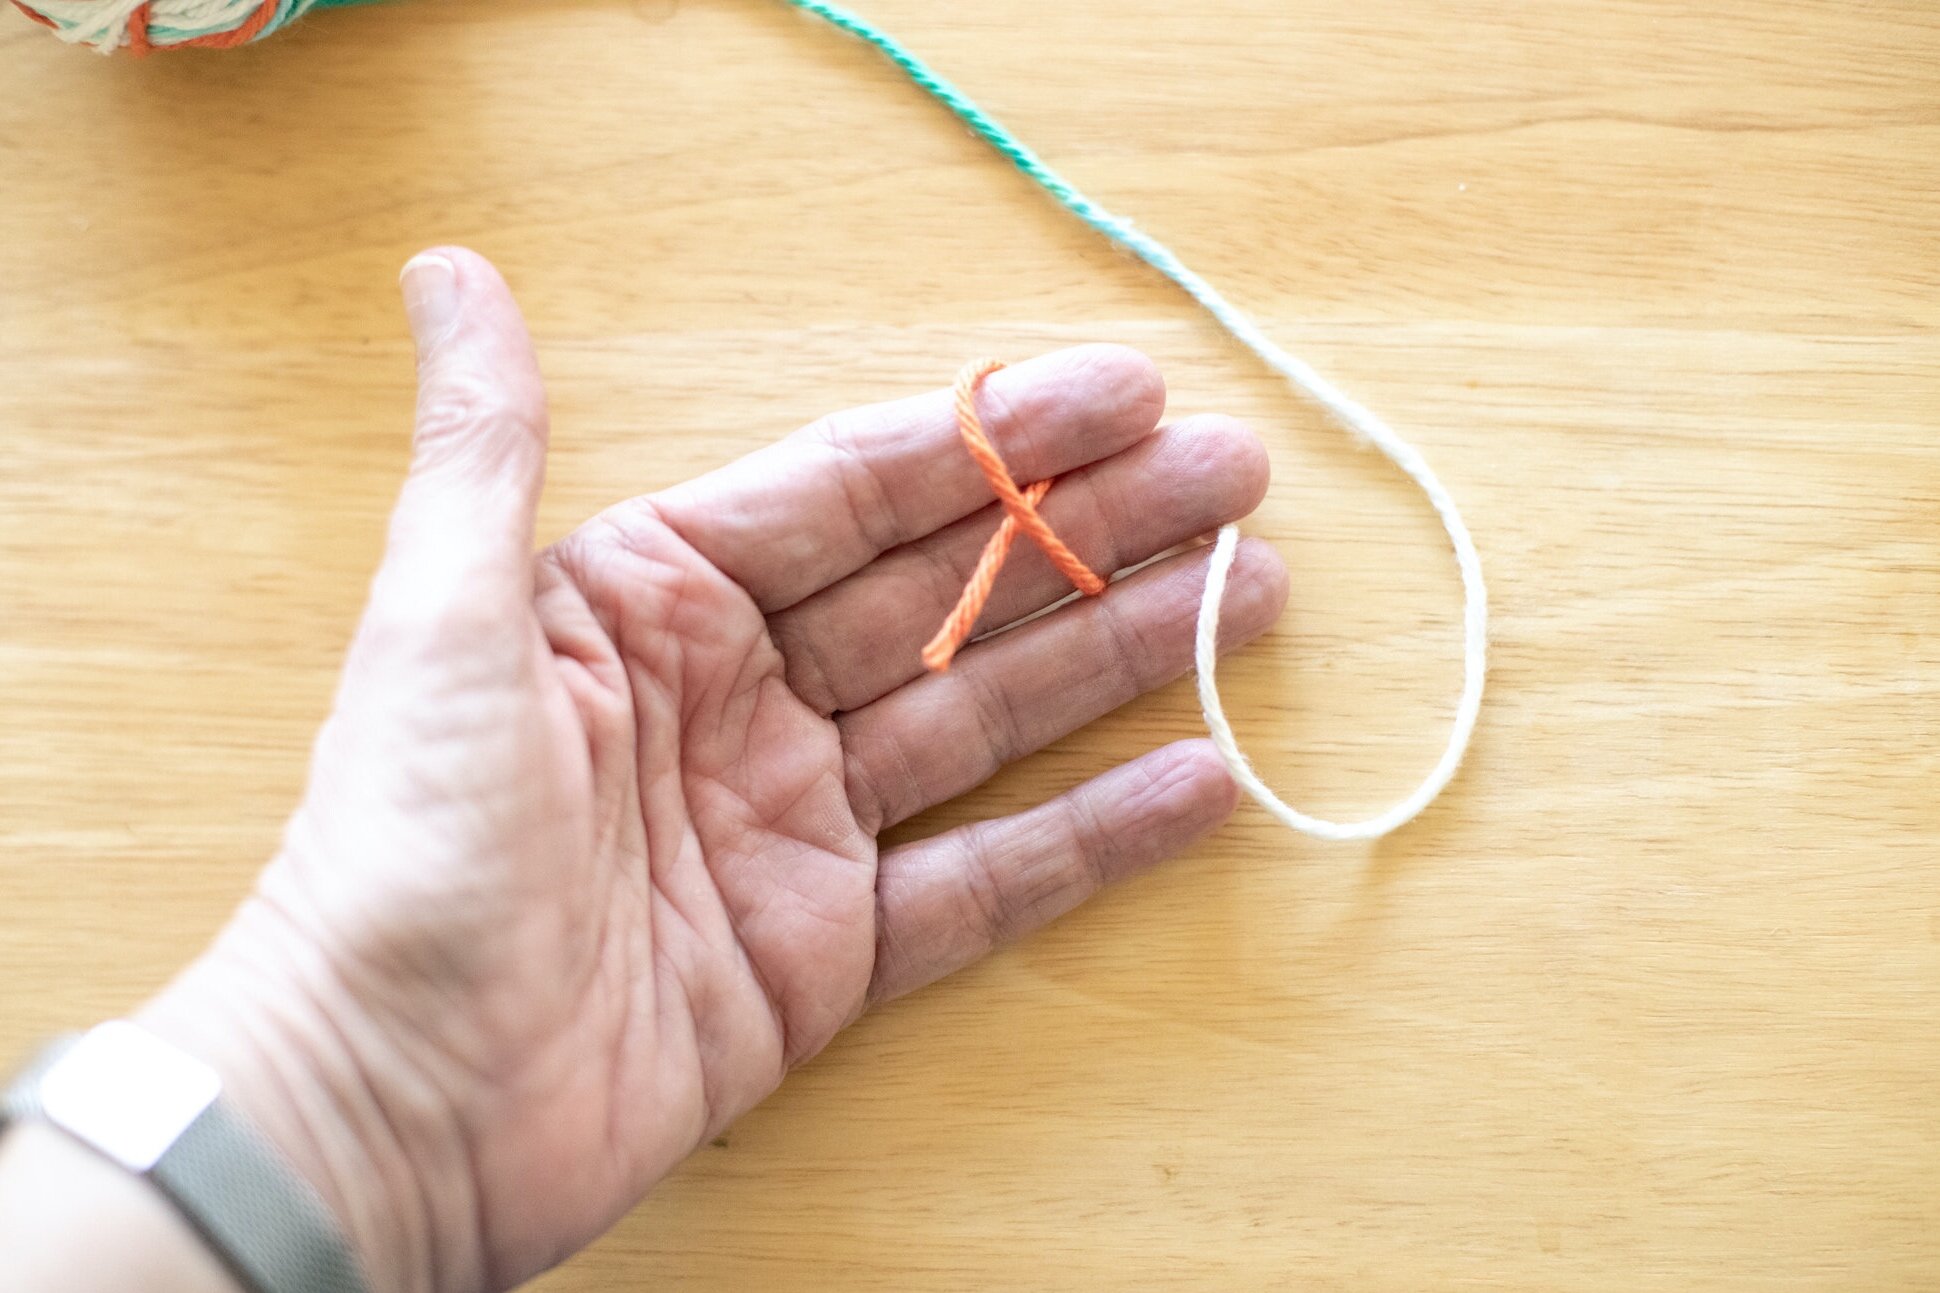
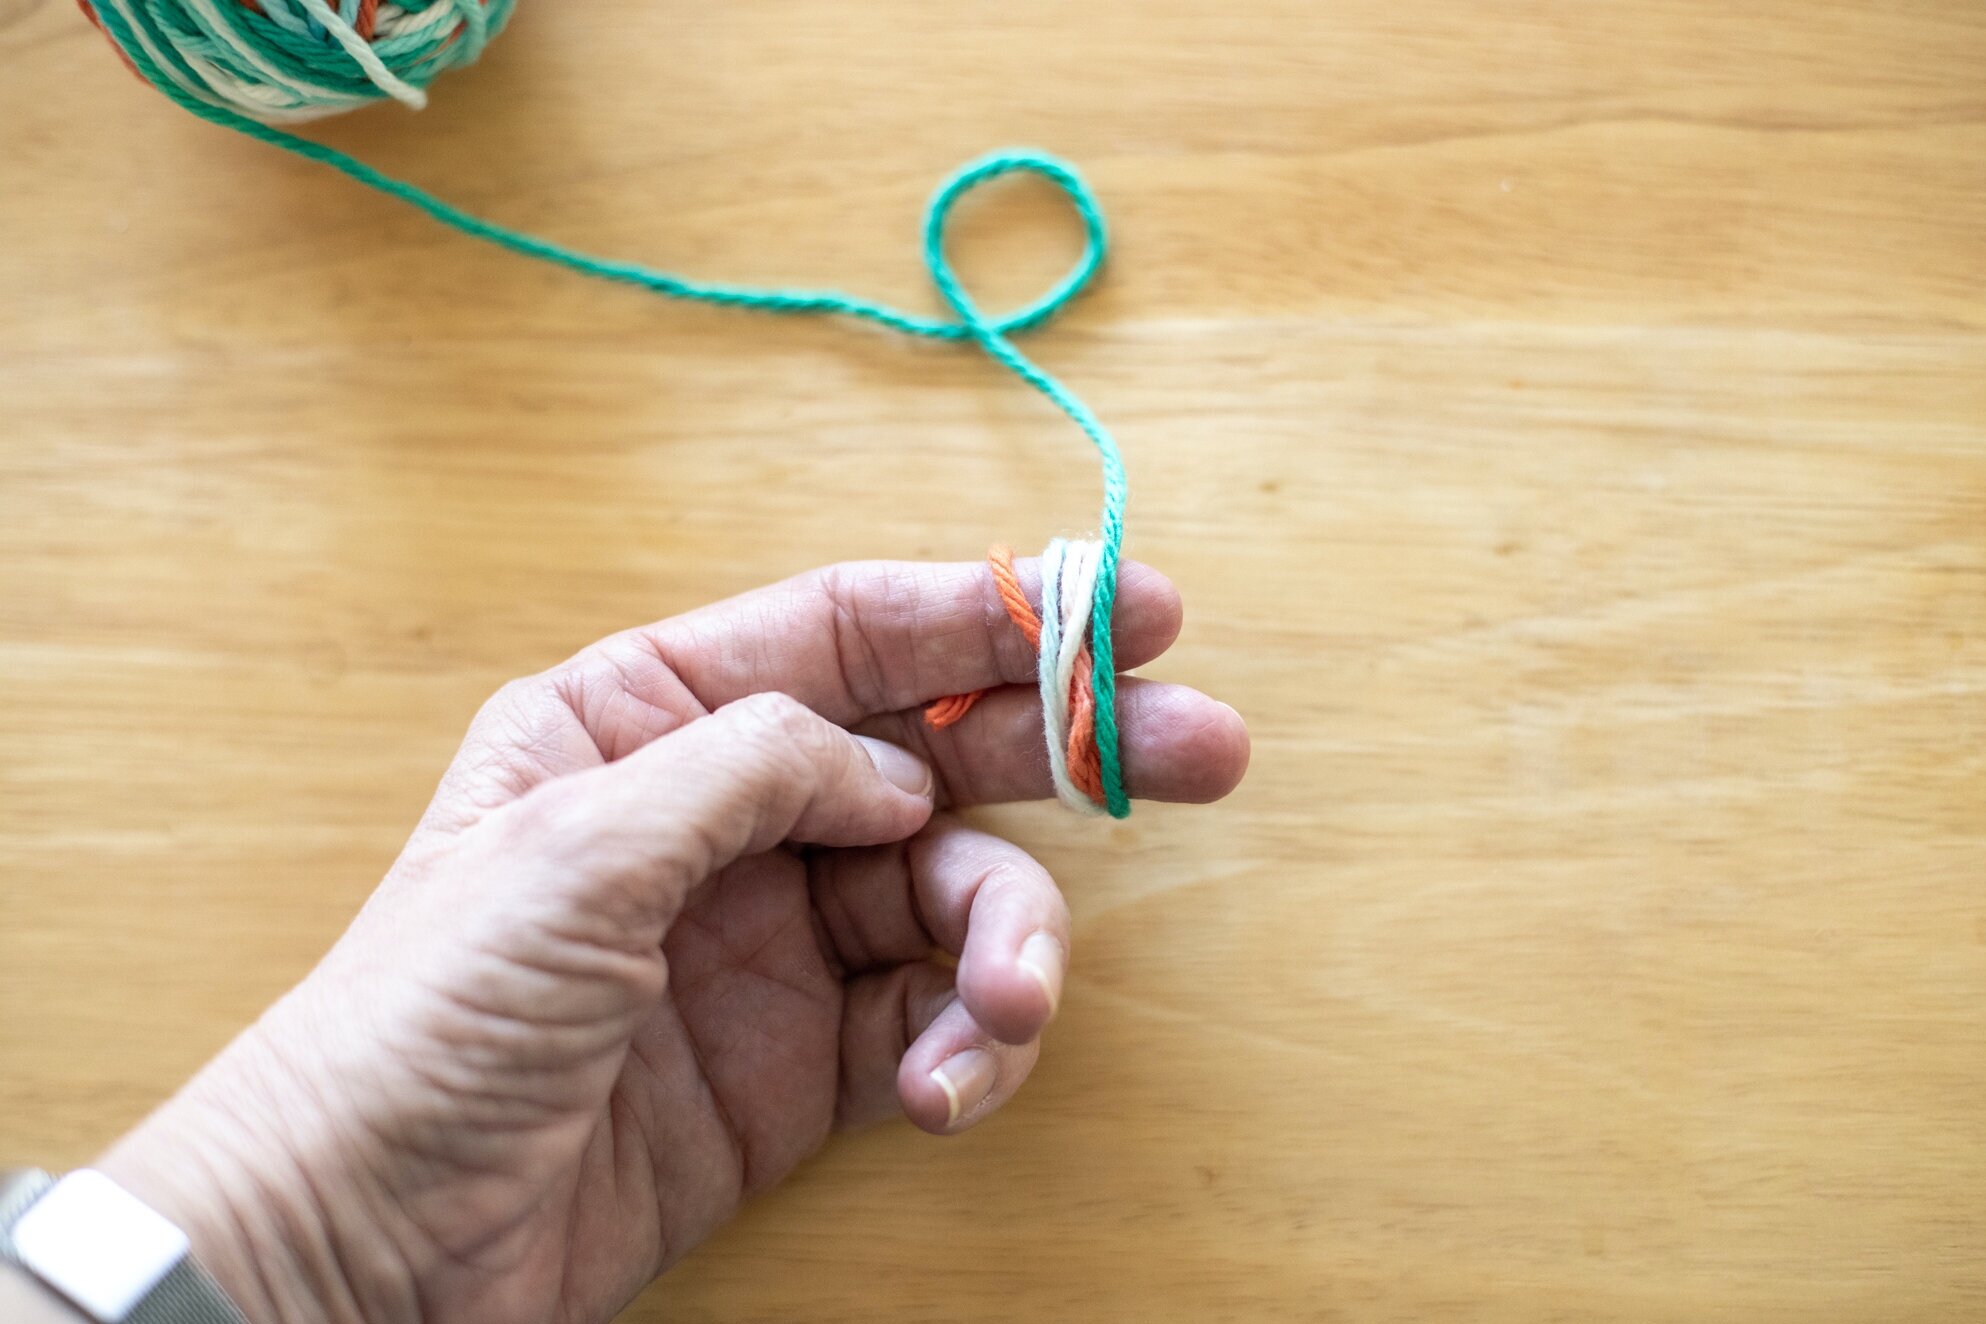
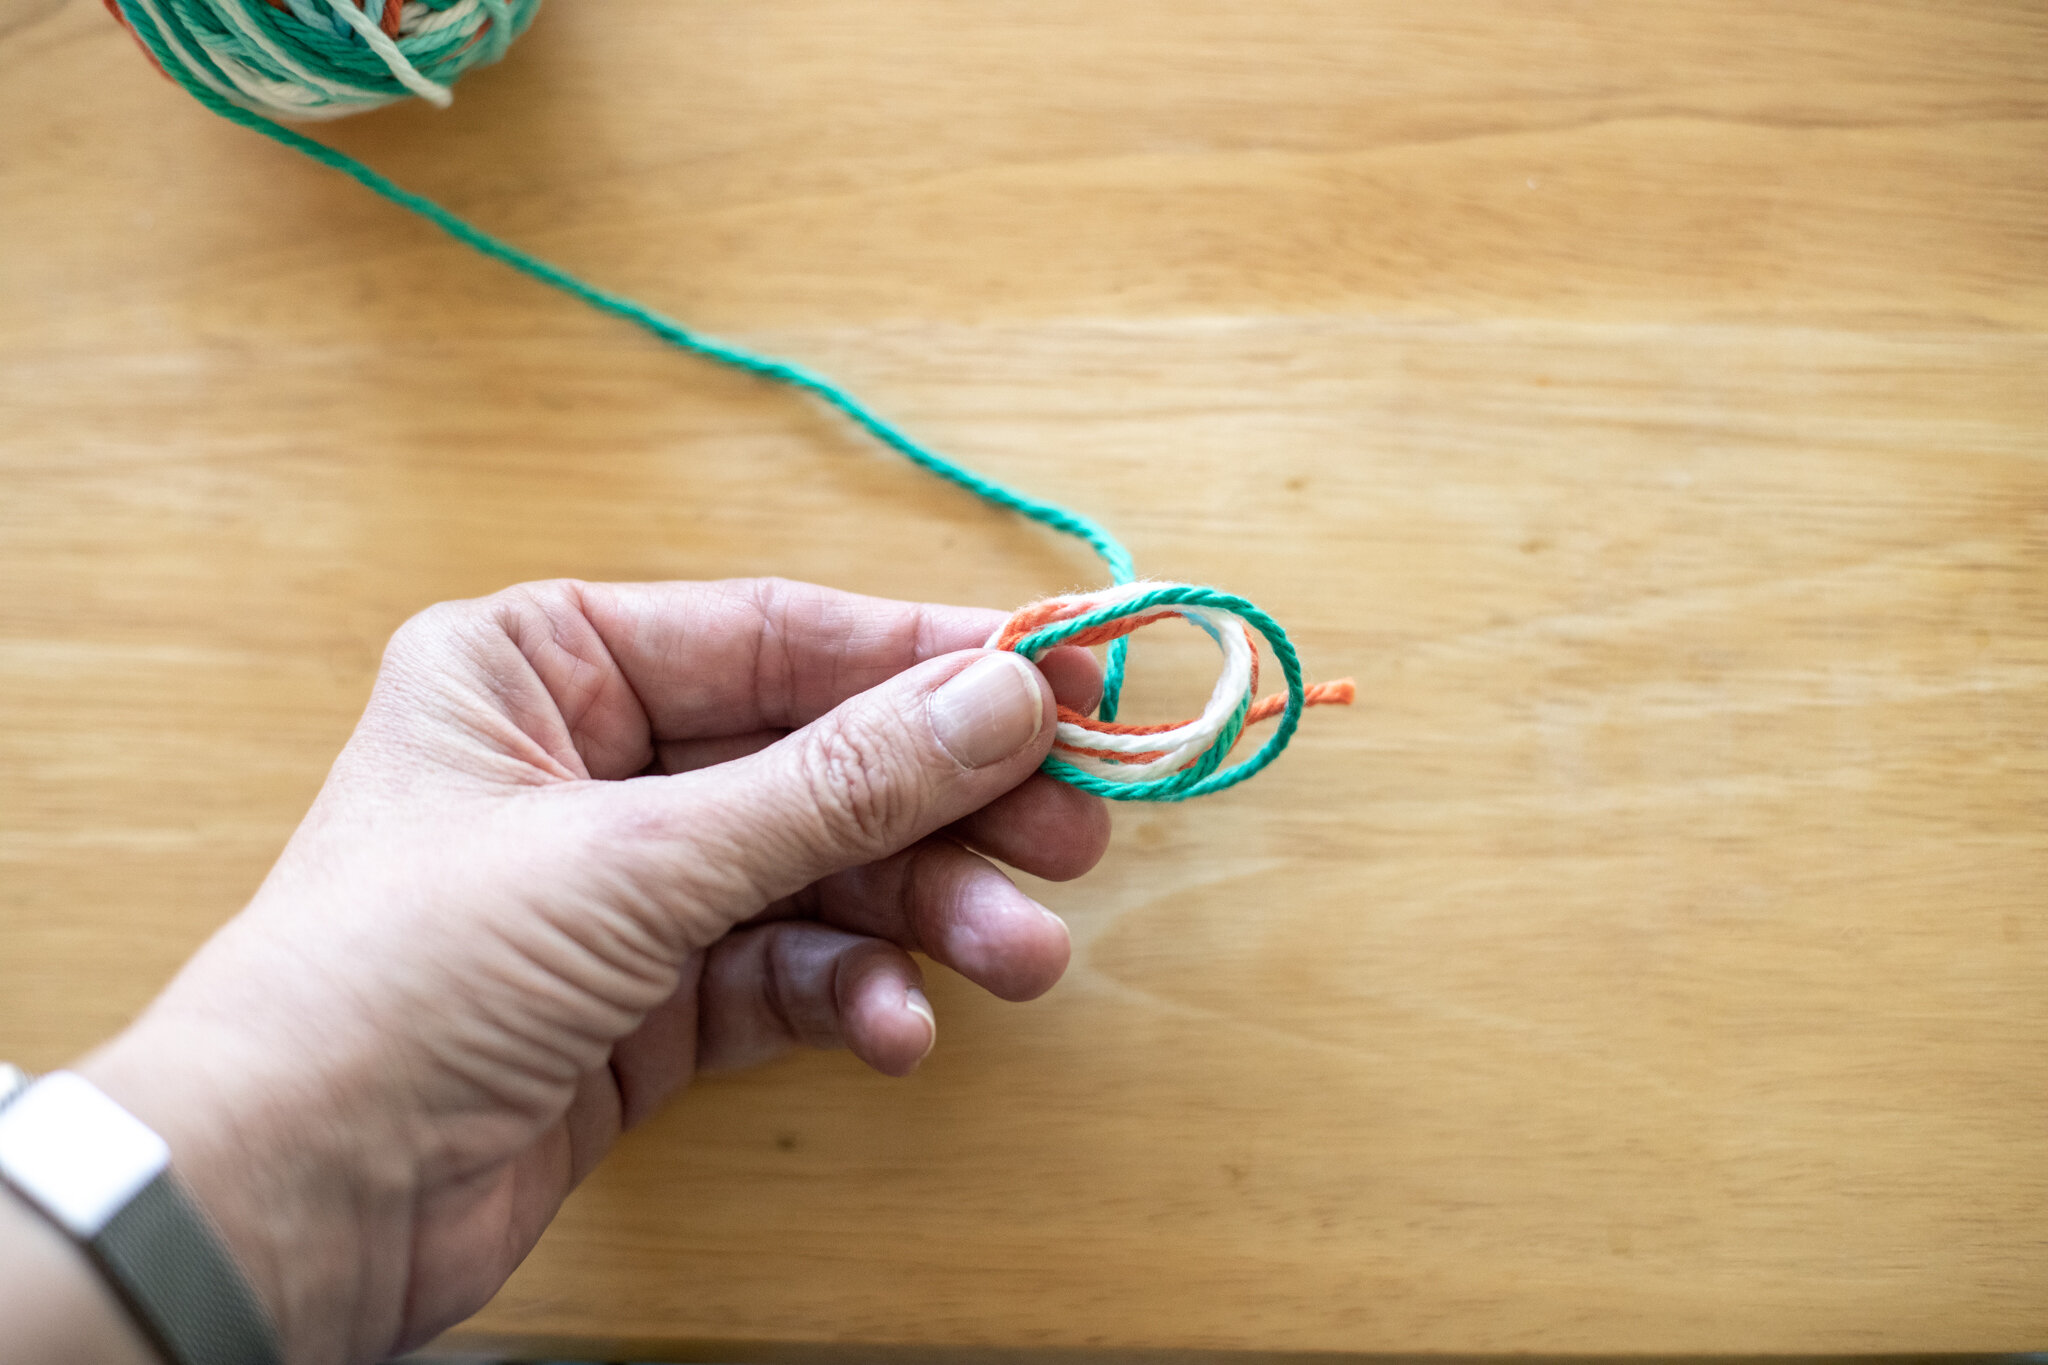


For young-young children, you can start the ball, then hand it over to them once it’s past the super-fiddly-fall-apart-if-you-let-go phase of creating them. They enjoy winding the yarn around and around. You can work towards a point where they can then use your hand to start the yarn ball. So you would hold the yarn between your fingers and they wrap it around your fingers for the first step. Eventually, they will develop the skills to hold and start the ball all on their own. It’s tricky to do two different activities with different hands.
If you know how to make a slip-knot, that’s another way to start where children' won’t pull the tail loose during the very first step. If you make a slip knot that can fit over a finger, that would hold the yarn on their finger for the first step.
The other trouble-spot that children fall into is winding the yarn way too tight around their fingers, which makes it difficult to pull off for the next step. Learning tension is a big skill. With this mistake, it’s pretty simple to unwind and start over. It’s best to supervise until they have the hang of it on their own.
We hope these techniques help you tame your yarn collection so children can easily select different colors for different projects. The calming winding of yarn is a lovely way to pass the time. You can even wind yarn balls while reading or watching a documentary. Children love to see their yarn in a tidy collection.
We hope this week finds you healthy and inspired. And, if productivity is a struggle, that’s okay too.

Many Ideas for Project Inspiration
Inspiration is everywhere. At the same time, we understand how trying times can fray our thoughts and make creativity feel challenging. One of my favorite places to collect ideas is Pinterest. For years I have discovered the cutest and sweetest ideas on Pinterest. I am amazed by the artistry of crafters and artists around the world. And the good news is that I actively collect them to share with our community.
I click through these pins and hopefully they haven’t broken or changed landing pages. Most of them should lead you to artists, ideas, and/or tutorials to spark your creative projects. Many of these lean into the same techniques we teach in Forest Fairy Crafts. Using simple supplies and stitches, crafters all over the world make incredible magical crafts. Please be aware, the projects pinned on these boards are (mostly) not created from our books. These are pins that connect to the philosophies of helping everyone use their hands to create beautiful things. We hope you enjoy them as much as we do :)
We have to start with the official Forest Fairy Crafts board. This collection provides an easy way to navigate and discover past posts on the blog that may inspire your current projects.

Forest Fairy Crafts on Pinterest shares lots of ideas from past posts
Handwork for Children collects ideas that can be adapted for children to make things with their hands. From weaving to finger-knitting to simple embroidery, these projects are curated with children in mind.
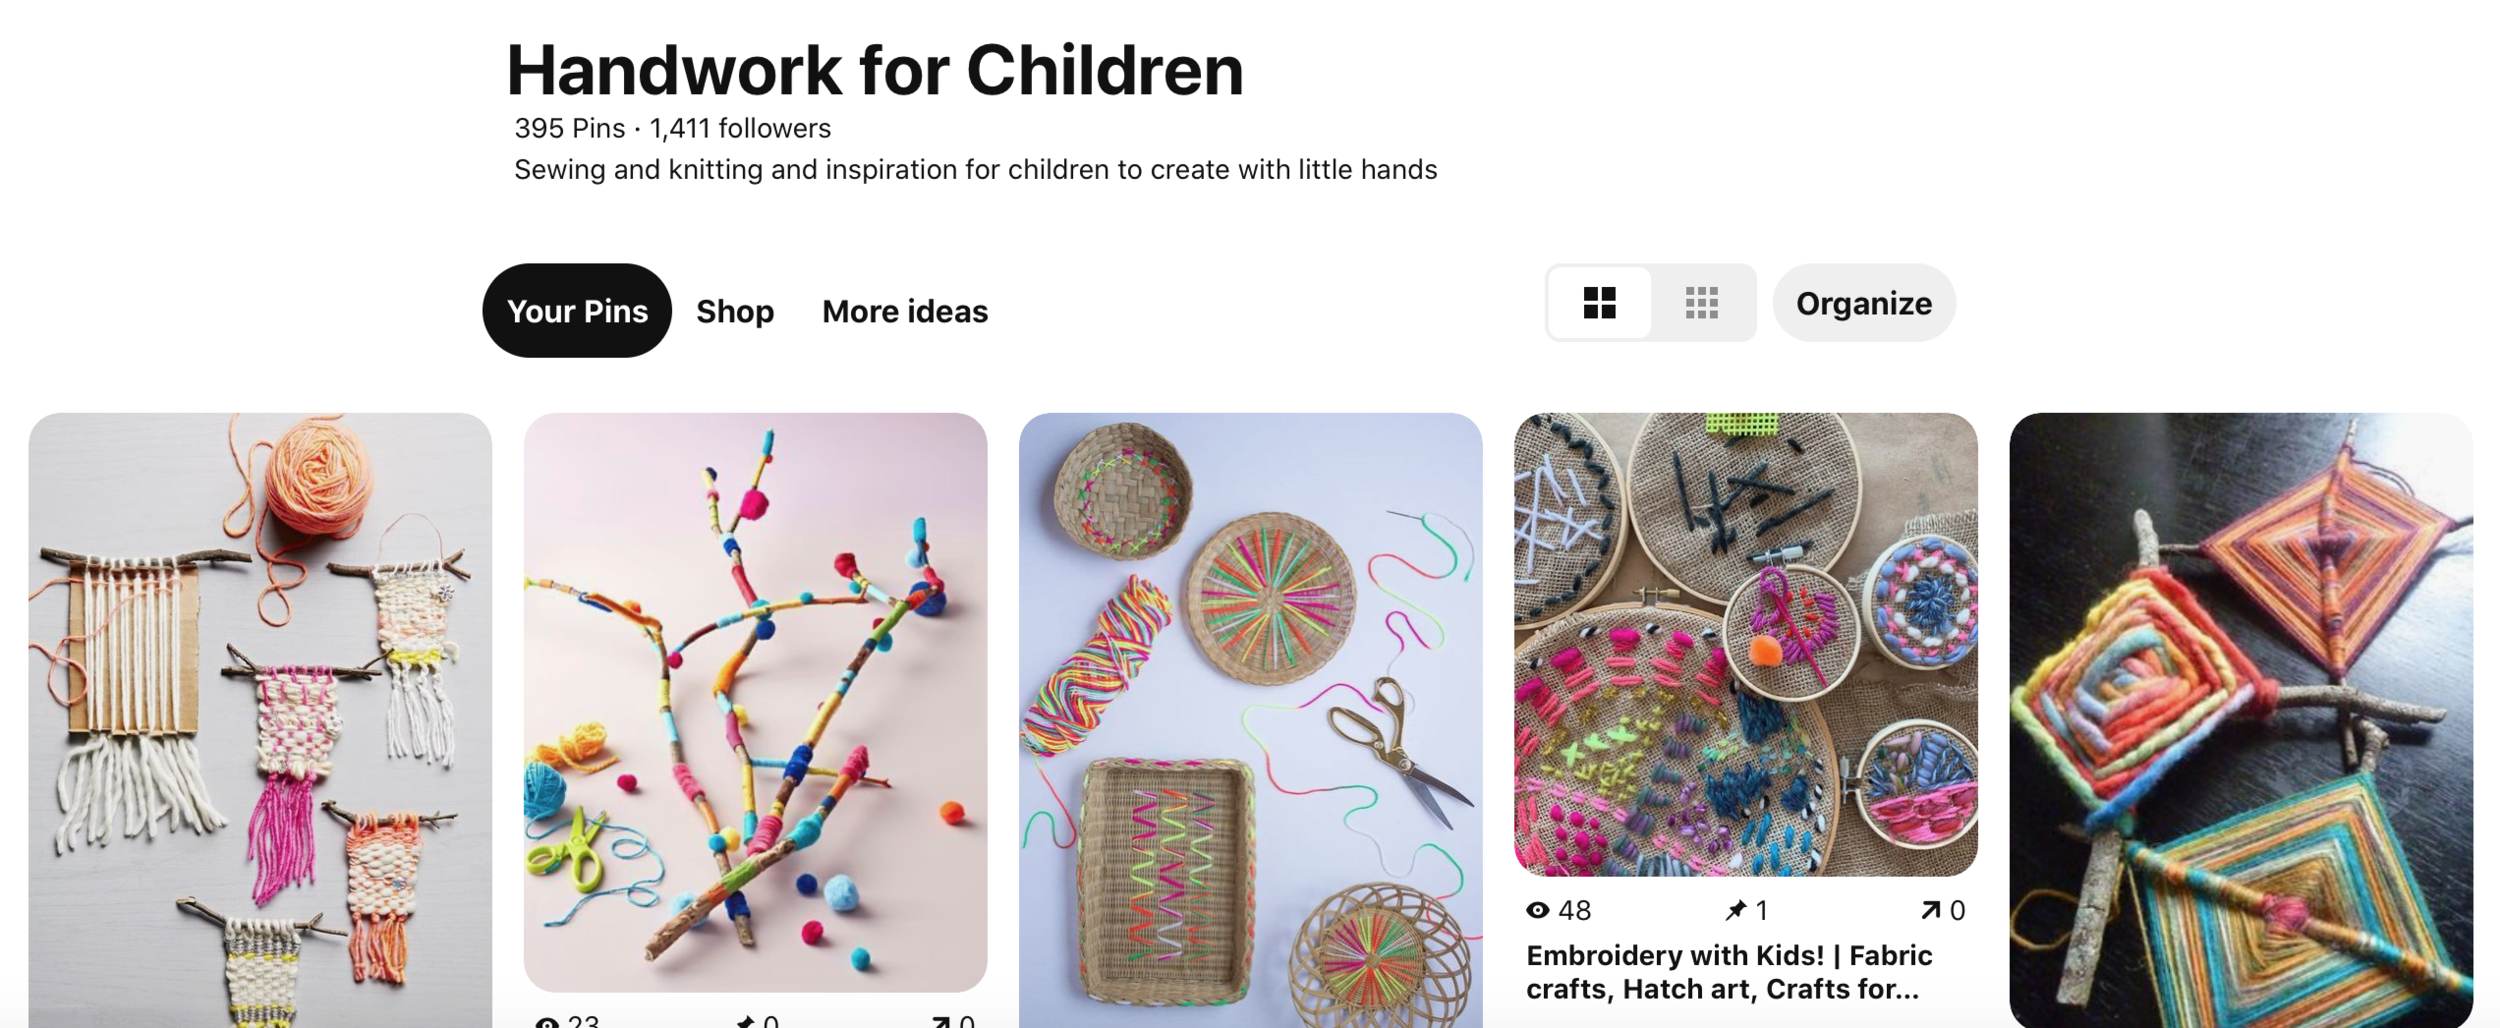
Sample image of our Handwork for Children Pinterest Board. Click through for more ideas.
In the Magic Forest is one of all time favorite boards. This board curates all of the little dolls and gnomes that we find charming into one place. As it’s grown over time, it has sections for different holidays and seasons. This board has so much talent and gorgeous detailing! They are made by artists all over the world. They can be tweaked for children-centered projects by simplifying some of the stitching. Or they may inspire adults to create crafts for their own enjoyment. Many of them link to independent sellers and Etsy shops where you could support creative artists.
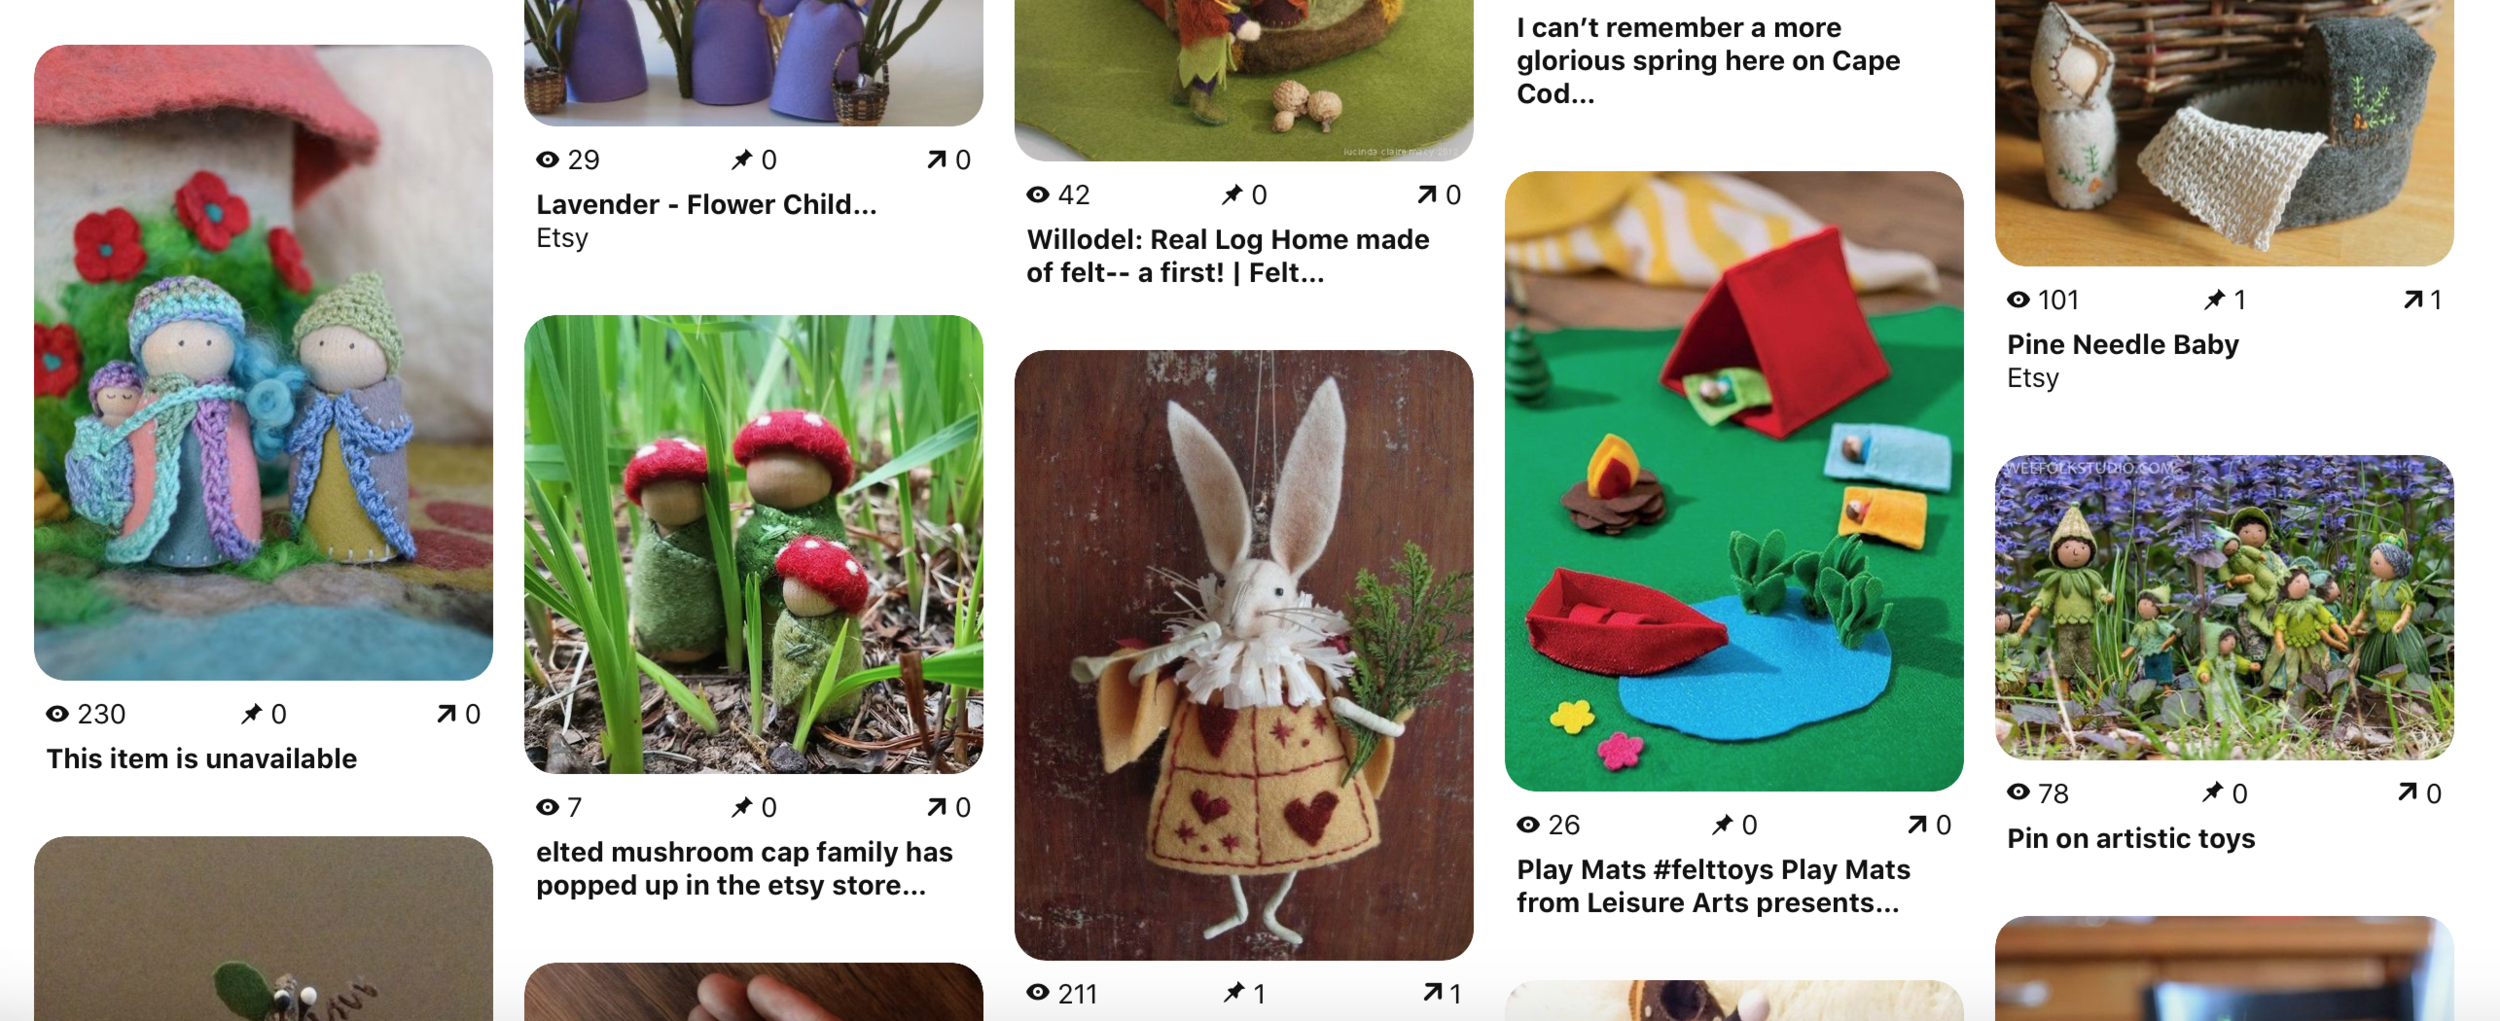
Delightful collection of inspirations around the world on our In the Magic Forest Pinterest board. Wonderful ideas to modify for your family.
Seasonal Arts and Crafts collects natural learning ideas for noticing and recognizing the changing world around us. From calendars to seasonal gnomes, these ideas encourage children to engage with the world in lovely ways.
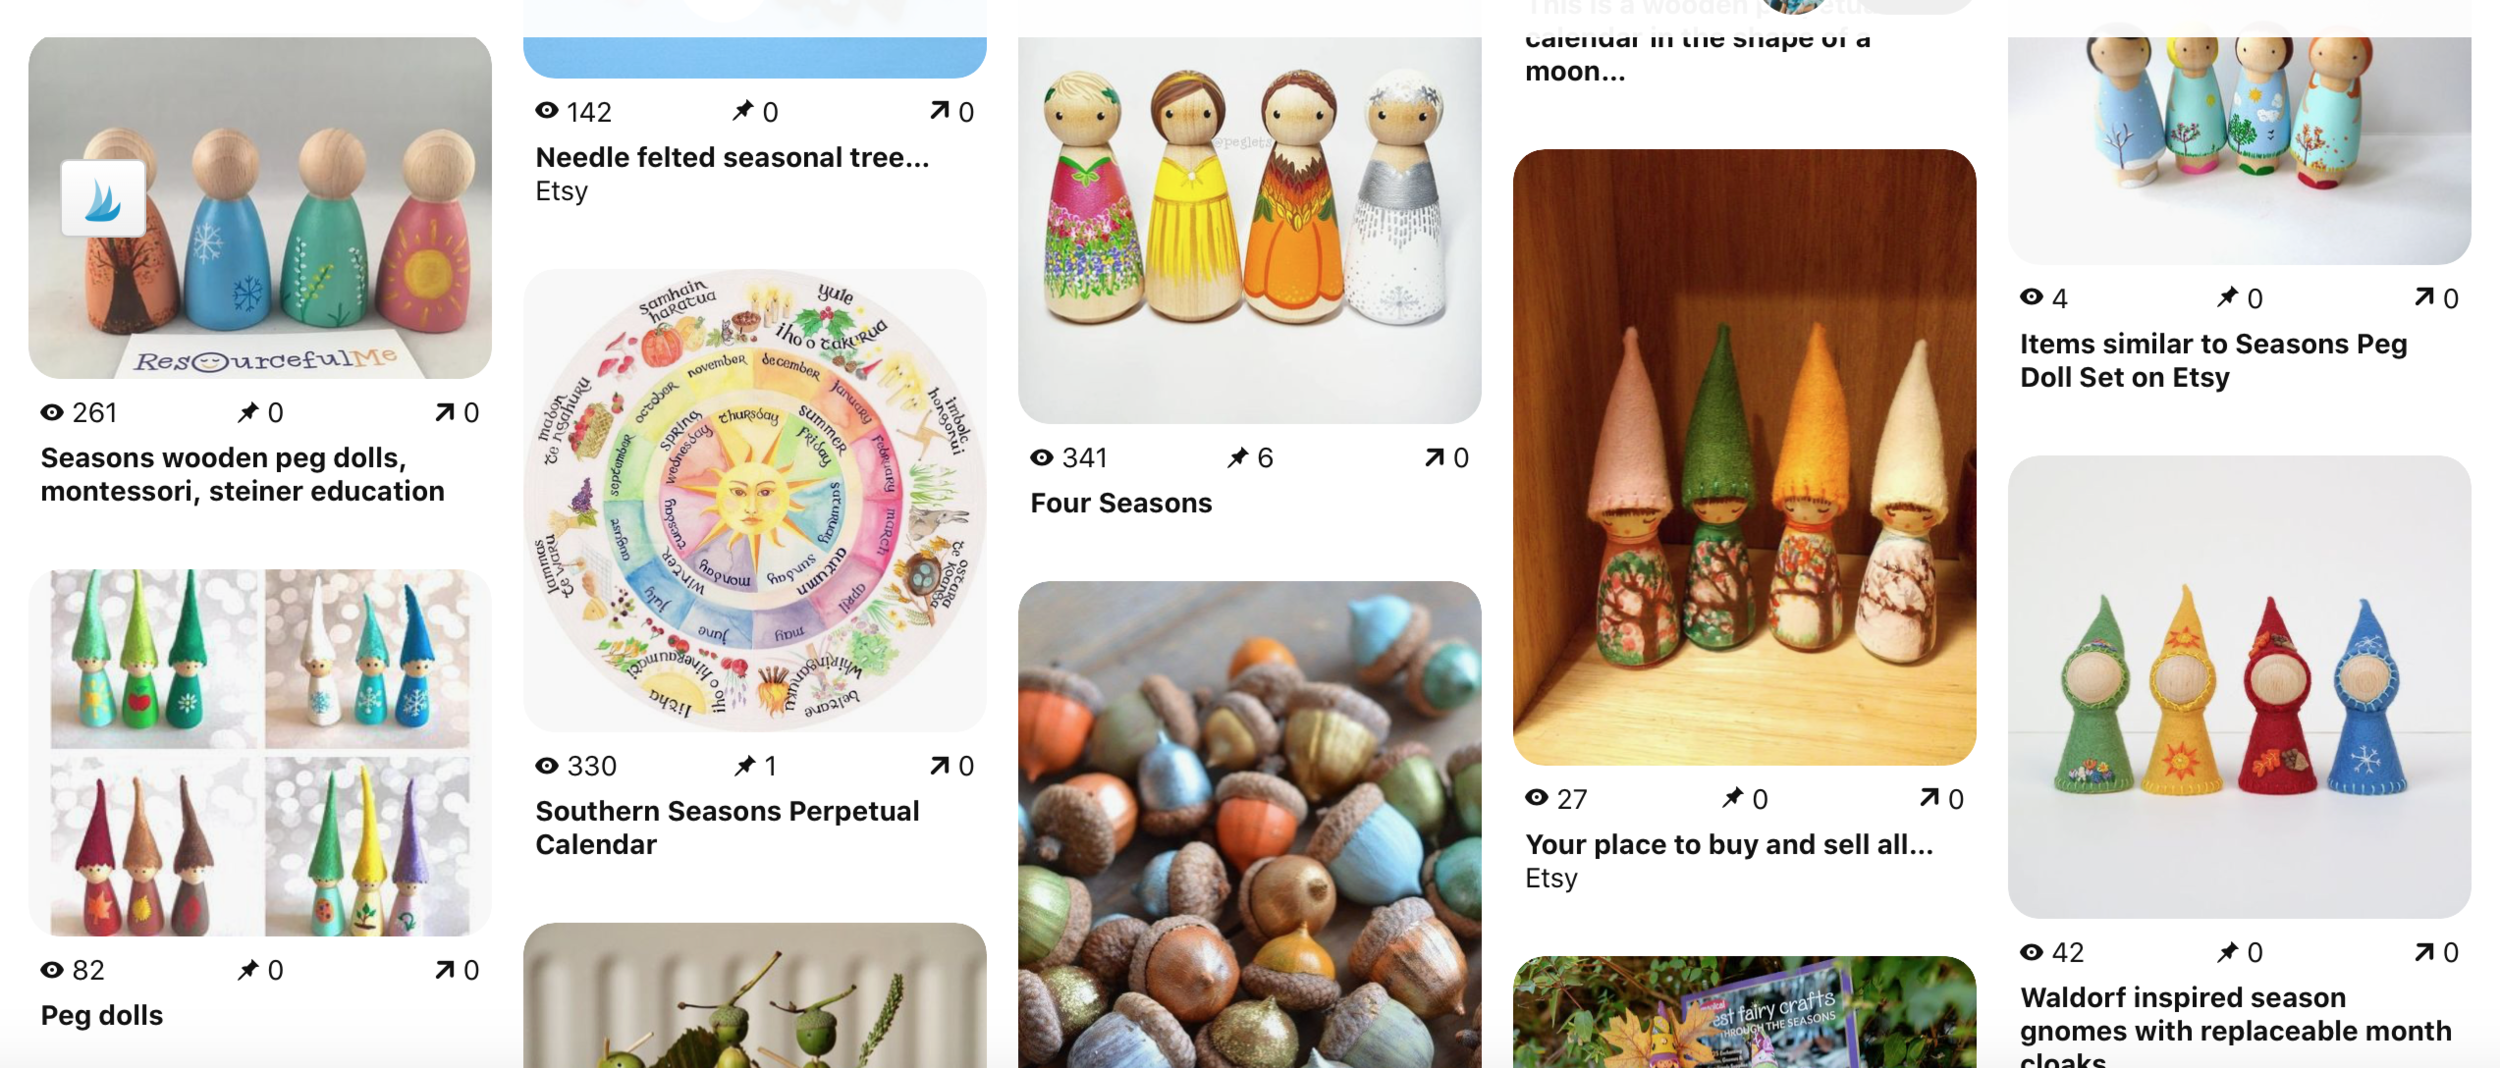
Seasonal Arts and Crafts encourage noticing the natural world with lovely crafts.
Discover, Play, Learn shares ideas for making learning fun and engaging. As a former teacher and homeschool teacher, I value ideas that engage children with more than pencil/paper practice.
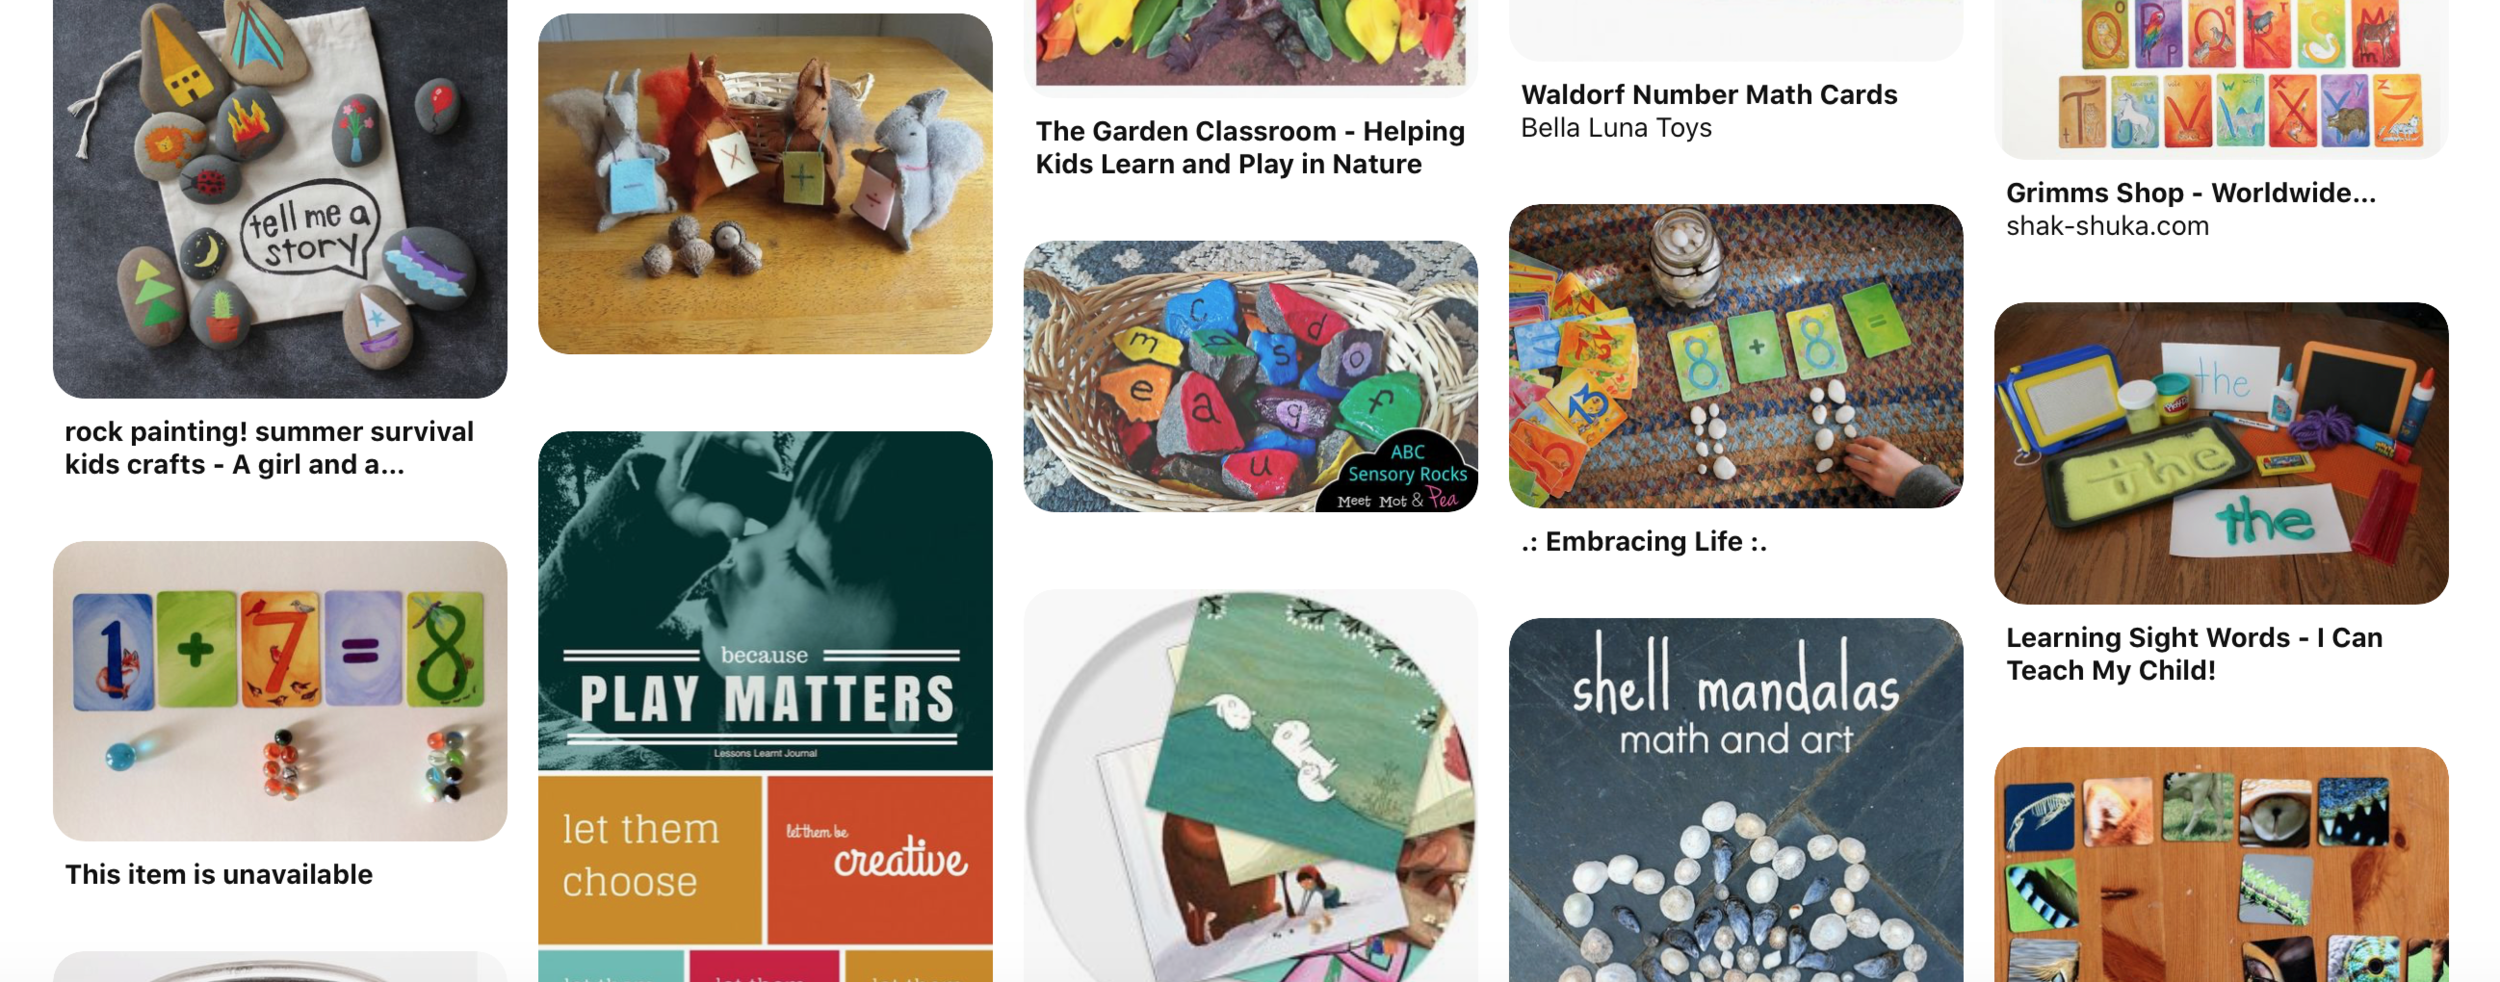
Discover, Play, Learn inspiration for engaging activities
One of my favorite inspirations is the Nature Table. I’m going to write more about Nature Tables at some point. They don’t need to be a table. They can be a shelf or windowsill or anywhere that you collect little treasures and toys that reflect the natural world. We are inspired by the ways people show their beautiful collections

Nature Table inspiration brings the beauty of nature into a display in your home
Of course, you can browse all of my boards and follow the ones that connect with you and your family. I’m telling you now that I have diverse interests including photography, castles, and nature. Follow the boards that inspire you :)

I pin and repin every day because I genuinely appreciate the community on Pinterest. Thank you to all the friends that have followed me through the years. I appreciate you!
I hope these boards help you find your next fantastic project idea :)
Wishing you good health and wonderful inspiration 💙
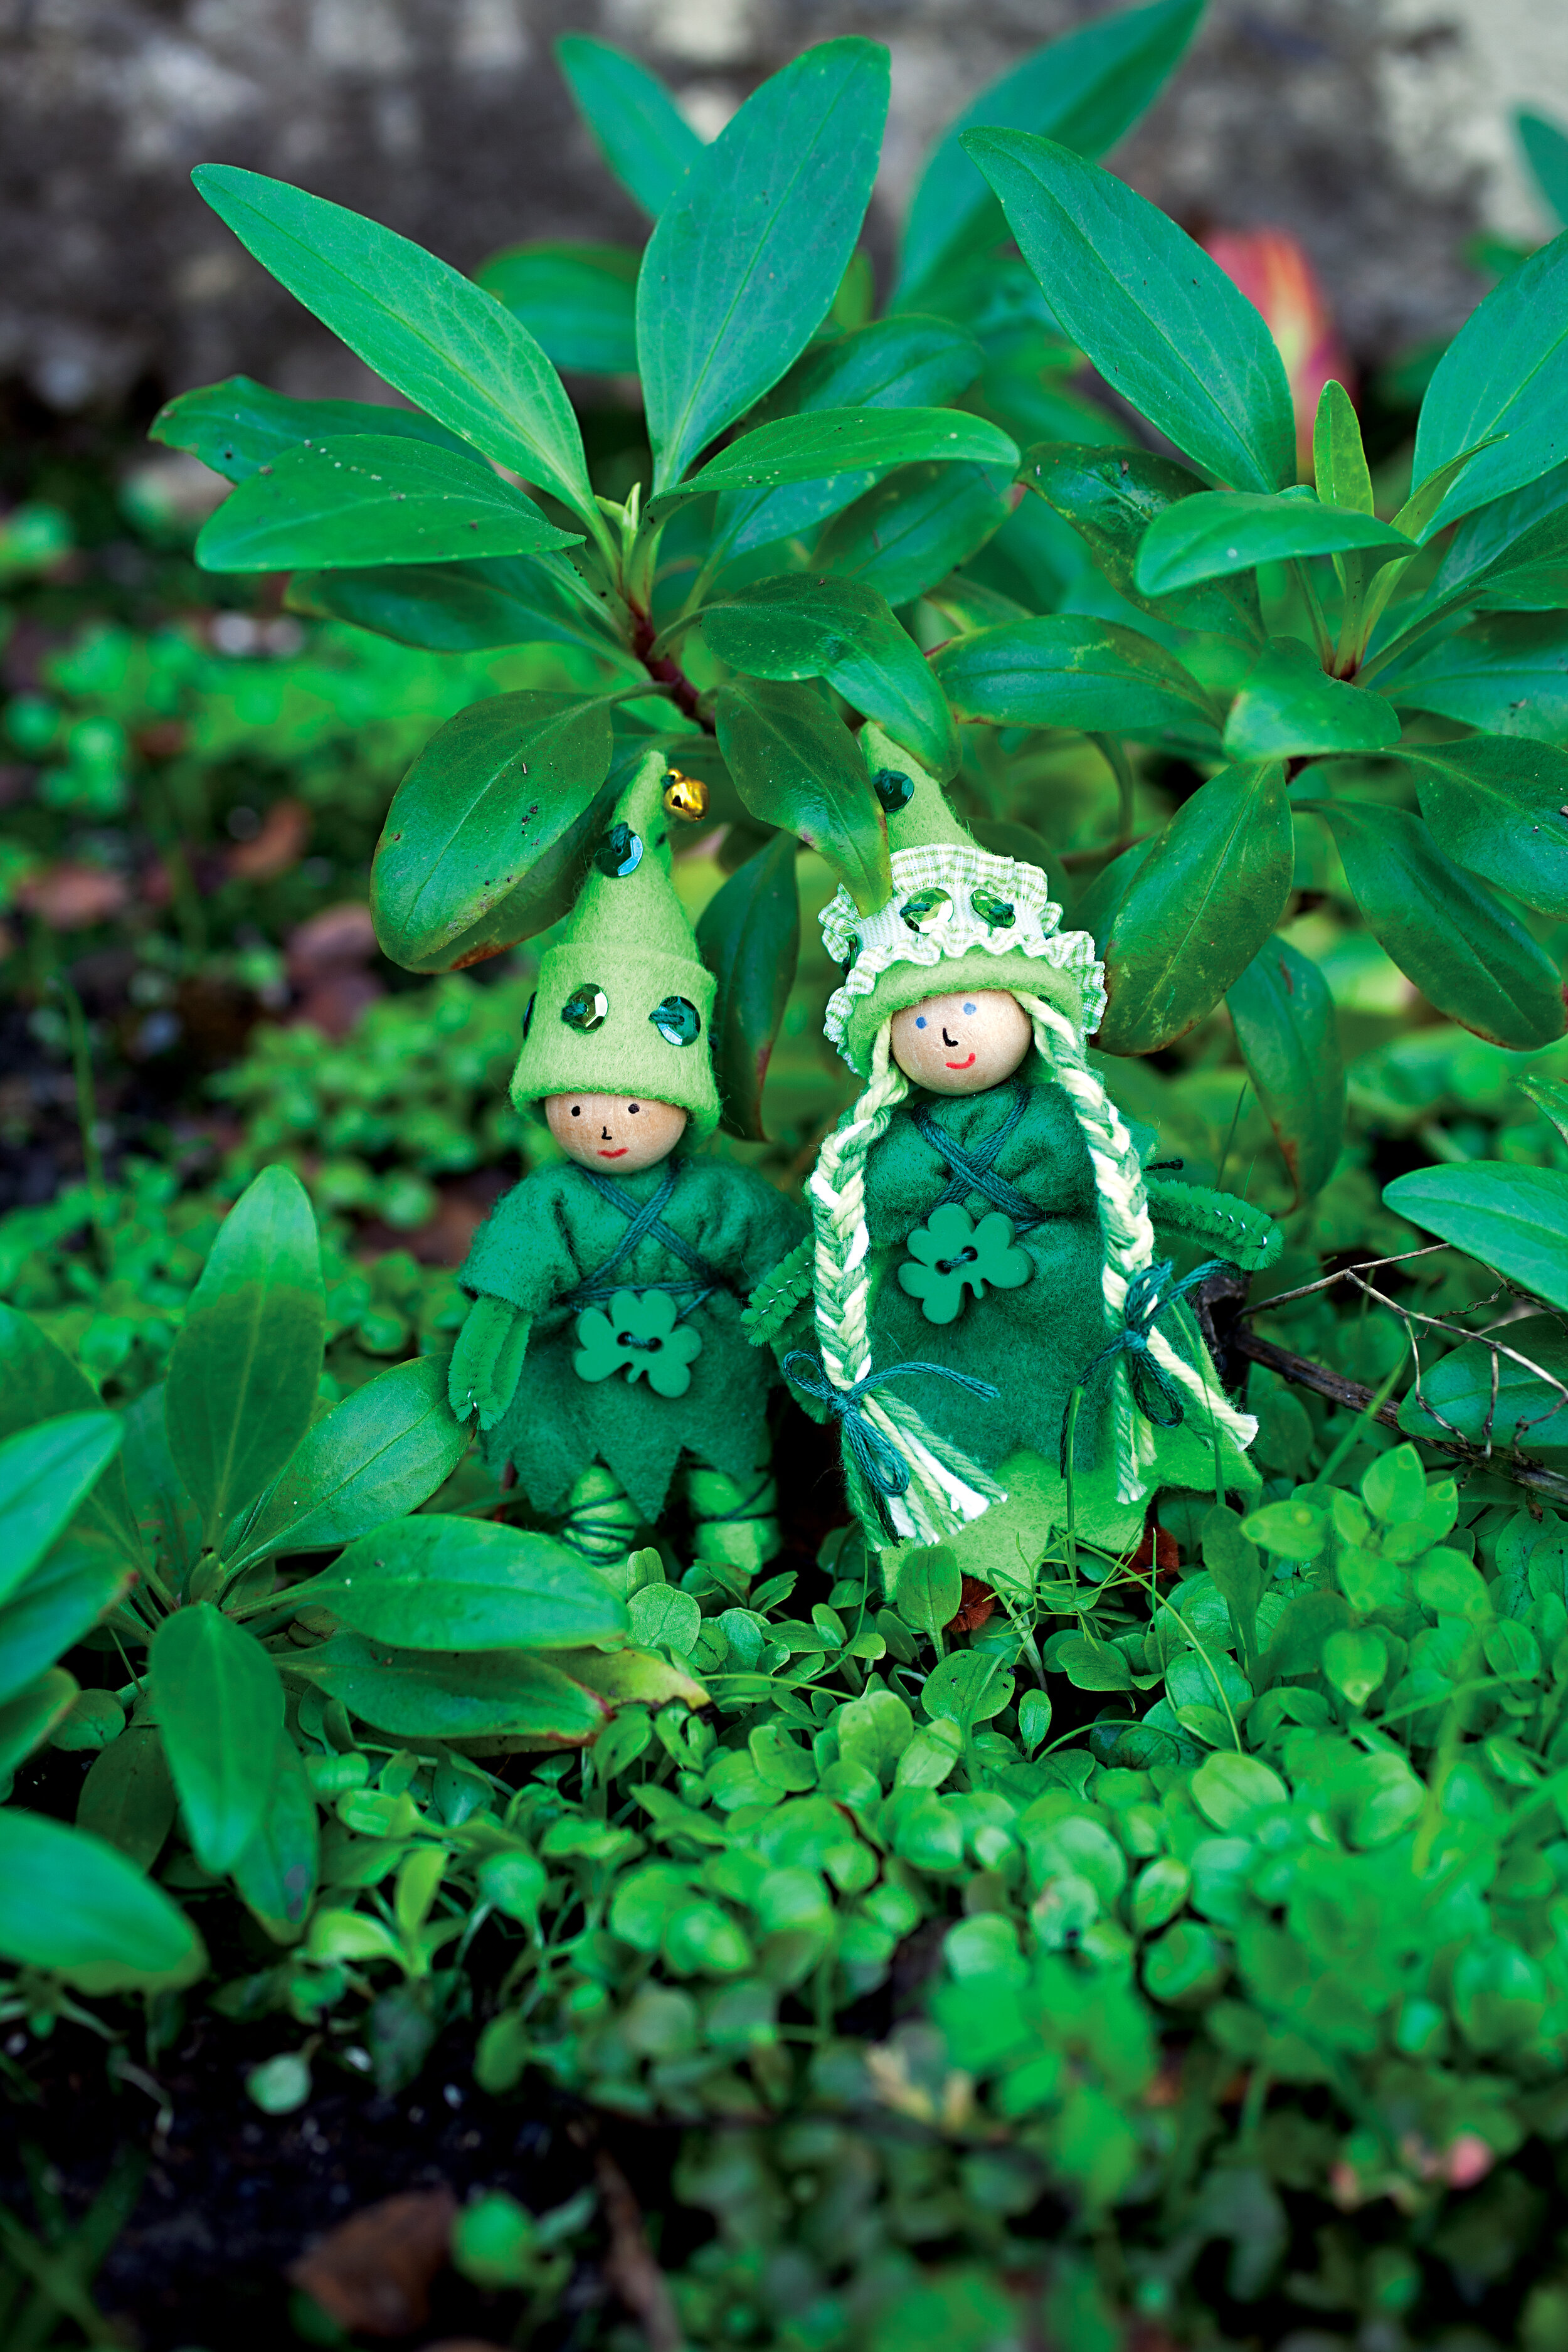
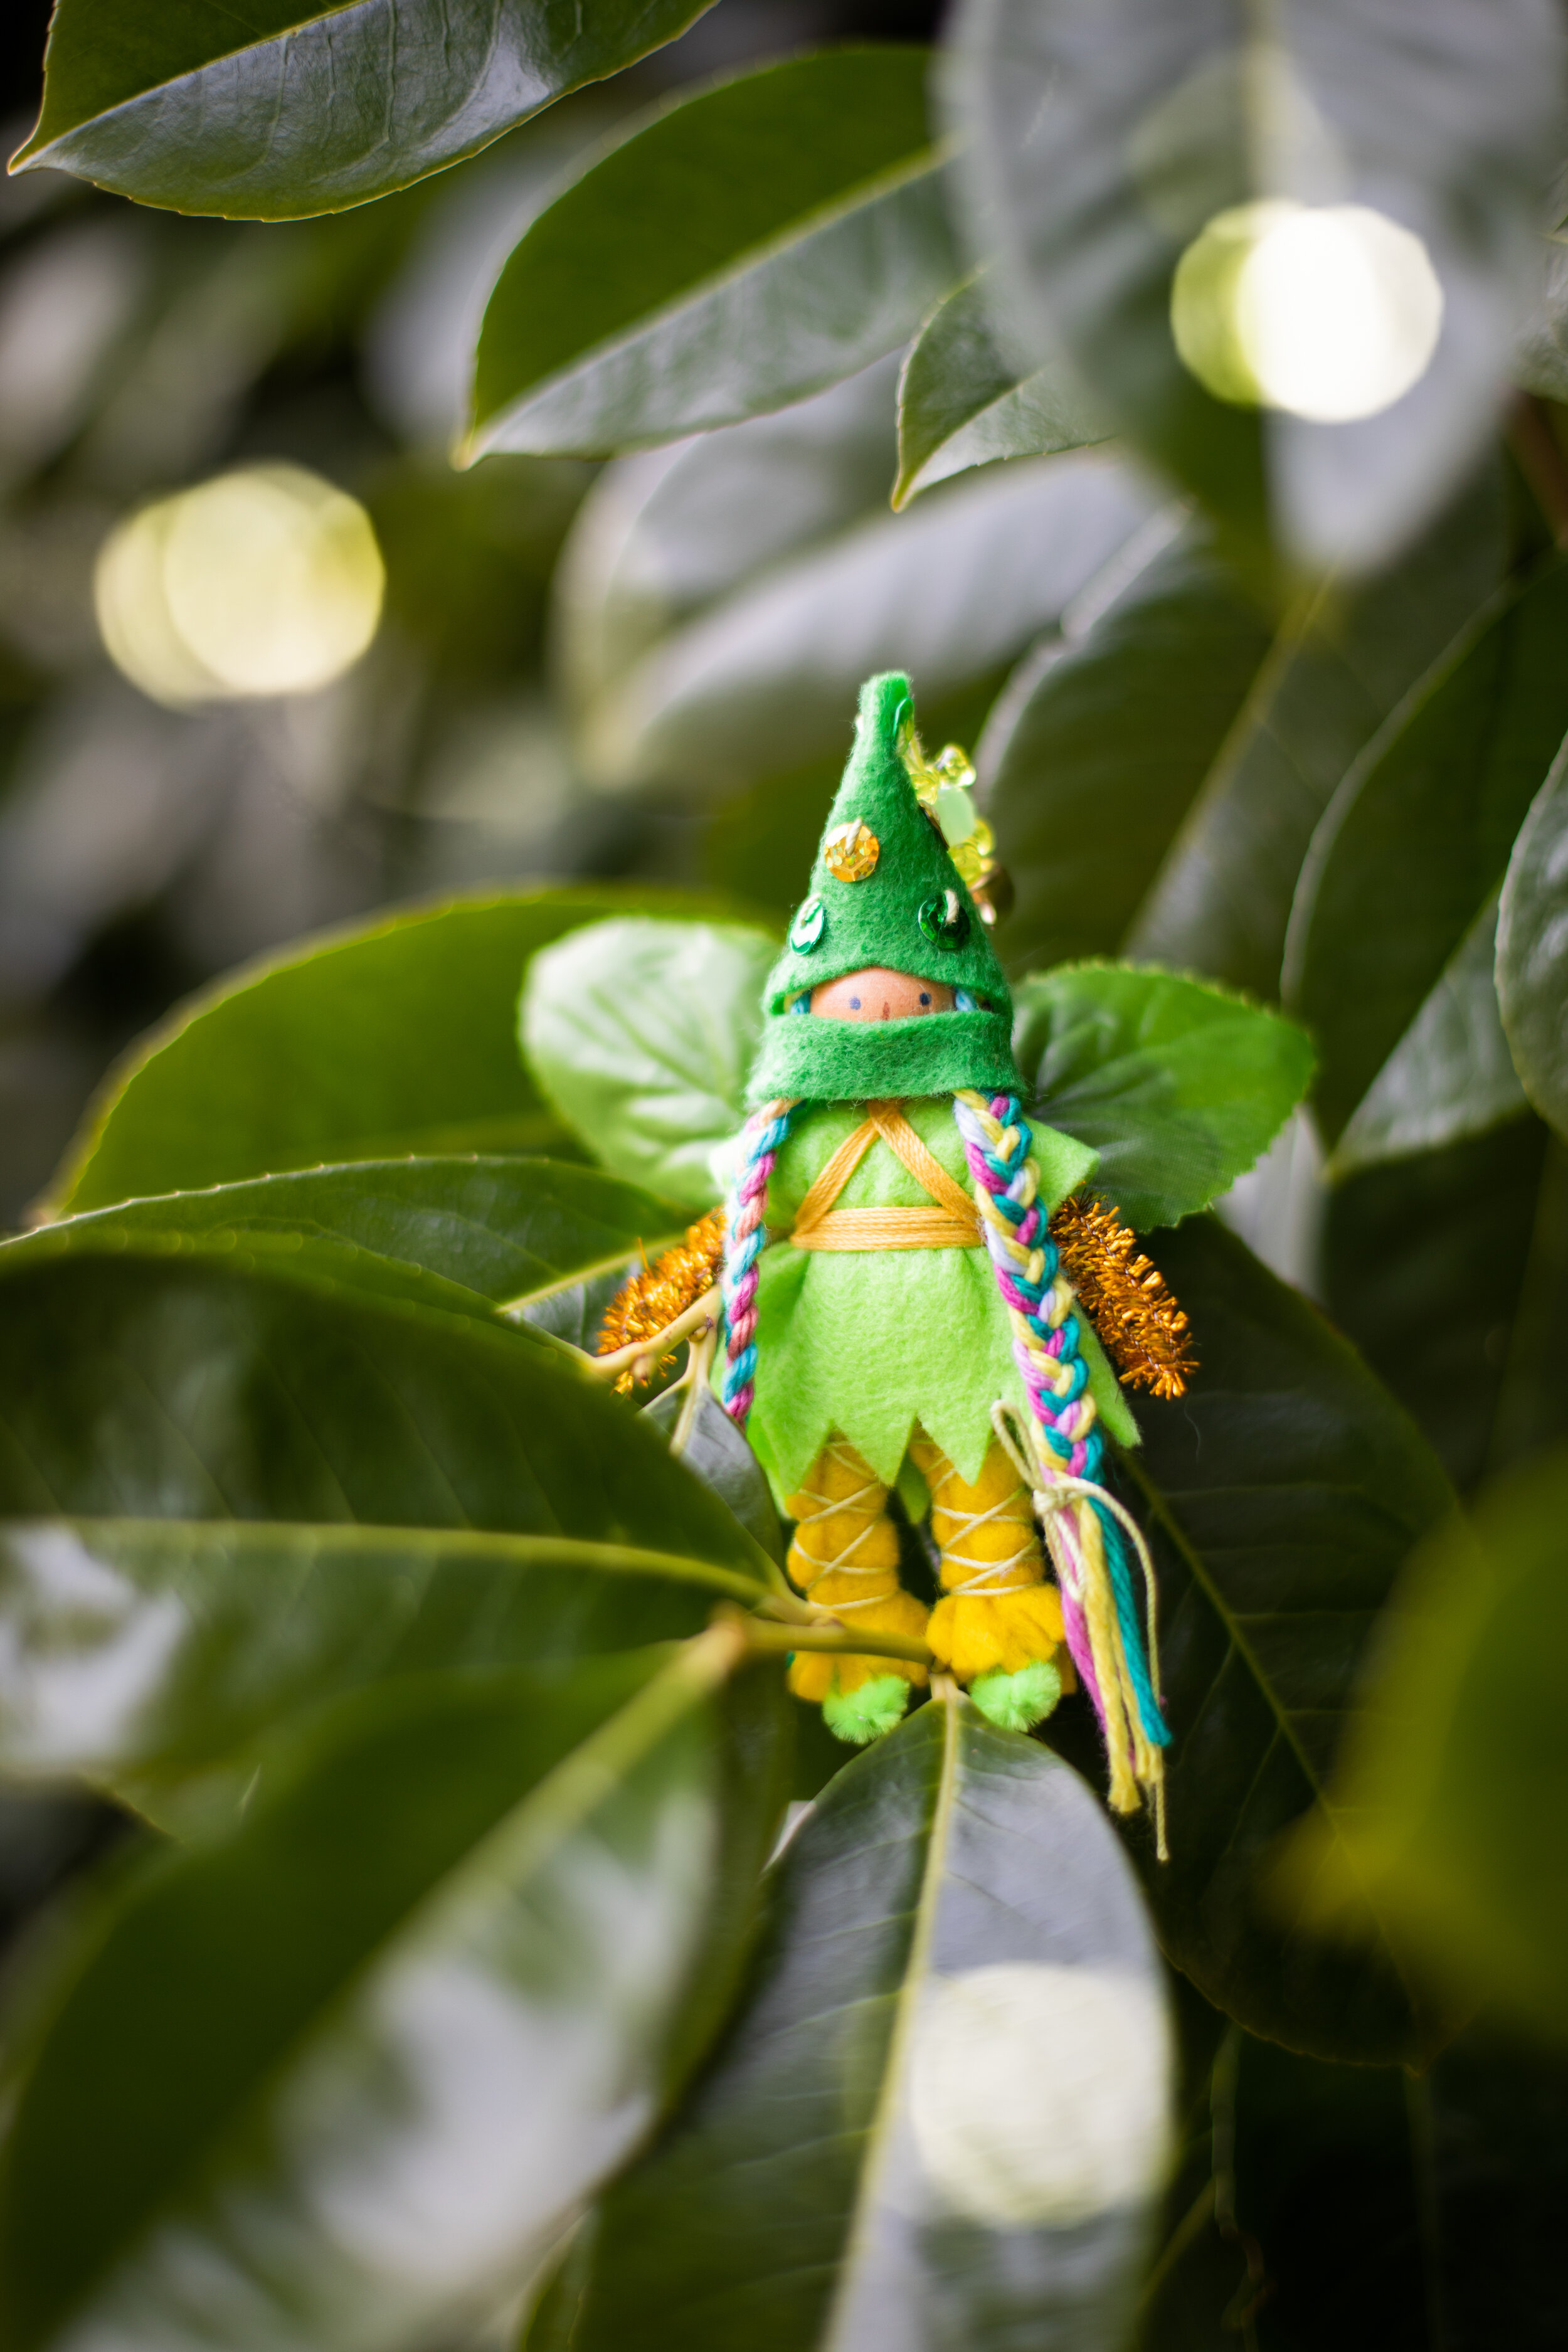
Creative Leprechauns
Leprechauns have diversified through the years. The jolly little folk hanging around rainbows have sought out adventure in recent years. And children are delighted to imagine all the ways that leprechauns may appear in modern times. Our first Forest Fairy Crafts book is perfectly suited to this creative craft. You can make any style of leprechaun by leaning into green and gold (especially sequins). This means that the ninja leprechaun can move through the world.

This little leprechaun was so fun to imagine with her rainbow hair and sparkly gold arms. I simply used the ninja pattern with different colors. This inspired me to wonder about a pirate leprechaun. Or a leprechaun mermaid? The possibilities are endless.
Of course, a fairy pattern can easily be made into a leprechaun. And it’s fun to celebrate gold and green, especially if you can find yarn threaded with gold or, like this fairy’s hair, a gold eyelash yarn.

So fun how they sparkle!
Of course, the book has an official leprechaun as well.

A fun way to add extra magic to the leprechauns world is to paint little pebbles gold (or simply pretend they’re gold). After all, couldn’t leprechauns use a magic spell to disguise their gold while on an adventure?

Photo credit C&T Publishing
I could imagine games with leprechauns that you create together. You could use larger pieces (or sew two pieces of felt together to show “gold”. Then hide them around the house similar to an Easter Egg hunt. Make your leprechaun a leprechaun home. I have it on good authority that leprechauns love new homes far more than leprechaun traps. Build a leprechaun town!
With the Magical Forest Fairy Craft Through the Seasons book, you can create any of the patterns with gold/green themes. You could make beanbags with sparkly sequins that could then be gently tossed onto chosen targets, such as into a bucket or onto a felt square.
Then write a story about your leprechaun(s). And draw a picture or two of them. You could write about their adventures when they met children for the first time, or what their home is like in Leprechaun-Town or what life is like for leprechauns. Honestly, after you make a leprechaun or two or three, the children tend to inspire their own games and ideas. What can you create together?
We also made Leprechaun babies. The baby pattern is in the first Forest Fairy Crafts book. And this post shows how to make the cute little hat.

So many magical ways to bring Leprechaun magic into your home. We hope that all the good luck of the Leprechauns finds you and your family!
For more Leprechaun inspiration and activities, visit these posts:
Happy Saint Patrick’s Day!

Happy Earth Day!
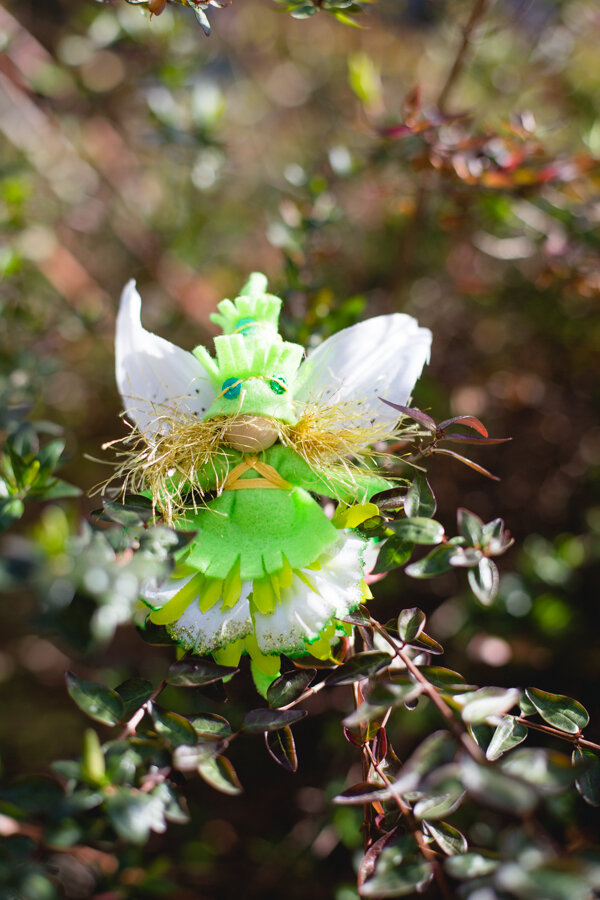
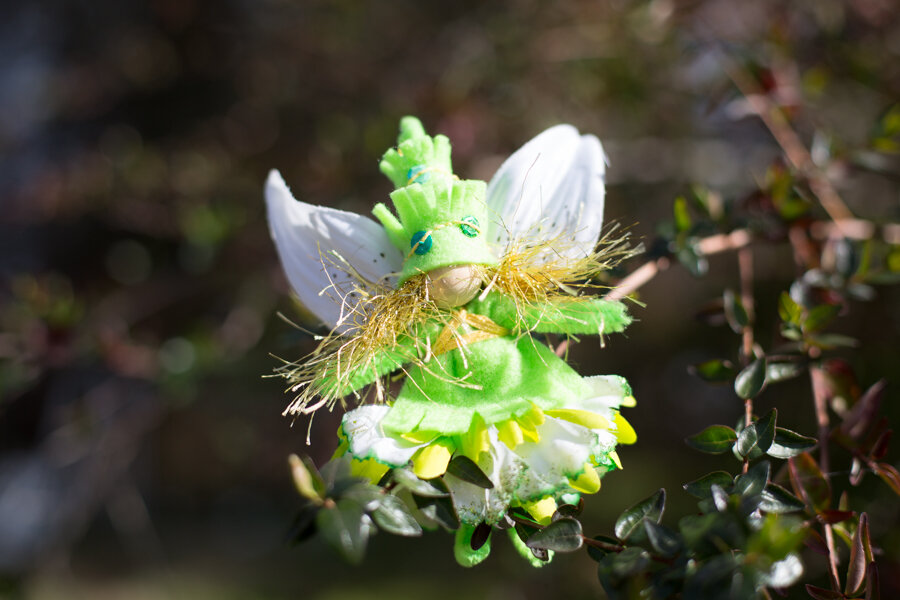
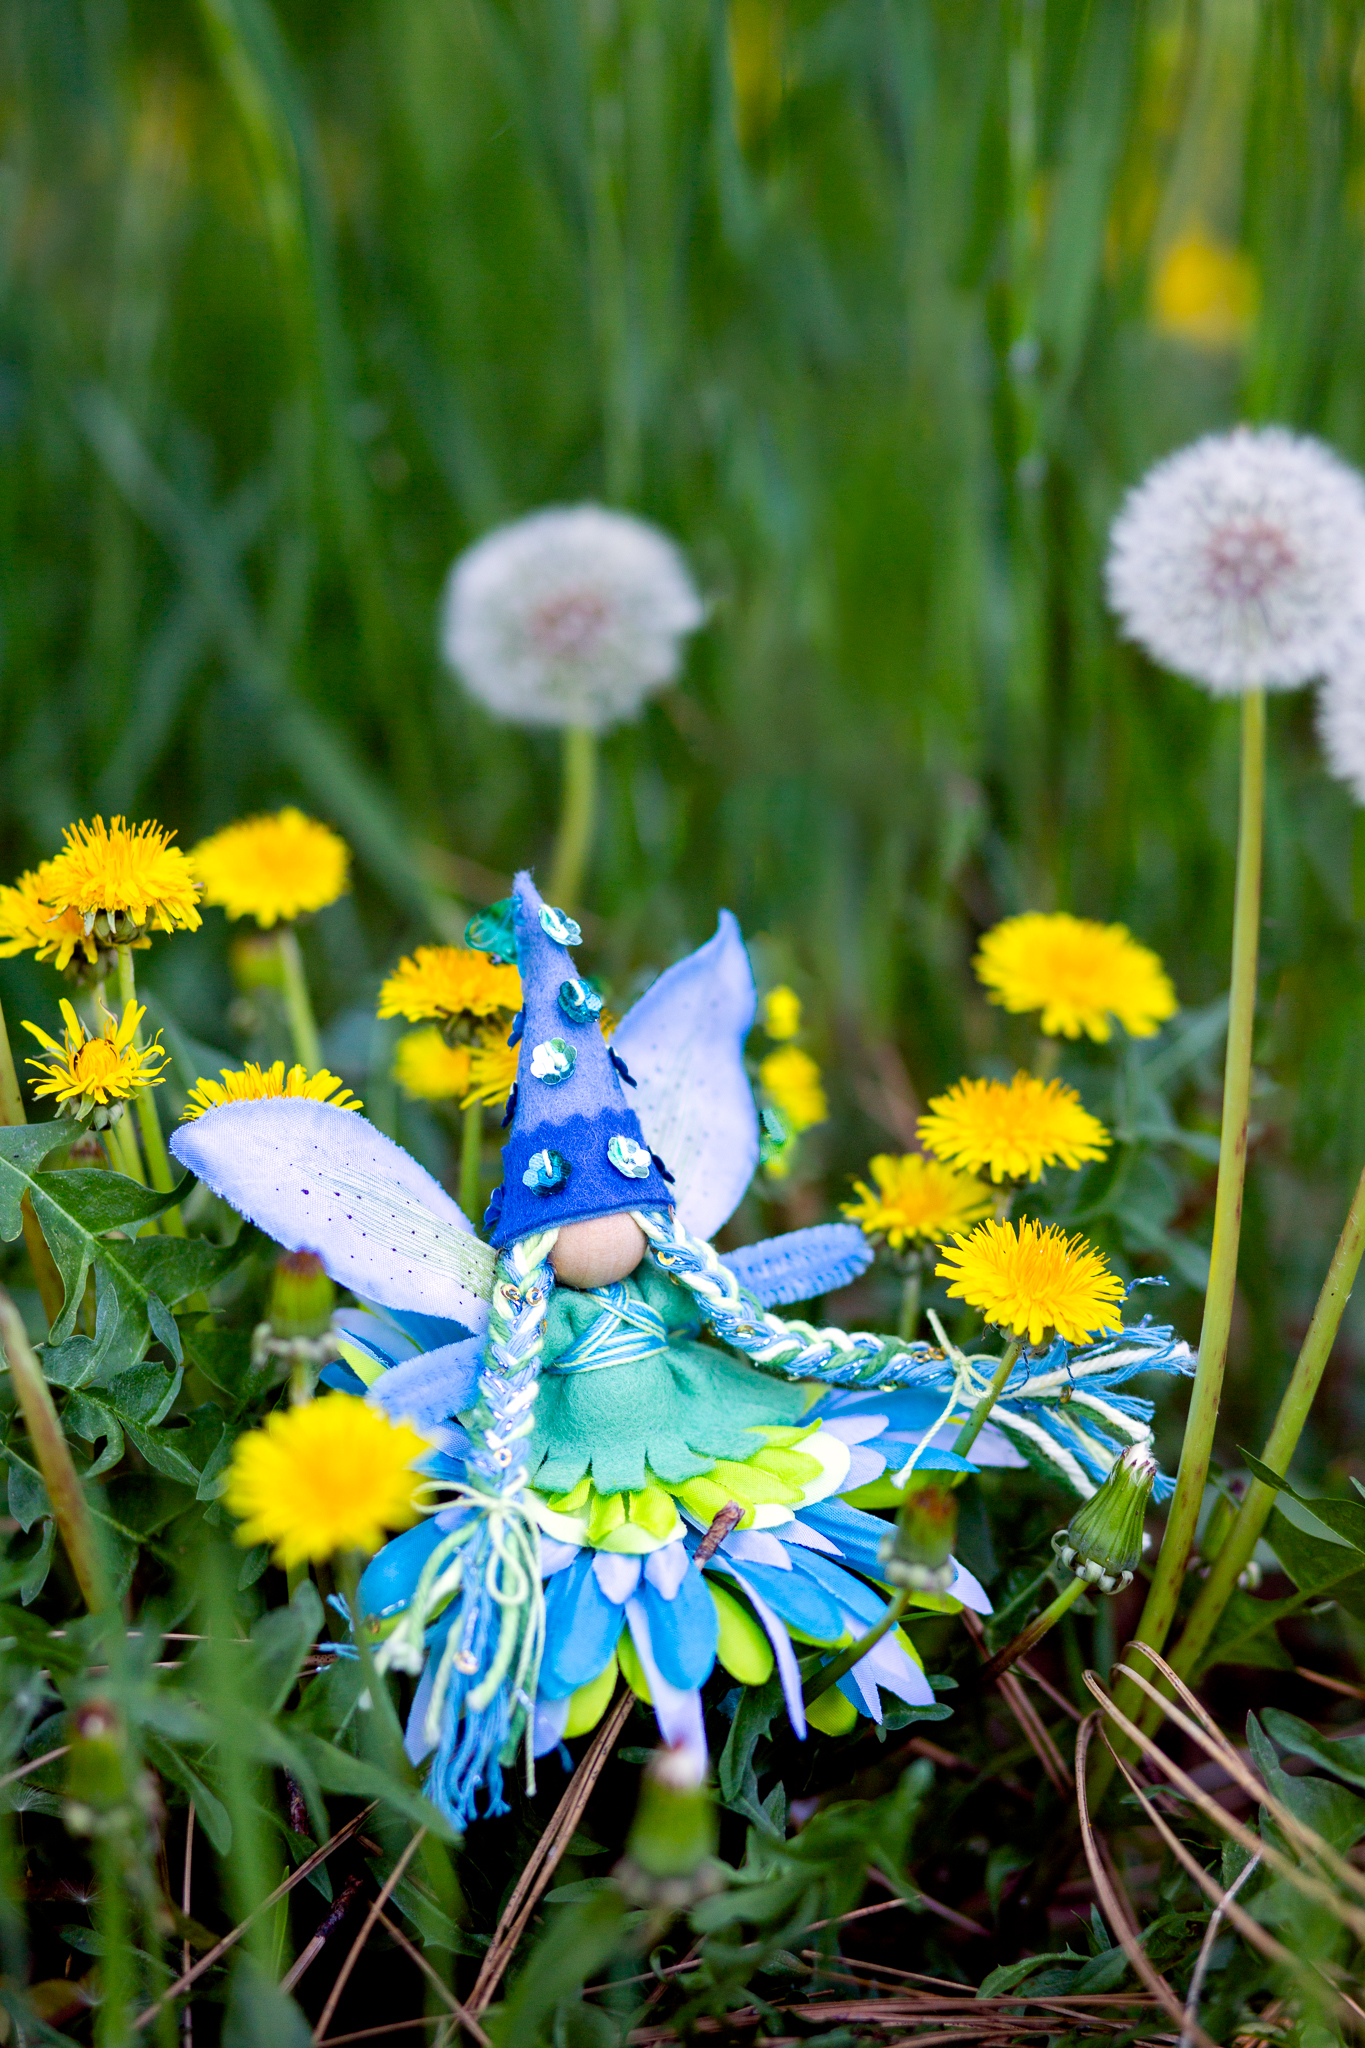
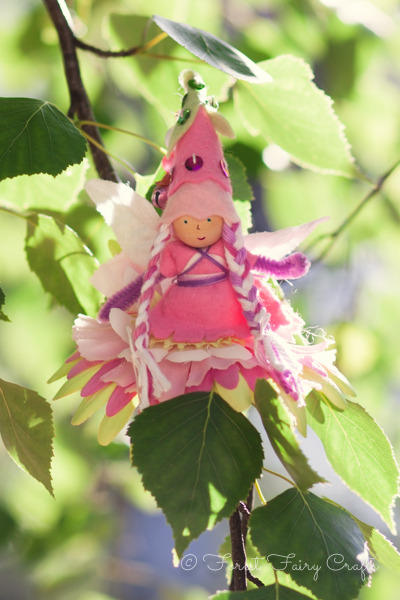
Happy Earth Day to our one and only home planet! The fairies love all the wild places of earth. We live among the Forest Fairies, but river fairies and ocean fairies and mountain fairies may be closer to your home. We created this Happy Earth Day fairy to celebrate all the blues and greens of sky, leaves, and water.
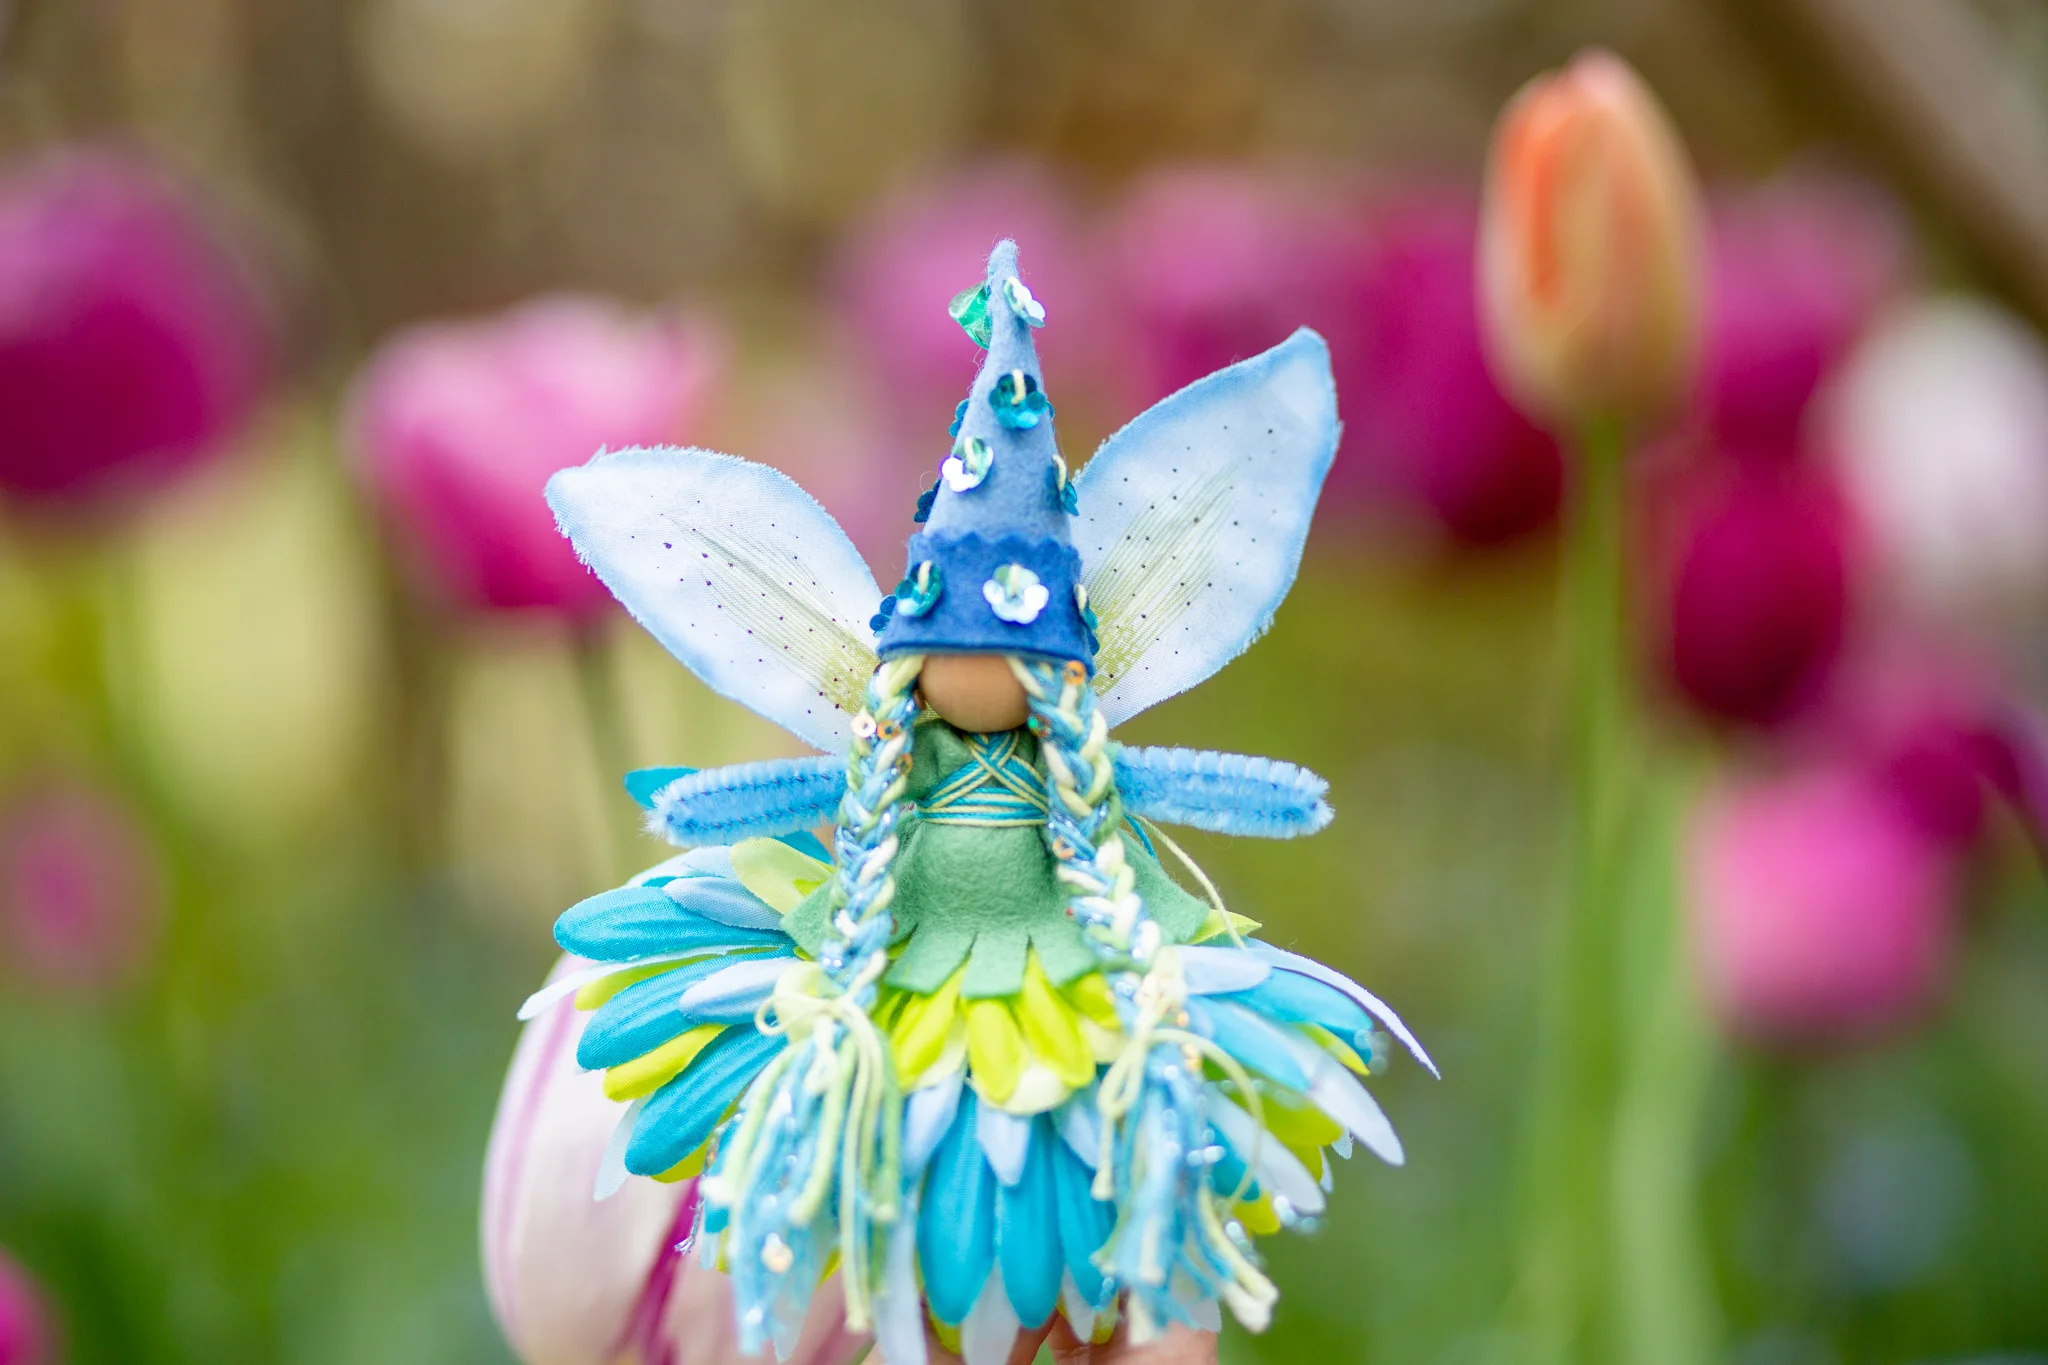
I found flower-shaped sequins which made simple sparkly decorations on her hat. We used “pinking shears” which have zig-zag edges for the crown shape on her hat band. For her hair, we used color changing green-white yarn and blue yarn with sparkles (and occasional sequins). Since each fairy takes a small amount of yarn, I look for interesting yarn that add to my collection. I also doubled the crochet thread around her dress for the blue/pale green layering effect.
Thinking about Earth Day fairies means being inspired by nature. What are the colors around your home? What sort of nature can be found, even in cities? What does a nature fairy mean for your part of the world?
The other thing that I feel is super-valuable for children is talking about respecting nature at all ages. Children may not realize that hitting trees with sticks can harm the tree, or plucking flowers may not help bees, or trampling young plants underfoot may not help those plants grow. Children are open to the idea of helping nature grow. They just need to learn what that means in their daily lives.

For us, we are mindful of nature by reusing supplies (that yarn stash that lasts me for years) and buying from thoughtful suppliers (as opposed to “cheap” supplies).
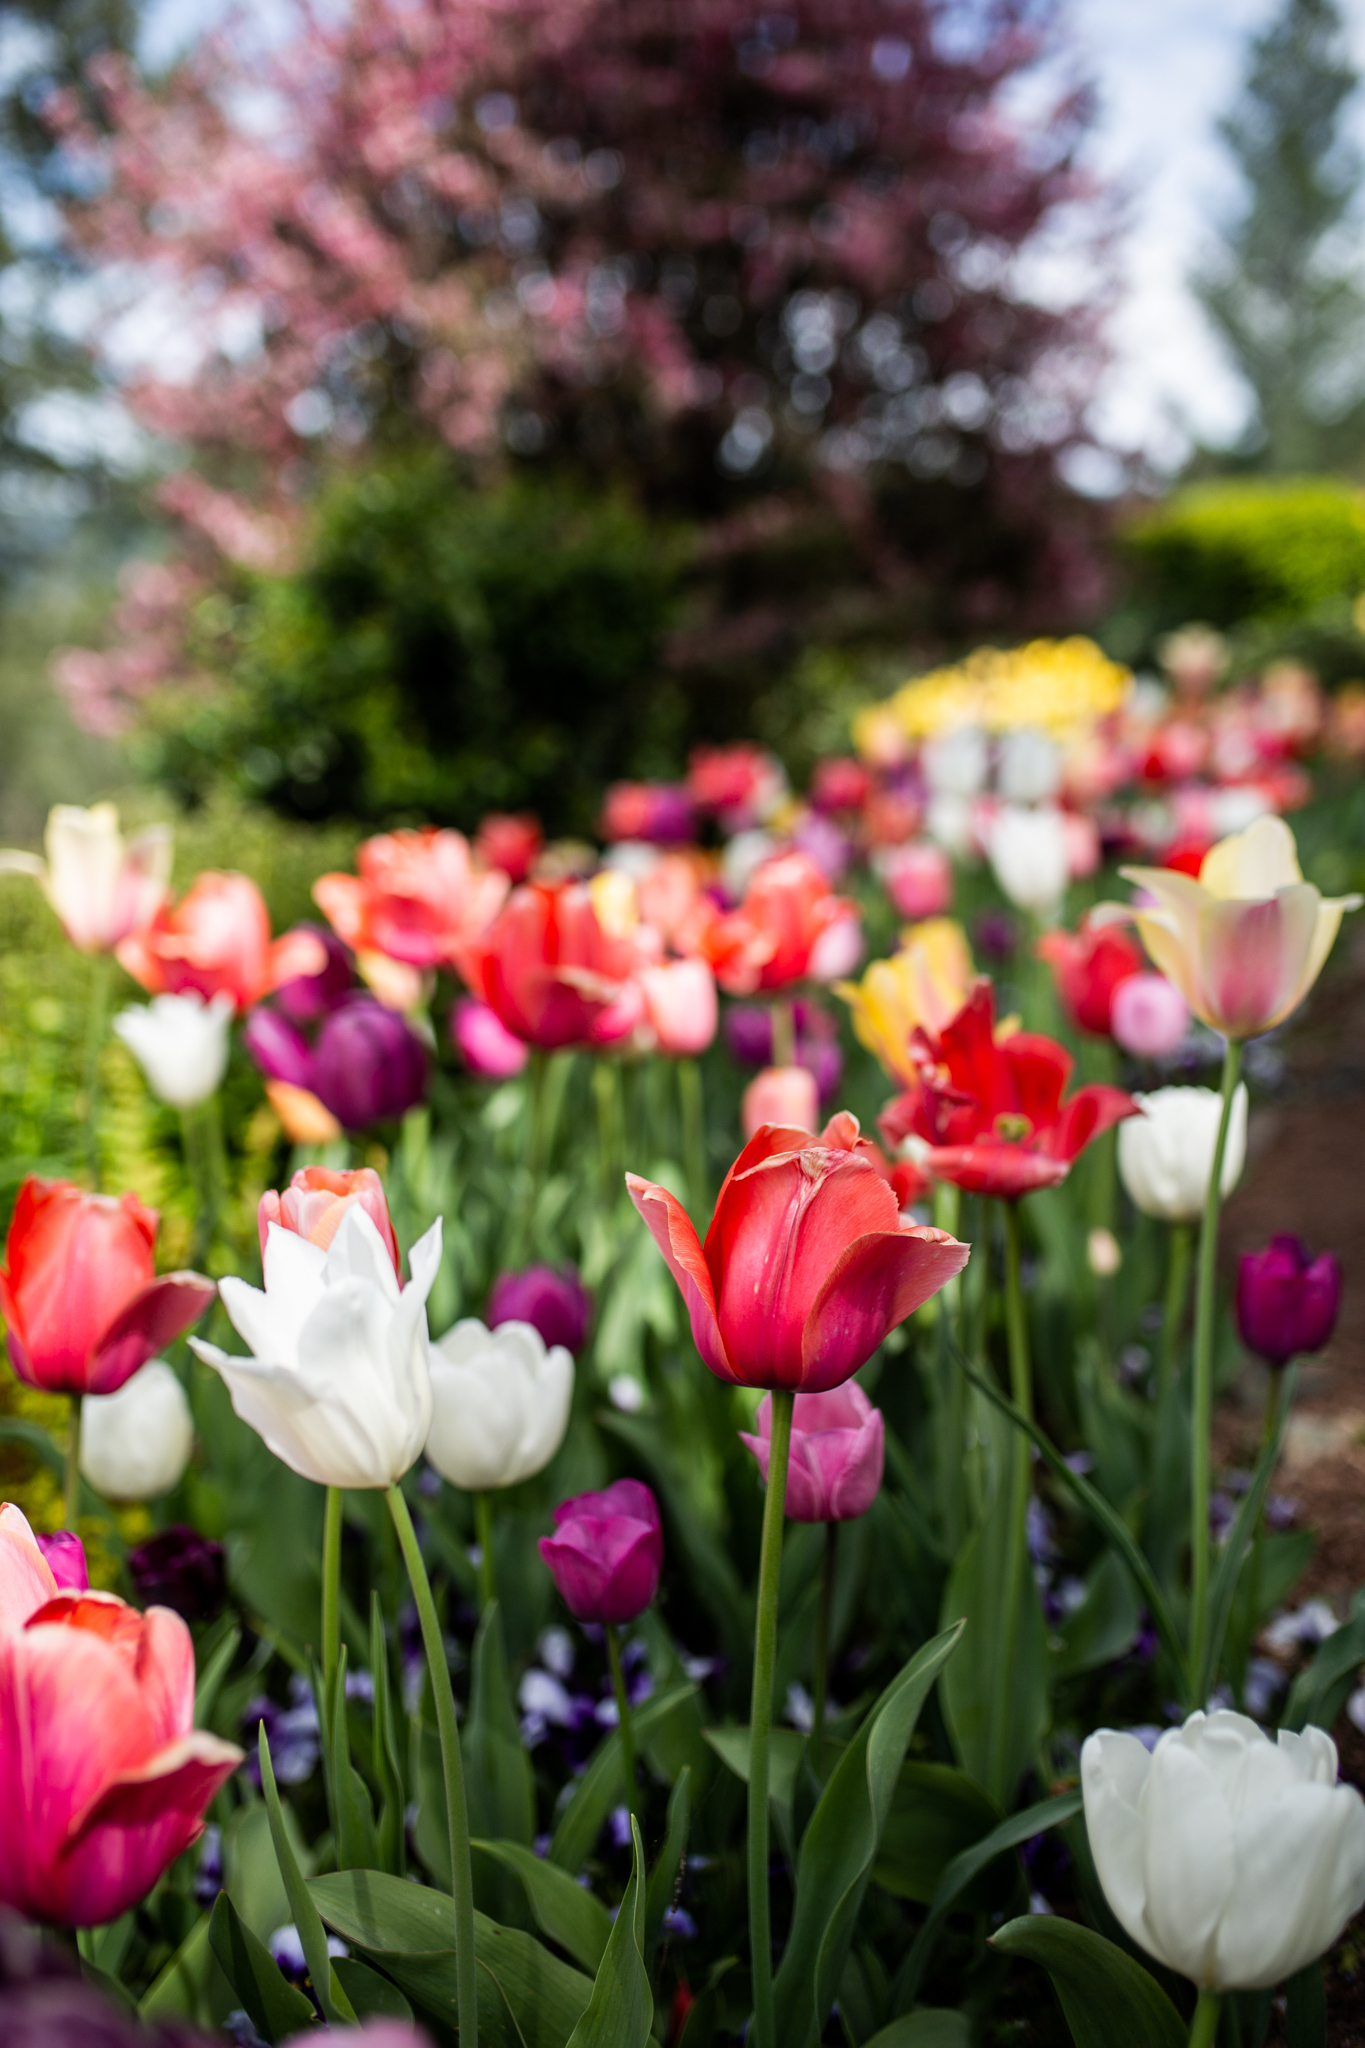
When I take photos, I am careful of the environment. We made the illusion of a fairy sitting in a flower with Photoshop magic. We visited a local favorite garden at Crystal Hermitage where they grow over 5000 tulip bulbs. We balanced the fairy by holding the flower carefully. Then we took the fairy away, and I took another of the flower by itself. Then I could “paint” the hand away by layering the two photos together.
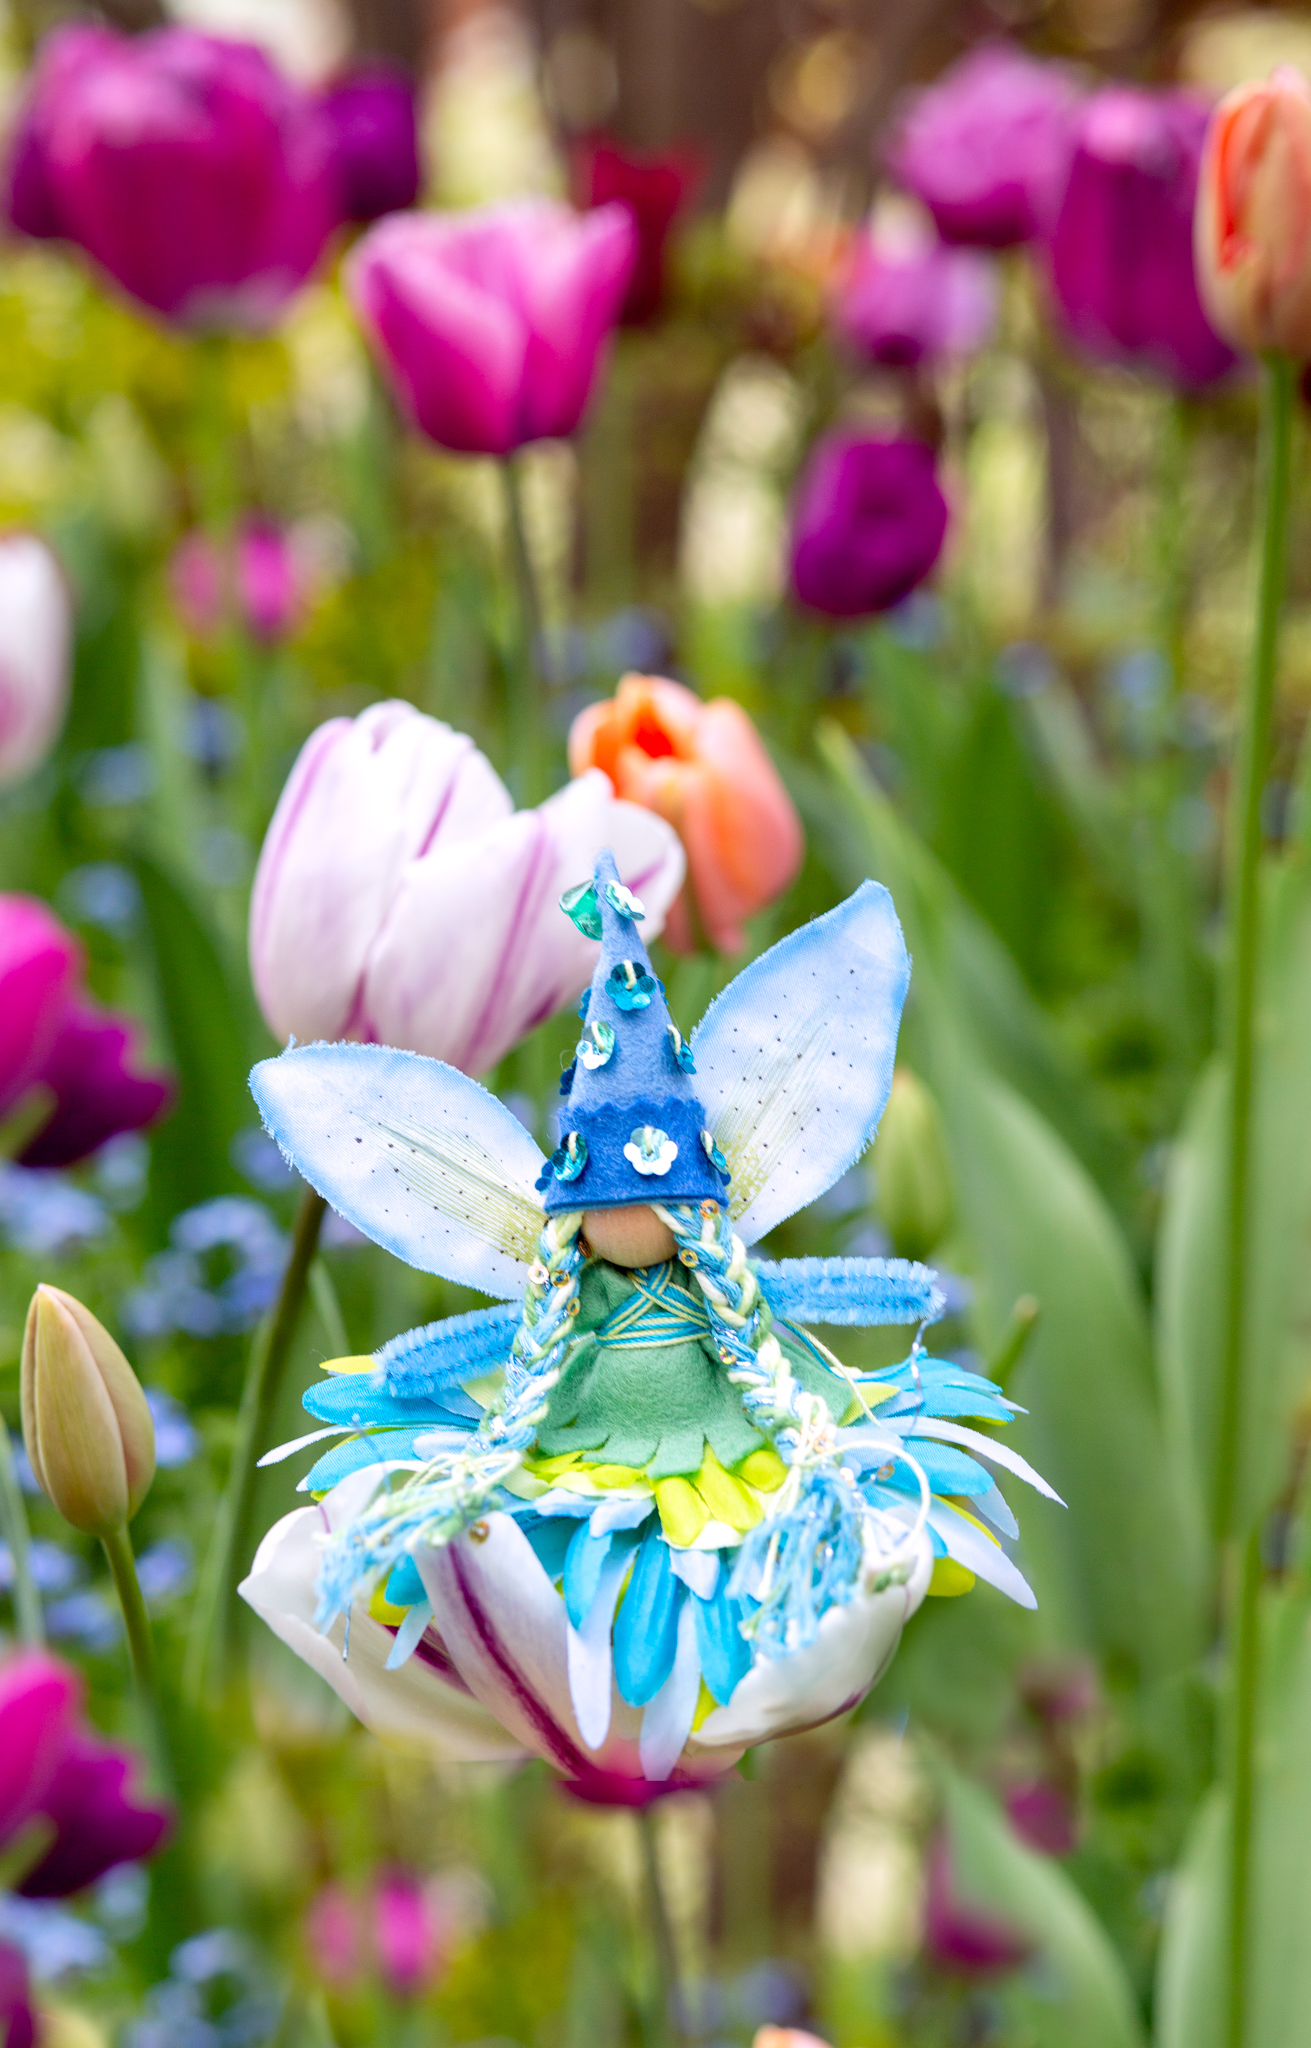
This meant that no flowers were harmed in the making of our photos. Respecting our earth is a daily habit. And celebrating should last all year. We hope that you get to enjoy nature today!


May your Earth Day be filled with magic :)
*this post does contain an affiliate link. Should you choose to purchase, a small amount returns to the forest while your pricing remains the same. Thank you!

Inspiration Crafts for Valentine's Day
We love discovering ideas from creatives. Each one is a new way to celebrate the friendship of Valentine's Day. Add to it that this time of year may be chilly outside, so it's a perfect time to sew (granted, I believe that every season is a wonderful season to sew). We collected a few of our favorite inspirations from around the web. Enjoy! How will we choose which project to make first?

Sweetheart Charms by Purl Soho
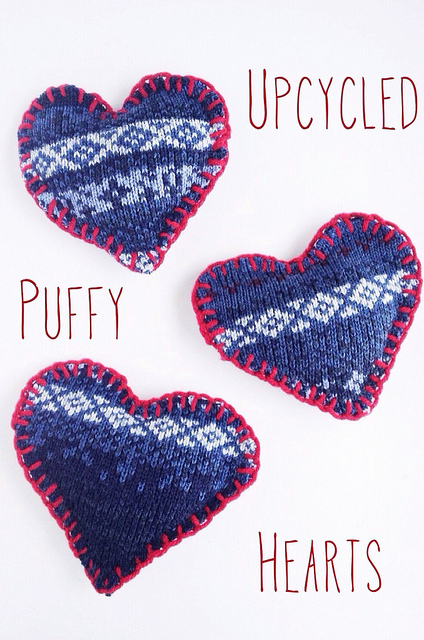
Upcycled Puffy Hearts on Maker Mama
Upcycled Puffy Hearts by Maker Mama
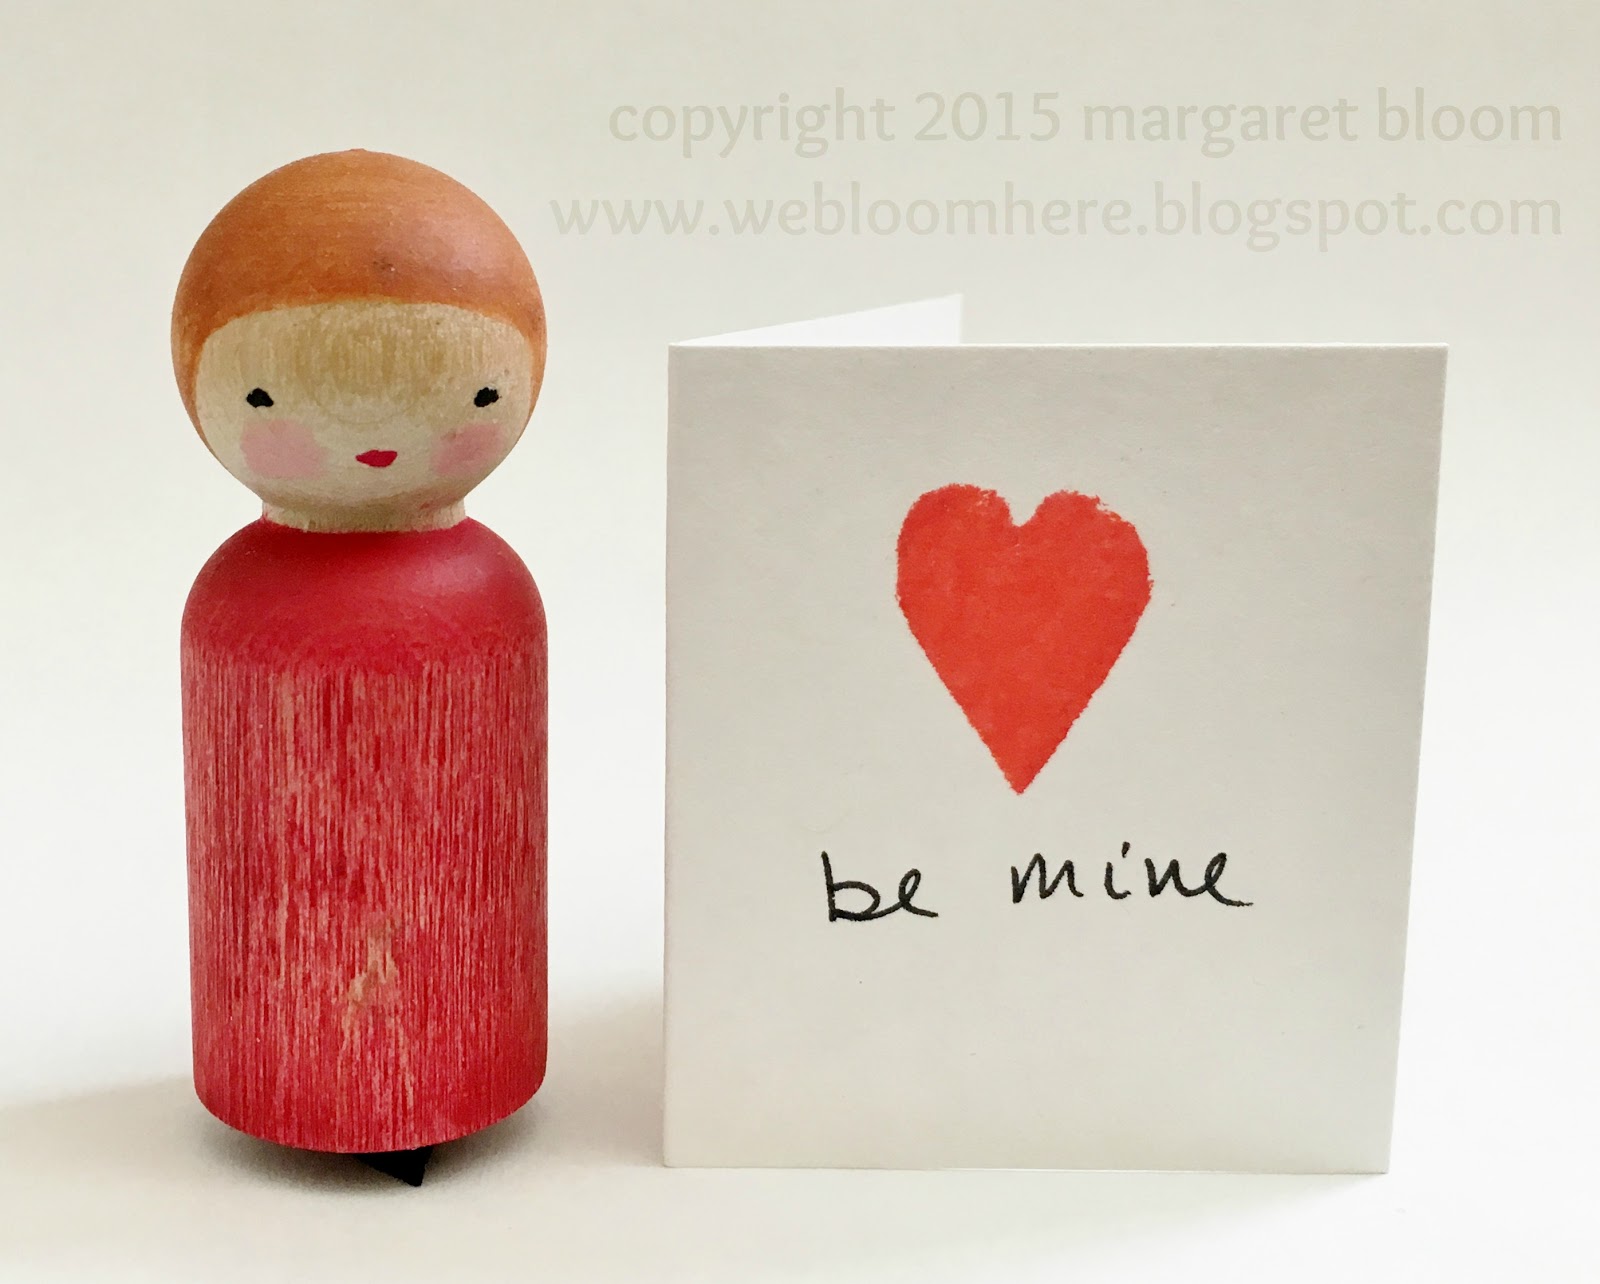
Peg Person Heart Stamp by We Bloom Here


And of course a Love Fairy can join the festivities :). The Forest Fairy Crafts book has all the directions that you need to make her (a few more than will fit in a blog post. We're looking forward to sharing directions for the Sweetheart Fairy Babies in Magical Forest Fairy Crafts Through the Seasons releasing in late summer, 2018.
Wishing you a lovely time creating Valentines! :)
PS- the links to our books are affiliate links, so a small amount is paid to us in compensation while your price remains the same. Thank you for supporting the forest. Cheers, friend :)
The First Forest Beasts
The Forest Beasts are here!

We had such fun designing these softies. The kids chose all the shapes and colors. I helped with the sewing machine- especially with the faux fur. That material is hard to sew!
I am inspired to think of easy, early tricks for sewing machine skills. The kids loved seeing their ideas become real life cuddle-monsters :)
These may be the first, but they sure won't be the last beasts :)
PS- Ian had a friend visiting. These were just as fun for the boys as the girls. A great boy craft! *Not that I believe certain crafts are for "boys" or "girls". I just see how they respond to different ideas. And the boys (and girls!) loved this one!
Five Ways to Personalize a Fairy


Fairies love to be gifts. Or special projects. And each time a fairy is crafted, they love to be unique. Fairies have a special magic. Because you create a fairy, you make her (or him) unique.
I give fairies as gifts all of the time. For new babies to hang over the crib, for birthdays, for children in difficult times. I have a few tricks for making a fairy unique. I hope they help you craft a fun fairy for friends, family, or yourself.
1. Favorite Colors
Ask about colors. Ask a parent or child about their favorite colors. Especially in childhood, colors change quickly. Use the colors to inspire your felt and petals.
Children often grow from pink, purple, pink, and more pink, to red, black, and dark purple.
Every age is fun! And using another person's favorite colors is fun.
2. Matching features
Match the family, match the details.
 Fairy Deer by Margaret Bloom at We Bloom Here
I love fairy families! We create big sisters and little brothers. I will use a little gnome for a baby or toddler. Children love when the fairy is part of a family!
Matching hair color and eye-color always delights children.
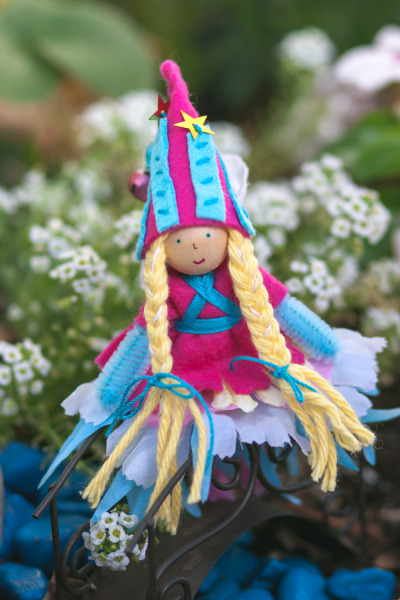
I gave this fairy yellow hair to match my friend's hair. I threaded a strand of sparkly white in to add texture. Of course, I love colored hair for fairies- pink! green! rainbow! so I don't often matchy-match. Still a fun plan now and again :)
3. Using numbers
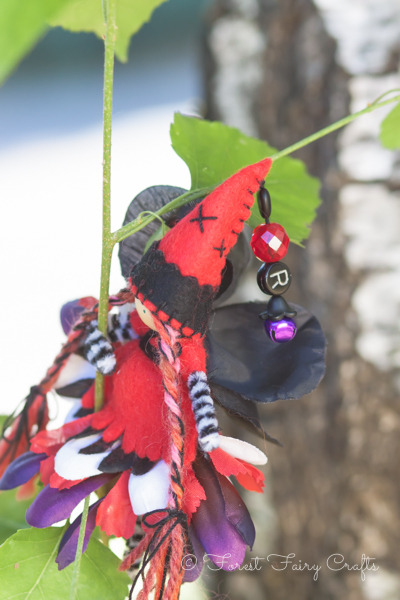
Numbers add a layer of significance to any fairy. The birthday fairies (pictures above with the blue candles on her hat) always have the number of candles matching the number of trips around the sun. Numbers can be used in other ways, too.
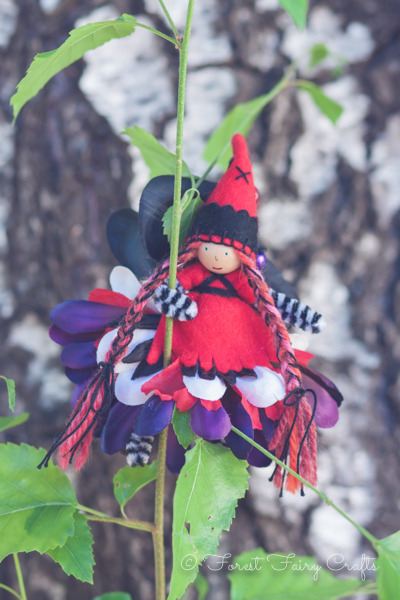
For this fairy, I sewed four Xs on her hat for the four people in her family (they wrap around so you don't see all of the Xs at once).
I use numbers all of the time with custom fairies. I will put a number of points on a crown, or beads on a hat. The numbers can reflect anything. From trips around the sun. To family. To dreams and goals. Numbers create another link between a fairy and her (or his) new home.
4. Charms and tokens
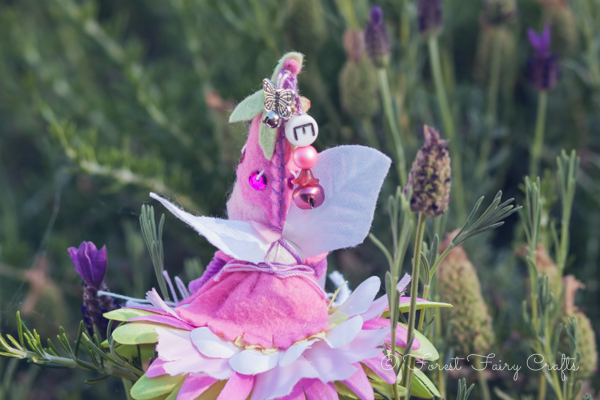
Bead stores can be my toy stores! A little charm can be the difference between an everyday fairy and a custom fairy.
For these fairies, I found beads with the same letter as the child's first name.

I had to treasure-hunt since the letters were buried in bowls of random beads. I need to find more letter-beads :).
I had a bead with the year for awhile which will help me in the future (I need 2014 beads :)). I also have charms with Made With Love on them. I adore charms with HOPE, or DREAM, or WISH on them. My challenge is that I often forget all my choices until the fairy is in the mail. Oops. This list will help remind me.
I also use charms to share a moment in time, favorites, or memories. This birthday fairy has a snowflake charm even though she has a spring birthday. Can you guess why?
I expect fairies to be loved, played with, and taken on adventures. My friend may not have this fairy forever. If she does, though, I want her to remember that this was the year she discovered a new favorite story and sang the songs with all of her heart. I want the fairy to reflect her life.
And my children do keep their fairies in a collection. We have everyday fairies and sentimental fairies :)
5. Stories, friends, and accessories
As I write this, I hear the stories that I hold as I create these fairies. Every once in awhile, I include a written note with the custom features of each fairy. Usually I let the fairy speak for itself. Most people notice matching elements, or discover the number of candles. Every once in awhile, though, I write a story to give with a fairy. Such as with the emotional Fairy Road that travelled with a fairy to a family in a very difficult time. Fairies are celebrations. They can also be a source of great comfort and strength. Fairies have been given to children who need extra support (my son carried one in his pocket the first days of school). They have also been angels in challenging times for health or grieving. Fairies have stories too. Writing a quick note can create an immediate connection between a fairy and a child (or adult).
I actually rarely give fairies a name. I often give that opportunity to the child. Naming is a connection as well. And they often choose a name that I would never imagine on my own :)
Fairies love friends! You can make your own, like Margaret Bloom made this darling deer to live in our Forest :)
We also give stuffed friends with fairies. We might give a cat or dog that looks similar to a family pet. Or magical friends. Often, I don't have time to make my own animal friends (I wish!). Luckily, the world makes awesome unicorns, dragons, foxes, and more that can accompany a fairy.
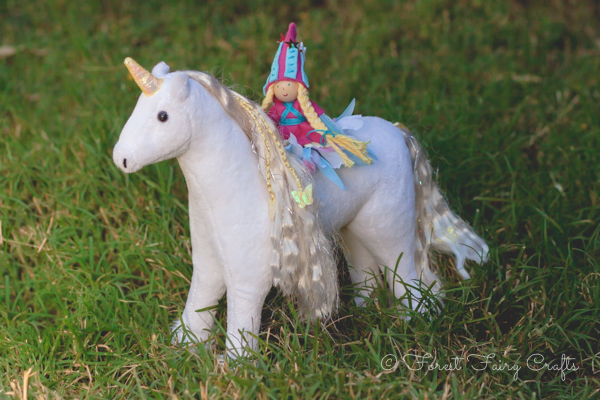
This unicorn is no longer available (unfortunately) the same company makes a similar Only Hearts Club Unicorn. Or you can click here to find many, many unicorns.
We also adore dragons
.
My almost-last idea (I have so many ideas!) is to give a bottle of Pixie Dust/Fairy Dust with your fairy.
Of course, again, I cannot find this exact bottle to share, but these look very similar- Pixie Dust Bottles with Fairy Wand. I need these wands to prop in the fairy's hand!
I just thought of necklaces or bracelets, too, that can travel with a fairy.
Every fairy has their own unique magic. Making your own means that no one else in the world can create the exact same fairy. That is magic right there :)
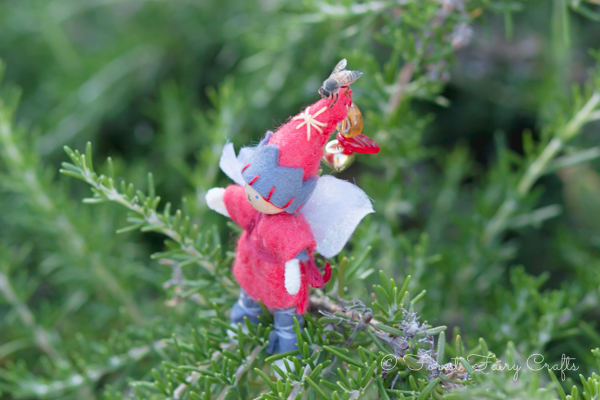
Fairies make lovely gifts. Even bees know the magic of fairies :)
Enjoy creating and giving the magic away!
Bonus sixth way! Of course, a very simple way to customize fairies is to choose a special fairy. A mermaid or zombie or warlock may be just what your friend loves these days. Our book has many, many choices!

All of the fairies in this post use tutorials found in our book. We want to inspire creating of all kinds (these tips are great for gnomes too). I am happy to answer any questions!
Now, I'm off to pack up the Birthday Fairy for a special friend. Share the magic :)
*please note: This post contains affiliate links. Should you choose to purchase any items through links on this post, a small amount returns to the Forest. Your price remains the same. We both win. And thank you!