
Spiderwebs and Spider Craft
My girl and I love Halloween! As we brought out this year's decorations, she really really wanted to decorate her room. In our family, that means creating new goodies!
She wanted to create cute spiderwebs and spiders. They're fun, easy, and quick. My niece visited and she had just finished reading Charlotte's Web so this craft especially inspired her. That gave my girl the chance to be Teacher, which is always fun.
Along the way, we learned more techniques for different looks. We hope you enjoy!
Supplies:
- Pipe Cleaners
- Wire Clippers (or scissors if you don't mind possible nicks in the metal when cutting wire)
- Yarn
- Fuzzy Yarn (we used Festive Fur)
The Making:
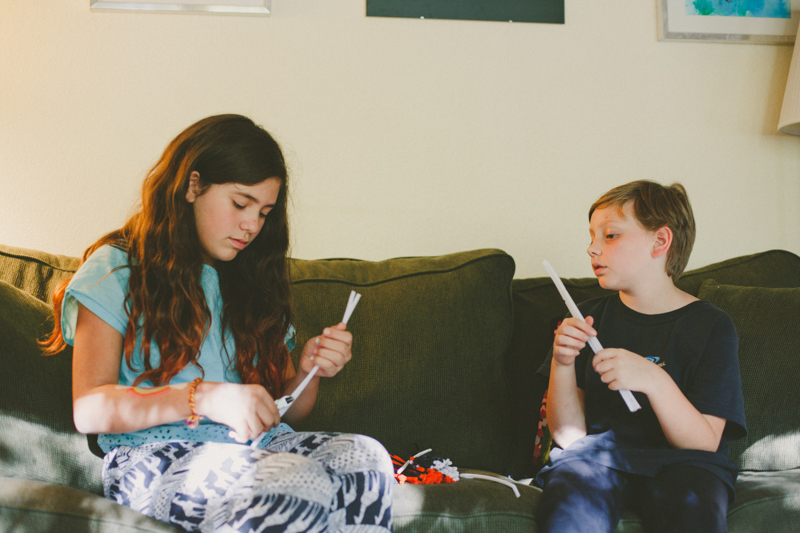
Clip three pipe cleaners in half so you have six in all. If you don't clip the pipe cleaners, they get weak towards the outer edges of the circle. I've also seen this project made with dowels which lets you make larger spiderwebs. The fuzzy pipe cleaners are easier for the yarn to stick in a spread out design.
Lay them them down and tie a piece of yarn around the middle. Spread them out and start winding the yarn around the center to hold them together.

The yarn can be white or black or purple (or any color). You can tie the pipe cleaners together while they are straight and then fan them out. My daughter insisted on tying them while they were all spread apart, which is trickier but still doable.

Start wrapping the yarn around the pipe cleaners, going around one, then the next one and the next one. Give yourself a little space between each layer as you go around and around the spiderweb. It may take a few passes to get the hang of it, but even spiders must practice making their webs (don't they?).
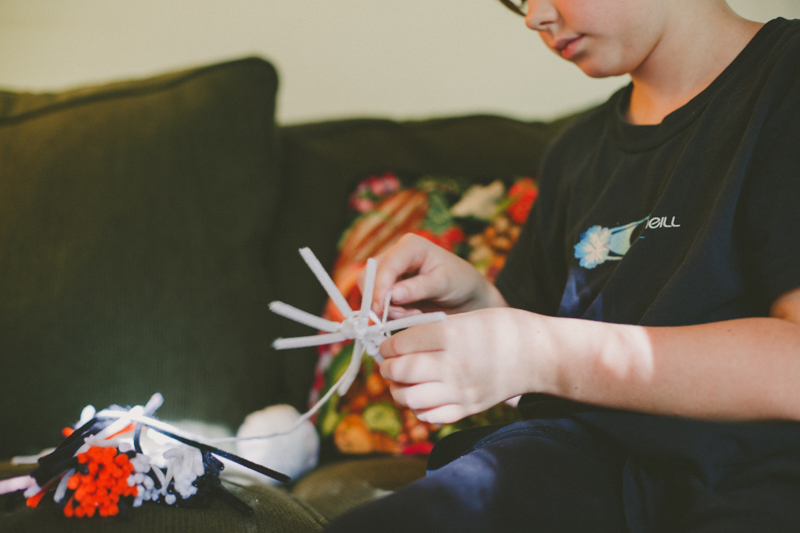

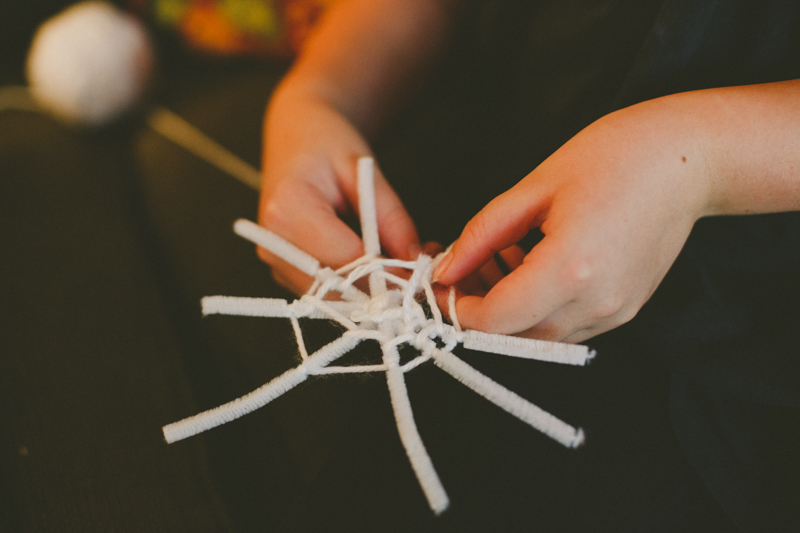
Continue to the outer edge of your spiderweb. Clip the yarn and tie around a pipe cleaner. Leave a little extra that you can use to hang the web.
For the spider, clip three pipe cleaners again to make six. The fuzzy yarn is a little tricky for little hands, so I helped with making the first spiders. We tried two ways that both worked.
First, we wrapped the fuzzy yarn around three fingers a few times. We clipped a length of plain purple yarn and tied around the middle. After our little fuzzy ball was secure, we tied it again around the middle of the three pipe cleaners to give our spider six legs.

Spread out the legs and bend to give your spider personality.
This version of the spider was a little flopsy (which was totally fine) except it inspired us to try again.
This time, we wrapped the fuzzy yarn into a ball. To learn how make a yarn ball, you can visit here. Basically, wrap the yarn around a few fingers, take off your fingers, wrap a few times in another direction, and again, and again. Once you get the hang of it, yarn balls are simple and fun.
Once the ball was about the size of a grape, we laid the three pipe cleaner legs across and wound around them too. Now we had six legs. We could fan them out and wrap the yarn between the legs. This technique made the spider more durable.

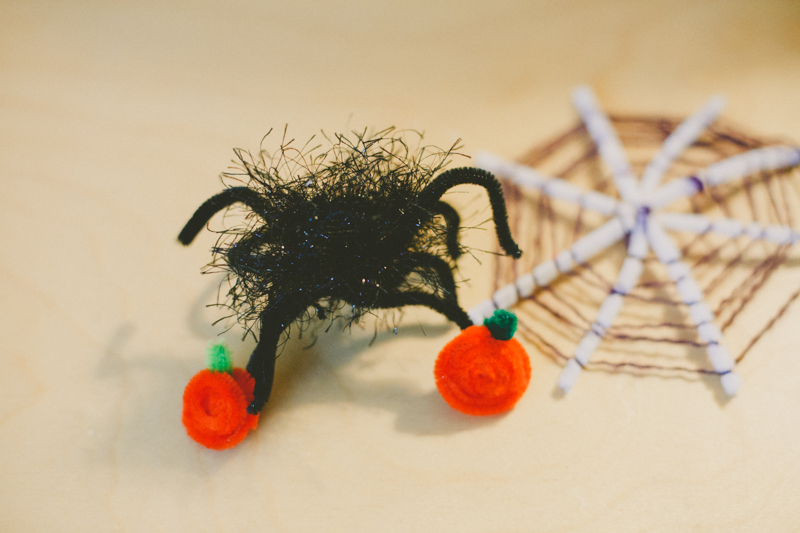
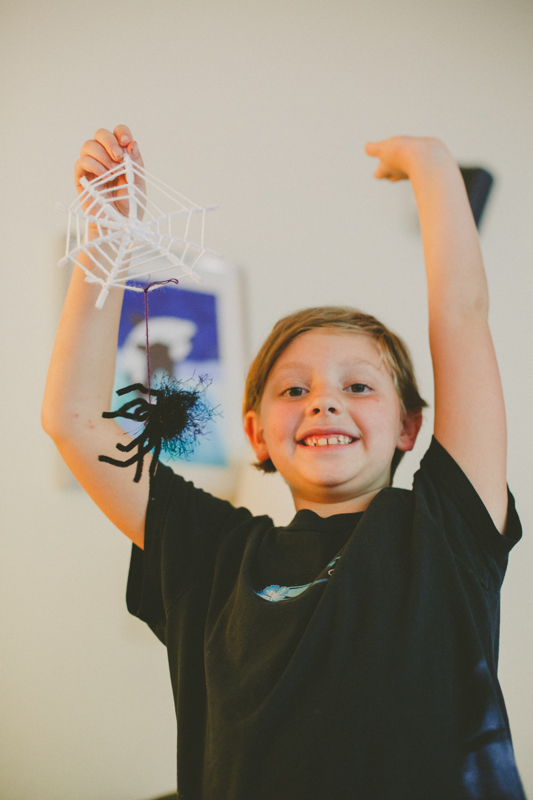
Isn't she cute?
Once our spider was nice size, we tied the yarn around the middle to secure it. The nice thing about fuzzy yarn is that it hides all the knots and loose ends. We tied a strand of plain yarn around it to give a thread/web for hanging.
Hurrah! The excitement kids show when they love their creating gets me every time!
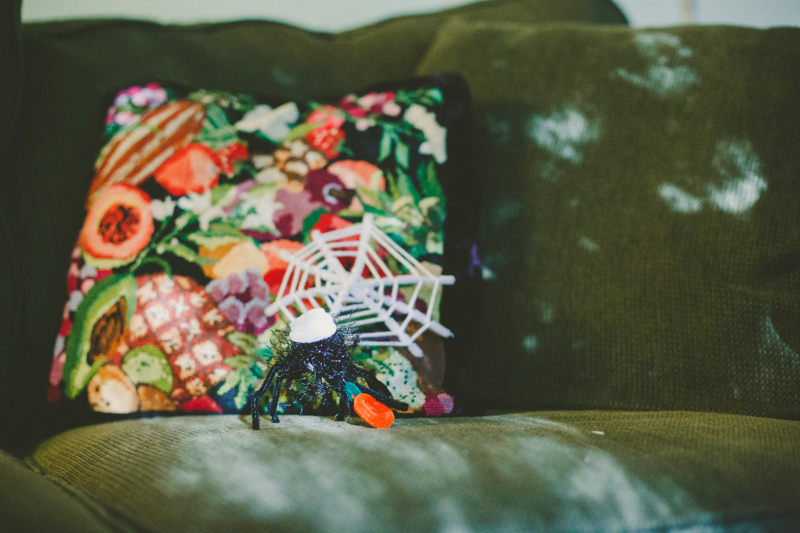
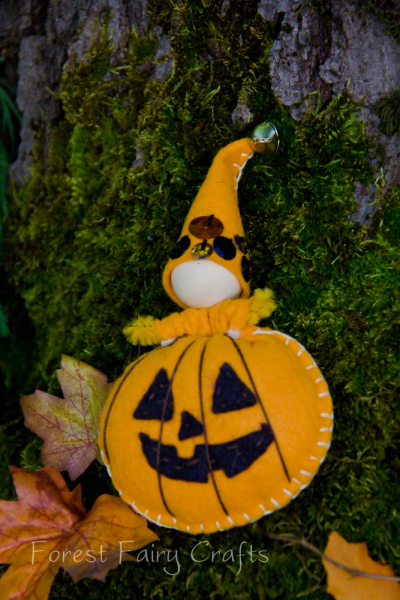
Meanwhile, the girls realized they could spin a piece of orange pipe cleaner in a spiral to make pumpkins! So many pumpkins! A tiny pice of green tucked into the spiral became perfect stems.

What lucky spiders getting decorations of their own!
Then, my favorite part of creating! The kids took off with their own ideas. My niece spiraled a white piece of pipe cleaner into a hat.
And my girl realized white pipe cleaners and white yarn can make an awesome ghost. Little pieces of orange pipe cleaner tucked into the yarn made perfect eyes.

Sometimes, all we need to do is give children the opportunity (and supplies). I am constantly amazed!
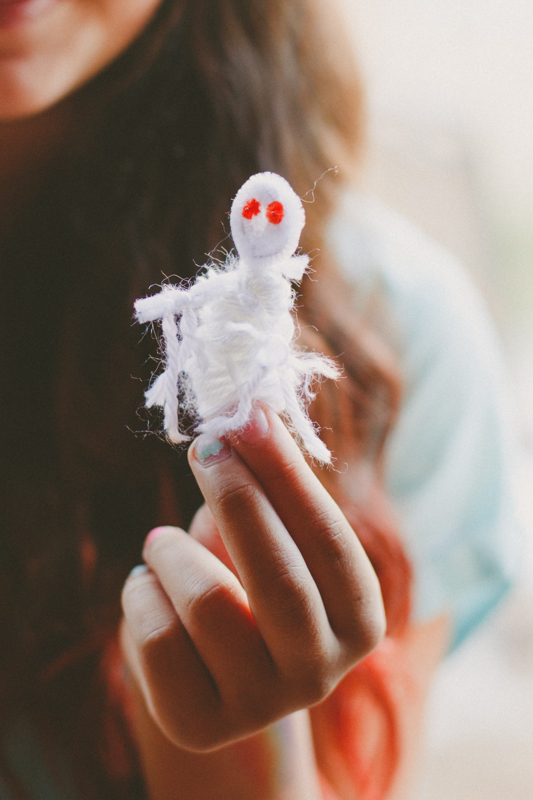
What a darling little ghost!
*I might need to write a tutorial for her ghost because I'm so curious how she made it :)
I hope these inspire your own decorations. A few pipe cleaners and yarn sure gave us a fun afternoon. And now our house is pleasantly spooky!

Zombie Bride and Groom
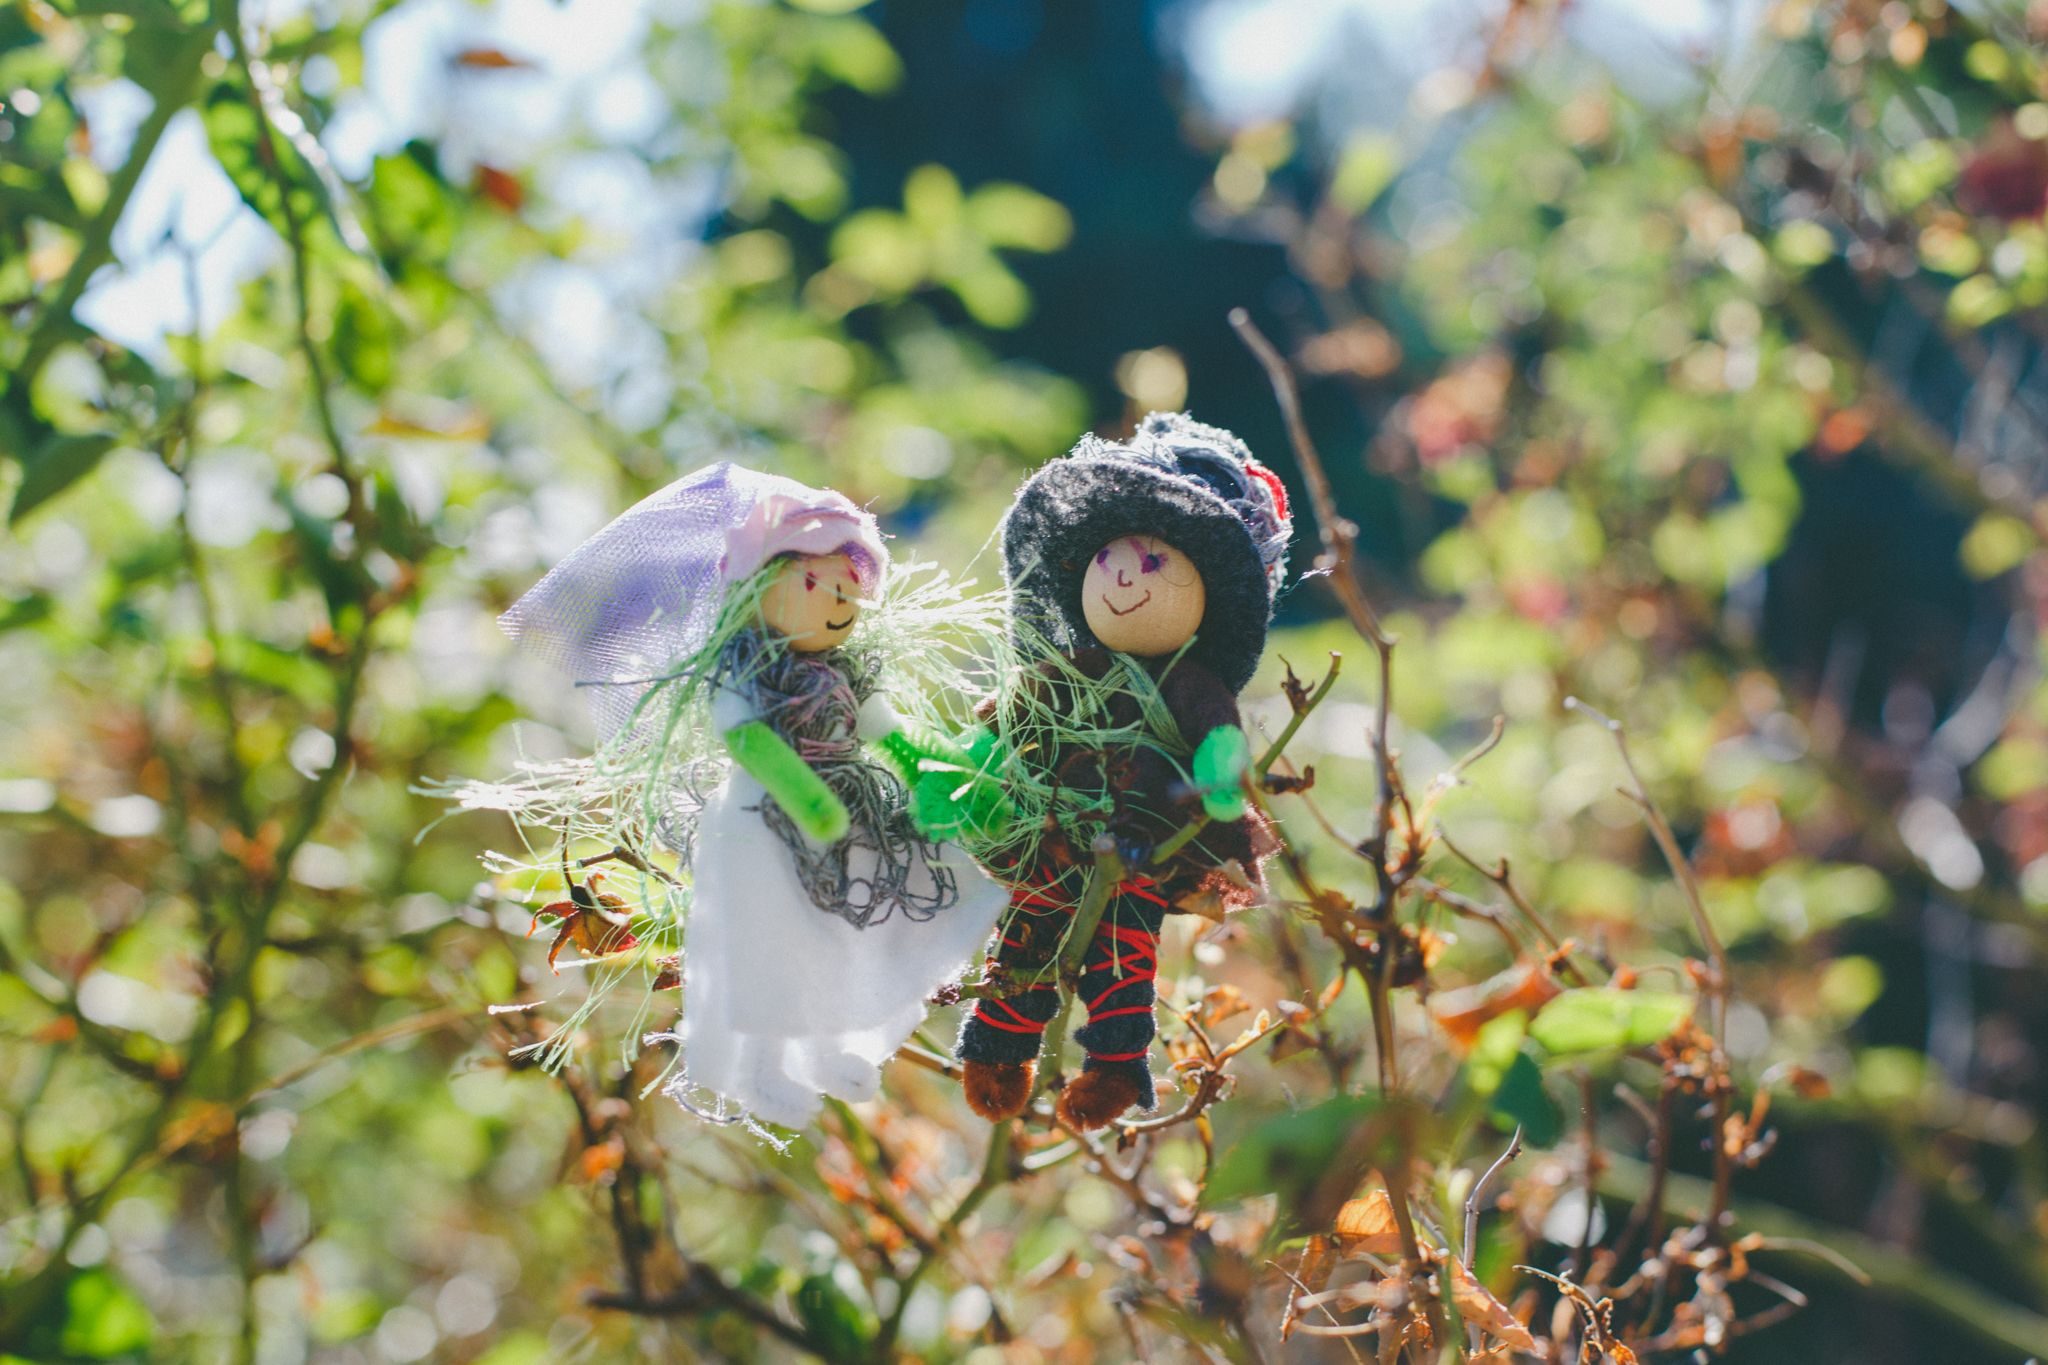
My daughter created this charming couple. We love zombies! In the Fairy Forest, the zombies are the wild children. They embrace mess. Tangles. Layers of rough-cut felt.
These two are cake toppers for a contest she entered featuring Ugly Cakes (yep, it's a real thing) at the Nevada County Fair. She was inspired to make a zombie wedding cake. She could make layers, and drizzle raspberry sauce, and add black icing (yuck)! We knew that a bride and groom cake topper would bring the entire cake together.
We used the zombie patterns from Forest Fairy Crafts. The layer of creepy cloth is easy to find in the Halloween season. I bought a mantle decoration years ago and use it for all of our zombies.
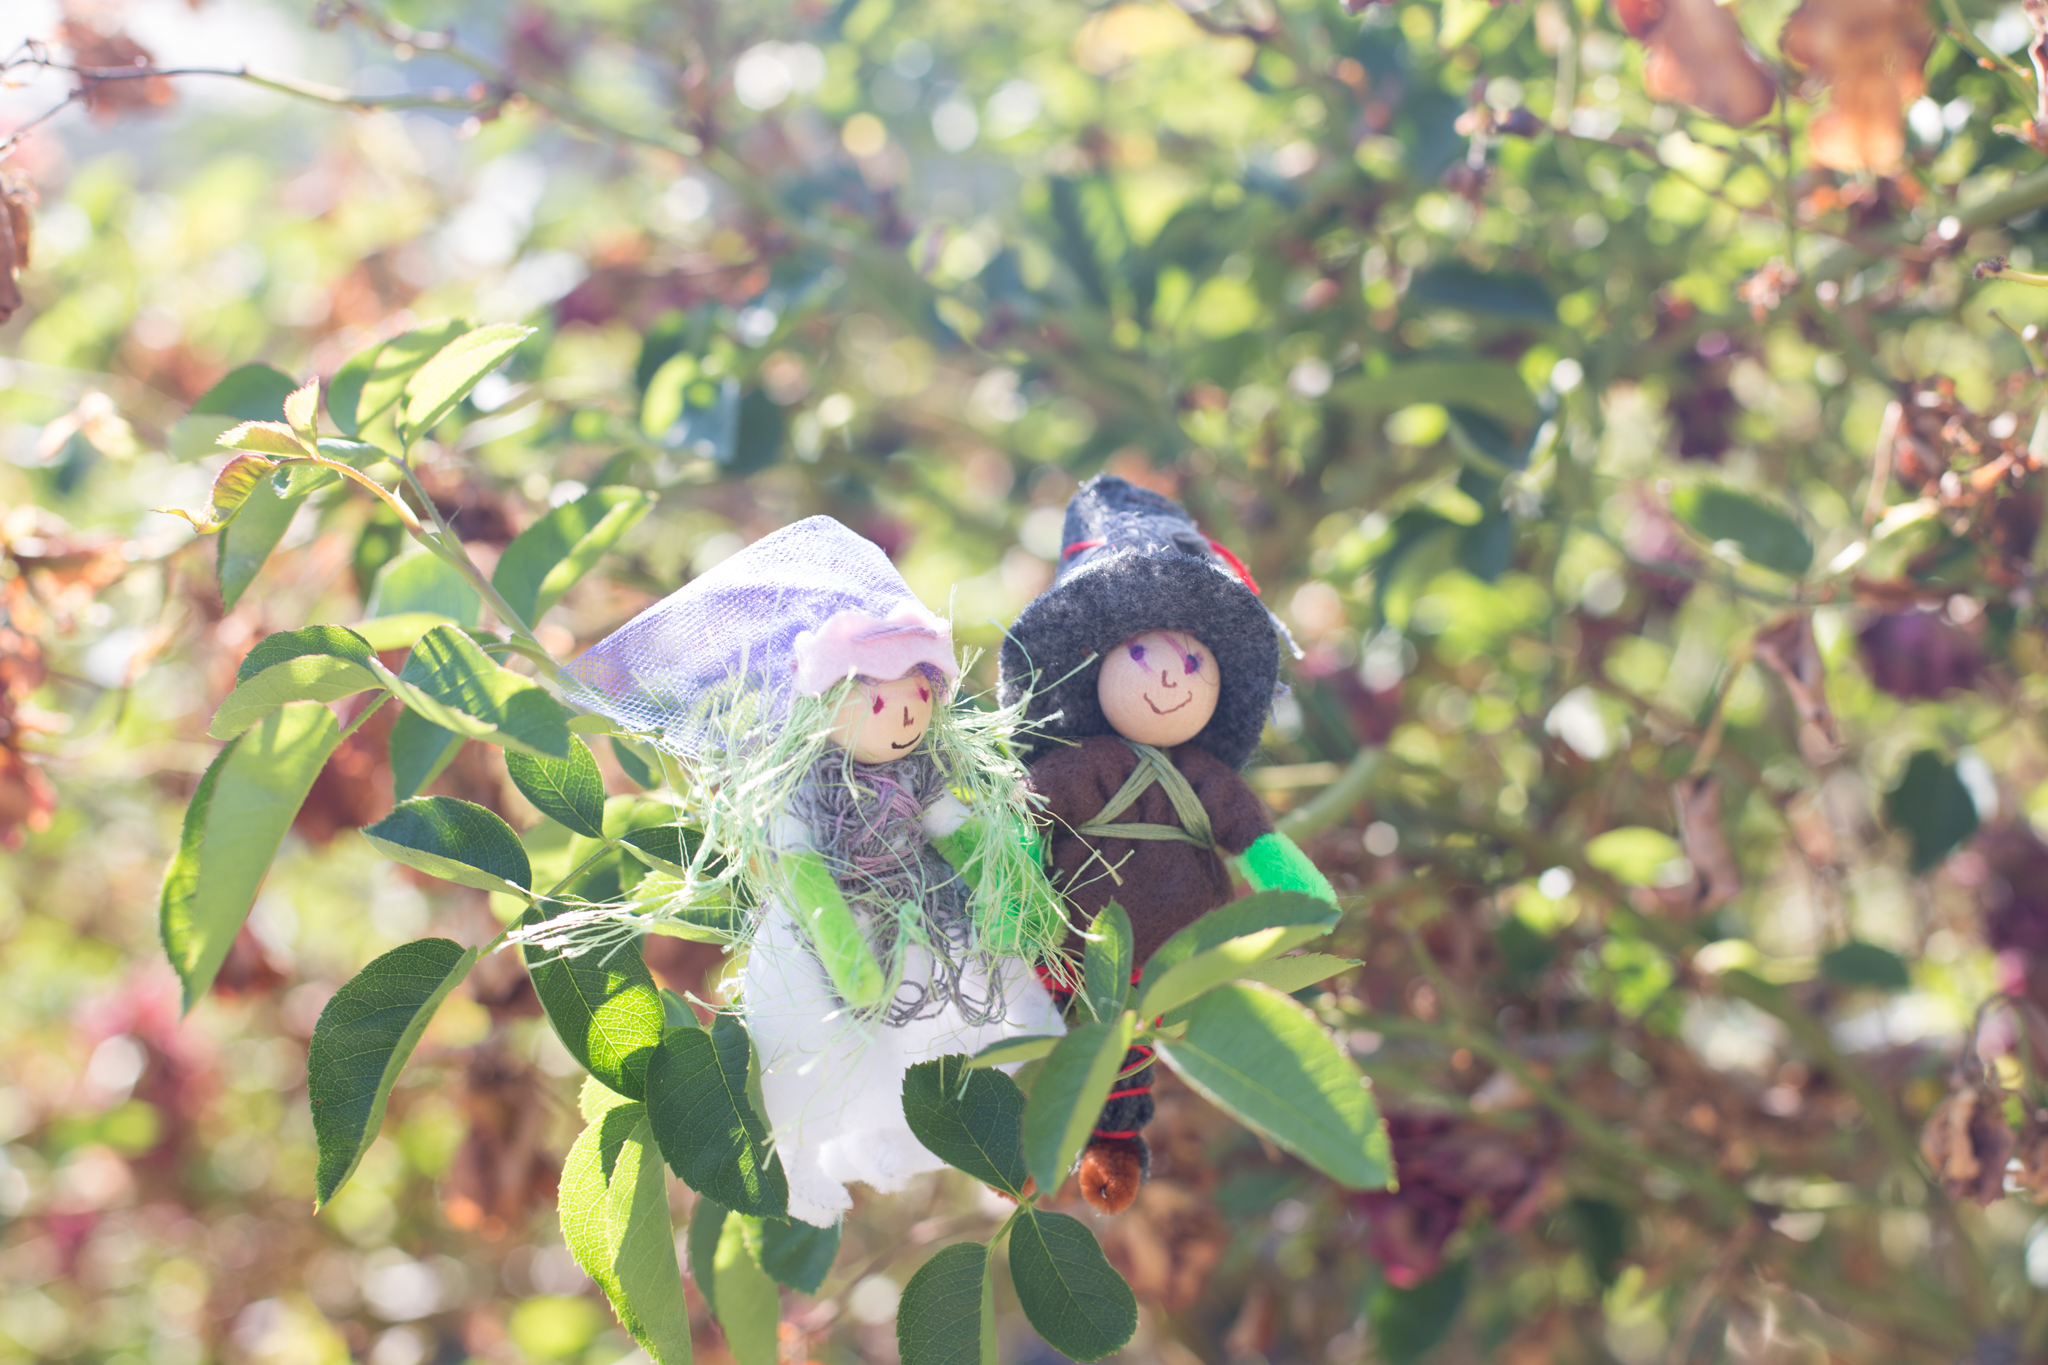
Our biggest challenge was their fancy hats. For the bride, we cut a strip of felt to hold her veil. We sewed the tulle onto felt with a few stitches and ended up securing the back with a stitch as well. Otherwise the tulle stood straight up!
For the groom, we used the same pattern as the witch and pirate hat. Except we created a tube instead of a triangle. I sewed a black rectangle to the top, then clipped around the edges to make it circular. I ended up doing these tricky parts because my daughter was distracted with lots of gooey decorating on the cake.

We wrapped a little creepy cloth around the hat as well. The nice thing is that we didn't have to worry about messy stitching or uneven edges. He is a zombie, after all.
For their faces, we used sharpie and smeared the ink before it dried. Again, we love the freedom of imperfections!
I hope these might inspire you to make happy zombie couples of your own! I ended up going to great lengths to keep them after the cake won a Blue Ribbon. Yes, she won first place!
And here's where they belong. On a zombie wedding cake!

Aren't they wonderful? The little dish at the top protected them from all of that icing.
And, don't worry, no one ate this cake :)
Remember, you have time to come to Circle of Hands Toys and Gifts on Saturday, October 17 to meet me and Margaret Bloom of We Bloom Here. Visit our Events for more information.
*this post does contain an affiliate link to our book. Should you choose to purchase, a small amount returns to the forest while your price remains the same. Thank you!
Happy Halloween!
We send lovely Halloween wishes to your part of the forest (even if you have lots of building around you)!
Asia made these witches with second grade students at the Nevada City School of the Arts (about 7 years old). They were inspired by the felted beads, which became perfect fairy-heads! Students brought them home today and I am sure they will inspire lots of spooky-wonderful-magic!

I fall in love with the little things. For these witches, Asia gave them a little tulle cape. She found darling tiny bats and they hang from each hat.
I wonder if I could sneak into the second grade class just to make my own :)
We hope that everyone is enjoying a safe and magical Halloween! Enjoy!
Autumn in the Forest
Hurrah for changing leaves and crisp mornings. We love the bright colors of fall, the blazing oranges and reds. We also love the shadowy colors of fall, the dusky purples and deep burgundies.
We haven't been able to post that much because we are busy creating these days. We have a few craft fairs booked for December (more on that soon). And the book is selling well! (thank you!) But the fun needs to be shared.
So happy October!
We have new things in the Forest. The first is that we now offer custom greeting cards with our images. When you go here, you can choose an image and design it however you like. You can order one, or a box of ten or more. I am excited to try them. I will be adding more holiday images as we get closer to the season.
We have also been selling kits locally and in our Etsy shop. The response is an overwhelming, "Thank You!" And as I prep for our own holiday crafting around here, I appreciate the effort the kit will save a lot of families. The kits do not include directions (they are meant as a companion to our book). They have supplies to make at least four different projects. If you are crafty, most of the supplies are probably in your stash, but if you are traveling, or just starting to craft, these kits save a lot of time.
My current challenge is choosing colors! I want to keep our inventory simple (pastels, woodland, seasonal) but they we go to the store and find turquoise and magenta. And what about angels? And winter?
Oh, the ideas are endless. The last special one for this month is the Spooky Crafty Kit with purples and black. Perfect for zombies and witches. I only have one left in our Etsy Shop.

I am adding petals to the kits, too, because the petal fairies are so much fun!
Speaking of petal fairies, I have too much fun making my own fairies :)
They're even harder to offer for sale. I fall in love with each and every one of them. Especially her...

She has this little smirk that makes me happy. Every single time I see her :)
I don't really want to send her off to a new home, but she is available here.
I wanted to make a pink and black fairy. And she kept adding details. She wanted sparkles. Gold thread in her hair. A wide-brim hat. And she has this sweet and sly look about her that reminds me why I craft. We can make magic :)
Speaking of magic, my girl has inspired me to create a little for her and her friends. This year, the big new thing at school is animal tails. And this is before the Fox song :). They wear tails to school almost every day. They asked me for cat tails. And Ian asked for an orange cat tail. Their friends want more, so I made a few extras.

And the more realistic, faux fur cat-tail...

I am getting the cat-tail posted (hopefully soon). The orange tail in is our shop :)
And we have exciting plans for the holidays. It's a secret for now, but I am working with one of my favorite magical artists... Lucky me :)
Time to enjoy this fantastic autumn! I am sending great fun and spooky-sparkles your way :)
A Month of Gratitude
The mind is everything. What you think, you become. ~Buddha
With this in mind, I hope to catch a month of gratitude, a little one each day.
We are trying this experiment in the Dragonfly class. I asked them what they appreciate in the world and I chose a theme to write as a sentence on a large piece of paper. I drew a border with a block crayon and a student helped me illustrate.
As with everything, sustaining the effort is the hard part. So I hope I can keep the momentum going!
Today they were grateful for birthdays!
I want to honor their childhood vision. Even though I wanted to steer them towards lovely, poetic appreciation, I also want to catch their world today. I love the beautiful, the quirky, and the silliness of the world through their eyes.
I built a foundation for this activity with our weekly Gratitude Circles. Every Friday we turn off the lights and turn on a battery-operated candle. We sit in a circle. We pass the candle around. Each student shares at least one thing in the week that she or he appreciates. At first, the circle is a stretch for some children. These days, the ideas are easier. Mom, Dad, my school, my friends. We have so much to be grateful for! I cannot wait to see what the month discovers!
I will try for a short daily post, but we may have summaries depending how the week goes :). Happy season of thanks! For me, I am thankful for my children's school (where I teach). Spending time with my boy yesterday, watching the littles with their Big Buddy Class (seventh grade) was a huge inspiration. So much sweetness!

My boy is Batman playing tag. The big kids were so fun and happy with the littles. Makes a Mama's heart happy and a teacher's heart proud :)
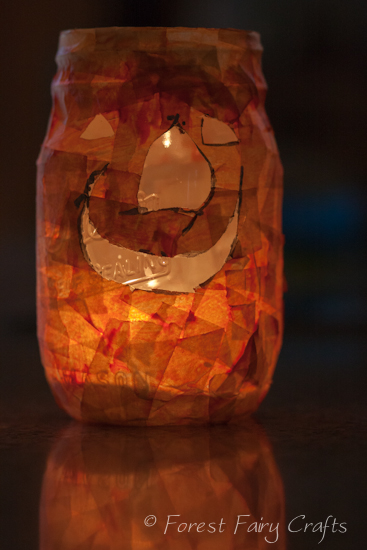
Also as a side note, I had to share this project from Ian's class. His teacher is amazing. She made these laterns with the students. The day before, they taped the jars with masking tape and painted them orange. On Halloween, the children drew Jack-O-Lantern faces. The teachers used an exacto knife to cut the shapes. So pretty! I am going to keep ours out for another few weeks :)
Spooky Fairies and Gnomes
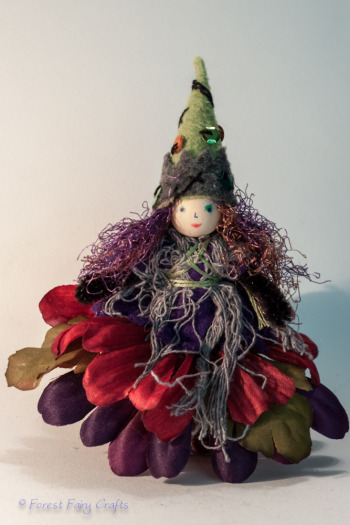
Happy spooky season! I love sewing fairies and gnomes with children. I also love sewing them all by myself! This season, especially, I get to have fun with make-believe! This is one of my favorite fairies to craft- the zombie fairy! Although she also reminds me of witch. In our fairy forest, zombies watch over the night-animals. They love tea parties under skeletal trees. They are playful and fun to sew.
We don't have tutorials for these fairies, yet, but the fairies are currently for sale in our Etsy shop. Tutorials will be available one day (stay tuned). And this week, we have a sale in the forest- 20% off with the code SPOOKY12. I know it's too late for this Halloween, but these little fairies are keepsakes that will stay with your family for years.
I also give these fairies as tree ornaments for my friends! ...just an idea for you :)
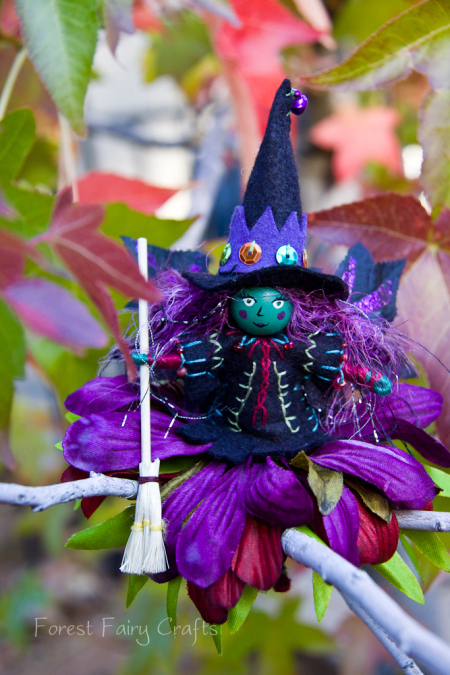
So, without further delay, here's my witch this year!
She makes me smile! I was distracted when I glued her hair, which happens in a house with young children :). So, when I tried to braid, I counted way too many strands of yarn. I could cut them, or... fishtail braids! I hadn't tried them before, but they are perfect for her. I especially love the purple and green together. She also chose the purple shirt. I orginally had black felt cut, but got my pieces mixed up with the zombie girl. This witch wanted to be sweet this year!
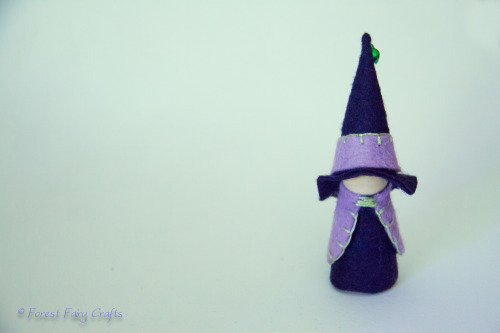
I also made a few witch gnomes.

They were so fun! We will get to share their hat-tutorial with you in the coming months because I do have a little trick for them :). One has found her forever-home, but the other two are still available.
So the spooky corners of the forest are getting ready for their favorite time of year! We wish you a happy, fun, safe holiday!
Fairies and gnomes are waiting for you here.
Oh, and we have a Pumpkin Fairy Craft Kit. You can leave the face pieces off for a harvest-season fairy. Or save it for next year. Fun stuff!
Happy Halloween!

Halloween Skirt
Just in time! I finished the tutorial for the Halloween Skirt! Of course, the skirt can be made any time of year with different fabrics.
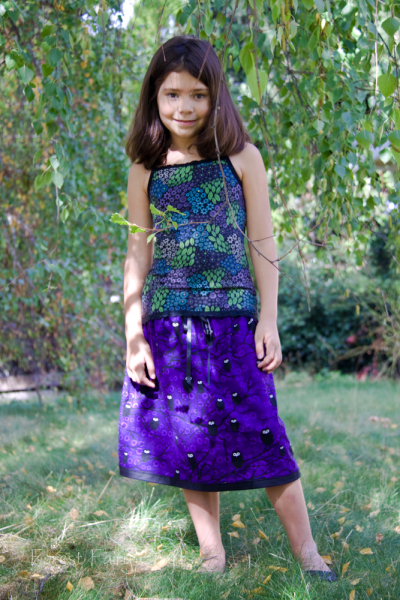
The fabric inspired this skirt. Black owls with white eyes sit on winding black branches. Anika has already taken it twirling :)
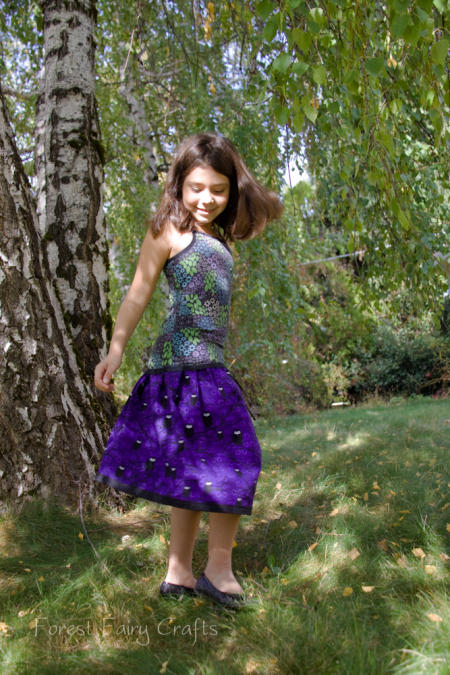
I have a feeling we'll be seeing the owls all winter :)
Our free tutorial has photographs for each step. Enjoy!
Click here for the Halloween Skirt Tutorial pdf
All tutorials are property of Forest Fairy Crafts. Please contact us for use permissions. Thank you!

In case you are wondering why is says Sweet Little Skirt #2 when you cannot find #1. . .
I took photos of another skirt project over a year ago and never got to the tutorial. This skirt will be #1 :). Hopefully posting soon :)

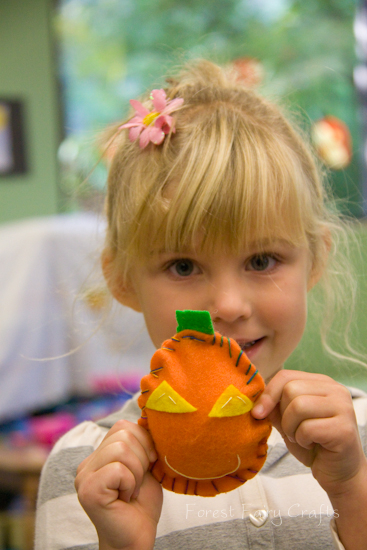
Moody Pumpkins with Groups of Children
On Tuesday, I sewed the Moody Pumpkins with the youngest students at our school. I am the art teacher on those days, and their all-day teacher was a little skeptical when I said I was bringing sewing into the classroom.
"With real needles?"
Yes. Real needles.
Because this is precious.
But I don't walk into a classroom with a pile of felt and a pincusion prickling with needles. No, that would be a disaster. A big part of crafting with children is being prepared. So, to get ready for this project, I was busy the night before.
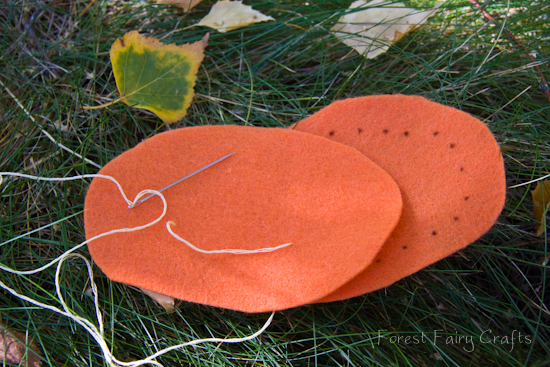
- Thread 15 needles with the outside thread (in this case, variegated rainbow crochet thread- see our Supply Hints)
- Cut pumpkins (back and front)
- Cut stems
- Cut lots of little yellow felt triangles so children can choose
- Thread needles with yellow embroidery thread for the face (though I learned that the rainbow was cute, too, when I was short one pumpkin the next day)
- Sew the mouth by knotting, pulling through, testing to make certain that it will fit, then knotting loose on the other end of the mouth so the pumpkin is ready for eyes.
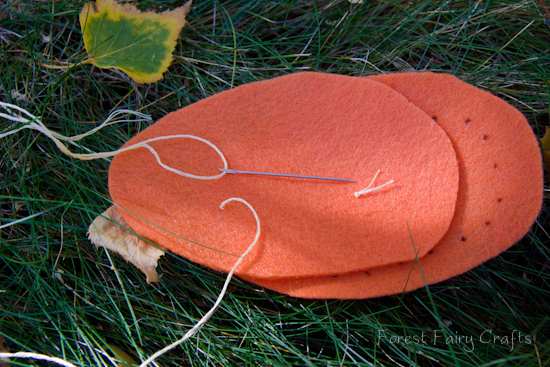
- Leave the threaded needle with the pumpkin- tuck into felt so it won't prick anyone.
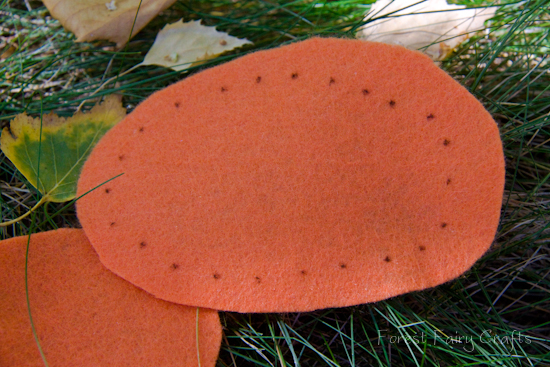
- On the back of the pumpkin, draw little dots for each spot the child will place the needle. This turns the sewing into a dot-to-dot, with the needle always poking into the next dot (whip stitch).
- Safety pin it all together with the smile on the outside so the children can choose their pumpkin.
- I do not try to make them all look the same. No, the fun is in unique pumpkins!
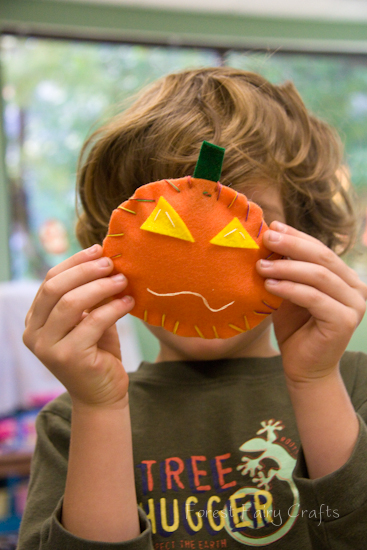
Some were tall and some were wide. All became special :)
I chose felt for the eyes on this project because it was faster than buttons. The child chose the triangles and an adult sewed the eyes on with a few stitches. We tied off the yellow thread. We sandwiched the stem between the pumpkin pieces. We used an already-threaded rainbow needle and did the first couple of stitches to anchor the stem. Then we modeled a stitch or two before handing the needle over to a child. We work one-on-one with children this young because most need us to hold the felt (see Tips & Tricks).
They sewed about 3/4 around, then stuffed the pumpkin and sewed it closed. Many students were amazed.
"I thought we had to glue it."
And, "I made a stuffie. Look, look, I made a stuffie!"
My favorite quote came from this little guy.

You can't hurry when you're sewing. The needle is sharp. Sewing is a quiet activity.
Why do I sew with children? Slowing down is precious.
Have fun! The Moody Pumpkin tutorial is here as a pdf download. All tutorials are property of Forest Fairy Crafts. Please contact us for use permission beyond sharing with friends and linking back to our site.
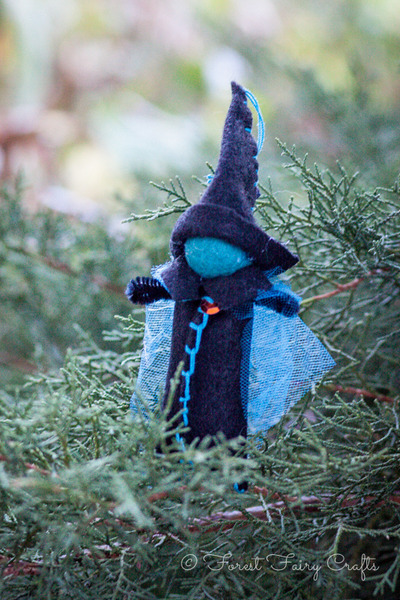
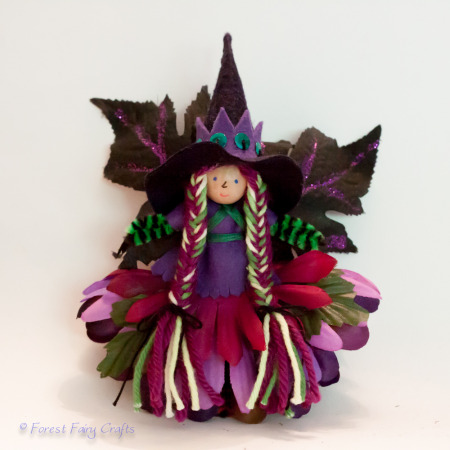
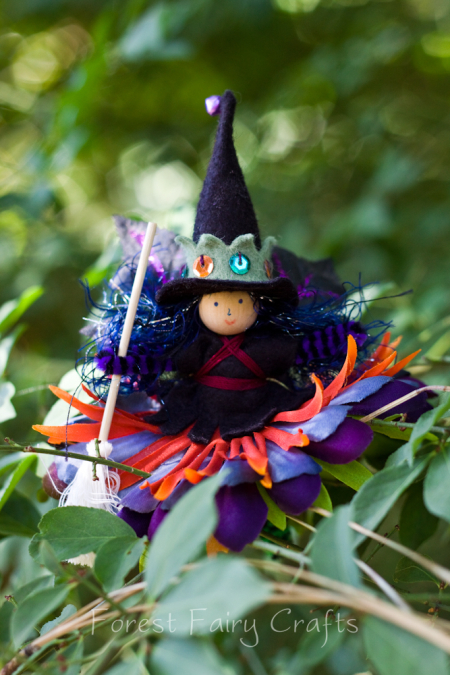
Fancy Fairy Witch
My fancy fairies inspired a friend to ask, "Could you make a fancy witch?"
Yes, yes, yes. I'd love to craft a fancy witch. And she was delightfully fun to create. Magic :)

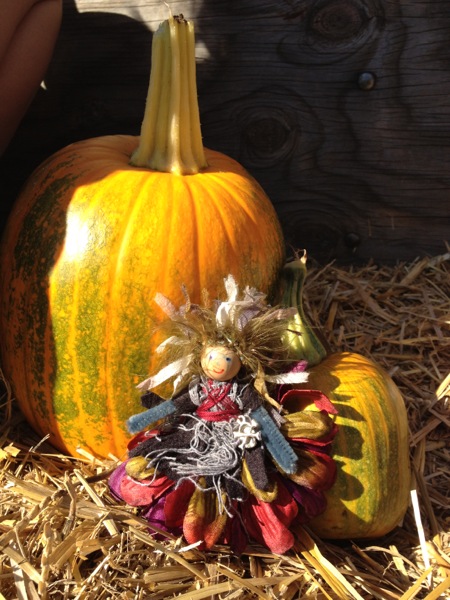
Forest Fairy Zombie

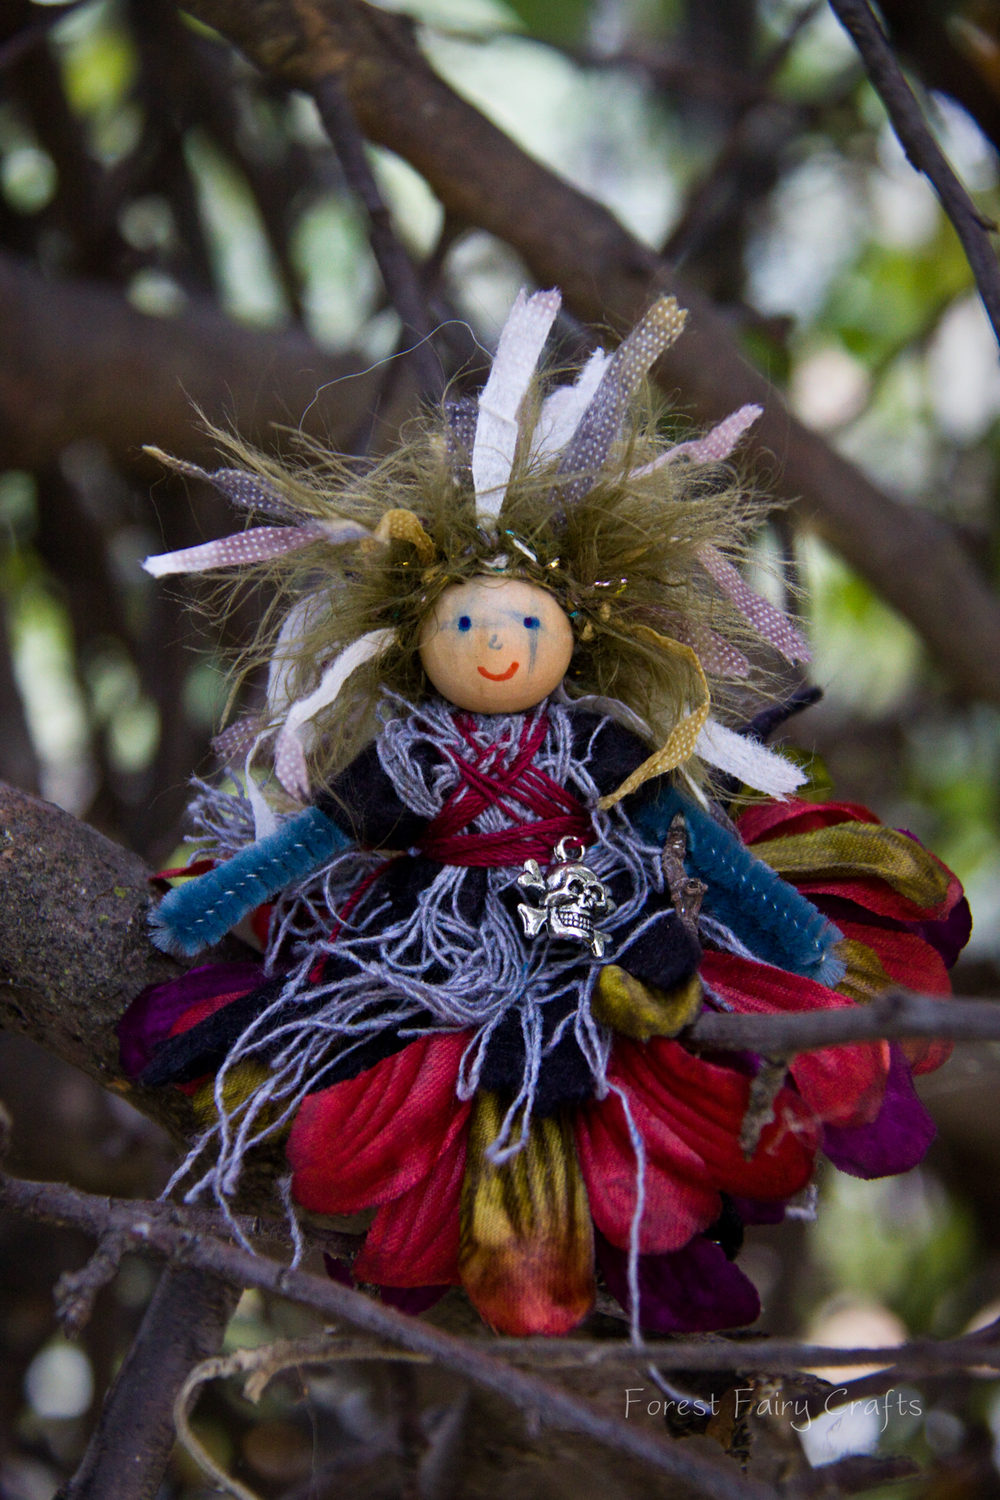
She lives in a spooky hollow among fallen trees. She dances in the rain. She only goes to one Fairy Ball a year, the Halloween Ball. Where she is crowned the Zombie Princess. :)
A Season of Witches
I made witches this weekend. I brought them to Make Local Habit (local store). I am constantly amazed how I can take similar supplies and create completely unique fairies. They take on a life of their own :)
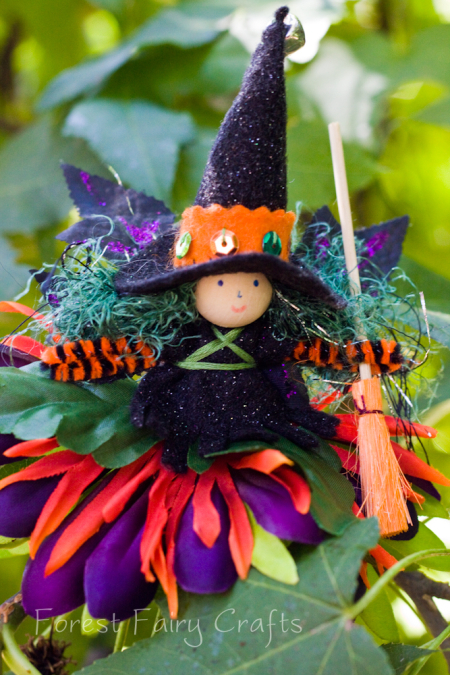
She had a sparkly black felt for her hat and tunic. Together, they are sweet happy magic :)

I plan to make a few more in the next week before I move on to Harvest Fairies and Holiday Fairies. I have one on my waiting list that I am busy sewing. If you are interested in having a witch of your own, contact me soon.
The spooky season passes way too quickly :)
