
Handprint Gardens
Children loved creating these gardens. A few steps steps led to wild, wonderful gardens. We are using them for Grandparents Day cards, but they would be lovely any time of year. In fact, for winter, we might make trees with fingerprint snow and bright birds. One idea leads to another :)
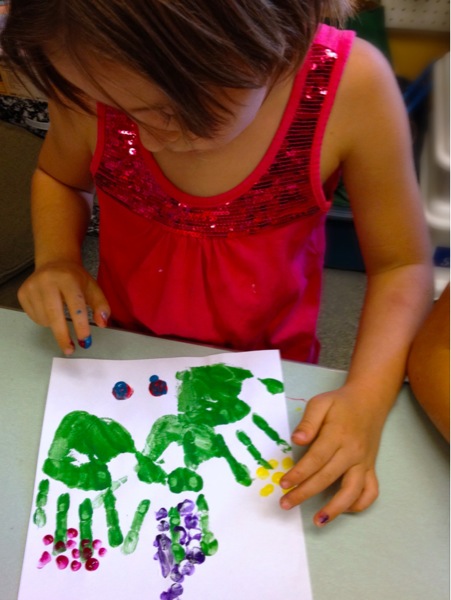
Step one: make handprints with green tempera paint (or acrylic, if you a brave). We made three prints of the same hand because I was working with an entire class and they needed a clean hand to turn on the faucet. At home, you could print both hands. Let the handprints dry.
Aside: I later realized we should use a color for the background- perhaps and layer of green over blue for ground and sky. Since we printed onto white paper, I used beeswax crayons to lightly shade ground and sky. The first graders painted their petals, bugs, and clouds before I shaded- both ways worked. A few children shaded their own. I had to watch that the colors wouldn't get too thick and cover their handprints. Next time, I will have them shade grass and sky first.
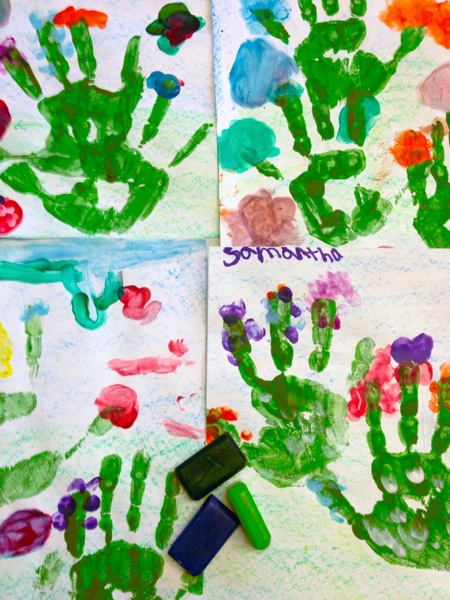
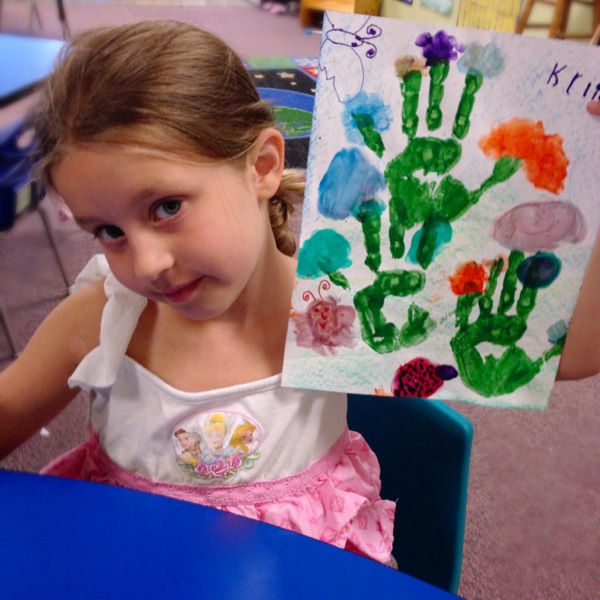
Step two: Add petals, leaves, and clouds. Use fingers! They loved dreaming up ways to create butterflies and different flowers like lupins. we did not use water to switch colors. Instead, we wiped our fingers clean with a paper towel. This kept the paint from getting drippy. I did supervise so they didn't start smearing too many colors together, or covering up their handprints with heavy petals. Let your colors dry.
Step three: Use markers to add embellishments. Add butterfly details, ladybug legs, and spiders.
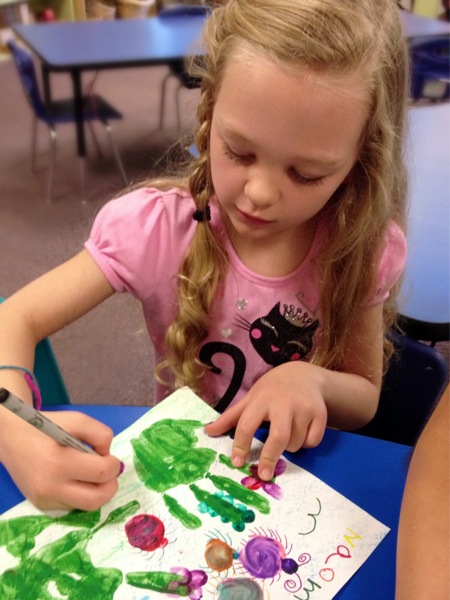
I told them that they could only color small areas- a few wanted to cover the paper with marker. I also told them to stop when the details started to overwhelm the painting. An art of childhood creativity is learning when to say Done. For personal projects that reflect their inner vision, I let them go until they say done. But every once in awhile, I say done.
A lovely moment within their gardens were the stories they shared while they drew. In my home, I would scribe their stories to go along with the illustrations. Spiderwebs and ladybug tea parties and rainbow butterflies. Beautiful!
We are gluing the gardens on colored paper-mats and writing I love you on the other side. Another adorable addition that everyone appreciates is a few open-ended prompts, like I love when my grandparents _______ and I hope they take me to the __________ and My grandparents are good at ________.
My favorite art catches personality and the moment. My favorite art is shared with proud smiles. These gardens grow wild and wonderful.
I hope you have fun painting them!
 "Pin It")
Wish Upon a Watercolor Star


The school year begins with hopes and dreams. I love to make dreams come true. So we create beautiful crafts to catch our dreams. Focus on them. Believe in them.
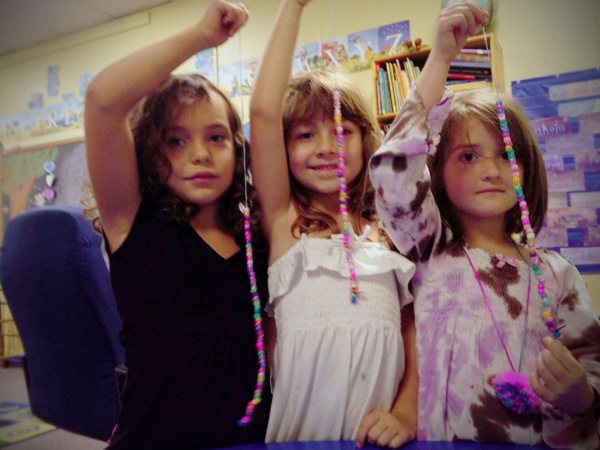
These watercolor stars were a three day project with our twenty kindergarten and first grade students. On day one, we painted stars. Day two, we strung beads. Day three, we wrote wishes. Along the way, we discussed ideas. What do we want? Play, discovery, friends. What fun, imagining our wonderful year!
Of course, you can wish anytime, for any reason. A wishing star would be a lovely party favor, or a baby mobile, or a rainy afternoon craft. Endless possibilities...
How do we make them?
- Cut a star with medium or heavyweight paper. We used watercolor paper. You can draw your own, or have your child draw a star, or use a free printable like this one on Spoonful.
- Children paint the star on both sides. We used watercolor paints, giving children yellow, red, and orange colors. You could use any paints you like, or markers, or colored pencils. Decorate your star.
- Thread a tapestry needle to a long piece of crochet thread. A tapestry needle has a blunt tip. It. Is perfect for children who say, "But I don't know how to sew!" Tie a bead to the ends of the thread so the other beads won't fall off.
- Have fun beading! Add beads and sequins to make a rainbow hanger for your star.
- Punch a hole into the star. Thread the needle through, tie off, and snip.
- Children write their name on one side, and their wish on the other side of the star. Hang your star in a special place. Enjoy your dream shining over you!
I encourage children to dream for emotions more than things. They may want money for our school (they know times are difficult) or toys or more books. I ask, "Why? How would you feel?" We want the emotion, not the stuff. Because maybe we can find fun and adventures another way.
At the same time, I change my ideas to catch a moment. I have a star-wish that my daughter made when she was three. Her wish?
I want to wish for a pony
That captured her. At three. Her sweetness. And that is my dream. To create projects with children that celebrate childhood. My dreams are coming true :) Enjoy!

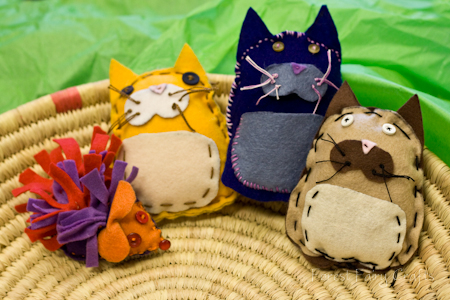

Plush Ornaments
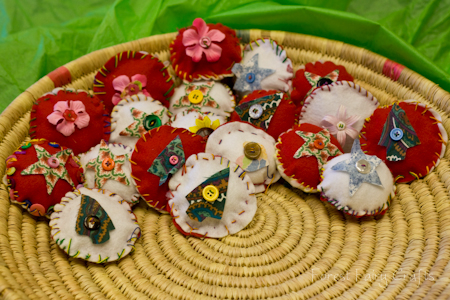
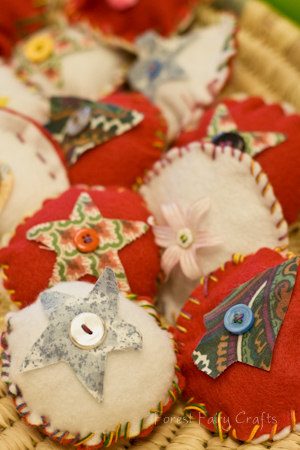
Our kindergarten class sewed these ornaments with Asia. They are simple designs that chlidren love to create.
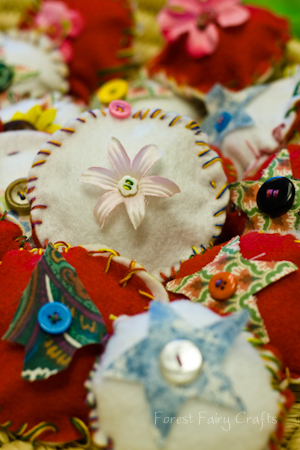
Lovely decorating!

Christmas Fairies
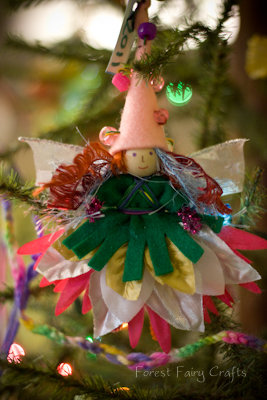
These faires were created by our kindergarten and first grade students at the Nevada City School of the Arts. We provide guidance, but they provide the magic :). Each fairy becomes a sweet reflection of the child who created her (or him). We made seventeen over the past three days. We hope you enjoy this glimpse of Fairyland.


Using the Waldorf tradtion of allowing children to imagine the faces . . . this boy liked his fairy to keep his fairy whimsical. I used to leave all of the faces blank, but students walked away and drew a face with the nearest pencil, then came to me crying when it wasn't what they imagined. So we compromise and I draw faces for most students.

And one Christmas Goblin (my student's words as he wanted red eyes)
Happy Holidays!
The tutorial to make the girl versions of these fairies is available in our Etsy shop. If you're interested in the boy version, send me a conversation through Etsy and we can figure out a way to help you (I haven't created his tutorial yet :)).
Many thanks to Miss Becky, Miss Marin, and Asia for helping make Fairyland possible!
