
Happy Saint Nicholas Day

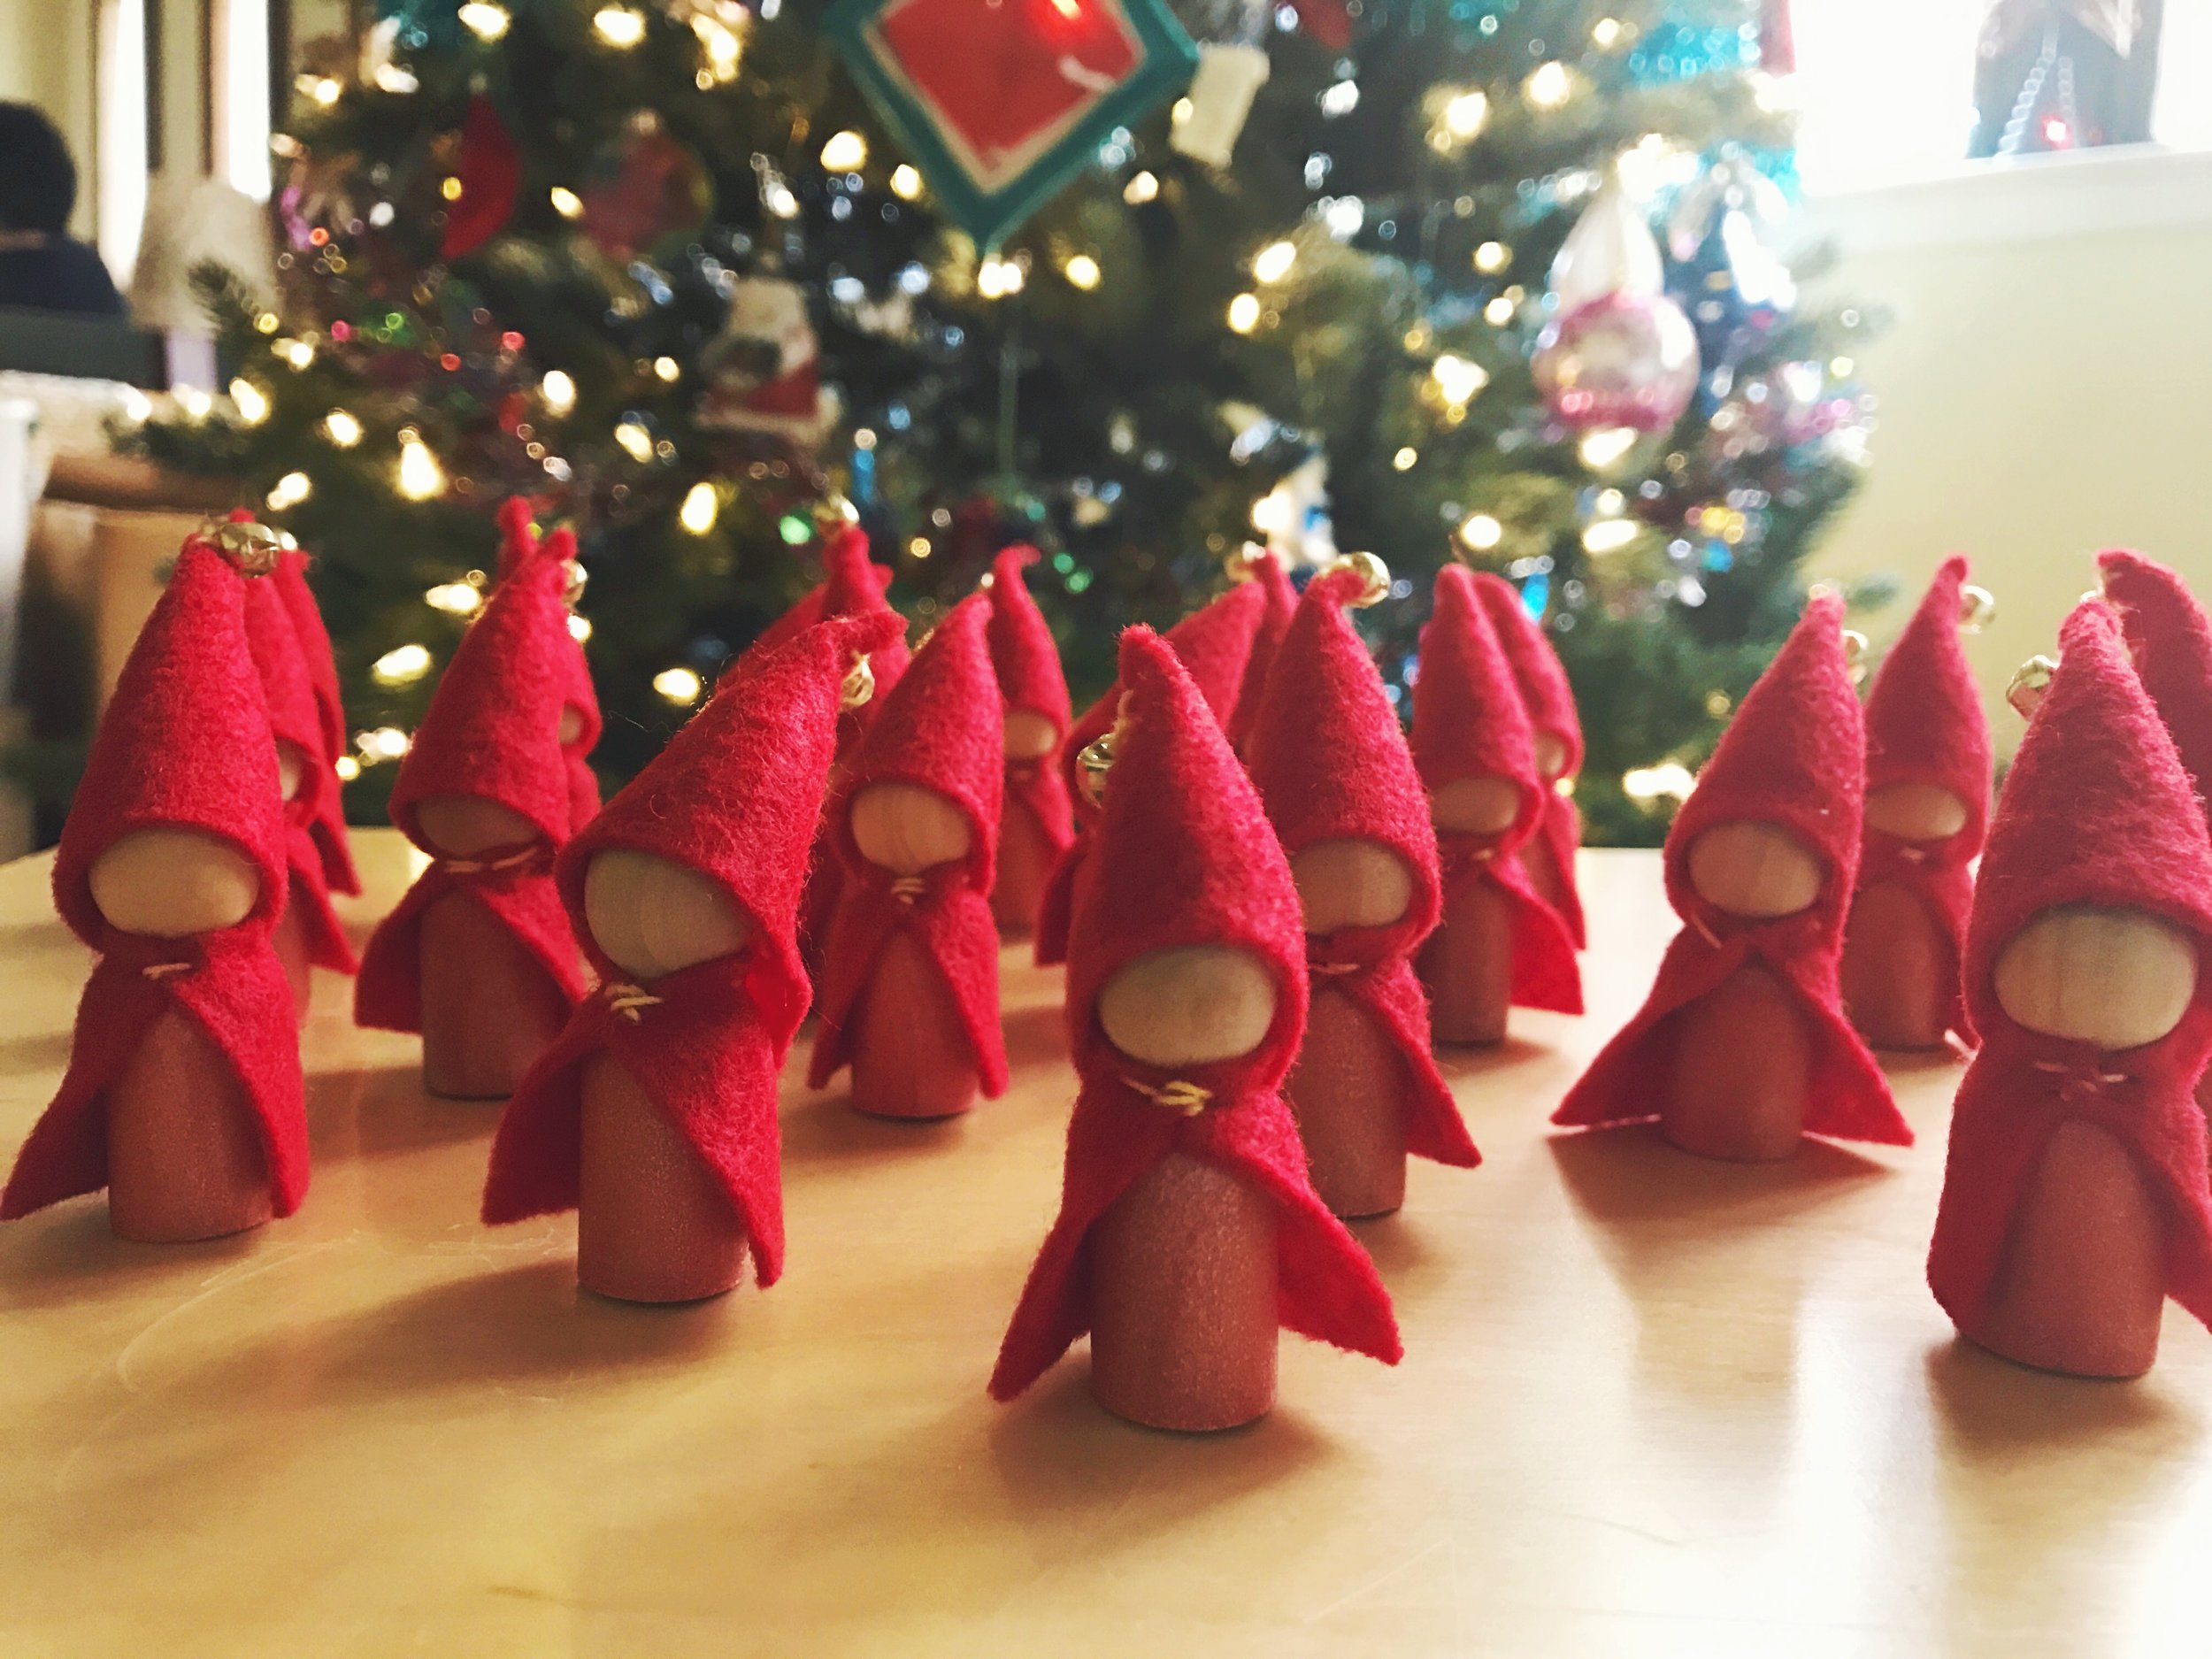
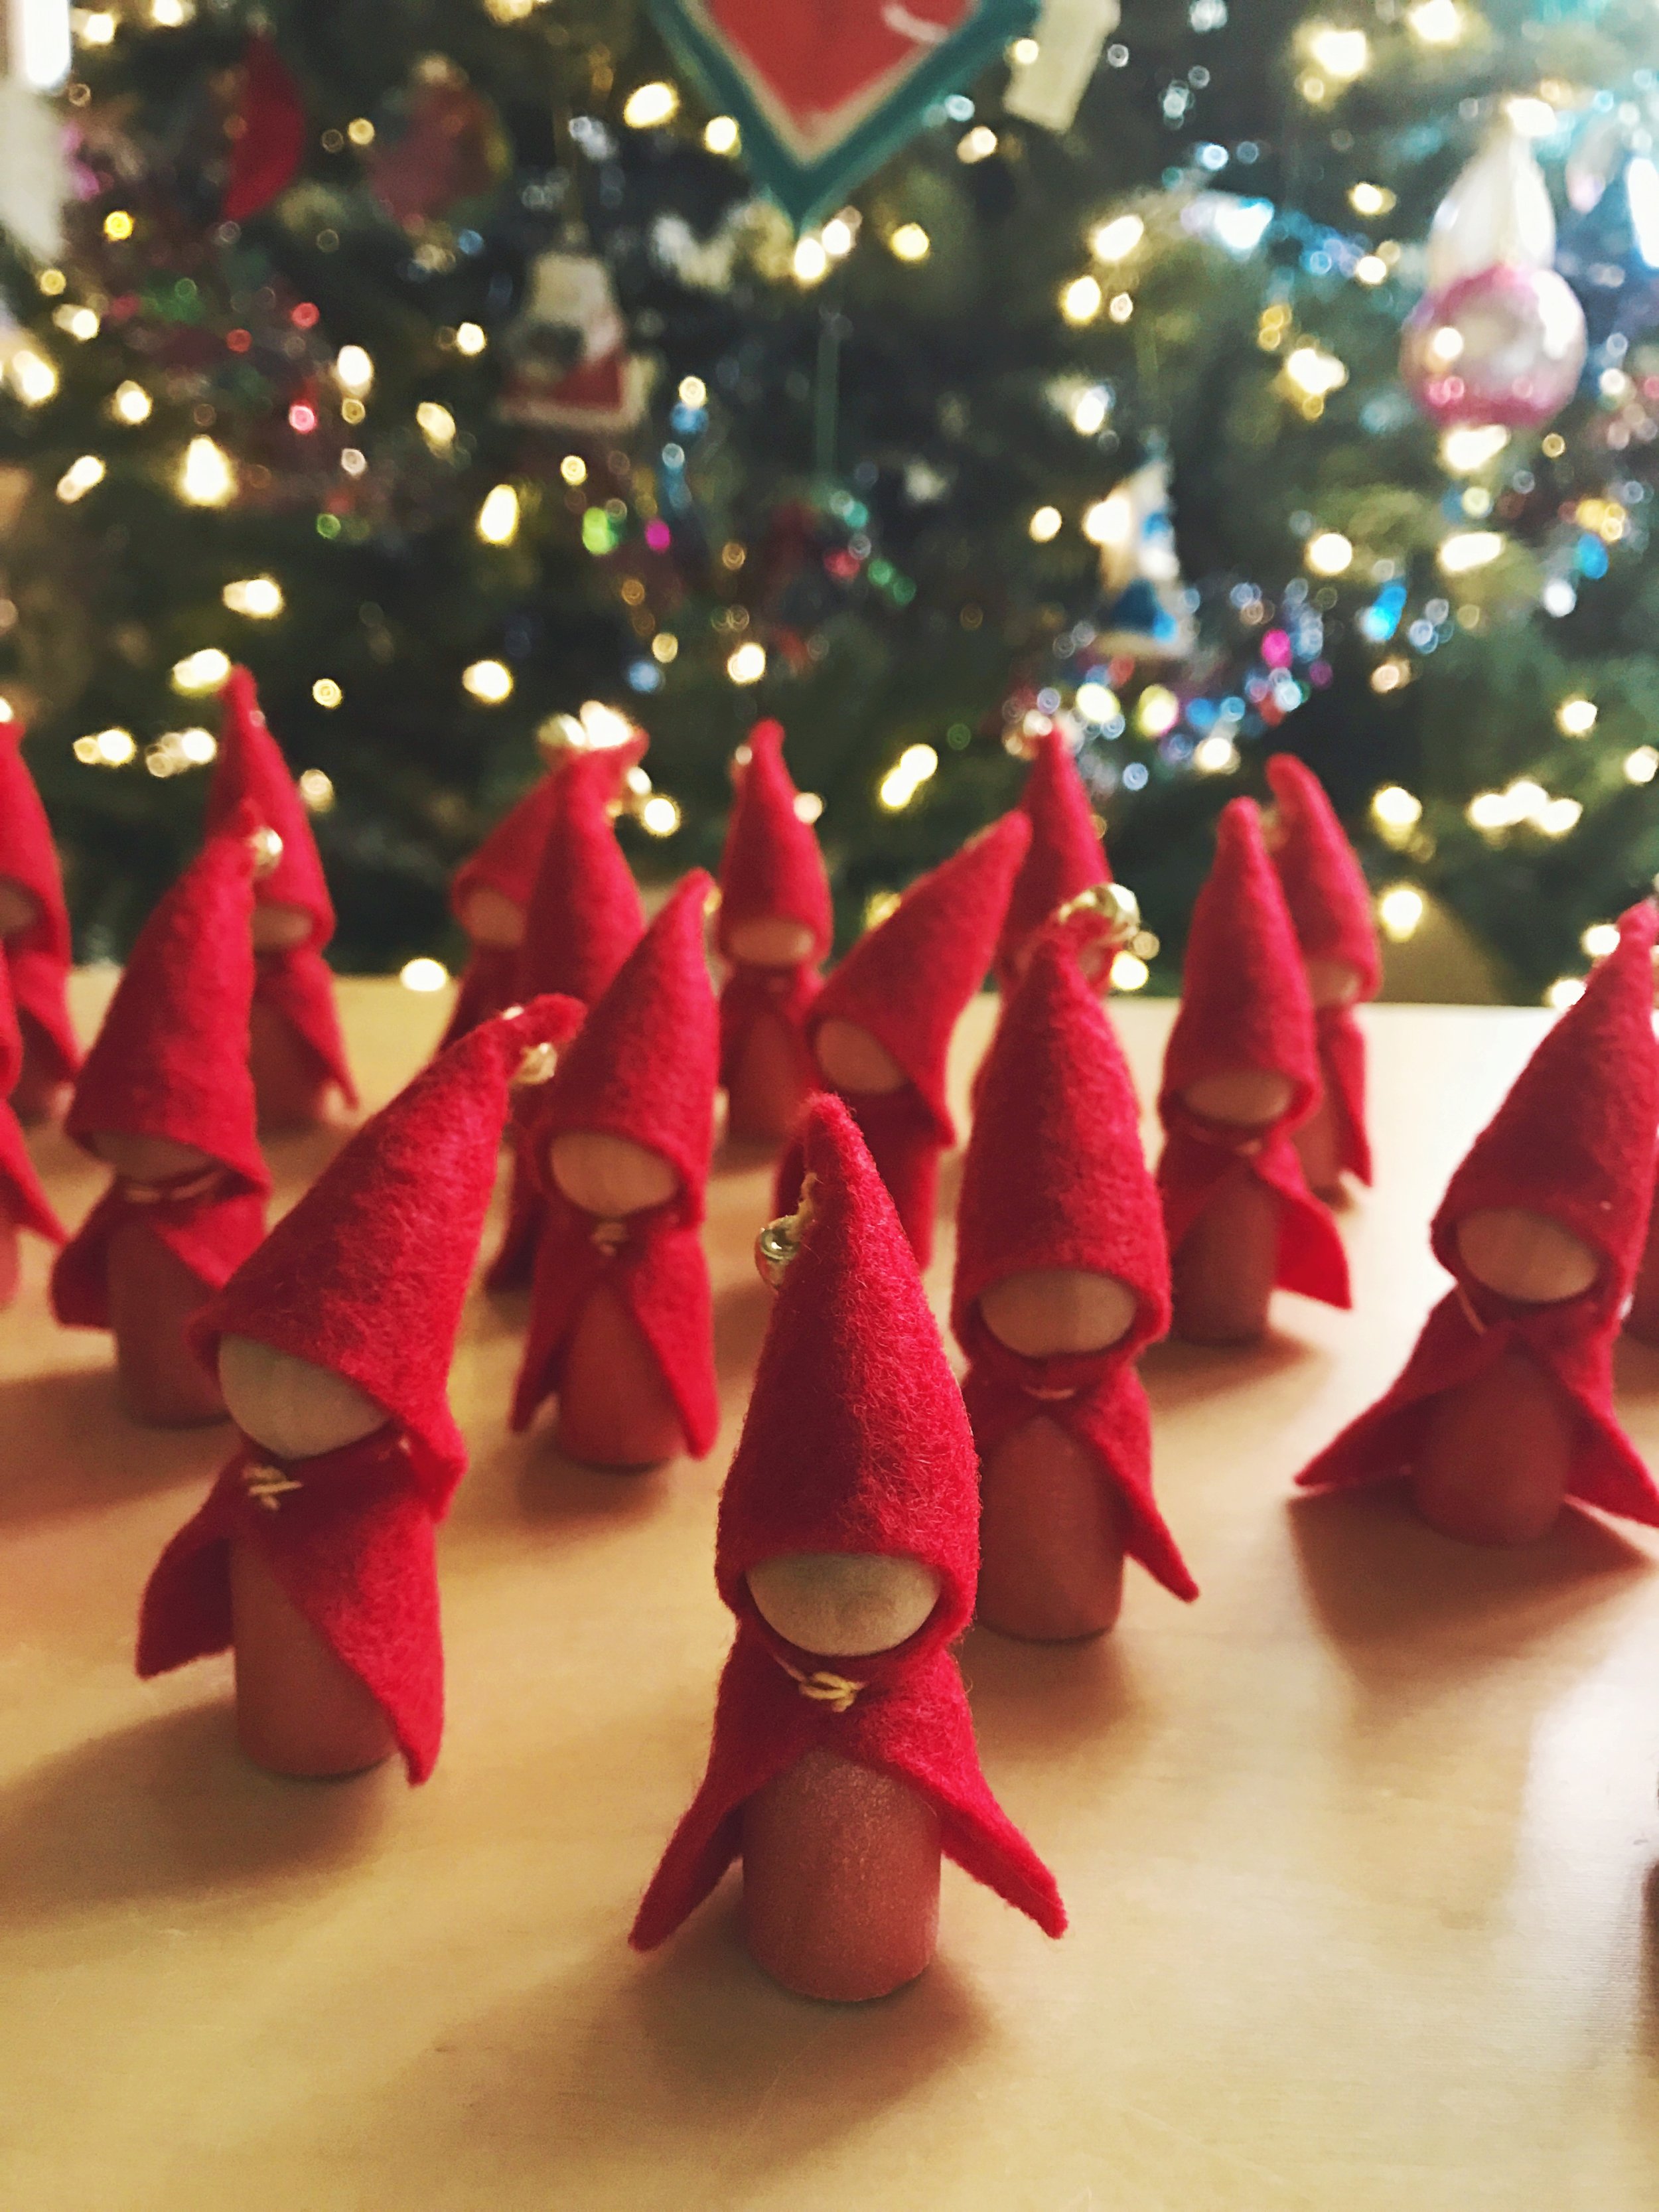
Little gnomes are off to help my son's class celebrate Saint Nicholas Day! Many European children leave a sock, stocking, or shoe by the fire in the hopes of a little treat from Saint Nikolas.
My dad is Czech. We celebrated Saint Mikulaš. He visited on a carriage led by a white horse. An angel and a čert (pronounced chert) traveled with him. The cert is a trickster devil who told Saint Mikulaš all the naughty things while the angel told all the kind, good things. You hoped that the angel had more to say than the devil :)
My son is learning about celebrations all around the world. He left slippers that they sewed together out in class today in case Saint Nicholas visited their school (spoiler alert! he did!)
These little gnomes didn't take very long for me to make. I kept things simple while my son was at school one day. In case you need to make many gifts quickly, here's how I made this collection.
- I painted the bases with watercolor paint and just a bit of sparkle with Iridescent Watercolor Medium mixed together.
- While the paint dried, I cut a little triangle and adjusted until I liked the height for the hat. I cut twenty by holding one and cutting felt without tracing. After all, imperfections are part of the fun. I sewed them with a few stitches, starting from the bottom and going up. I added a bell at the top and tied off. Set aside and repeat nineteen times.
- The capes are simple rectangles. I could have curved the corners at the bottom. Saint Nicholas wears a long cloak anyway. I cut a long strip of felt, measured around the peg person to find the right fit, then cut twenty. I tied a knot in the thread, started in the back midway, then ran a stitch towards the front. I secured onto the dry peg dolls with a few stitches at the front (pulling the first stich to help gather the cape a little). I ran a few stitches towards the back and tied a knot. The hat would hide all of the knots. Repeat nineteen times.
- Finally, I tucked a tiny bit of stuffing into the hat and glued onto each little gnome. Magic!
My daughter helped sew a few hats and cloaks. Thank you!
I have found, when creating larger projects, it helps me to complete all of an element at once. Say, sew twenty hats, instead of trying to complete one character at a time. It sure is gratifying to see them all come together at the end!
My son came home bubbling with stories about everything he found in his little stocking. Here's to all the gift-givers and magic-makers :)
*this post does contain an affiliate link. If you choose the iridescent medium, a small portion returns to the forest while your cost remains the same. Thank you!
Five Ways to Personalize a Fairy


Fairies love to be gifts. Or special projects. And each time a fairy is crafted, they love to be unique. Fairies have a special magic. Because you create a fairy, you make her (or him) unique.
I give fairies as gifts all of the time. For new babies to hang over the crib, for birthdays, for children in difficult times. I have a few tricks for making a fairy unique. I hope they help you craft a fun fairy for friends, family, or yourself.
1. Favorite Colors
Ask about colors. Ask a parent or child about their favorite colors. Especially in childhood, colors change quickly. Use the colors to inspire your felt and petals.
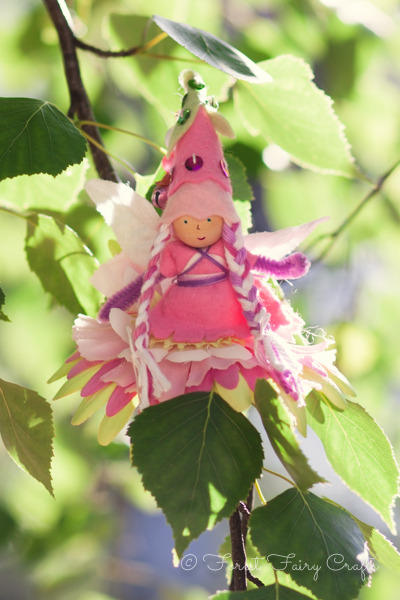
Children often grow from pink, purple, pink, and more pink, to red, black, and dark purple.
Every age is fun! And using another person's favorite colors is fun.
2. Matching features
Match the family, match the details.
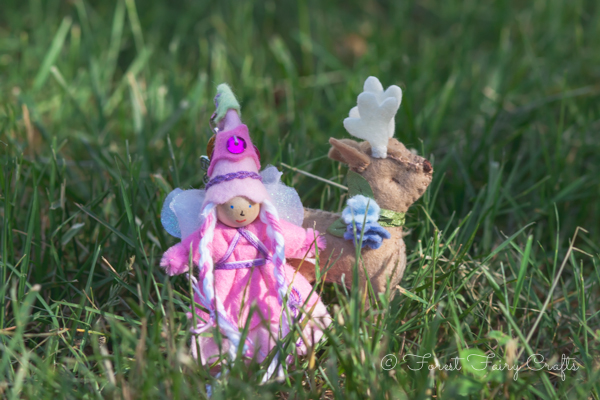
 Fairy Deer by Margaret Bloom at We Bloom Here
I love fairy families! We create big sisters and little brothers. I will use a little gnome for a baby or toddler. Children love when the fairy is part of a family!
Matching hair color and eye-color always delights children.
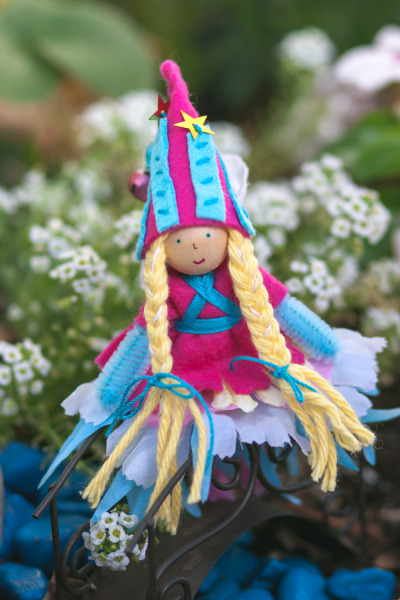
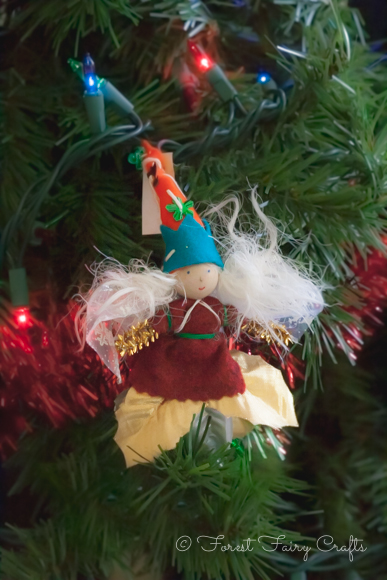
I gave this fairy yellow hair to match my friend's hair. I threaded a strand of sparkly white in to add texture. Of course, I love colored hair for fairies- pink! green! rainbow! so I don't often matchy-match. Still a fun plan now and again :)
3. Using numbers
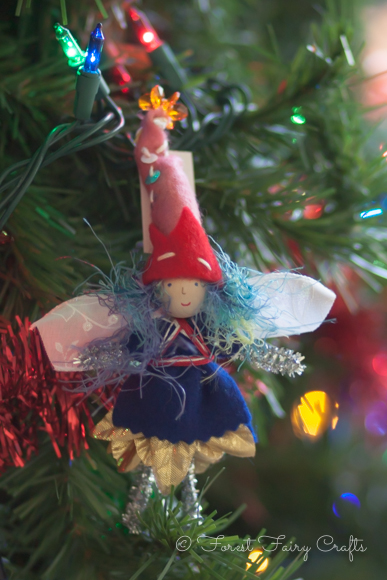
Numbers add a layer of significance to any fairy. The birthday fairies (pictures above with the blue candles on her hat) always have the number of candles matching the number of trips around the sun. Numbers can be used in other ways, too.
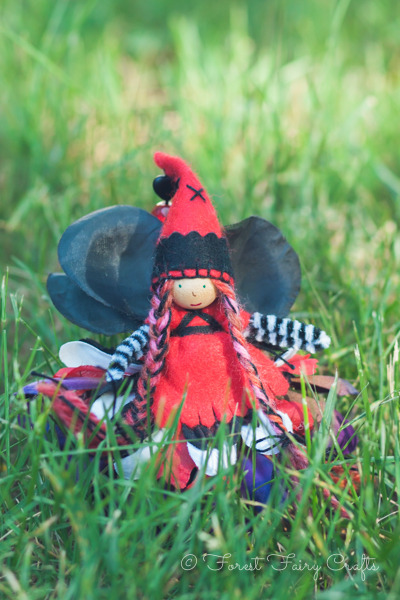
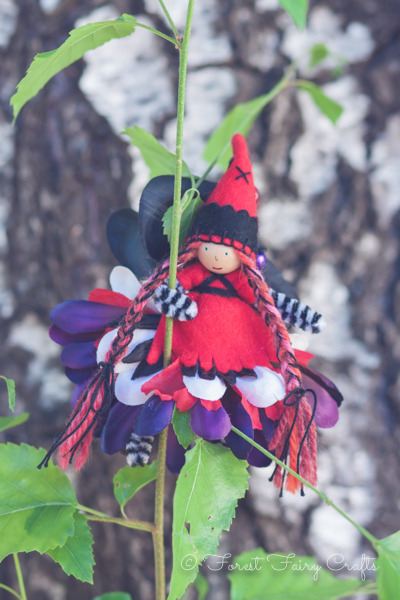
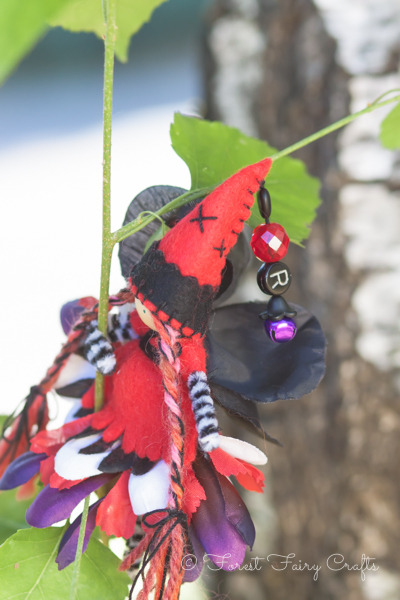
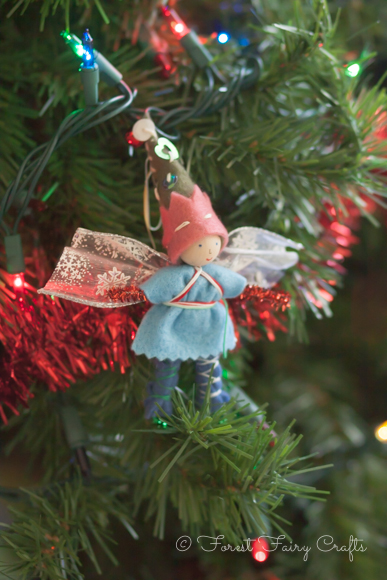
For this fairy, I sewed four Xs on her hat for the four people in her family (they wrap around so you don't see all of the Xs at once).
I use numbers all of the time with custom fairies. I will put a number of points on a crown, or beads on a hat. The numbers can reflect anything. From trips around the sun. To family. To dreams and goals. Numbers create another link between a fairy and her (or his) new home.
4. Charms and tokens
Bead stores can be my toy stores! A little charm can be the difference between an everyday fairy and a custom fairy.
For these fairies, I found beads with the same letter as the child's first name.
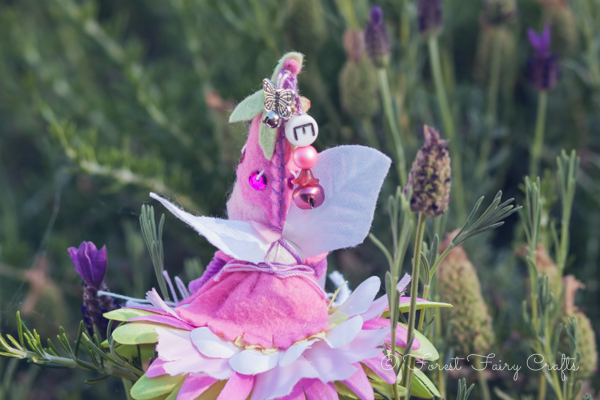

I had to treasure-hunt since the letters were buried in bowls of random beads. I need to find more letter-beads :).
I had a bead with the year for awhile which will help me in the future (I need 2014 beads :)). I also have charms with Made With Love on them. I adore charms with HOPE, or DREAM, or WISH on them. My challenge is that I often forget all my choices until the fairy is in the mail. Oops. This list will help remind me.
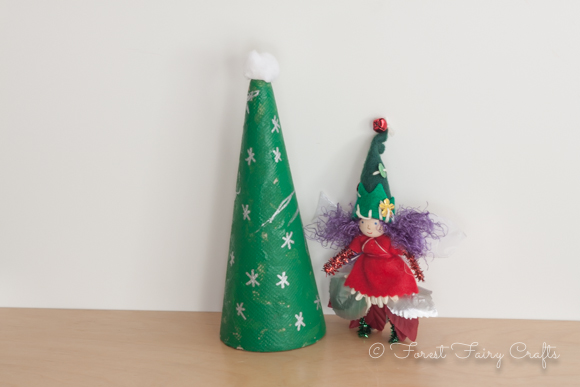
I also use charms to share a moment in time, favorites, or memories. This birthday fairy has a snowflake charm even though she has a spring birthday. Can you guess why?
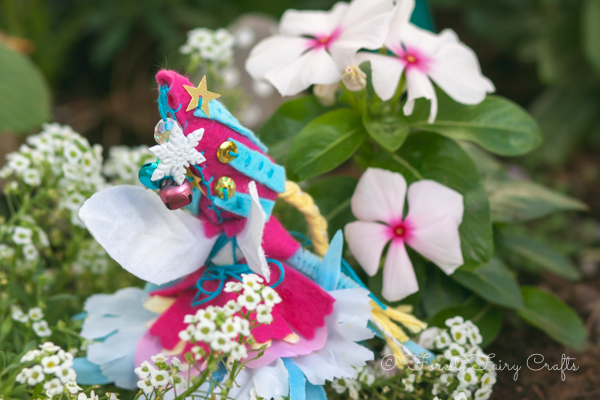
I expect fairies to be loved, played with, and taken on adventures. My friend may not have this fairy forever. If she does, though, I want her to remember that this was the year she discovered a new favorite story and sang the songs with all of her heart. I want the fairy to reflect her life.
And my children do keep their fairies in a collection. We have everyday fairies and sentimental fairies :)
5. Stories, friends, and accessories
As I write this, I hear the stories that I hold as I create these fairies. Every once in awhile, I include a written note with the custom features of each fairy. Usually I let the fairy speak for itself. Most people notice matching elements, or discover the number of candles. Every once in awhile, though, I write a story to give with a fairy. Such as with the emotional Fairy Road that travelled with a fairy to a family in a very difficult time. Fairies are celebrations. They can also be a source of great comfort and strength. Fairies have been given to children who need extra support (my son carried one in his pocket the first days of school). They have also been angels in challenging times for health or grieving. Fairies have stories too. Writing a quick note can create an immediate connection between a fairy and a child (or adult).
I actually rarely give fairies a name. I often give that opportunity to the child. Naming is a connection as well. And they often choose a name that I would never imagine on my own :)
Fairies love friends! You can make your own, like Margaret Bloom made this darling deer to live in our Forest :)
We also give stuffed friends with fairies. We might give a cat or dog that looks similar to a family pet. Or magical friends. Often, I don't have time to make my own animal friends (I wish!). Luckily, the world makes awesome unicorns, dragons, foxes, and more that can accompany a fairy.
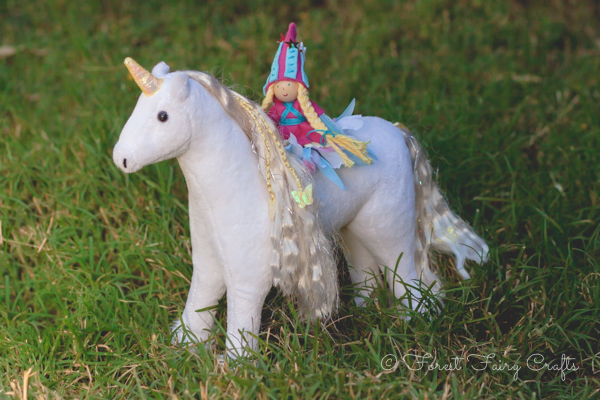
This unicorn is no longer available (unfortunately) the same company makes a similar Only Hearts Club Unicorn. Or you can click here to find many, many unicorns.
We also adore dragons
.
My almost-last idea (I have so many ideas!) is to give a bottle of Pixie Dust/Fairy Dust with your fairy.
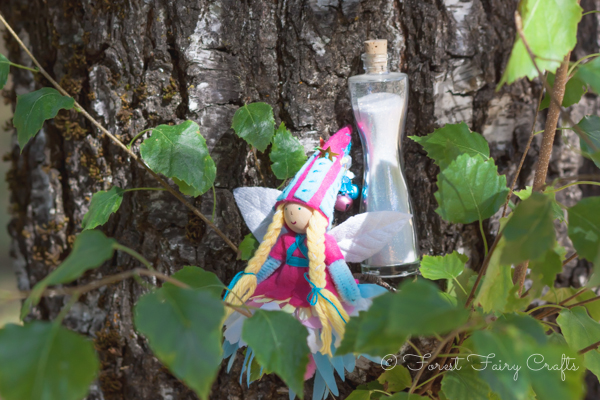
Of course, again, I cannot find this exact bottle to share, but these look very similar- Pixie Dust Bottles with Fairy Wand. I need these wands to prop in the fairy's hand!
I just thought of necklaces or bracelets, too, that can travel with a fairy.
Every fairy has their own unique magic. Making your own means that no one else in the world can create the exact same fairy. That is magic right there :)
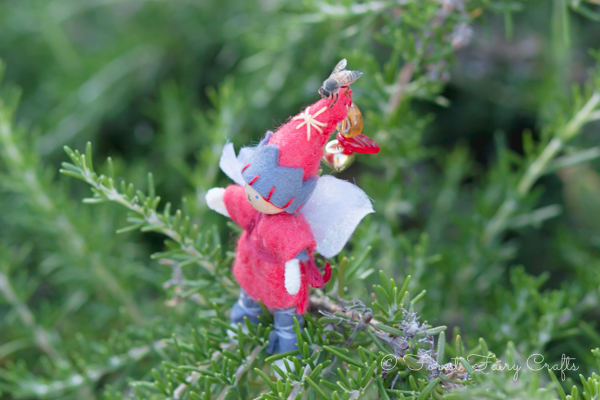
Fairies make lovely gifts. Even bees know the magic of fairies :)
Enjoy creating and giving the magic away!
Bonus sixth way! Of course, a very simple way to customize fairies is to choose a special fairy. A mermaid or zombie or warlock may be just what your friend loves these days. Our book has many, many choices!

All of the fairies in this post use tutorials found in our book. We want to inspire creating of all kinds (these tips are great for gnomes too). I am happy to answer any questions!
Now, I'm off to pack up the Birthday Fairy for a special friend. Share the magic :)
*please note: This post contains affiliate links. Should you choose to purchase any items through links on this post, a small amount returns to the Forest. Your price remains the same. We both win. And thank you!
Child-Made Fairies for Christmas
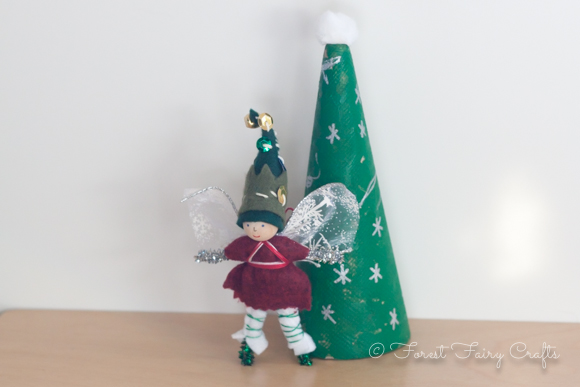
One of my favorite things about the holidays is making fairies with children. Every student in my class (20 in all) makes a fairy. The boys (and a few girls) are not inspired by fairies, so they make elves. Or angels. Whatever the fairies are called, they bring joy to the season.
Our book was inspired by projects like these fairies. Because families sometimes wonder how their five, six, or seven year old made such treasures. Every little fairy/elf/angel is unique. Reflecting the unique voice of the child.
How does it work?
The directions, with many photographs, are all in our book. What the child makes and what I make depends on time and the child. Some children show great independence and want a lot of creative freedom. Other children enjoy having my attention for each little step. I do have a plan for creating twenty child-made fairies. I am working on a post for sewing fairies with groups of children. For now, though, I want to share my secrets for working with one child at a time. Because I get to make these with family, too.
What the child does:
- chooses felt and pipe cleaner colors, yarn, sequins, wings
- sews the decorating felt band on the hat, adds sequins and decorations galore
- sews up the back of the hat
- adds beads and bells to the top of the hat
- winds thread (pants or tunic)
- chooses petal skirts
- tries hat on to see how it all looks together
What the adult does:
- makes the body
- draws the face
- cuts the felt
- threads the needle and ties knots
- demonstates (models) the first couple of stitches and how to add sequins
- lets go of expectations :)
- folds hat in half when decorating is done, sews an anchor stitch at the bottom
- models sewing up to the top of the hat (one stitch)
- knots thread for clothing
- models first steps for winding thread (pants or over-shoulder, under arm)
- holds wings until they are attached with winding thread
- clips tiny amount so petal skirts can scoot up the legs
- glues hair and hat on fairy/elf/angel
Of course, this all changes depending on the age and personality of the child. And it doesn't have to be done on the same day. Take breaks. See the little bits of felt and thread come together to create a magical keepsake.
One of our favorite things at the recent craft fair was hearing from families whose students left us five or even ten years ago. "We still have our fairies," they said. On the tree or the table or the mantle.

We still love our fairies :)
Moody Pumpkins with Groups of Children
On Tuesday, I sewed the Moody Pumpkins with the youngest students at our school. I am the art teacher on those days, and their all-day teacher was a little skeptical when I said I was bringing sewing into the classroom.
"With real needles?"
Yes. Real needles.
Because this is precious.
But I don't walk into a classroom with a pile of felt and a pincusion prickling with needles. No, that would be a disaster. A big part of crafting with children is being prepared. So, to get ready for this project, I was busy the night before.
- Thread 15 needles with the outside thread (in this case, variegated rainbow crochet thread- see our Supply Hints)
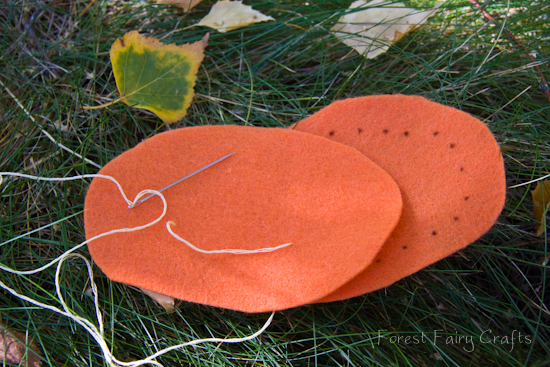
- Cut pumpkins (back and front)
- Cut stems
- Cut lots of little yellow felt triangles so children can choose
- Thread needles with yellow embroidery thread for the face (though I learned that the rainbow was cute, too, when I was short one pumpkin the next day)
- Sew the mouth by knotting, pulling through, testing to make certain that it will fit, then knotting loose on the other end of the mouth so the pumpkin is ready for eyes.
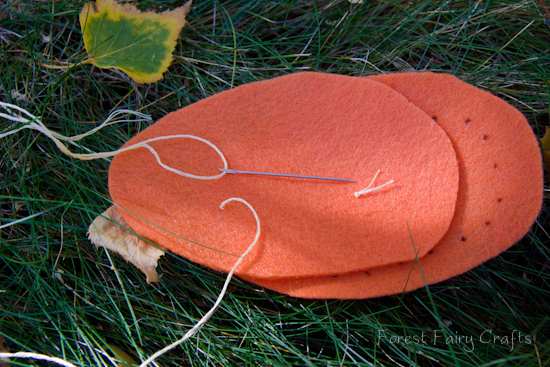
- Leave the threaded needle with the pumpkin- tuck into felt so it won't prick anyone.
- On the back of the pumpkin, draw little dots for each spot the child will place the needle. This turns the sewing into a dot-to-dot, with the needle always poking into the next dot (whip stitch).
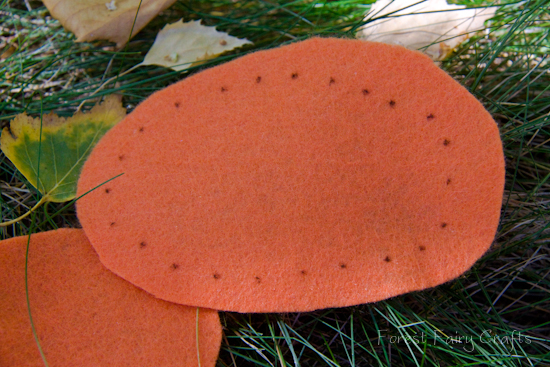
- Safety pin it all together with the smile on the outside so the children can choose their pumpkin.
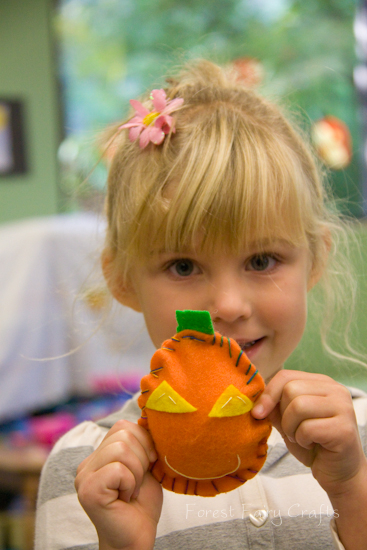
- I do not try to make them all look the same. No, the fun is in unique pumpkins!
Some were tall and some were wide. All became special :)
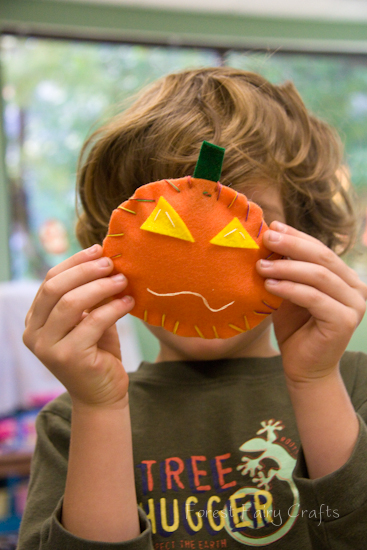
I chose felt for the eyes on this project because it was faster than buttons. The child chose the triangles and an adult sewed the eyes on with a few stitches. We tied off the yellow thread. We sandwiched the stem between the pumpkin pieces. We used an already-threaded rainbow needle and did the first couple of stitches to anchor the stem. Then we modeled a stitch or two before handing the needle over to a child. We work one-on-one with children this young because most need us to hold the felt (see Tips & Tricks).
They sewed about 3/4 around, then stuffed the pumpkin and sewed it closed. Many students were amazed.
"I thought we had to glue it."
And, "I made a stuffie. Look, look, I made a stuffie!"
My favorite quote came from this little guy.

You can't hurry when you're sewing. The needle is sharp. Sewing is a quiet activity.
Why do I sew with children? Slowing down is precious.
Have fun! The Moody Pumpkin tutorial is here as a pdf download. All tutorials are property of Forest Fairy Crafts. Please contact us for use permission beyond sharing with friends and linking back to our site.