
Wishing Heart
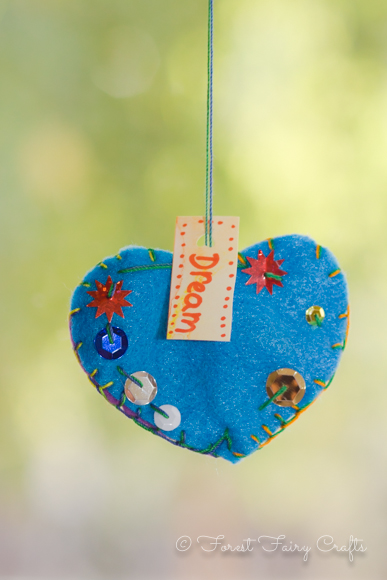
Let's begin with a wish. A hope. A dream. Let's made crafts to celebrate our wishes. Because the best wishes are from the heart.
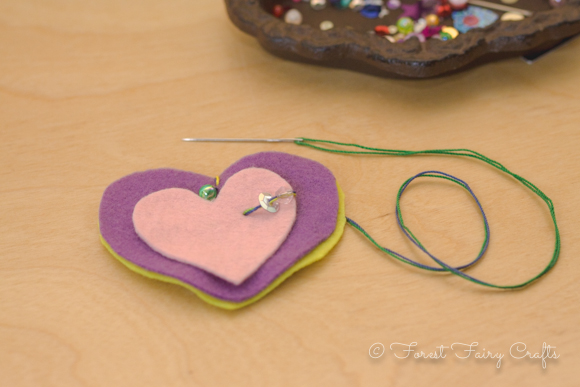
This was my first sewing project of the year with second and third grade students (7-9 years old). Most had used needle and thread before. I wanted a project that would let them explore. A project that let everyone be successful. Whether they wanted one decoration. Or a hundred and one :)
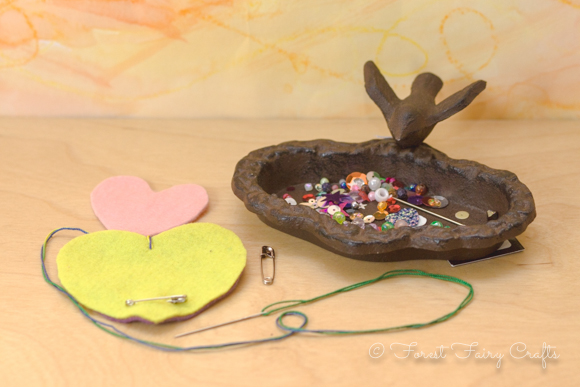
Supplies:
- Felt (two colors for each heart)
- Needle and thread (chenille needles and crochet thread)
- Safety pin
- Beads and sequins
- Slip of pretty paper for name and wish
- Optional: a third, smaller felt heart to decorate
Age: 6+
Prep: Cut hearts. Secure them together with a safety pin. Double and knot thread on the needle. Sew one stitch at the top hiding the knot between the two hearts. The stitch and the safety pin keep the felt together while children sew.
Children: These hearts are a lovely first sewing activity because almost everything is beautiful (expect for tangles). Children add a bead or sequin to one side of the heart. They push the needle through felt anywhere they like. Big stitches work just fine.
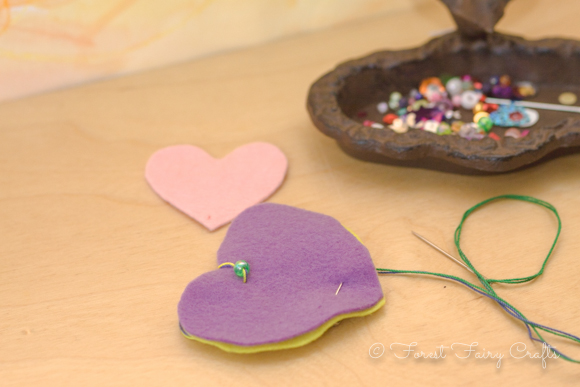
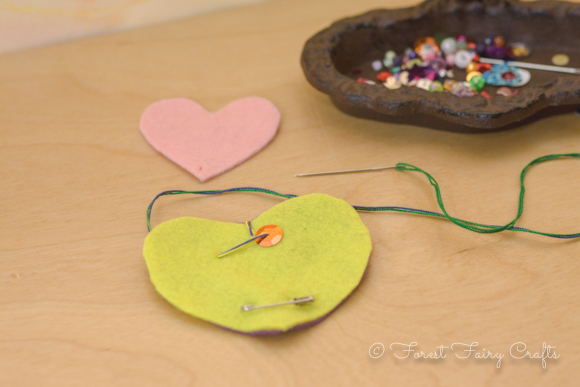
Now the needle and thread is on the other side. Add another sequin, bead, or both.
You can also add the little felt heart. Be careful when going through three layers of felt. It may take a little practice.
Add all of the sequins and beads that make your heart happy.
Helper: Just encourage. Sort out any tangles. Take off the safety pin once the two pieces of felt are secure.
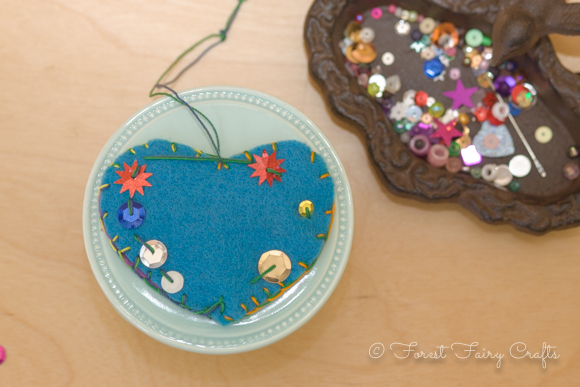
Most design choices will be fine. Long strings of beads. Loops around the outside of the heart. Crisscross stitching. It's all okay. This allows children to experiment with sewing. And have fun! They can stitch around the outside if they like, but it's not needed.
Tie a knot. Move the string to the center for hanging if there is enough string left. If not, add a string. Many children strung beads on their hanging thread to catch the light. If beads go on the hanging thread, be sure to tie a knot around the last bead so they don't slip off.
Children: Write your name and a wish on a pretty slip of paper.

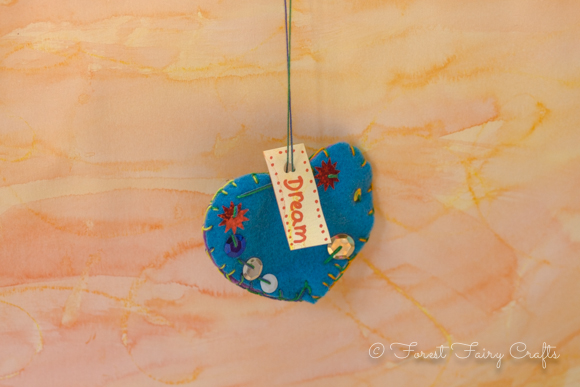
Each class hung their hearts in a special area of the room.
One is lovely. A collection is gorgeous.
Have fun sewing this week!
For more insights about sewing with children and teaching children how to sew, consider our Forest Fairy Crafts book. It shares our favorite needles and threads along with stitches, troubleshooting, and more. The link is an affiliate link. Should you decide to purchase, a small amount returns to the Forest. Enjoy :)
Wishing Stars
We start a journey with expectations. And children are often told "don't do this," or "don't do that," as they start an adventure (like a new school year). Think of all the rules, the rules, the rules :)
So I like to think of the things we do want for our adventure. What do we want to create? How do we want to feel? What should we bring to this journey?
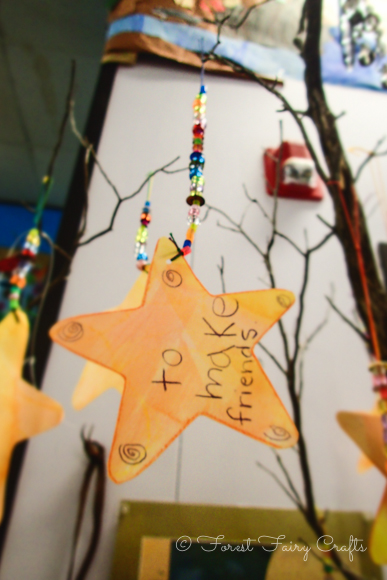
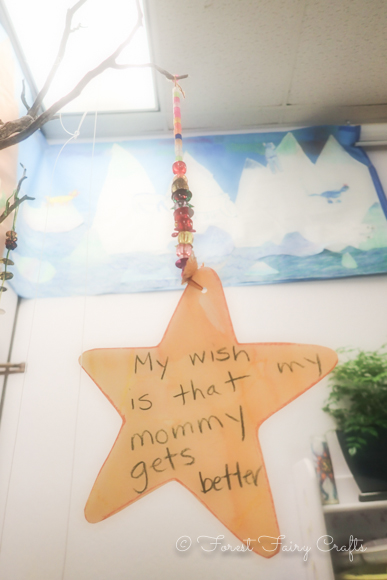
Children often wish for things. Things like ponies or candy. I want to wish for things we cannot touch. Kindness. Friends. Creativity. Beauty. Hope. Love.
And, every once in awhile, a child cracks my heart wide open with a wish. Like this one.
Something about crafting allows us to feel deeply. To share deeply. Creating a space where we can express ideas that are big and mighty. They connect us. As we sew or bead or knit, we create together. We create community.
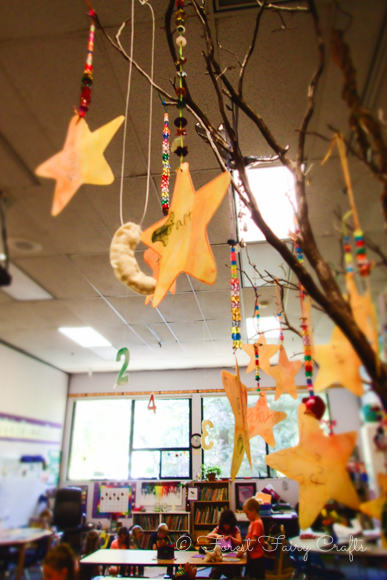
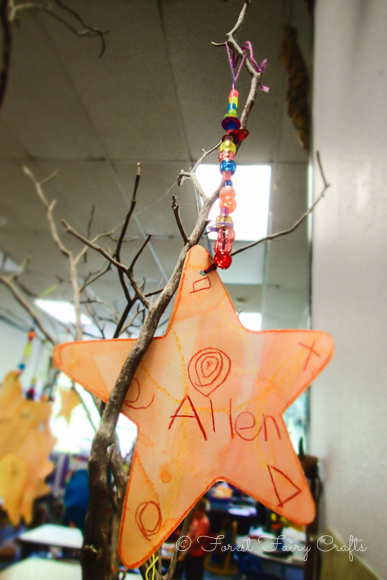
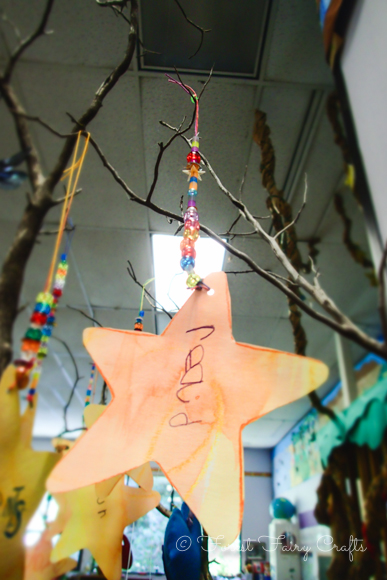
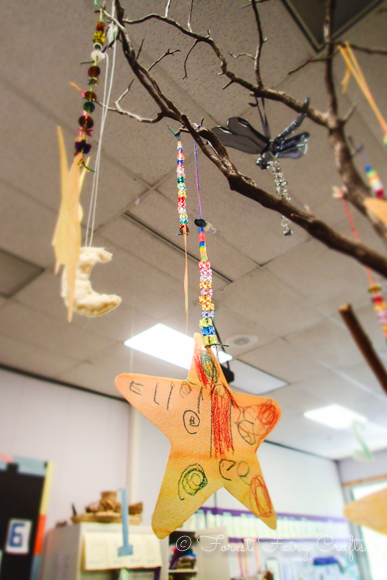
The stars can be very simple or made fancier.
Optional: Children can watercolor or decorate their own paper. We have painted squares on both sides, then we cut into stars. For time's sake, I watercolored and cut these stars.
Supplies:
- Stiff paper
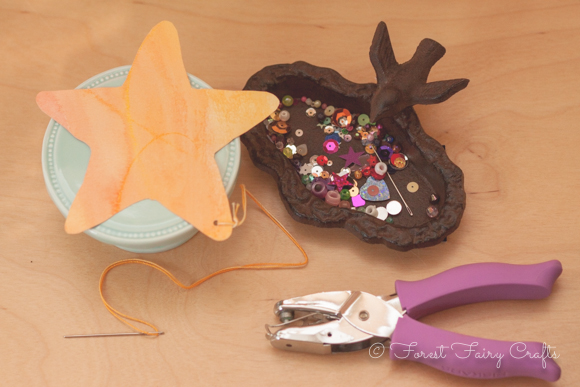
- Needle and thread (I used friendly blunt needles and crochet thread)
- Beads and sequins
- Hole punch
Prep:
Watercolor paper on both sides and punched a hole. Double the thread and tie a knot. Go through the hole, then back through the loop in the thread. The thread is now attached to the star and ready for decorating.
Ages: 5-7
For children:
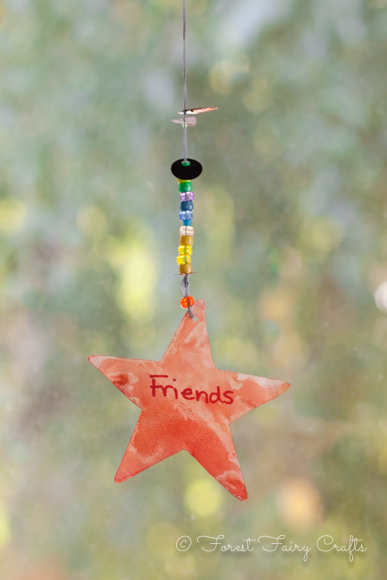
Write name on one side of the star and a wish on the other side. If a wish is hard to choose, add a few beads while thinking. Wishes can take time. Decorating the star is also lovely. Thread sequins and beads. Hang in a sunny place to see the sun shine on your wishing star.
Helper: When tying off, be sure to tie around the last bead, or else they can all slide right off the thread. I loop the needle through the last bead a couple of times to secure all the other beads on the thread.
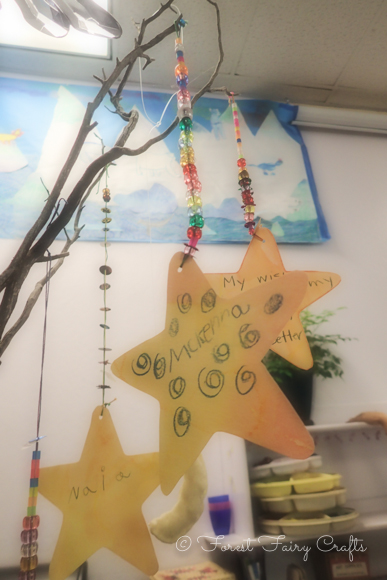
Enjoy! One class hung them on a branch. Another hung them from the ceiling over their gathering space. All those wishes watching over the children. Beautiful! These inspire a lot of discussion and create a lovely space where children celebrate wishes coming true :)
This wish? To read. May all your wishes come true :)
Wish Upon a Watercolor Star


The school year begins with hopes and dreams. I love to make dreams come true. So we create beautiful crafts to catch our dreams. Focus on them. Believe in them.
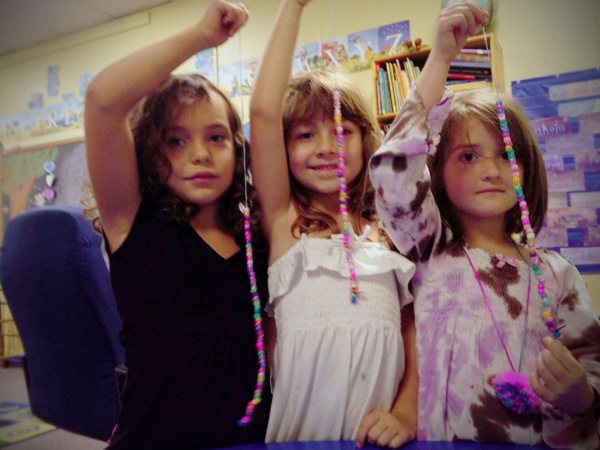
These watercolor stars were a three day project with our twenty kindergarten and first grade students. On day one, we painted stars. Day two, we strung beads. Day three, we wrote wishes. Along the way, we discussed ideas. What do we want? Play, discovery, friends. What fun, imagining our wonderful year!
Of course, you can wish anytime, for any reason. A wishing star would be a lovely party favor, or a baby mobile, or a rainy afternoon craft. Endless possibilities...
How do we make them?
- Cut a star with medium or heavyweight paper. We used watercolor paper. You can draw your own, or have your child draw a star, or use a free printable like this one on Spoonful.
- Children paint the star on both sides. We used watercolor paints, giving children yellow, red, and orange colors. You could use any paints you like, or markers, or colored pencils. Decorate your star.
- Thread a tapestry needle to a long piece of crochet thread. A tapestry needle has a blunt tip. It. Is perfect for children who say, "But I don't know how to sew!" Tie a bead to the ends of the thread so the other beads won't fall off.
- Have fun beading! Add beads and sequins to make a rainbow hanger for your star.
- Punch a hole into the star. Thread the needle through, tie off, and snip.
- Children write their name on one side, and their wish on the other side of the star. Hang your star in a special place. Enjoy your dream shining over you!
I encourage children to dream for emotions more than things. They may want money for our school (they know times are difficult) or toys or more books. I ask, "Why? How would you feel?" We want the emotion, not the stuff. Because maybe we can find fun and adventures another way.
At the same time, I change my ideas to catch a moment. I have a star-wish that my daughter made when she was three. Her wish?
I want to wish for a pony
That captured her. At three. Her sweetness. And that is my dream. To create projects with children that celebrate childhood. My dreams are coming true :) Enjoy!
